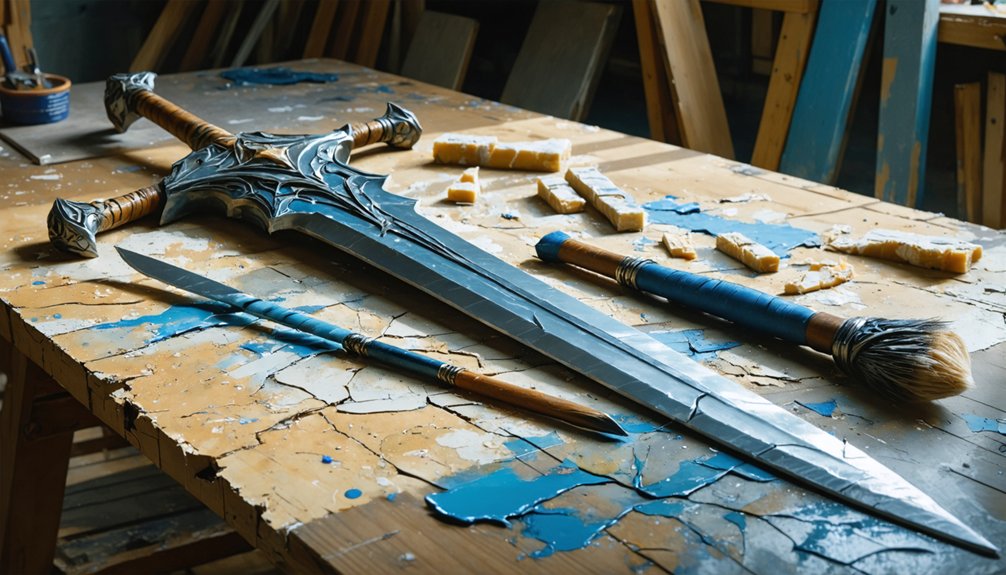
Start by sanding your EVA foam seams smooth, then seal the surface with a heat gun held 2-3 inches away to collapse foam cells. You’ll want to apply 2-3 coats of flexible primer using makeup sponges, letting each layer dry for 30 minutes. Once primed, spray on your base coat and build depth by layering dark-to-light shades with thinned acrylics. The cosplay community has perfected weathering techniques that’ll take your prop from basic to battle-worn.
Key Takeaways
- Sand seams smooth and heat seal the foam surface with a heat gun at 2-3 inches distance to close foam cells.
- Apply 2-3 coats of flexible primer or Plastidip using foam wedges, allowing 30 minutes drying time between coats.
- Use spray paint for the base coat after priming to prevent paint absorption into foam cells.
- Build depth by layering dark to light shades in 3+ coats, using thinned acrylics for smooth gradients.
- Add weathering with dry-brushed black on edges and watered-down acrylics in recesses for realistic wear effects.
Preparing Your EVA Foam Surface
Before you crack open your first paint bottle, your EVA foam needs proper surface preparation—and that means working through four essential steps in sequence.
Start by sanding your seams with fine-grit sandpaper to remove bumps and create smooth shifts between pieces. Next, float your heat gun over the surface to collapse foam cells—this tightens the texture and prevents paint absorption. Don’t overheat, or you’ll separate your glued seams.
Sand seams smooth, then heat-seal the surface to close foam cells—but keep that gun moving to protect your glued joints.
Wipe down your piece thoroughly to remove dust and debris. Clean foam accepts primer evenly; contaminated surfaces create splatters.
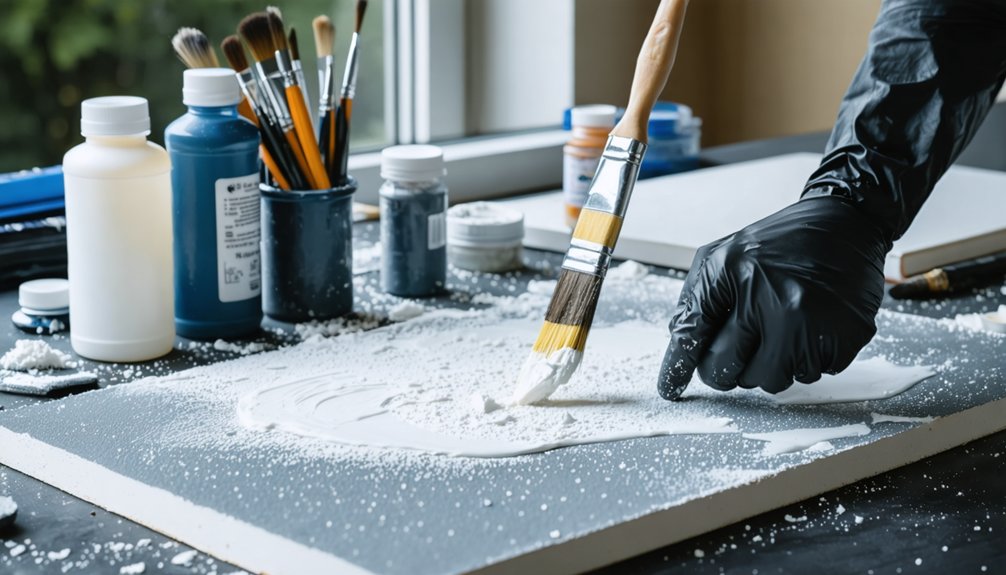
Finally, apply flexible primer using foam wedges or makeup sponges. These surface preparation tools guarantee even coverage across your foam sculpting techniques. Test on scrap pieces first, then build multiple thin coats with 24-hour drying intervals between applications.
Heat Sealing and Plastidip Application
Before you paint your EVA foam, you’ll need to seal the surface so it won’t absorb gallons of paint like a sponge. Heat sealing with a heat gun is the most popular method in the cosplay community—it’s quick, free if you already own the tool, and creates that telltale shine that lets you know you’re doing it right.
While Plasti-Dip is another option you’ll hear about, most builders skip it due to the fumes and cost, favoring heat sealing followed by brush-on sealants instead.
Heat Gun Technique
When you’re ready to transform raw EVA foam into a paintable surface, the heat gun becomes your most valuable tool. Set it to medium heat and maintain 2-3 inches distance as you float across the surface. Heat dissipation strategies matter—work from one corner to the opposite side, creating controlled temperature gradients that prevent warping. You’ll see the foam tighten and develop a subtle shine as cells collapse.
Key visual indicators you’re doing it right:
- Black foam develops a glossy sheen across treated areas
- White foam shows barely perceptible surface tightening
- Edges curl slightly inward before settling flat
- Previously matte texture transforms to semi-smooth finish
- Heat-sealed sections resist finger-press indentation
Avoid overheating glued seams—they’ll separate. This sealed surface prevents paint absorption, letting coatings sit like proper primers.
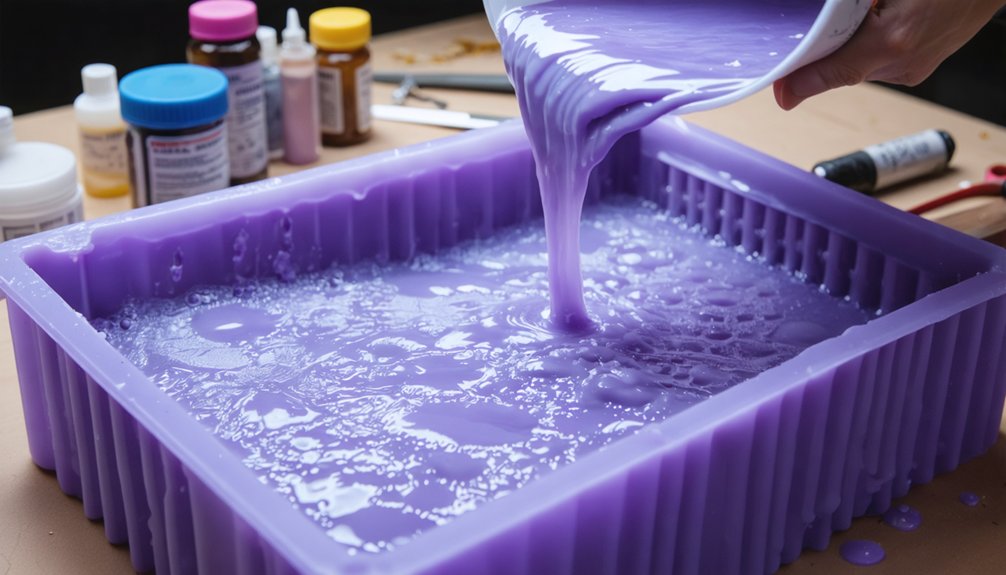
Applying Plastidip Properly
Your heat-sealed foam now needs protection and a receptive surface for paint—that’s where Plastidip becomes your foundation layer. Shake the can vigorously for one minute, then warm it in hot water for ten minutes—warmer Plastidip atomizes better, creating smoother coverage.
Hold the can 20-30 cm from your surface and apply thin, even passes. Start your spray motion beside the foam, not directly over it, preventing splatters and bubbles.
Apply three to four light coats, allowing 30 minutes between layers during the curing process. Your first layer establishes coverage, while subsequent coats build that smooth, slightly glossy finish. There’s no mixing plastidip required—straight from the can works perfectly. Test on scrap foam first, and work in ventilated spaces for ideal results.
Applying Your Base Coat
After heat sealing your EVA foam, you’ll need to apply primer before any paint touches the surface. This sealed base prevents paint from soaking into foam cells, ensuring smooth coverage. Clean your surface thoroughly—Plastidip won’t hide dust or debris.
Your application toolkit:
- Foam wedges or makeup sponges for stroke-free Plastidip coverage
- Mid-range brushes for acrylic work (save money, not quality)
- Spray paint cans for professional-looking base coats
- Scrap foam pieces for testing brushwork techniques
- Multiple thin primer layers rather than single thick coats
Apply two to three primer coats with 30-minute drying intervals between layers. For clean application, practice on test pieces first. Spray paint delivers the most effective results—two coats provide ideal coverage. Let everything dry overnight before advancing to detail work.
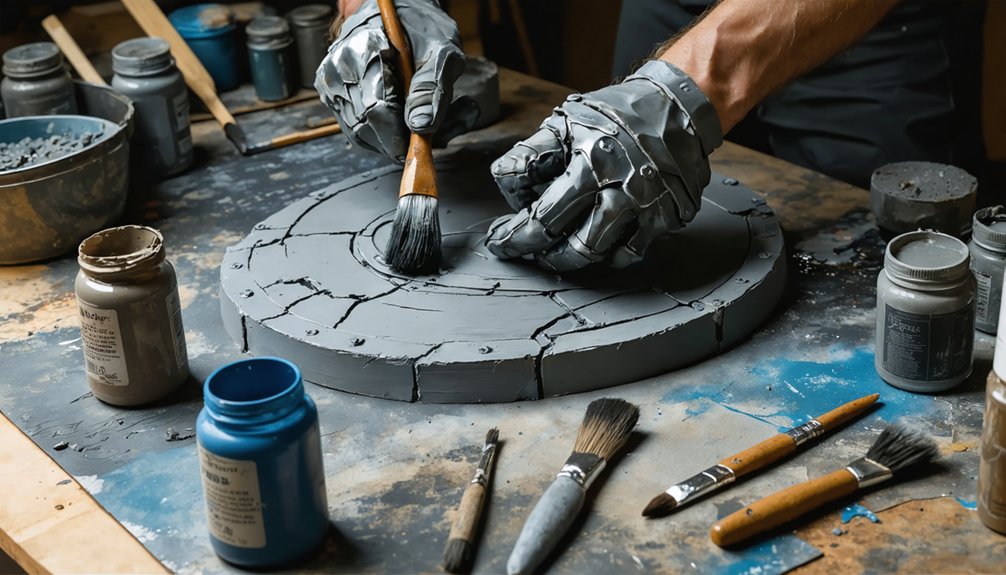
Creating Depth With Layers and Gradients
Once your base coat dries completely, you’re ready to transform flat surfaces into dimensional masterpieces through strategic layering. Start with strategic layer planning by identifying recessed areas—apply your darkest shades here first, then work outward. Build at least three progressive layers, allowing 30 minutes between each for proper curing.
Master paint viscosity adjustment by thinning your acrylics slightly with water—this creates smooth, self-leveling gradients without harsh brush marks. Dab foam wedges or makeup sponges evenly across surfaces, leaving intentional gaps between layers to reveal underlying tones.
Progress from dark to light, building brighter highlights without completely covering previous work. This technique creates natural progressions that make armor pieces and props pop. Your cosplay community will notice the professional depth you’ve achieved through patient, methodical layering.
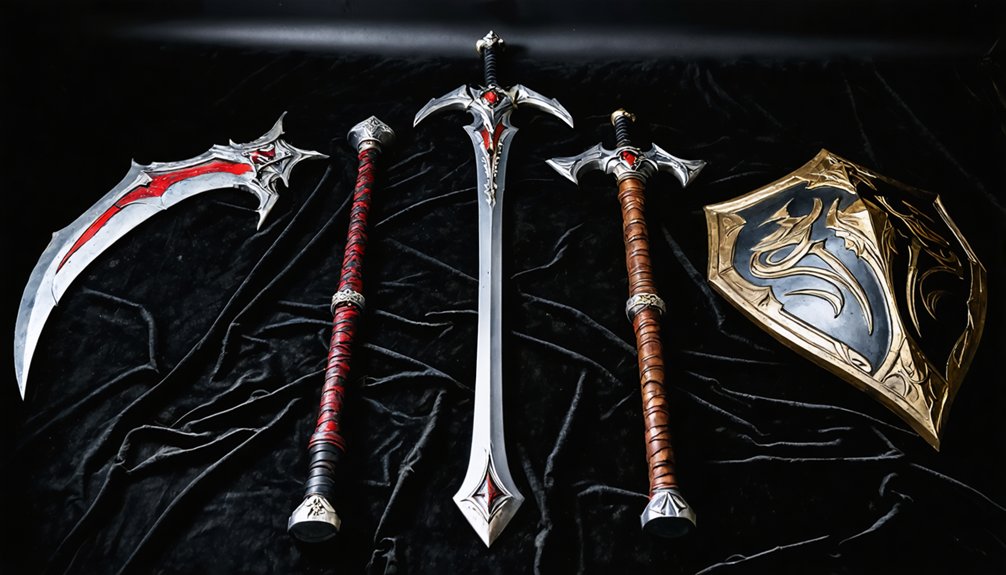
Adding Weathering and Metallic Accents
While pristine foam builds look impressive, battle-worn weathering transforms ordinary props into storytelling pieces that fellow cosplayers will stop to photograph. Master distressing metallic highlights by brushing Tamiya silver on edges and corners where natural paint chipping occurs.
Layer your effects—start with silver under-painting, seal thoroughly, then add dirt tones without rust-like finishes for clean sci-fi aesthetics.
Your weathering toolkit creates depth through strategic application:
- Dab black paint on raised edges simulating high-impact wear zones
- Dry brush matte black lightly after wiping most paint from bristles
- Apply watered-down acrylics in recesses for natural dirt accumulation
- Spray chrome liberally then dab edges for selective metallic accents
- Build multiple dirt color passes for dimensional realism
Seal your base with three Plasti Dip layers before weathering—this protects your foundation while allowing experimental techniques that push creative boundaries.
Pro Techniques for Enhanced Details
Once you’ve mastered basic painting and weathering, you’re ready to explore techniques that’ll make your foam props look professionally crafted. Airbrushing creates ultra-smooth gradients, V-groove detailing adds sharp dimensional lines, and strategic layering builds depth that makes flat surfaces pop.
These methods take practice, but the cosplay community agrees they’re what separates good builds from showstoppers.
Airbrushing for Smooth Finishes
Airbrushing transforms your EVA foam props from homemade-looking pieces into professional-grade armor and weapons that rival convention favorites. The Iwata Eclipse delivers exceptional paint atomization control with adjustable airbrush settings that let you dial in perfect coverage every time.
Your technique makes the difference:
- Layer shadows first: spray AutoBorne Sealer base, then hit corners with your darkest shade
- Build gradually: multiple whisper-thin coats beat one heavy pass that drips
- Test your flow: shoot scrap foam first to confirm your paint thins properly
- Master light-to-dark: progress from deep shadows to brilliant highlights for dimension
- Combine methods: airbrush your base, then hand-brush weathering details
Thin your Createx paints with 4011 reducer until they atomize without clogging, creating that coveted streak-free finish.
V-Groove Detailing Methods
V-grooves transform flat EVA foam into dimensional armor pieces that capture light and shadow like genuine metal plating. Master cutting clean v grooves by slicing 45-degree angles with a sharp blade—never penetrate completely through. Peel away excess material, then square your edges by filing lightly back and forth for mechanical precision.
For advanced textured ridge formation, try the hot glue technique: cut shallow V-grooves on your foam’s backside, fill with hot glue, and press edges together while cooling. This creates flawless raised details instantly.
Dremel tools offer scratchy dimension—tap sanding drums perpendicular for chip marks or angle them along pre-drawn lines for grooves. Before painting, prime grooves with black base coats, then dry brush lighter shades overtop for multi-tonal realism that makes details pop.
Dimensional Layering Effects
Sharp grooves give your foam armor mechanical precision, but true depth comes from stacking multiple techniques that play with light, shadow, and surface variation. Sculpting texture patterns through heat pressing creates your foundation—aluminum foil imprints leather grain while 3D stamps add hex patterns to heated sections. Once cooled, apply dimensional puff paint for raised filigree that catches light differently than flat surfaces.
Your painting strategy transforms these physical textures into convincing metal:
- Base coat dark, filling grooves with shadow tones
- Dry brush progressively lighter metallics on raised edges
- Sponge blend 3-4 gradient layers for smooth flow
- Preserve texture depth with light sealant coats
- Overnight cure between layers prevents smudging
Blending tone gradients across textured surfaces creates the dimensional illusion that separates novice props from convention-floor showstoppers.
Frequently Asked Questions
How Long Does Painted EVA Foam Armor Typically Last Before Needing Touch-Ups?
With proper paint application and sealing, your EVA foam armor lasts 3-5 years before needing touch-ups. You’ll want a maintenance schedule after conventions or heavy use, since travel handling and physical stress roughen paint layers faster than everyday wear.
Can You Paint EVA Foam Without Heat Sealing or Plastidip First?
You *can* apply spray paints or acrylic paints directly to unsealed EVA foam, but here’s the catch: you’ll face poor adhesion, uneven coverage, and faster wear. Sealing first guarantees your innovative designs stay vibrant longer.
What’s the Best Way to Store Painted EVA Foam Pieces Long-Term?
Store your pieces flat in a suitable container with proper temperature control between 50-90°F. Keep them away from direct sunlight and humidity. Stack carefully with protective layers between painted surfaces to prevent compression damage and preserve flexibility.
How Do You Fix Paint That’s Cracking or Peeling off Foam?
Cracked paint feels like a costume disaster! Strip the damaged layers, then rebuild properly using primer before painting—specifically flexible PVA or Plasti-Dip. Finish by applying sealant over painted foam. Your fellow crafters swear this prevents future peeling!
Is It Safe to Wear Painted EVA Foam in Hot Weather?
Yes, it’s safe to wear painted EVA foam in hot weather. The material’s heat resistance handles outdoor temperatures well, though you’ll want proper ventilation inside your costume. Main safety concerns involve moisture buildup rather than heat damage to the foam itself.