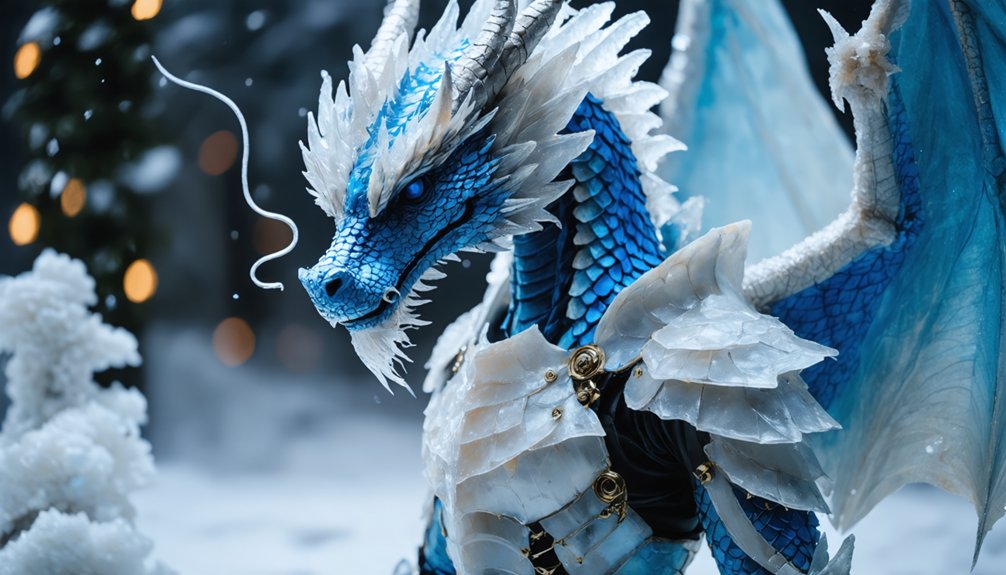
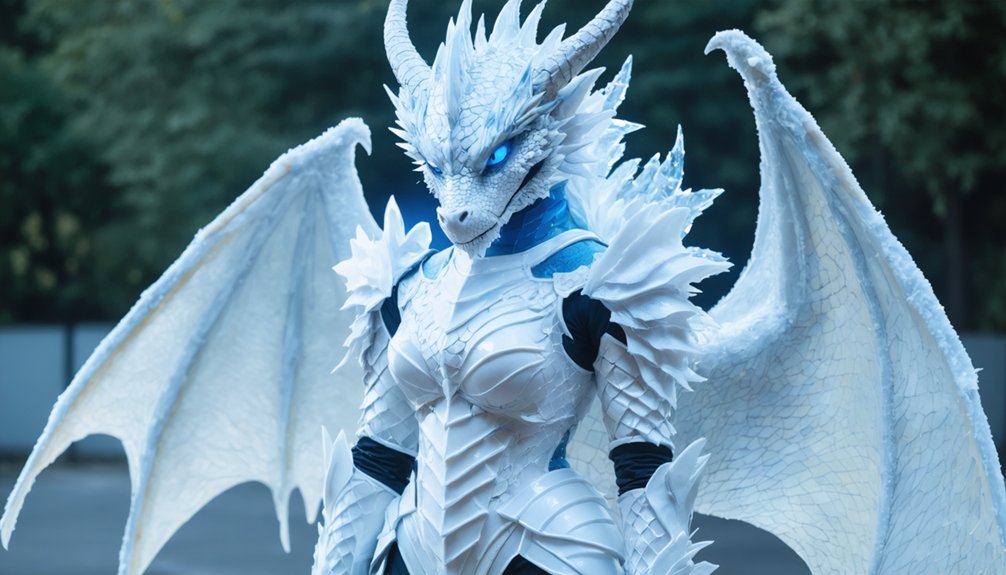
To build the best ice dragon cosplay, you’ll need thermoplastics like Worbla or Wonderflex, EVA foam, sheer fabrics, Barge cement, and Jacquard Lumiere paints. Start with a white bodysuit base, mold your helmet from thermoplastics, sculpt Styrofoam horns, and construct translucent wings with embedded LEDs. Use resin for rigidity and Dye-na-flow for icy color effects. Every technique you need to pull this build together successfully is covered ahead.
Key Takeaways
- Start with a thermoplastic dome helmet base using Wonderflex or Worbla, adding Styrofoam horns secured with Barge cement for durability.
- Layer Jacquard Lumiere paints over a white bodysuit for reflective ice scales, using a Cricut machine to cut dimensional foam scale plates.
- Build wings using open-cell polyethylene foam layered with sheer translucent fabric and embedded LED lights for a glowing icy effect.
- Reinforce high-stress armor zones with fabric backing, heat-curved edges, and resin-coated connection points to maintain structural integrity throughout convention wear.
- Improve wearability by adding helmet padding, elastic straps, hidden EVA foam vents, and stretch-compatible adhesives across high-movement armor seams.
Gather Every Material Before You Start Building
Before diving into construction, you’ll want to stock up on six core material categories: thermoplastics, foam, fabric, adhesives, paint, and specialty components.
Stock up on six core material categories before building: thermoplastics, foam, fabric, adhesives, paint, and specialty components.
For thermoplastics, source Wonderflex, Worbla, or Thibra for helmet and armor work. Grab 5mm EVA foam, open-cell polyethylene foam, and craft foam sheets for structural builds.
You’ll need sheer fabric plus a plain white bodysuit as your foundation. Stock Barge cement and hot glue for adhesion.
For paint, get Jacquard Dye-na-flow and Lumiere paints. Specialty components include resin teeth, dragon eyes from Etsy shops, and PlatSil 73-25 for prosthetics.
For material sourcing tips, compare Etsy, Amazon, and local craft stores before purchasing.
Budget-friendly options include pre-cut foam patterns and Cricut-compatible craft foam sheets, which reduce both material waste and labor costs considerably.
Build Your Ice Dragon Helmet From Scratch
With your materials staged and ready, the helmet build kicks off your physical construction phase. Your helmet design starts with Wonderflex or Worbla, using thermoplastic techniques to mold a precise dome base. Apply heat evenly, then shape quickly before cooling locks the form.
Execute foam layering next using these key steps:
- Cut Styrofoam horns, bond them using Barge cement for structural integrity.
- Apply paper mache into crevices, reinforcing aesthetic enhancements throughout.
- Use heat guns on thicker EVA foam for dimensional texture detailing.
- Blend scaling patterns across surfaces using Jacquard paints for visual effects.
Finish by installing comfort fittings like elastic straps and interior padding. Color blending ties your ice dragon’s icy palette together, unifying every structural element into one cohesive, striking headpiece.
Create a Body Suit With Icy Scale Details
Once your helmet is complete, the body suit construction begins with a plain white base — your canvas for transforming fabric into scaled, icy armor.
Apply Jacquard Dye-na-flow using scale coloration techniques to achieve uniform, frost-toned coverage across the entire suit. Layer Jacquard Lumiere paints over the dyed foundation to build depth and simulate reflective ice scales.
For dimensional texture, cut precise scale plates from craft foam using a Cricut machine, then attach them strategically across the back and tail regions with Barge cement.
Fabric layering methods using sheer materials over base fabric amplify the translucent, glacial aesthetic. Modify the suit structurally by sewing wing pockets into the back panel, ensuring clean integration with your wing assembly during final construction stages.
Make Translucent Ice Dragon Wings That Glow
Building translucent ice dragon wings requires open-cell polyethylene foam as your structural frame, cut and shaped to match your desired wingspan dimensions.
Layer sheer translucent materials over the foam structure, then match your body suit’s color gradients across the wing surface for cohesion.
Incorporate these techniques for stunning glow effects:
- Embed small LED light sources within wing pockets before sealing layers
- Apply layering techniques using multiple sheer fabrics to create depth and luminosity
- Use Jacquard Dye-na-flow to paint icy design patterns across fabric panels
- Add finishing touches with resin coating on wing posts for rigidity
Sew dedicated wing pockets into your back suit for secure attachment and removal.
This approach guarantees your wing structure remains functional without sacrificing aesthetic impact.
Connect Your Wings and Armor Without Bulk
Securing wings and armor without creating visual or structural bulk starts with strategic placement of your wing pockets—sew these directly into the back suit seams so the attachment point distributes weight evenly across your shoulders rather than concentrating it at a single stress point.
For wing attachment, reinforce pocket edges with barge cement before stitching to prevent tearing under dynamic movement.
Armor alignment requires equal precision—use elastic straps underneath craft foam plates to allow natural body articulation without gaps forming between panels. Heat-curved foam conforms better to your torso’s geometry, eliminating the awkward floating effect cheaper flat pieces create.
Resin-coated wing posts slot cleanly into reinforced pockets, keeping your silhouette sharp.
Coordinate your armor’s edge lines with suit seams so both systems visually unify rather than compete.
Build Frost Armor That Won’t Fall Apart at the Con
For frost armor that survives a full convention day, you’ll want to start with Black Worbla or Thibra, since both materials produce smooth, rigid surfaces that hold their shape under stress.
Use Barge cement to bond your foam edges securely, ensuring clean seams that won’t separate when you’re moving through crowded spaces.
At high-movement areas like shoulders, elbows, and joints, glue fabric backing onto the foam before painting to prevent cracking and chipping throughout the event.
Selecting Durable Armor Materials
When crafting frost armor that holds up through a full convention day, your material choices make or break the build. Durability testing confirms that not all materials perform equally under stress, so run material comparisons before committing.
Top-performing options include:
- Black Worbla or Thibra – delivers smooth, realistic armor surfaces that resist warping
- 5mm EVA foam – lightweight and flexible, ideal for high-movement sections
- Craft foam with fabric gluing – prevents paint chipping during active wear
- Heat-gun-shaped thick foam – creates dimensional scaling with structural integrity
Prioritize Worbla for rigid chest and shoulder pieces where impact resistance matters most.
Reserve EVA foam for articulated joints. This layered material strategy keeps your ice dragon armor intact from opening ceremony through the final hall cosplay competition.
Bonding Foam Edges Securely
Barge cement is your go-to adhesive for bonding foam edges that need to hold through a full convention day. Apply thin, even coats to both surfaces, let them tack up for 60–90 seconds, then press firmly together. This contact-cement foam adhesion technique creates an aggressive, immediate bond that resists flex and heat.
For curved frost armor sections, use a heat gun to pre-shape pieces before cementing. Bonding pre-curved edges produces cleaner seams with less stress on the joint. Hot glue works as a secondary secure bond method for holding complex edge angles while Barge sets permanently underneath.
Always work in ventilated spaces when using Barge cement. These layered foam adhesion techniques guarantee your ice dragon armor survives the convention floor without delaminating mid-wear.
Reinforcing High-Movement Areas
Securing foam edges with Barge cement keeps your panels locked together, but flat bonds alone won’t save high-stress zones from failing mid-convention.
Apply targeted reinforcement techniques where your armor flexes most—shoulders, elbows, and hip joints demand extra attention for mobility considerations.
Layer these protective strategies over bonded seams:
- Fabric backing: Glue woven fabric underneath foam panels at joint areas to distribute stress and prevent cracking.
- Heat-curved edges: Use a heat gun to round armor edges, reducing sharp stress points that split under movement.
- Hot glue fillets: Run a thin bead along interior seam corners to absorb flex forces.
- Resin coating: Apply resin selectively to structural posts and connection points, adding rigidity without restricting articulation.
These methods keep your frost armor intact through an entire convention day.
Finish Your Ice Dragon Costume With Horns and Prosthetics
To complete your ice dragon costume, you’ll need to tackle two final components: custom prosthetics and sculpted horns.
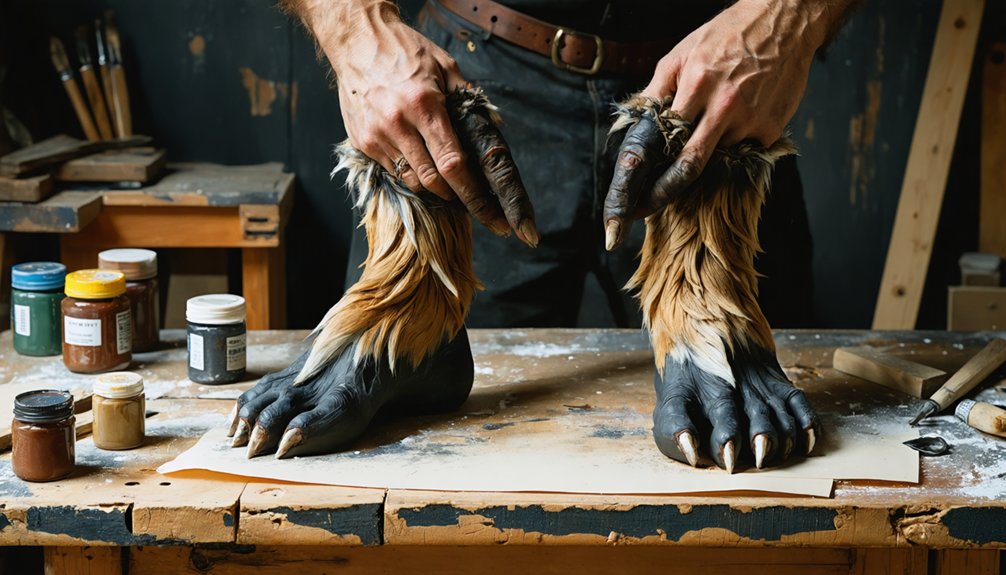
Use Monster Clay on a foam board base to sculpt your facial prosthetics, then cast them in PlatSil 73-25 for clean, reproducible pieces you can fit accurately using paper stencils or a face cast.
For the horns, you can either 3D-print detailed versions or hand-sculpt them from styrofoam before securing them to your helmet structure with Barge cement.
Sculpting Custom Prosthetics
Once you’ve completed the main elements of your ice dragon costume, sculpting custom prosthetics and horns will elevate the overall look with a professional, creature-feature finish.
Using Monster Clay on foam board bases, you can apply advanced prosthetic techniques to create anatomically precise facial pieces. Custom molds made with PlatSil 73-25 allow you to reproduce consistent prosthetic elements efficiently.
Key steps for precision prosthetic work:
- Use paper stencils or face casts to guarantee accurate prosthetic placement
- Sculpt Monster Clay directly onto foam board for structural stability
- Pour PlatSil 73-25 into your custom molds for reproducible results
- Mark detailed design lines onto foam surfaces using markers before cutting
These methods deliver repeatable, high-quality prosthetics that integrate seamlessly with your ice dragon’s headpiece and overall aesthetic.
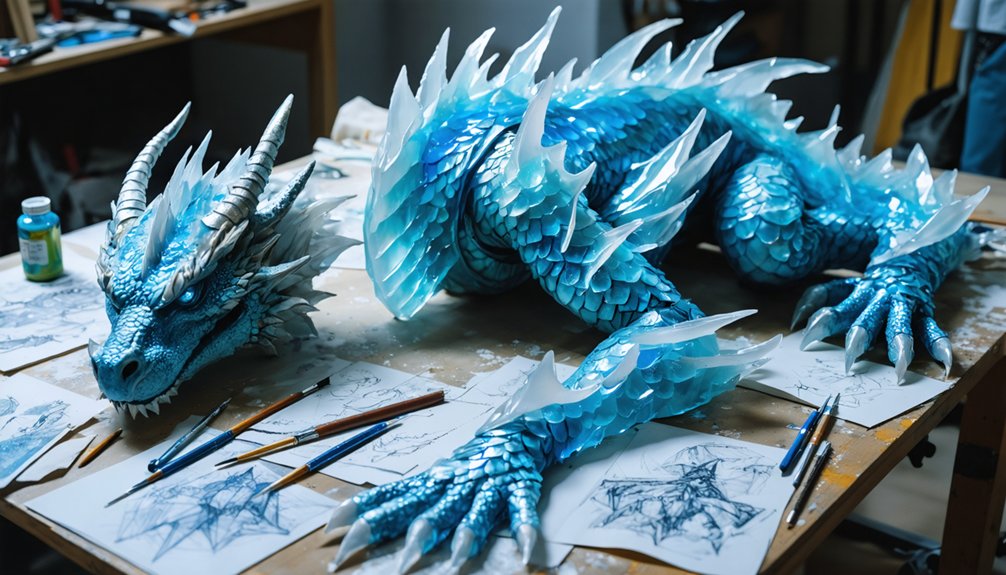
Crafting Ice Dragon Horns
With your prosthetics sculpted and ready, crafting the horns is your next step toward completing the ice dragon’s headpiece. You’ve got two strong options: 3D-printed horns for precise detailing or hand-sculpted Styrofoam horns cut and shaped to your specifications.
Use a heat gun for horn shaping techniques, carefully bending thicker foam pieces to achieve natural, dimensional curves.
Once shaped, secure the horns onto your Wonderflex or Worbla helmet base using Barge cement for a durable bond.
For paint application tips, layer translucent blues and whites using Jacquard Lumiere paints to simulate an icy, crystalline finish.
Apply a resin coating over the horn posts to increase rigidity. This process guarantees your horns remain structurally sound and visually striking throughout extended wear.
Wear Your Ice Dragon Costume Comfortably All Day
Wearing an ice dragon costume all day requires thoughtful preparation, especially when you’re dealing with a full headpiece, wings, and layered armor.
Prioritize costume comfort by integrating helmet padding and elastic straps to reduce pressure points during extended wear.
Integrate helmet padding and elastic straps to minimize pressure points and maximize comfort during extended costume wear.
Key wearability tips for mobility enhancement and long term durability:
- Ventilation strategies: Cut small hidden vents into EVA foam sections to improve airflow and heat management.
- Fabric flexibility: Use stretch-compatible Barge cement applications to maintain movement range across armor seams.
- Padding options: Apply foam padding inside the headpiece and suit lining to cushion high-friction zones.
- Wing attachment: Reinforce wing pocket stitching with heavy-duty thread, ensuring secure yet removable connections.
Test each component through full range-of-motion checks before your event day.
Frequently Asked Questions
How Much Does Building a Full Ice Dragon Costume Typically Cost?
You’ll typically spend $200–$800 on material costs for a full ice dragon costume. Prioritize design tips like sourcing Worbla, EVA foam, and Dye-na-flow strategically to optimize your budget without sacrificing innovative, high-quality results.
Can Beginners Complete This Costume Without Prior Cosplay Experience?
Yes, you can complete this costume as a beginner. Start with smart materials selection—choose EVA foam and pre-designed Etsy patterns. These beginner tips help you build confidence before tackling advanced Worbla or prosthetic techniques.
How Long Does the Entire Ice Dragon Costume Take to Build?
Like climbing a mountain, your timeline’s steep—expect 60–120 hours total. Your design techniques and material choices directly impact duration; complex Worbla helmets, wing construction, and foam scaling each demand significant time investments you’ll carefully manage.
Which Conventions Have Rules Restricting Large Dragon Wing Costumes?
The knowledge base doesn’t cover specific convention policies, so you’ll need to directly check each event’s costume safety guidelines. Most major cons like SDCC, DragonCon, and PAX actively restrict oversized wings that obstruct walkways.
Can Ice Dragon Costume Pieces Be Safely Stored Between Convention Events?
You can safely store your ice dragon costume materials using smart storage solutions: keep Worbla pieces flat, wrap EVA foam in breathable fabric, and store resin components in padded containers to prevent warping or cracking between events.
References
- https://www.youtube.com/watch?v=Z0VSBhUddBw
- https://www.instructables.com/Dragon-Costume-1/
- https://www.youtube.com/watch?v=vY9hOrHhpqo
- https://www.youtube.com/watch?v=LRZBKE6do2w&vl=en
- https://blog.adafruit.com/2017/05/30/cosplay-interview-with-silver-ice-dragon-cosplay/