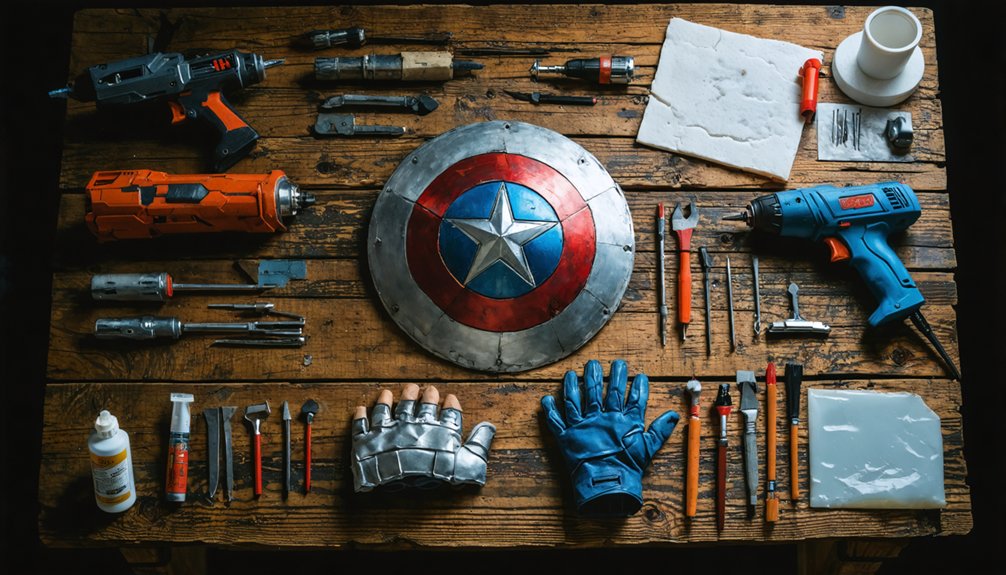
To build DIY superhero props and weapons, you’ll want to start with EVA foam as your go-to material since it’s lightweight, flexible, and easy to heat-shape. Sketch your designs from multiple angles, take precise body measurements, and create paper templates before cutting. Use contact cement for strong bonds, internal dowels for rigid weapons, and finish everything with dry-brushing and protective sealant for screen-accurate results. There’s much more technique waiting ahead to elevate your build.
Key Takeaways
- EVA foam is the best material for DIY superhero props, offering lightweight flexibility, durability, and easy shaping for weapons and armor pieces.
- Sketch your prop from multiple angles using character references, then create paper templates to ensure accurate scaling and precise dimensions.
- Use a heat gun held 2–3 inches away to shape foam into curves, and a Dremel tool to engrave realistic battle-worn textures.
- Bond foam pieces with contact cement applied to both surfaces, and insert wooden dowels inside weapons for essential structural rigidity.
- Seal foam before painting, then apply dry-brushing and black acrylic weathering effects to achieve a professional, screen-accurate finish.
Choose the Right Materials for Superhero Cosplay Props and Weapons
Selecting the right materials separates a convincing superhero prop from a flimsy disappointment. Your material selection directly impacts durability considerations, so prioritize medium-density EVA foam for structural balance between flexibility and strength.
The right materials make or break your prop — prioritize EVA foam for the perfect balance of durability and flexibility.
For weight management, EVA outperforms wood or resin on wearable pieces without sacrificing rigidity.
Explore design versatility by combining materials strategically. Insert PVC pipes or wooden dowels into foam weapon cores for reinforced stability. Your texture choices define realism — craft foam handles fine surface details, while thicker EVA accepts heat-shaped curves convincingly.
For cost efficiency, purchase foam sheets in bulk and repurpose closet items as costume bases. Achieve precise color matching by layering acrylic paints over heat-sealed foam.
Mastering layering techniques transforms flat materials into dimensional, screen-accurate props that genuinely impress.
Plan and Sketch Your Cosplay Prop Before You Build
Before you cut a single piece of foam or fabric, grab a notebook and sketch your prop from multiple angles, referencing character images to nail proportions and fine details.
Use design software or graph paper to map out exact dimensions, noting the assembly sequence so you’re not guessing mid-build.
Measure your body and the prop’s intended scale twice, then transfer your finalized design onto paper templates you’ll trace directly onto your materials.
Sketch Your Design First
Planning your cosplay prop on paper before you ever pick up a blade or heat gun saves you from costly mistakes and wasted materials. Start by gathering design inspiration from official character artwork, comics, or film stills. Study character proportions carefully — oversized gauntlets or undersized shields immediately break visual authenticity.
Sketch your prop from multiple angles in a dedicated notebook or digital software like Adobe Illustrator. Annotate dimensions directly onto your drawings, referencing your actual body measurements. You’ll want to note assembly sequences, material layers, and joinery points before committing foam to blade.
Transfer finalized sketches into paper templates, which you’ll later trace onto EVA foam. This iterative process tightens your design logic, eliminates guesswork during construction, and dramatically accelerates your build timeline without sacrificing precision.
Measure Before You Cut
Skipping measurements before cutting foam or fabric is the fastest way to waste materials and ruin a build you’ve spent hours planning. Measure your body twice using a flexible tape measure, recording chest, waist, arm length, and shoulder width before touching any material.
Apply the same measurement techniques to your reference images, scaling proportions accurately against your body dimensions.
Transfer those numbers onto paper templates first, never directly onto foam. This approach tightens cutting precision greatly, eliminating costly guesswork.
When tracing templates onto EVA foam, use a fine-tip marker for clean, accurate outlines. Double-check each dimension against your original measurements before making a single cut.
That extra sixty seconds of verification protects hours of crafting effort and guarantees every component fits together seamlessly during final assembly.
Cut and Shape EVA Foam for Cosplay Props Like a Pro
Mastering 3 core techniques—cutting, heat-shaping, and sealing—transforms raw EVA foam into professional-quality cosplay props that hold their form under convention conditions. Your scalpel delivers advanced cutting methods with precision, while layering strategies build dimensional armor pieces that breathe realism.
- Heat application tips: Hold your heat gun 2–3 inches from foam, applying steady circular motion until it softens, then press it against curved molds for organic shapes.
- Texture creation ideas: Use a Dremel tool to engrave battle-worn grooves, scratches, and panel lines directly into sealed foam surfaces.
- Edge finishing techniques: Cut foam at 45-degree angles, then sand beveled joins smooth before sealing, eliminating visible seams.
These foam shaping techniques elevate amateur builds into convention-worthy masterpieces.
Bond and Reinforce EVA Foam Weapons So They Don’t Fall Apart
Three critical bonding methods—contact cement, internal rod reinforcement, and strategic layering—determine whether your EVA foam weapon survives a full convention day or crumbles under the first enthusiastic swing.
Master these bonding techniques by applying contact cement to both foam surfaces, letting each coat flash dry before pressing them together firmly.
For reinforcement methods, insert a threaded rod or wooden dowel through your weapon’s core, creating a rigid skeleton your foam layers surround. This prevents catastrophic flexing during handling.
Your durability tips don’t stop there—cut foam at 45-degree angles before joining edges, eliminating visible gaps that weaken structural integrity.
Stack multiple foam layers strategically, alternating density grades for flexibility where needed and rigidity where stress concentrates.
Heat-seal every bonded surface afterward, locking your assembly permanently.
Paint and Finish Cosplay Props to Look Screen-Accurate
Achieving screen-accurate finishes transforms raw foam into convincing props that fool cameras and crowds alike. Master paint techniques by heat-sealing foam first, then apply texture layering using sponges and dry-brushing for dimensional depth. Use color matching references directly from production stills to nail authentic palettes.
- Brush black acrylic into crevices, wipe highlights away, revealing weathering effects that mimic battle-worn metal scratches and oxidized edges.
- Layer metallic paints over matte base coats for armor’s finish options, catching light exactly like filmed costumes.
- Seal everything with matte or satin protective coatings, locking in aging effects while preventing chipping during conventions.
Detail enhancement comes from stippling rust tones, silver edge-catching, and subtle gradient blending. You’ll create props indistinguishable from studio originals.
Attach and Secure Armor Pieces So They Move With You
Securing armor pieces so they move naturally with your body requires a layered attachment strategy that balances hold strength with flexibility.
Start with adjustable straps using elastic webbing and Velcro for secure fittings that accommodate movement allowance across joints.
Layer construction by bonding rigid EVA foam over a flexible spandex base, creating layered construction that follows your body’s contours.
Prioritize ergonomic design by pre-bending heated foam panels to match your natural posture before attaching them.
Use chicago screws at flexible joints to allow pivot points without compromising armor alignment.
Test armor mobility by running through your character’s key poses, identifying stress points early.
Reinforce connection zones with contact cement plus rivets, ensuring each panel shifts cohesively with every motion you make.
Frequently Asked Questions
How Do You Safely Store Foam Props Without Warping or Damage?
Oh sure, just toss them anywhere! For proper prop storage and foam preservation, you’ll want to store props flat, away from heat, in cool, dry spaces—preventing warping, crushing, or material degradation effectively.
Can EVA Foam Props Withstand Outdoor Weather Conditions at Events?
EVA foam’s durability isn’t naturally weather-resistant, but you’ll boost it using weatherproofing techniques like heat-sealing surfaces and applying Plasti-Dip coatings. These innovative methods shield your props from moisture, UV exposure, and temperature fluctuations during outdoor events.
How Do You Repair a Broken Prop Quickly During a Convention?
When your prop experiences an “unexpected character development,” you’ve got quick fixes ready! Pack emergency kits with a hot glue gun, contact cement, and spare EVA foam. You’ll restore structural integrity and wearability fast, keeping your heroic journey uninterrupted.
What Is the Average Cost to Build a Superhero Prop?
You’ll typically spend $20–$100 using budget-friendly materials like EVA foam and acrylic paints. Master prop design techniques—layering foam, heat-sealing, and precise cutting—to craft stunning, convention-ready superhero props without breaking your creative budget.
How Do You Transport Large Cosplay Weapons to Convention Venues?
Massive yet manageable, you’ll transport large weapons using padded cases and modular designs. Disassemble props via threaded rods, reassemble on-site. Maximize prop visibility tips by labeling components, and explore transportation methods like rolling luggage for effortless convention arrivals.
References
- https://4neodesigns.com/diy-superhero-costume/
- https://www.youtube.com/watch?v=YnFwielXmVQ
- https://www.playpartyplan.com/diy-superhero-costume-ideas/
- https://excelblades.com/blogs/diy/guide-to-diy-cosplay
- https://www.youtube.com/watch?v=LSP_HY-i1CE
- https://www.dremel.com/gb/en/make-with-dremel/how-to/how-to-start-making-cosplay-props—with-waynes-workshop
- https://www.youtube.com/watch?v=bJ6ykQFTo-k
- https://www.instructables.com/Superhero-Props/
- https://cos-bond.com/2019/04/06/planning-and-patterning-cosplay-weapons/