You’ll need EVA foam, PVC pipes, and contact cement as your foundation materials, plus a heat gun, utility knife, and Dremel rotary tool for shaping. Master heat-forming techniques and 45-degree angle cuts to create authentic details. Always wear NIOSH-rated respirators with P100 filters and safety glasses when working with Plasti Dip or other sealants. Seal your foam with Mod Podge, then apply Epsilon Pro for impact resistance. Layer your paints and add acrylic washes for cinematic weathering effects that’ll bring your props to life—and there’s much more to explore.
Key Takeaways
- Use EVA foam, PVC pipes, and foam board as primary building materials with contact cement and hot glue for assembly.
- Essential tools include heat guns for shaping foam, Dremel rotary tools for detailing, and utility knives for cutting materials.
- Shape props using heat-forming techniques, 45-degree angle cuts, and test all methods on scrap materials before final application.
- Seal foam with Mod Podge, apply Plastidip primer, then use layered painting and weathering techniques for realistic finishes.
- Always wear NIOSH-rated respirators, safety glasses, and chemical-resistant gloves while working with adhesives and sealants.
Essential Materials for Building Film-Accurate Props
When building film-accurate cosplay props, you’ll need to understand your material options before making your first cut. EVA foam delivers material versatility across 2mm to 10mm thicknesses, enabling layered armor details while maintaining structural integrity. PVC pipes form robust weapon skeletons, complemented by acetate sheets for transparent components. High-density foam and Plastazote provide superior durability over standard craft foam, which risks melting during heat-shaping processes.
Sourcing affordable options starts with foam board for base panels and polyestyrene spheres for dimensional accents. Contact cement bonds foam layers permanently, while hot glue handles quick EVA attachments. Seal surfaces with Plasti Dip before applying acrylic paints to prevent absorption. Integrate LED strips like NeoPixel for illuminated effects, and reinforce heavy props using wood bases for long-term convention wear.
Must-Have Tools Every Cosplay Prop Maker Needs
Your prop-making success depends on acquiring the right tools before starting any project. You’ll need heat and cutting implements to shape materials, specialized equipment for adding details, and proper safety gear to protect yourself during fabrication.
These three tool categories form the foundation of every cosplay workshop, from basic foam cutting to advanced thermoplastic forming.
Essential Heat and Cutting Tools
Essential heat and cutting tools form the backbone of any cosplay prop workshop, enabling you to transform raw materials into screen-accurate replicas. Heat guns thermally activate materials like Worbla and EVA foam, reducing shaping time while allowing intricate curve formation.
Following tool safety guidelines, you’ll use dual-temperature hot glue guns for precise adhesive application methods across foam, fabric, and plastic substrates. Sharp utility knives with replaceable blades cut intricate patterns when paired with cutting mats for clean edges.
Dremel rotary tools deliver variable-speed sanding, carving, and engraving capabilities for detailed finishes. Wood-burning tools and soldering irons heat-emboss textures into foam surfaces, though you’ll need respiratory protection against fumes.
These specialized instruments enable professional-grade prop fabrication while maintaining material integrity throughout construction.
Shaping and Detailing Equipment
After you’ve mastered cutting and heat-forming your base materials, you’ll need specialized equipment to transform rough shapes into screen-accurate replicas with professional-grade surface details.
The Dremel 8220 cordless multi-tool serves as your precision workhorse, featuring an EZ Twist Nose Cap for quick accessory changes and integrated LED lighting for intricate work. Pair it with the Flexible Shaft (225) attachment for reduced hand fatigue during extended sessions.
Essential detailing implements include:
- Engraving cutters (2.4mm) that create consistent grooves and dots across EVA foam armor pieces
- Pounce wheels for transferring patterns while adding authentic weathered textures
- Silicone sculpting tools that press details into heated thermoplastics without surface adhesion
- Needle file usage for refining edges and contours with surgical precision
- Budget-friendly wood burners offering sculpting tool variety through interchangeable tips
Safety Gear for Crafting
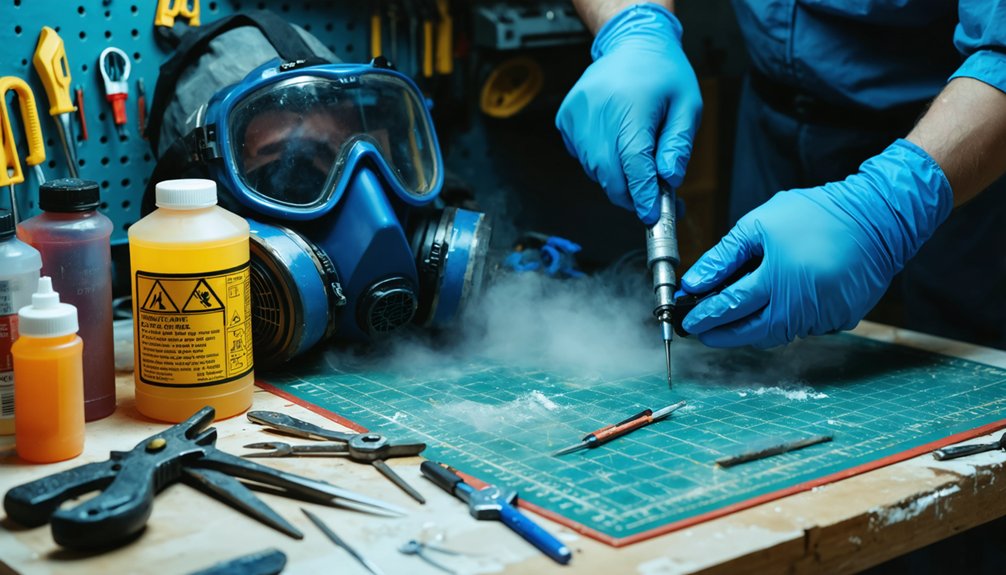
Before you begin cutting, sanding, or heat-forming any materials, you’ll need proper safety gear to protect against the hazards inherent to prop fabrication. Essential personal protection equipment includes impact-resistant safety glasses ($1-$35), NIOSH-rated respirators with appropriate filters (P100 for particles, 6001 for organic vapors), and disposable gloves for handling resins and adhesives. Full-face shields defend against high-velocity sanding debris, while ear muffs prevent hearing damage from power tools.
Match respiratory filters to your materials—standard surgical masks won’t seal properly against oily paint particles or sawdust. Wear full skin coverage when working with caustic chemicals or heated foam to prevent burns. Store Material Safety Data Sheets alongside your equipment for quick reference.
Maintain adequate ventilation during all chemical processes, as storage requirements dictate keeping respirators and protective gear accessible within your workspace.
Fundamental Techniques for Shaping and Assembling Props
When you’re ready to transform flat materials into dimensional cosplay props, mastering fundamental shaping and assembly techniques becomes your primary objective.
Begin with customized patterning—resize digital images to exact dimensions, then trace onto cardboard or EVA foam for precision cutting.
Heat foam with a heat gun to create curves and bends, then secure with hot glue while pliable.
For prototype finishing, employ these essential methods:
- Cut foam at 45-degree angles on joining edges for seamless assembly
- Carve intricate textures using a Dremel with flex shaft to reduce hand fatigue
- Layer cardboard strategically to build dimensional depth and structural integrity
- Heat-emboss organic details with wood-burning tools for authentic weathering effects
- Test all techniques on scrap materials before committing to final pieces
Sharp blades minimize post-cut sanding requirements.
Constructing Durable Weapons and Armor Pieces
Your shaping skills now support the construction of larger, more complex prop categories that demand strategic structural planning.
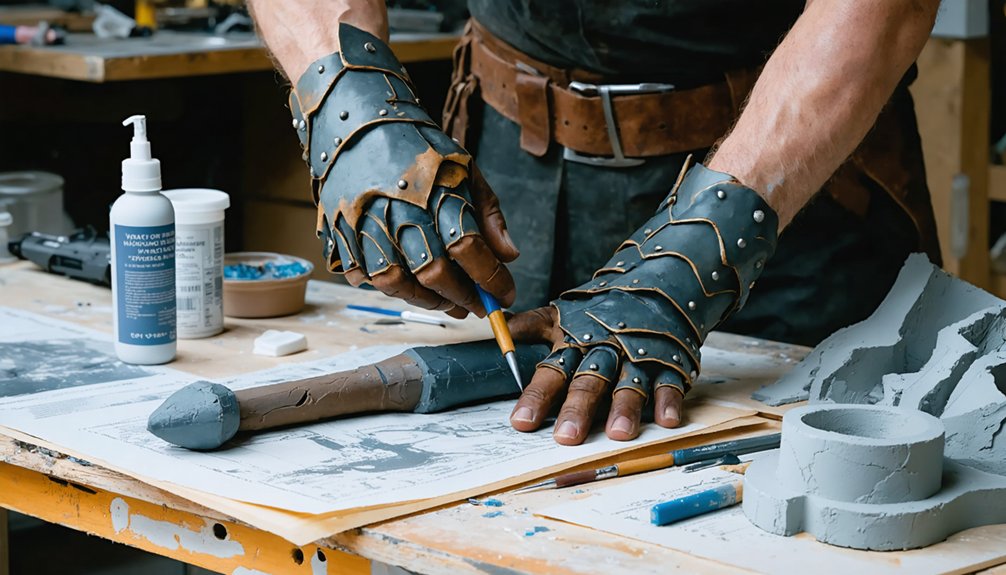
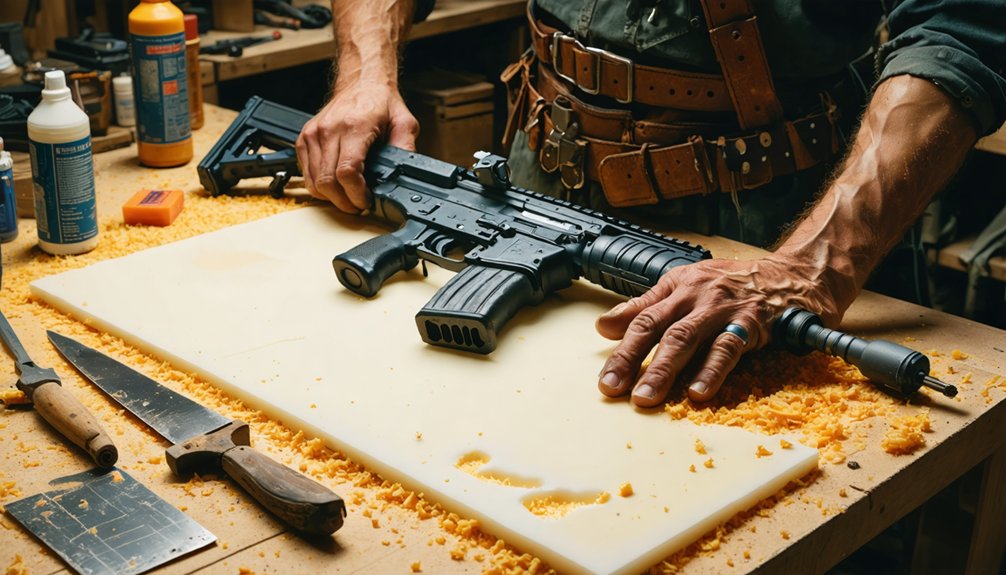
For weapons, insert PVC pipe skeletons through EVA foam cores, utilizing couplings to create segmented staffs or swords. High-density 10mm EVA foam delivers necessary rigidity for blade structures, while wooden dowels reinforce arrows and slim armaments.
When securing foam armor components, layer varying foam thicknesses—combining 10mm bases with 5mm detailing—then bond with targeted hot glue lines along seams.
Apply Worbla’s thermoplastic properties for compound curves requiring heat-molded precision.
Achieving metallic prop finishes demands strategic coating: seal foam with Mod Podge, then apply Epsilon Pro or UreCoat for impact-resistant surfaces. Dremel-carved textures enhance realism before final sealing, while fabric decoupage reinforces stress points on armor articulation zones.
Painting and Weathering for Cinematic Realism
How does a pristine foam prop transform into a battle-worn artifact that survives cinematographic scrutiny? Substrate preparation guidelines begin with Plastidip primer—warm the can in hot water for ten minutes, then apply with proper respiratory protection. Layered paint techniques start with titanium white base coats, followed by strategic shadow placement using dark metallic gray pulled outward for gradation.
Essential weathering effects include:
- Acrylic washes (1:1 paint-to-water ratio) wiped selectively with paper towels
- Stippled distressing using stiff brushes with dark brown pigment
- Exposed metal simulation through foam sponge dabbing with silver paint
- Rust drip patterns alternating copper and metallic tones
- Mod Podge ultra matte sealing for protection post-weathering
Build pigment density through waterless second passes, creating dimensional contrast that flat canvas techniques can’t achieve.
Safety Precautions When Working With Cosplay Materials
Working with cosplay materials exposes you to chemical fumes, particulates, and contact hazards that require proper protective equipment. You must establish adequate ventilation before handling materials like resins, primers, adhesives, and thermoplastics that release harmful vapors during application or heating.
Your workspace setup should prioritize respiratory protection and prevent skin contact with caustic substances through appropriate barrier methods.
Protective Gear Requirements
Before you cut your first piece of foam or mix any resin, you must assemble the proper protective gear to shield yourself from the hazards inherent in prop making. Proper glove selection and exposure mitigation aren’t optional—they’re fundamental to your creative safety.
Essential protective equipment includes:
- Hard plastic safety glasses or full goggles for power tools, chemicals, and heat work—goggles fit over prescription eyewear
- NIOSH-rated respirators with P100 filters for resin vapors, adhesive fumes, and carcinogenic materials—paper masks fail completely
- Chemical-resistant disposable gloves specified by material safety labels for absorption prevention
- Cut-resistant gloves when handling sharp edges or 3D print supports
- Disposable coveralls for thorough skin coverage during sanding, painting, or chemical handling
Pair these with hearing protection for power tools and heat-resistant work surfaces for thermal applications.
Workspace Ventilation Guidelines
Whether you’re heating thermoplastics, sanding foam, or mixing resin, inadequate ventilation transforms your workspace into a health hazard that compounds with every project. Implement cross-ventilation by opening two windows while positioning fans to drive fresh air inward and contaminated air outward.
For enclosed spaces, proper exhaust system installation requires venting directly outside—never recirculating fumes indoors. Local exhaust solutions like fume hoods and snorkel systems capture hazardous vapors at their source, particularly critical when working with contact cement’s carcinogenic off-gassing or PVC’s hydrogen chloride emissions.
While OSHA ventilation regulations primarily target commercial facilities, their standards provide excellent benchmarks for dedicated makerspaces. Combine mechanical ventilation with material-specific protocols: UV resin printing demands continuous airflow, ABS extrusion requires robust extraction, and spray finishing necessitates downdraft tables for particulate control.
Transportation and Convention Compliance Tips
Since transporting cosplay props requires careful planning to protect your work and comply with venue regulations, you’ll need to master both packing techniques and convention logistics before your first event.
Disassemble props into compact components using Velcro connections for checkpoint navigation and airline baggage fees optimization. Prioritize lightweight materials like expanded polyvinyl chloride for durability. Pack irreplaceable items—corsets, wigs, foam weapons—in carry-on luggage to prevent devastation from loss.
Essential transport strategies:
- Nest soft clothing around fragile prop components as protective padding
- Include explanatory notes stating “costume props: foam/3D printed materials”
- Verify venue accessibility rules for wheeled luggage before arrival
- Design hand truck compatibility into oversized builds
- Plan parking lot assembly for single-entry conventions
Custom wooden crates protect large-scale builds during transit, while bright luggage ascertains visibility when managing multiple costume changes.
Frequently Asked Questions
How Do I Choose Which Character’s Props to Make First?
Start by considering personal skill level, then assess material availability, and finally evaluate prop complexity. You’ll succeed selecting unique character props that match your technical abilities—choose flat designs like swords or daggers using accessible EVA foam and basic cutting tools.
What’s the Average Cost to Complete a Full Prop Set?
You’ll spend $50-$150 for beginner sets, $50-$200 mid-range, $90-$400 advanced, or $200-$4200+ professional builds. Your budget planning and material acquisition strategy directly determines complexity—start conservatively, then scale up as your fabrication skills develop.
How Long Does It Take to Build Props for Beginners?
Rome wasn’t built in a day—your first prop takes weeks to months depending on complexity. Your prop making timeline shrinks as prop building skills improve through practice with foam cutting, heat shaping, and assembly techniques.
Can I Sell Props I’ve Made From Copyrighted Characters?
Selling copyrighted character props carries significant legal risks without proper licensing considerations. You’ll need authorization from rights holders to commercialize derivative works legally. For personal use, you’re clear—but commercial sales require traversing intellectual property protections.
Where Do I Find Accurate Reference Images for Film Props?
You’ll find film reference photos through ShotDeck’s searchable database and Frame Set’s curated collections. For stock prop images, explore Unsplash’s 3 million resources or Pexels. Cross-reference multiple angles to guarantee dimensional accuracy before material selection.