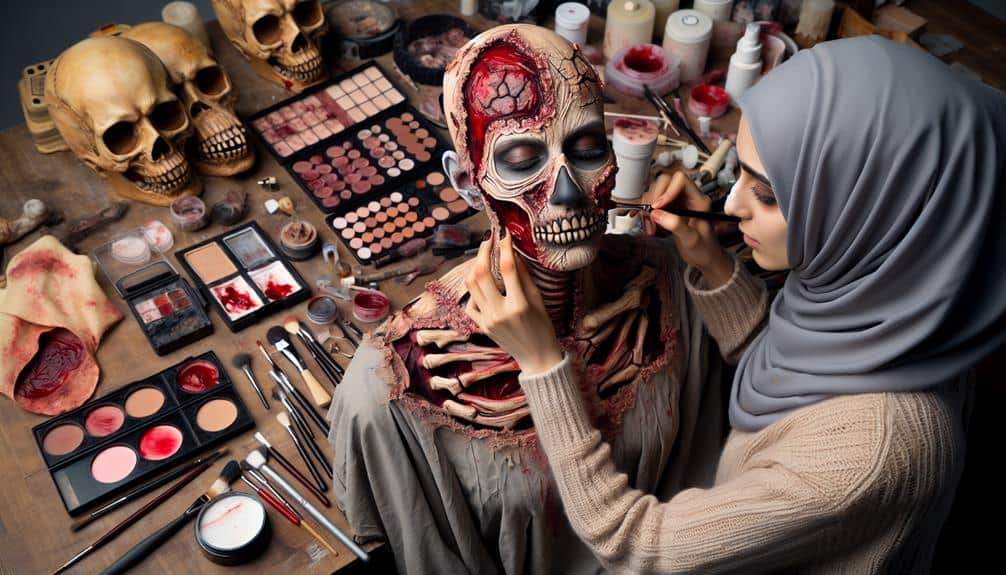
Coincidentally, the key to achieving realistic zombie makeup lies in mastering a few essential techniques. From selecting the right base makeup to adding depth with contouring and shadows, each step plays a vital role in bringing your undead character to life.
But what truly sets apart a mediocre zombie look from a jaw-droppingly convincing one? It's all about the intricate details that go into creating lifelike wounds, decayed skin effects, and those final touches that elevate your makeup to a whole new level of authenticity.
Key Takeaways
- Choose foundation lighter than skin tone and blend for undead look.
- Use prosthetics and blood for realistic wounds and injuries.
- Contour with cool tones, shadows, and blood splatter for depth.
- Create decaying skin effects with layers, textures, and realistic details.
Choosing the Right Base Makeup
To achieve a realistic zombie look, start by selecting a foundation that's a few shades lighter than your natural skin tone. This lighter shade will help create the appearance of undead, decaying skin. When choosing a foundation, focusing on products that offer full coverage to conceal your natural complexion effectively.
Once you have your foundation, mastering blending techniques is vital for a seamless finish. Blend the foundation evenly over your face and neck, making sure to reach all areas for a consistent base.
Color matching is essential in creating a believable zombie look. Consider adding a touch of green or grey to your foundation to mimic the appearance of death. Experiment with different shades until you achieve the perfect undead hue that suits your desired look.
After applying your foundation, set your makeup with a setting spray to make longevity. Additionally, lightly dusting translucent powder over your face can help mattify the skin and prevent any unwanted shine. Mastering these foundation and setting techniques is key to achieving a truly convincing zombie makeup look.
Creating Realistic Wounds and Injuries
For a truly convincing zombie makeup look, mastering the art of creating realistic wounds and injuries is the next step in bringing your undead character to life. To achieve this, consider the following techniques:
- Torn Flesh: Use prosthetic pieces or tissue paper to create the illusion of torn flesh. Apply liquid latex around the edges to blend it seamlessly into your skin. Once dried, carefully tear the center to reveal the torn effect, enhancing the realism of your zombie look.
- Blood Splatter: Utilize a combination of fake blood and a stippling sponge to create realistic blood splatter effects. Dip the sponge into the fake blood and then lightly tap it over the desired areas for a gruesome and authentic appearance. Remember to vary the intensity and direction of the splatter to mimic different injury types.
- Layering: Enhance depth and realism by layering different wounds and injuries. Combine torn flesh with bruising effects and blood splatter to create a more dynamic and believable zombie makeup look. Experiment with textures and colors to achieve a truly convincing undead appearance.
Adding Depth With Contouring and Shadows
Enhance the eerie allure of your zombie makeup by skillfully employing contouring and shadows to add depth and dimension to your undead visage. To achieve a convincing undead look, start by highlighting the bones on your face using a cool-toned contour shade. Focus on hollowing out areas like the cheeks, temples, and jawline to create a gaunt and sunken appearance that mimics the effects of aging and decay.
For the eyes, create the illusion of undead sunken eyes by blending a dark shadow around the sockets and under the lower lash line. This will give your eyes a hollow and haunting look that's essential for a realistic zombie effect. To add an extra touch of horror, consider incorporating subtle blood splatter around the eyes or mouth for a gruesome touch that will elevate your zombie makeup to the next level.
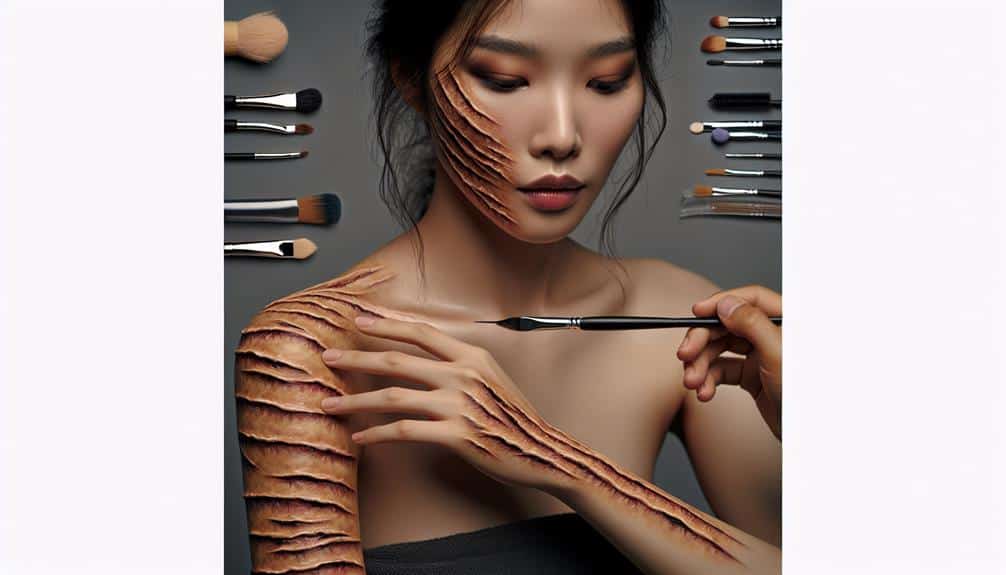
Incorporating Decayed Skin Effects
Create a ghastly and unsettling appearance by skillfully incorporating decayed skin effects into your zombie makeup, bringing a chilling realism to your undead transformation. When aiming for a truly authentic zombie look, focusing on details like decayed flesh and textured scars can make a significant difference. Here are some key tips to help you achieve that gruesome undead aesthetic:
- Decayed Flesh: Use a combination of makeup products to create the appearance of decaying skin. Start by layering different shades of green, gray, and brown to mimic the look of rotting flesh. Adding small details like cracks and peeling skin can enhance the overall effect.
- Textured Scars: Incorporating textured scars into your zombie makeup can add depth and realism to your overall look. You can achieve this by using special effects makeup products like scar wax or liquid latex to create raised scars and wounds on the skin. Adding fake blood can make the scars appear fresh and gruesome.
- Blending Techniques: To guarantee a seamless blend between the decayed skin effects and the rest of your zombie makeup, practice blending techniques to create a natural transition. Use sponges, brushes, and your fingers to blend different colors and textures together for a more realistic finish.
Finishing Touches for Authenticity
To achieve an authentic zombie look, consider the importance of meticulous details in your finishing touches. Applying blood splatter strategically can enhance the realism of your makeup. Use a stippling sponge or a toothbrush dipped in fake blood to create splatter effects on your face and clothes. Focus on areas like the mouth, hands, and clothing to simulate a gruesome aftermath.
Another essential finishing touch is smudging dirt on exposed skin areas. Utilize a mixture of face paint or eyeshadow in earthy tones to mimic dirt and grime. Pay attention to areas where natural wear and tear would occur, such as elbows, knees, and neck. Blend the dirt carefully to avoid harsh lines and achieve a natural, lived-in appearance.
Frequently Asked Questions
How Can I Make My Zombie Makeup Last All Day Without Smudging or Wearing Off?
To make your zombie makeup last all day without smudging or wearing off, use long-lasting techniques like waterproof products and smudge-proof solutions. Finish with a setting spray to seal the look in place.
Are There Any Special Techniques for Creating a Realistic Zombie Bite Mark?
Creating a realistic wound requires finesse. For a lifelike bite mark, special effects techniques like layering prosthetics and using color gradients make a difference. Blend edges seamlessly, add depth with shading, and finish with blood for authenticity.
Can I Use Regular Face Paint for Zombie Makeup, or Do I Need to Use Special Effects Makeup Products?
You can achieve a creepy zombie look using regular face paint, but special effects products enhance realism. Face paint techniques help create depth, while special effects makeup guarantees longevity and prevents smudging. Experiment with both for the best undead transformation.
What Is the Best Way to Make My Zombie Makeup Look More Three-Dimensional and Lifelike?
To make your zombie makeup more three-dimensional and lifelike, focus on blending techniques for a seamless finish. Use highlighting tips to add depth and texture application for a decaying look. Contouring tricks can enhance realistic features.
Is There a Way to Make My Zombie Makeup Look More Fresh and Bloody, Rather Than Decayed and Old?
To make your zombie makeup appear fresh and bloody, focus on realistic wounds and gore makeup techniques. Blend in fresh blood effects for a gory finish. This approach adds a dynamic touch to your look, creating a more recent zombie appearance.