To apply prosthetic ears or horns for cosplay, you’ll need spirit gum, the prosthetics themselves, and blending makeup. Start by cleaning your skin with isopropyl alcohol and letting it dry completely. Apply spirit gum to both surfaces, wait until it’s tacky, then press the prosthetic firmly into place for 30–60 seconds. Blend the edges with foundation and set everything with powder. Keep going to master every step from painting to removal.
Key Takeaways
- Clean your skin with isopropyl alcohol and allow it to dry completely before applying any adhesive to ensure a strong bond.
- Apply spirit gum to prepped skin, wait for it to become tacky, then seat the lower flange first before pressing upward.
- Press each prosthetic section firmly for 30–60 seconds after placement to secure adhesion and prevent lifting.
- Blend prosthetic edges seamlessly into your skin using foundation makeup, feathering outward to hide visible seams.
- To remove, saturate spirit gum bonds with dedicated remover, then gently peel edges away to avoid skin or prosthetic damage.
What Supplies Do You Need for Prosthetic Ears and Horns?
Before diving into the application process, you’ll need to gather a few key supplies. For elf ear supplies and horn application, the essentials are prosthetic ears or horns and spirit gum. These two items are non-negotiable.
For enhanced results, consider adding ear cuffs, RMG make-ups, make-up sponges, setting powder, and a powder puff to your kit. These optional tools elevate precision and finish quality considerably.
If you’re building custom silicone ears, you’ll require alginate, Ultracal plaster, soft translucent silicone rubber, petroleum jelly, ear plugs, non-sulfur clay, silicone pigment, and Ease Release 200.
For painting unpainted prosthetics, stock up on RMG make-ups in multiple shades, round make-up sponges, talc or baby powder, and a powder puff.
How to Paint Prosthetic Ears to Match Your Skin Tone
To paint your prosthetic ears, you’ll need to select Graftobian RMG colors that closely match your skin tone, with the Light Stack RMG working well for fair to tanned complexions.
Apply the paint using round make-up sponges rather than wedge shapes, as they blend more naturally and help mask the underlying latex color for a realistic finish.
Once you’ve achieved a seamless blend, set the paint with talc or baby powder using a powder puff to lock in the color and prevent smearing during wear.
Selecting Matching RMG Colors
When selecting RMG colors for your prosthetic ears, you’ll want to start with Graftobian’s RMG line, available at Aradani Studios. This professional-grade makeup system offers precise color matching across a broad spectrum of skin tones, ensuring seamless integration between your prosthetics and natural complexion.
For fair to tanned skin tones, use the Light Stack RMG selection as your baseline. Layer multiple shades strategically to replicate your skin’s natural depth and undertones.
You’ll need round make-up sponges rather than wedge shapes, as they deliver superior blending and more natural-looking results.
Apply your selected RMG directly onto the prosthetic, never onto bare skin, preserving the ear’s reusability. This technique also effectively masks the underlying latex color, dramatically increasing the overall realism of your finished prosthetic.
Blending Paint Seamlessly
Once you’ve selected your RMG colors, begin blending by applying the base shade directly onto the prosthetic’s surface using a round make-up sponge, working in light, overlapping strokes to build coverage gradually.
Color layering techniques require patience—never saturate the prosthetic in a single pass.
Follow these texture enhancement tips for professional results:
- Layer midtones over the base, concentrating pigment toward raised contours.
- Stipple darker shades into recessed areas to simulate natural depth.
- Feather highlight colors along edges to eliminate harsh shifts.
- Seal completed layers with talc or baby powder using a powder puff.
These steps guarantee your prosthetic integrates convincingly with surrounding skin, producing transitions that withstand close inspection throughout extended wear.
How to Prep Your Skin So Prosthetic Ears Stick Properly
Proper skin preparation is the foundation of a long-lasting prosthetic bond, so you’ll want to follow a few critical steps before applying any adhesive.
Start with skin exfoliation tips: gently remove dead skin cells using a mild exfoliant, then cleanse the ear area thoroughly with isopropyl alcohol to eliminate oils and residue. Allow the skin to dry completely before proceeding.
For adhesive application techniques, mask off surrounding areas to protect healthy skin from spirit gum or medical adhesive.
Apply a thin, even adhesive layer directly to the prosthetic’s flange, wait until it reaches a tacky consistency, then press firmly against your ear. Hold steady for 30 seconds to activate the bond.
Clean edges immediately using a cotton swab for precision placement.
How to Apply Prosthetic Ears and Horns That Actually Stay Put
Achieving a secure, lasting bond with prosthetic ears and horns depends on layering the right techniques in the correct order. Master these adhesive techniques for reliable ear placement every time:
Mastering prosthetic ear and horn placement requires precise layering of the right techniques, applied in the correct sequence.
- Apply spirit gum to your prepped skin, letting it reach a tacky consistency before pressing the prosthetic firmly into position.
- Seat the lower flange first, anchoring the earlobe bond before working upward toward the tip.
- Position ear cuffs over the back seam to conceal edges and reinforce attachment points.
- Blend edges immediately using foundation makeup, feathering outward to eliminate visible shifts.
Press each section for 30–60 seconds after placement.
Don’t rush curing time—premature movement breaks the adhesive bond and compromises your overall ear placement integrity.
How to Blend Prosthetic Ear Edges Into Your Skin Seamlessly
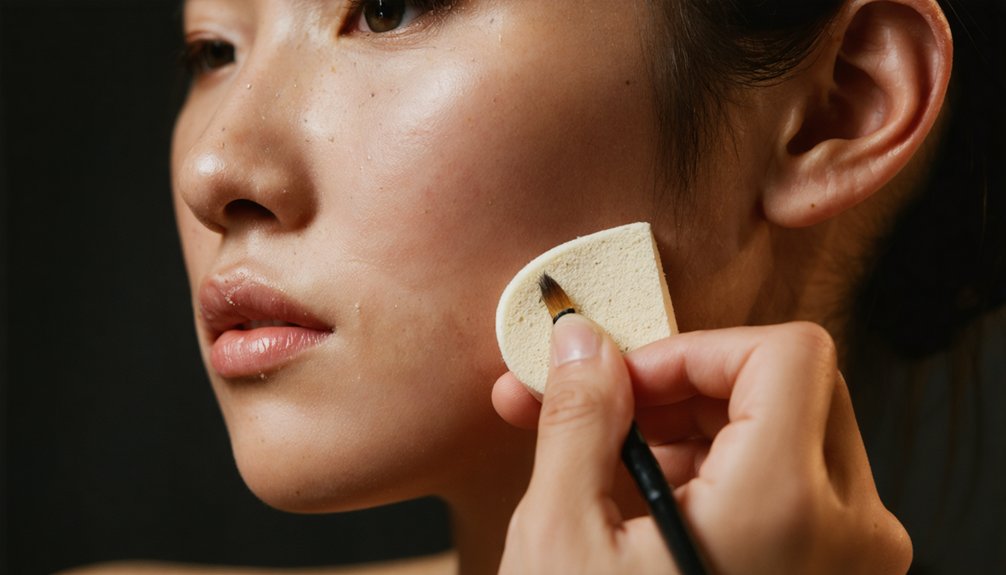
Blending prosthetic ear edges seamlessly into your skin requires the right products applied in deliberate sequence. Start your edge smoothing process by applying foundation makeup directly over the prosthetic’s perimeter, feathering outward onto surrounding skin.
Use round sponges rather than wedge shapes, as they distribute product more naturally and support superior blending techniques.
If you’re working with silicone ears, build a thicker lower flange during fabrication to strengthen the earlobe bond and minimize visible edge lines.
For latex prosthetics, layer RMG makeup matching your skin tone across the flange, masking the underlying latex color effectively.
Once blended, set everything with talc or baby powder using a powder puff.
Position ear cuffs strategically to conceal remaining back seams, completing your seamless integration.
How to Remove and Store Prosthetic Ears So They Last Longer
Removing prosthetic ears correctly preserves their structure and extends their usable life considerably. Applying proper removal techniques prevents tearing delicate edges and maintains adhesive surfaces for reapplication.
Proper prosthetic ear removal preserves structural integrity and significantly extends usability across multiple wears.
Follow these essential storage tips:
- Saturate spirit gum bonds with dedicated make-up and spirit gum remover before gently peeling edges away from skin.
- Clean residual adhesive using silicone-friendly release agents like Ease Release 200 without degrading the prosthetic material.
- Pat surfaces dry completely before storing, preventing moisture-related deterioration.
- Store painted prosthetics in a cool, dry container, protecting RMG-painted surfaces that maintain 6–12 months of durability when handled correctly.
Consistent application of these removal techniques and storage tips guarantees your prosthetics deliver reliable, high-quality performance across multiple cosplay events.
Frequently Asked Questions
Can Prosthetic Ears Be Worn Safely With Existing Ear Piercings?
Like a puzzle fitting perfectly, yes, you can safely wear prosthetic ears with existing ear piercings. Monitor your skin sensitivity, keep piercings exposed, and use spirit gum carefully to avoid irritation around pierced areas.
How Long Can Prosthetic Ears Be Comfortably Worn in One Sitting?
You can comfortably wear prosthetic ears for 4–8 hours. Your adhesive types, like spirit gum or medical adhesive, and proper application techniques directly impact wear time, ensuring a secure, irritation-free fit throughout your cosplay event.
Are Prosthetic Ears Suitable for People With Sensitive Skin Conditions?
If you’ve got skin sensitivity, you’ll want to test adhesives first. Use medical-grade spirit gum and refine your application techniques by blending edges with hypoallergenic foundation, minimizing direct contact with irritating materials.
Can Custom Silicone Ears Be Reused Across Multiple Cosplay Events?
Like a trusted tool in your kit, your custom silicone ears can absolutely be reused. Prioritize custom ear maintenance by cleaning them post-use and practice proper silicone ear storage to extend their lifespan across multiple events.
Do Prosthetic Ears Stay Secure During Outdoor Events in Hot Weather?
Your prosthetic ears can stay secure outdoors if you’re using the right adhesive options. Spirit gum offers moderate heat resistance, but medical-grade adhesives perform better. You’ll want to reapply as sweat accumulates during extended outdoor events.
References
- https://www.instructables.com/Applying-Elf-Ears-realistically…-in-5-minutes/
- https://www.youtube.com/watch?v=fYG-AcFCKuw
- https://www.instructables.com/Elf-Ears-custom-made-in-silicone-rubber/
- https://www.aradanicostumes.com/pages/how-to-paint-elf-ears-the-aradani-way
- https://www.youtube.com/watch?v=0v3THmb097w