Cosplaying Geralt of Rivia means tackling one of gaming’s most technically demanding costumes. You’ll layer a quilted cotton shirt under a black tunic, construct heat-shaped EVA foam chest armor, weave 120 meters of wire into chain mail pauldrons, and craft twin foam swords with battle-worn finishes. Add theatrical amber contact lenses, scar wax facial detailing, and a resin-cast wolf medallion to complete the look. There’s far more craftsmanship involved than you’d expect.
Key Takeaways
- Start with a layered base outfit using light brown quilted fabric, a black tunic, dark brown leather trousers, and matching leather boots.
- Craft EVA foam chest armor by heat-shaping, sanding edges for a battle-worn look, then priming and painting for authenticity.
- Weave chain mail pauldrons from 2mm wire rings and attach them to leather shoulder bases for accurate detailing.
- Recreate Geralt’s scars using scar wax or liquid latex, feathering edges and layering colors for a realistic appearance.
- Purchase cost-effective items like the wolf medallion, chain mail sections, and metal spurs rather than custom crafting them.
What Makes Geralt’s Look So Difficult to Replicate
Geralt of Rivia’s look is deceptively complex, layering multiple material types, construction techniques, and weathered details that must work together seamlessly.
Geralt’s complexity stems from costume layering that combines leather, chain mail, quilted fabrics, and EVA foam armor — each demanding different tools and skill sets. You’re not just assembling a costume; you’re engineering visual authenticity across every component.
Engineering Geralt’s costume means mastering leather, chain mail, quilted fabrics, and foam armor — simultaneously, seamlessly, authentically.
Iconic details like the wolf medallion, twin swords, and vertical facial scars demand design accuracy and character nuances that elevate the build beyond basic cosplay.
Armor intricacies require heat-shaping foam, battle-damage texturing, and precise painting. Material sourcing becomes its own challenge, needing varied leather shades, 120 meters of wire, and chain mail.
Prop realism, especially the crossbow and swords, demands crafting challenges you’ll need to anticipate early.
Know What to Buy and What to Build First
Before a single stitch is sewn or foam piece is cut, you need to divide the full build into two strategic categories: what you’ll purchase ready-made and what you’ll construct from scratch. Budget considerations should drive this decision early.
Geralt’s wolf medallion, chain mail sections, and metal spurs are worth buying — replicating these authentically costs more time than money saved. Conversely, his EVA foam chest armor, quilted shirt, and leather pauldrons demand custom construction because off-the-shelf versions never capture the worn, battle-damaged aesthetic accurately.
Material sourcing becomes your next priority: identify leather suppliers, yoga mat foam, and 120 meters of 2mm wire before committing to a timeline.
Map every component against your skills and budget, then build your production sequence accordingly.
Build Geralt’s Base Outfit From Scratch
With your build list mapped and materials sourced, construction starts at the foundation — Geralt’s base clothing layers that everything else sits on top of.
Fabric selection here is critical: you’ll need light brown cotton for the quilted shirt, black fabric for the loose tunic, and dark brown leather for pants and boots.
Start by drafting patterns against a mannequin or your own duct-taped body cast. Add 5–12mm seam allowance throughout.
Sew the quilted shirt first using a grid-stitch technique across doubled cotton fabric — this creates the padded, medieval-armor aesthetic before any actual armor techniques even apply.
Construct the black tunic loose and layered over it. Fit the leather trousers with a traditional front-flap closure, then move to assembling the dark brown leather boots last.
Craft Geralt’s Leather and Chain Mail Armor
To shape Geralt’s chest armor, trace your pattern onto EVA foam cut from yoga mats. Then use a heat gun to warm the foam until it’s pliable and press it firmly against a curved surface like a mannequin to mold it into a body-conforming shape.
Once cooled, sand the edges to add battle-worn texture, prime the surface, and layer your paint to achieve that weathered, combat-scarred aesthetic.
For the chain mail pauldrons, you’ll need to weave 2mm wire rings into a layered configuration. Then attach the finished mail sections onto your light brown leather shoulder base using small metal rings or heavy-duty thread to create Geralt’s signature multi-layered shoulder protection.
Shaping EVA Foam Armor
Shaping EVA foam into Geralt’s battle-worn armor requires heat, pressure, and a steady hand. Using a heat gun, apply controlled foam heating to each panel until it becomes pliable, then press it firmly against a curved surface — your knee or a rounded mold works perfectly — holding the shape until it cools.
This technique creates the organic contours that make Geralt’s chest and back plates feel authentically worn.
For edge detailing, bevel each armor piece’s perimeter using a sharp blade at a 45-degree angle, then lightly re-heat the edges to smooth any roughness.
Layer thin foam strips to simulate battle damage, pressing them while warm to bond seamlessly.
Once shaped, sand the entire surface to eliminate texture inconsistencies before priming and painting.
Assembling Chain Mail Pauldrons
Once your EVA foam armor pieces are shaped and primed, Geralt’s layered pauldrons demand an entirely different skillset — weaving and mounting chain mail onto light brown leather shoulder plates.
Mastering chain mail techniques starts with linking individual rings consistently, maintaining uniform tension throughout each row. Use 2mm wire, cutting rings precisely before connecting them in a four-in-one pattern for authentic medieval structure.
For armor assembly, cut your leather shoulder plates first, punching evenly spaced holes along the edges using your drill and hole punch.
Thread the chain mail directly through these holes, securing sections firmly so movement doesn’t loosen the connection. Layer multiple leather strips beneath the chain sections, mimicking Geralt’s signature stacked pauldron silhouette.
Finally, attach completed pauldrons to your shoulder belts, ensuring comfortable weight distribution across both shoulders.
Make Geralt’s Swords, Medallion, and Crossbow
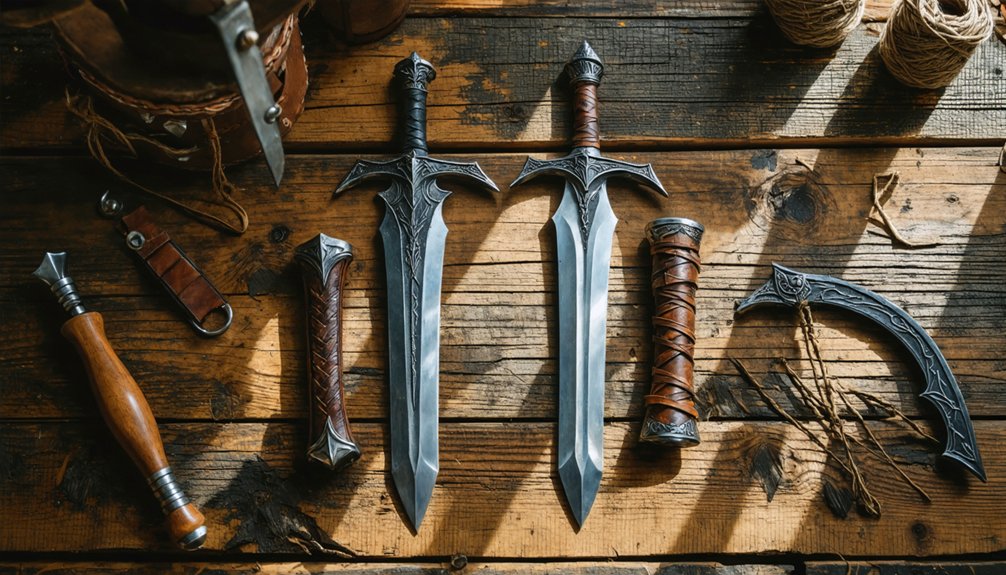
Geralt’s iconic arsenal—two witcher swords, a wolf medallion, and a crossbow—ties the entire costume together, so you’ll want to craft each piece with care.
For sword crafting, cut blade profiles from 6mm EVA foam, layering thinner sheets for the fuller groove. Heat-shape each edge, then prime and paint with metallic acrylics. Weapon aging comes next—dry-brush darker tones into scratches you’ve deliberately carved for battle-worn authenticity.
Suspend both swords from a leather shoulder belt using riveted loops.
For medallion design, cast a wolf motif in resin or sculpt it from foam clay, finishing with silver paint.
Crossbow assembly requires a sturdy internal wire armature supporting foam-built limbs and a taut cord. Mount it using a dedicated hip strap, keeping prop materials lightweight without sacrificing visual accuracy.
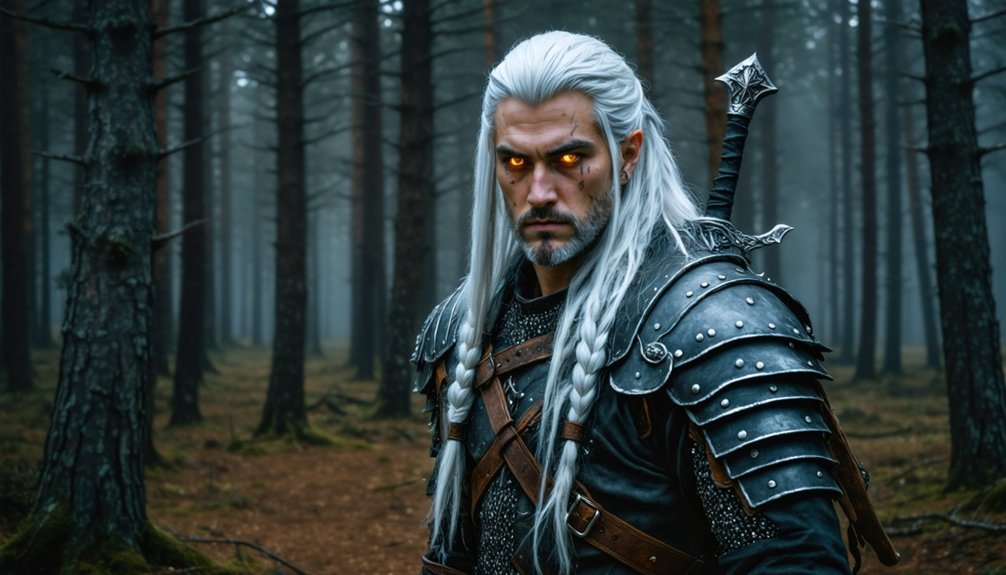
Style Geralt’s White Hair, Scars, and Yellow Eyes
To nail Geralt’s iconic look, you’ll need a long, shoulder-length white wig styled with slight waves to capture his battle-worn aesthetic—secure it with wig clips or an adjustable cap for a snug fit.
Apply yellow, cat-pupil contact lenses to replicate his mutant eyes, ensuring you’ve consulted an eye care professional for proper sizing and safe insertion.
Use flexible scar wax or liquid latex to sculpt his distinctive marks: a vertical scar running down his left forehead across his eye and curving onto his cheek, plus a second scar on his right forehead, blending each with skin-tone theatrical makeup for a seamless, realistic finish.
Achieving Geralt’s White Hair
Pulling off Geralt’s signature look starts with getting his long, shoulder-length white hair right. Your best bet is exploring quality wig options rather than bleaching natural hair. Look for synthetic or heat-resistant fiber wigs in pure white or silver-white tones, ensuring the length hits your shoulders accurately.
Once you’ve secured your wig, use hair products specifically formulated for synthetic fibers to style it. A light-hold styling spray keeps strands controlled without creating plastic-looking clumps.
Geralt’s hair isn’t perfectly groomed—it’s slightly disheveled, battle-worn, and textured. Use a wide-tooth comb to create natural separation and subtle wave.
Secure the wig firmly using wig tape or grip bands underneath to prevent shifting during convention wear, especially when adding additional costume elements like pauldrons and swords.
Recreating His Yellow Eyes
Few elements of Geralt’s appearance are as immediately striking as his unnatural yellow eyes with their cat-like, vertically slit pupils—and nailing this detail elevates your cosplay from good to genuinely unsettling.
Your most effective option is theatrical contact lenses in amber or golden yellow with vertical slit pupils, sourced from reputable vendors requiring a valid prescription. Never purchase unlicensed lenses—improper fit risks corneal damage.
If contacts aren’t viable, commit to bold eye makeup instead: apply deep-set shadowing around the socket using smoky grey and black eyeshadow, then layer a golden-yellow pigment across the lid to simulate Geralt’s otherworldly mutation.
Sharp, defined brow lines reinforce the predatory intensity his eyes carry. Combining both contacts and eye makeup delivers the most cinematically accurate, haunting result.
Applying Geralt’s Scars
Once you’ve locked in those unsettling yellow eyes, Geralt’s scars are the next layer of identity that separates a polished cosplay from a truly convincing one.
You’ll need to replicate two distinct marks: a vertical scar running down the left forehead, crossing the eye, and curving onto the cheek, plus a secondary scar on the right forehead.
Use scar wax or liquid latex for dimensional scar application techniques that catch light realistically. Press the material flush against skin, then feather the edges with a silicone blending sponge.
Apply makeup blending tips by layering pinkish-red tones beneath a desaturated flesh tone, mimicking aged tissue. Set everything with translucent powder to prevent transfer.
Reference in-game screenshots frequently to nail the exact trajectory of each mark.
Add Battle Damage, Weathering, and Trophy Details
Weathering transforms a clean costume into a battle-hardened witcher’s kit, and you’ll achieve the most convincing results by working in deliberate layers.
Start with battle damage techniques on your EVA foam armor: use a heat gun to indent realistic slash marks, then sand edges irregularly. Dry-brush dark brown and black acrylic paint into recessed areas, building depth gradually. Apply raw umber selectively around joints and seams where grime accumulates naturally.
For trophy crafting, attach a metal hook to your belt and hang monster teeth, claws, or sculpted EVA pieces finished with aged patina effects.
Paint trophies with bone-colored base coats, then streak dark washes into crevices. Your wolf medallion benefits from similar treatment — a light silver dry-brush over darkened recesses convincingly sells decades of Witcher contracts.
Frequently Asked Questions
How Much Does a Complete Geralt of Rivia Cosplay Typically Cost?
You’ll spend $150–$400 total, depending on your cost breakdown. Budget tips: source EVA foam yoga mats cheaply, thrift leather pieces, and DIY chain mail using 120m of 2mm wire to cut expenses dramatically.
Can I Machine Wash My Leather and Chain Mail Cosplay Pieces?
Don’t machine wash your leather care pieces or chain mail maintenance components! You’ll warp, crack, and rust them. Instead, spot-clean leather with conditioner and hand-rinse chain mail, then air-dry both thoroughly.
How Long Does the Entire Geralt Cosplay Build Usually Take?
You’ll typically spend 60–120+ hours building Geralt’s full cosplay. Factor in Geralt character analysis for accurate detailing, plus prop making tips for foam armor, chainmail, leatherwork, and sword construction to streamline your innovative build timeline.
Are There Beginner-Friendly Alternatives to Crafting Chain Mail From Scratch?
Imagine buying pre-made chain mail fabric online — you’ll save hours! These chain mail alternatives are perfect crafting tips for beginners: simply cut, attach, and style onto your pauldrons and armlets without wrestling complex wire-linking techniques.
Which Conventions or Events Are Most Popular for Witcher Cosplay Appearances?
You’ll find the best Witcher conventions and cosplay gatherings at Comic-Con, WitcherCon, and gaming expos like Gamescom. These events attract passionate fans where you can showcase your meticulously crafted Geralt costume to truly innovative, appreciative audiences.
References
- https://www.instructables.com/Witcher-Cosplay-Geralt-of-Rivia/
- https://www.scribd.com/document/793414143/Geralt-Cosplay-Guide
- https://forums.cdprojektred.com/index.php?threads/the-witcher-cosplay-guide-geralt.31782/
- https://www.joycedesign.nl/product/geralt-cosplay-armor-patterns-and-tutorial/
- https://carboncostume.com/geralt-from-netflixs-the-witcher/
- https://isleofhalloween.com/geralt-of-rivia-witcher-costume-ideas/