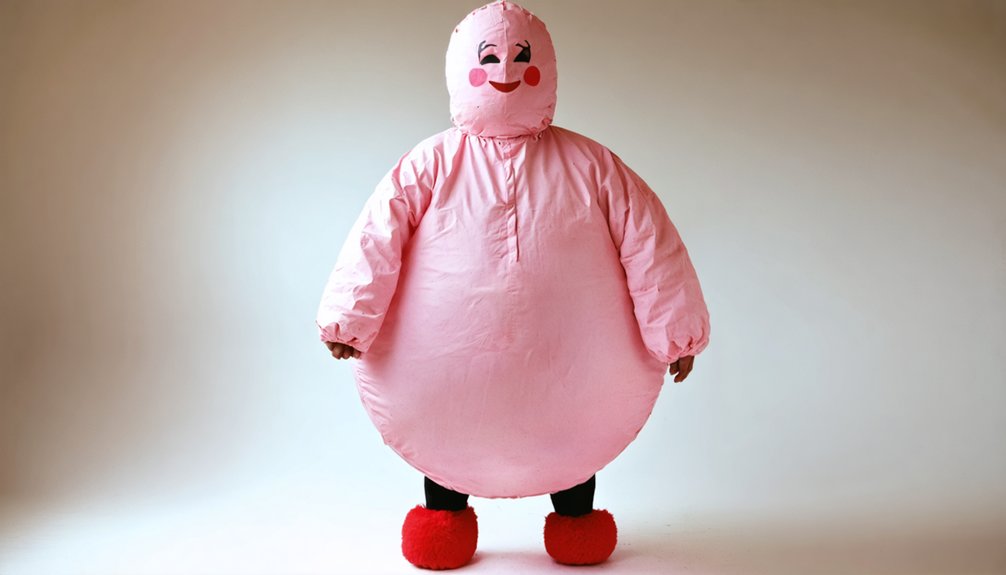
You can cosplay Kirby using surprisingly simple materials! Start with a large, overinflated yoga ball as your base, then coat it in paper mache using flour, water, and newspaper strips. After drying for 3-4 weeks, deflate the ball, spray paint the shell pink, and add felt facial features for that iconic Kirby look. It’s an affordable, creative build that anyone can tackle. Stick around to uncover every step that’ll bring your Kirby costume to life!
Key Takeaways
- Use an overinflated yoga ball as Kirby’s round base, stabilized on a bucket, with a bottom entry hole cut using a box cutter.
- Build the shell with 3–4 layers of newspaper and flour-water paste, reinforcing stress areas with cloth strips for durability.
- Allow the paper mache shell to dry completely for 3–4 weeks before deflating and removing the yoga ball inside.
- Spray paint the shell pink, add deeper shading with dry-brushing, and glue felt paper facial features for Kirby’s signature look.
- Repurpose eye hole cutouts as arm nubs, and install mesh screens behind eye openings for visibility while maintaining character accuracy.
Start With a Yoga Ball as Your Kirby Cosplay Base
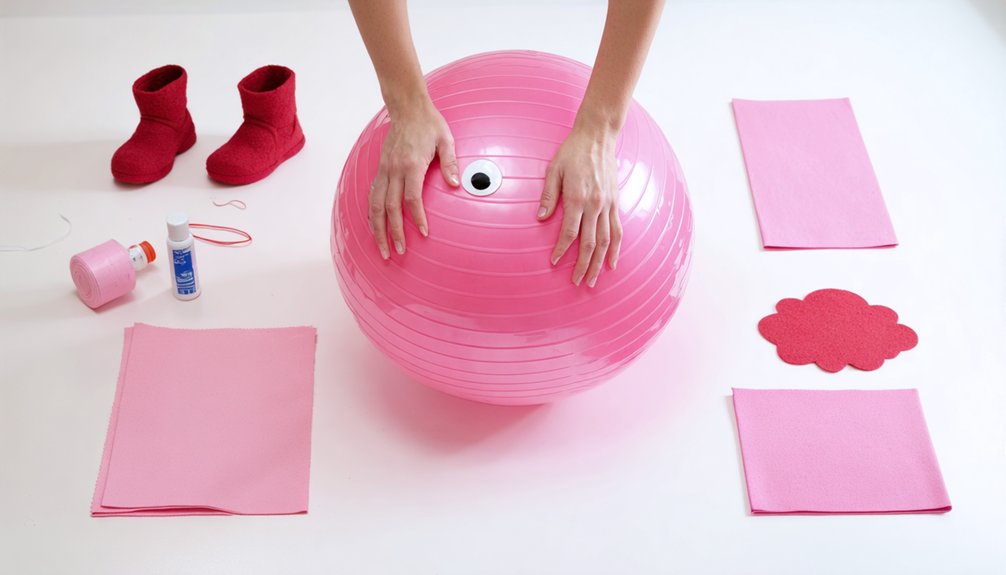
Since Kirby’s iconic round shape is the foundation of the entire costume, you’ll want to grab the biggest and cheapest yoga ball you can find. Overinflate it so you can comfortably fit inside, then place it on a bucket to stabilize it during construction. Use a box cutter to carefully cut your entry hole at the bottom.
Your fabric choices matter early on — select pink fabric or darker-shade pink leggings that’ll match Kirby’s signature body color once construction wraps up.
If you’re planning interior lighting techniques, now’s the time to map out where LED strips or small lights might sit against the shell. Getting these decisions locked in before layering saves serious rework later and keeps your build innovative from the start.
Gather Every Material Before You Start Building
Before you lay a single strip of newspaper, you’ll want every material staged and ready to go. Scrambling mid-build wastes time and risks mistakes. Smart fabric selection and organized costume storage from day one keep your workflow sharp.
Staging every material before you begin transforms a chaotic build into a smooth, enjoyable creative process.
Gather these essentials upfront:
- Yoga ball, box cutter, and bucket for shaping your round base structure
- Flour, water, and newspaper for paper mache layering with 3-4 solid coats
- Pink fabric, spray paint, and felt paper for color-accurate finishing details
- Speakers, aluminum wire, and hot glue gun for functional and structural enhancements
Designate a dedicated costume storage area where drying layers won’t get disturbed.
Having everything within arm’s reach transforms a chaotic build into a smooth, creative process you’ll actually enjoy.
Build Your Kirby Cosplay Shell With Paper Mache
With your materials staged and ready, it’s time to bring Kirby’s iconic round shape to life. Place your overinflated yoga ball on a bucket for stability, then mix flour and water into a smooth paste. Coat the entire surface generously before layering large newspaper sheets on top.
Apply 3-4 layers total, smoothing each layer carefully for structural integrity. For fabric reinforcement, incorporate strips of cloth between layers in high-stress areas, dramatically strengthening your shell.
Consider costume ventilation early by planning small strategic openings that won’t compromise the structure’s shape.
Allow each layer to dry completely before adding the next. Start this process 3-4 weeks before your convention date — rushing the drying timeline risks a fragile, unusable shell. Patience here delivers a durable, show-stopping result.
Dry the Shell Completely Before Moving On
Watch for these drying success indicators:
- No cold spots — feel every surface area; dampness means weakness
- Solid tapping sound — a hollow knock confirms structural integrity
- Zero flexibility — a sturdy shell won’t bend under light pressure
- Costume ventilation check — make certain airflow reaches interior sections during drying
Skipping this stage risks cracking, collapsing, or warping once you deflate the yoga ball.
Position your shell somewhere with strong airflow and moderate warmth.
Once it’s rock-solid throughout, you’re cleared to deflate and remove that inner ball safely.
Paint and Shape Your Kirby Cosplay Costume
Once your shell is rock-solid, it’s time for the most satisfying part — transforming that papier-mâché blob into an unmistakable pink puffball. Start by spray painting the entire shell pink for a smooth, even base coat. Don’t rush this step — let each layer cure fully before adding another.
Next, explore color blending to add dimension, layering a slightly deeper pink around the bottom to suggest Kirby’s rounded weight.
For texture techniques, lightly dry-brush a pale pink highlight across the top curve to create a subtle glow effect.
Cut eye holes from the shell, saving the cutouts for arm nubs. Hot glue mesh screen inside the eye openings, then paint over them for a seamless look. Your Kirby is finally taking shape!
Cut and Attach Kirby’s Face Details
Now that your shell is painted and shaped, it’s time to bring Kirby’s iconic face to life! Face detail techniques make all the difference between a good cosplay and an unforgettable one.
Cut eye holes carefully, then repurpose those cutouts as arm nubs—zero waste, maximum creativity! Use these eye placement tips to nail Kirby’s signature look:
- Cut oval eye holes symmetrically, centering them on the upper-front portion of your shell
- Hot glue mesh screen inside each eye hole, then paint over it for depth and detail
- Use felt paper to craft the eyes, mouth, and rosy blush circles
- Cut a mouth opening wide enough for candy interaction with trick-or-treaters
Your Kirby face is now ready to charm everyone!
Add Speakers, Red Shoes, and Final Costume Details
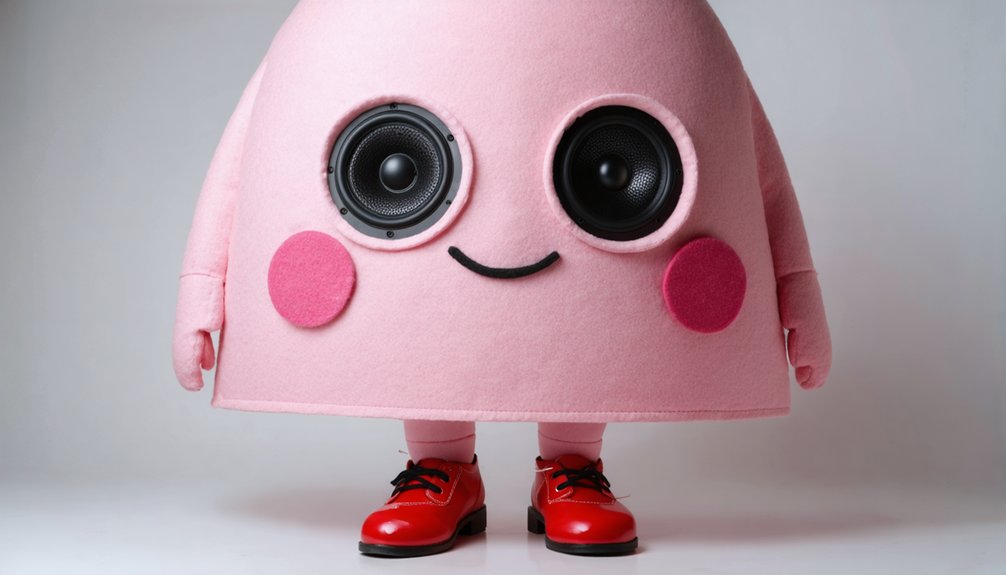
Your Kirby costume is almost complete, and these final details will take it from great to legendary! Glue speakers inside the shell and connect them to an MP3 player loaded with Kirby’s iconic theme song — it’s an instant crowd-pleaser that elevates your entire presentation.
For costume durability, secure all interior components firmly so nothing shifts while you’re wearing it. Red shoes complete the classic Kirby silhouette, adding bold color contrast that makes the whole look pop.
Always prioritize material safety by double-checking that all glued elements, wiring, and speakers are properly insulated and won’t irritate your skin during extended wear. Do a full test run before the convention — move around, breathe comfortably, and confirm everything holds together. You’re officially ready to transform into everyone’s favorite pink puffball!
Make a Kirby Hat to Wear Over the Costume
Here’s what you’ll need to bring this mini Kirby to life:
- Download and print a pattern template on regular and transparency paper for precise tracing.
- Trace the design onto off-white felt using a pencil for clean, accurate outlines.
- Cut out eye sections in blue, black, and white, then layer and glue them onto felt.
- Use an invisible stitch to join seams and add light brown yarn details throughout.
For costume storage, simply flatten or hang the hat — it’s far more compact than a full shell build!
Frequently Asked Questions
Can Children Safely Wear This Kirby Cosplay Costume Independently?
Children can’t safely wear this costume independently! For child safety and independent wear, you’ll want adult supervision — the heavy shell, limited visibility, and ski helmet requirement make it too complex for kids steering alone. Stay creative, stay safe!
How Much Does Building a Complete Kirby Cosplay Typically Cost?
Over 60% of cosplayers spend under $50! You’ll typically invest $30–$80 for your complete Kirby build. Smart material sourcing—cheap yoga balls, newspaper, flour—maximizes costume durability while keeping costs surprisingly low and creatively rewarding!
Can the Costume Be Stored and Reused for Future Conventions?
Yes, you can absolutely reuse your Kirby costume! With smart storage solutions like a cool dry space, and thanks to material durability from multiple paper mache layers, it’ll survive future conventions, letting you rock Kirby’s charm again!
What Is the Approximate Total Weight of the Finished Costume?
Your finished Kirby costume’ll weigh roughly 10-15 pounds! The paper mache layers, fabric weight of pink materials, and added accessories influence material durability. You’re creating something innovative, so plan accordingly for comfortable convention wearing!
Can the Costume Be Worn Comfortably in Hot Outdoor Environments?
Like a greenhouse trapping summer’s heat, you’ll find comfort challenging! The papier-mâché shell limits fabric breathability, yet costume durability shines. You’d better plan frequent cooling breaks and hydration stops for outdoor conventions!
References
- https://www.youtube.com/watch?v=9evANfOLgoc
- https://www.instructables.com/Kirby-Costume/
- https://www.costumet.com/games/kirby/
- https://www.instructables.com/Customizable-Squishy-Kirby-Figures/
- https://www.instructables.com/E-Z-Kirbys-Epic-Yarn-Plush/
- https://www.youtube.com/watch?v=_ii8O1Zing0
- https://www.youtube.com/watch?v=9FUEllk6Dt4
- https://www.scribd.com/document/887138611/Amigurumi-Kirby