Start by analyzing character reference images to identify signature elements like weapons, headwear, and dimensional proportions. You’ll craft props using 6mm-10mm EVA foam for lightweight durability, reinforced with Worbla thermoplastic for structural integrity. Secure layers with contact cement, then apply Plasti Dip base coats followed by black acrylic and metallic dry-brushing for authentic finishes. Match wigs precisely to character specifications using heat-resistant fibers, and select 14.5-15mm contacts for proper proportions. Master these foundational techniques to gain access to advanced weathering methods, comfort optimization strategies, and cohesive coordination principles.
Key Takeaways
- Analyze character references to identify signature elements like hairstyle, props, colors, and textures for instant recognition.
- Use EVA foam and Worbla with PVC or dowel frameworks to build lightweight, durable props at accurate scale.
- Apply Plasti Dip base coats, layered acrylics, and weathering techniques like dry brushing for realistic finishes.
- Select heat-resistant wigs with lace fronts and enlarged contacts (14.5-15mm) to match character-specific facial features.
- Test prop flexibility, weight distribution, and attachment security while comparing assembled pieces against source material references.
Understanding Your Character’s Essential Accessories
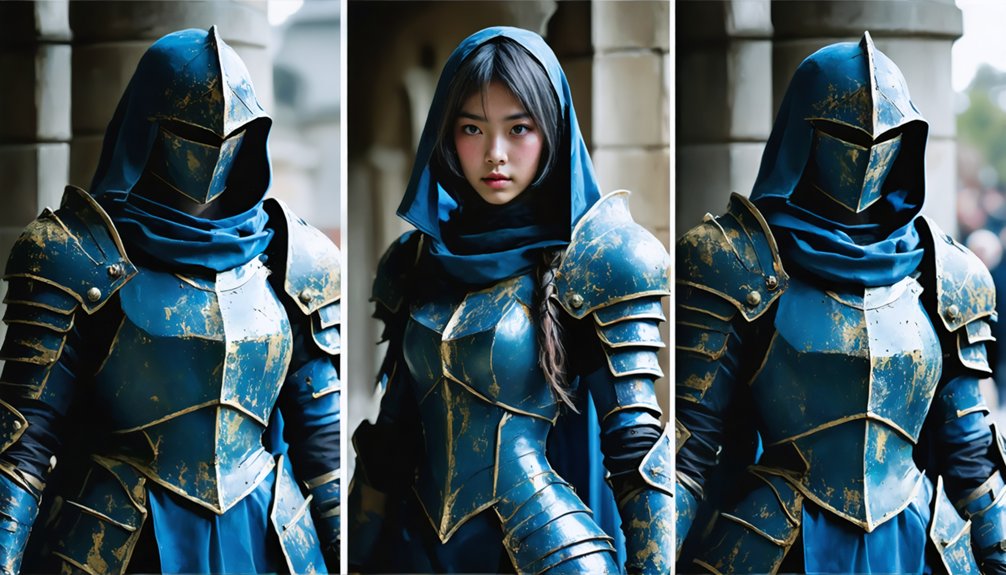
Before you purchase a single item or begin construction, conduct an extensive character analysis to identify every accessory that defines your subject’s visual signature. Document hairstyle specifications, facial markings, signature props, and headwear configurations through screenshot compilation and reference material aggregation.
Authentic character interpretation demands cataloging color palettes, material textures, and dimensional proportions of each component. Prioritize elements that establish instant recognition—a character’s weapon specifications, unique eyewear designs, or distinctive hair ornaments often carry more visual weight than costume base layers.
Break down costume authenticity requirements into hierarchical categories: critical elements that define character identity, secondary accessories that enhance recognition, and tertiary details that demonstrate craftsmanship excellence. This systematic approach prevents overlooking essential components while optimizing your resource allocation toward maximum visual impact.
Selecting the Right Tools and Materials for Accessory Crafting
While character analysis identifies what you’ll build, material selection determines whether your accessories withstand convention wear and photoshoot demands. EVA foam mats deliver lightweight durability for armor and props, while thermoplastics like Worbla enable heat-formed weaponry with superior structural integrity. Contact cement provides robust bonding for intricate foam assemblies, and Plasti Dip coatings guarantee flexible, long-lasting finishes.
Your toolkit must balance precision and versatility. Craft knives cut intricate patterns, while Dremel rotary tools sand detailed finishes. Heat guns mold thermoplastics into curves matching character specifications. Storage considerations matter—organize tools systematically to prevent damage between projects.
Plan for maintenance and repair from the start. Stock matching paints, adhesives, and replacement foam pieces. Quick-fix capabilities using hot glue guns and super glue enable convention-floor repairs, certifying your accessories remain photoshoot-ready throughout extended wear.
Choosing and Styling the Perfect Wig
Character accuracy hinges on wig selection that balances styling potential with construction quality. Prioritize dense-base constructions like Rocky or Jareth styles that accommodate heat styling and layering techniques. You’ll need heat-resistant fibers for durability when executing character-specific textures. Match length parameters precisely: short cuts above shoulders, medium to collarbone, long extending mid-back or beyond.
Lace front constructions deliver natural hairlines essential for widow’s peaks or exposed forehead styles. Select wefted bases when volume augmentation through additional wefts becomes necessary. Apply semi-permanent dyes like Arctic Fox for custom color matching, retaining tags for future replacement coordination.
Implement proper wig maintenance protocols using specialized detanglers and fiber-appropriate products. Store units on canvas heads within breathable bags to preserve styling integrity between conventions. Adjustable cap construction guarantees secure, comfortable wear during extended event participation while preventing distribution irregularities that compromise realism.
Transforming Your Look With Contacts and Makeup
Your wig establishes surface-level accuracy, but facial transformation separates amateur attempts from professional-grade character embodiment. Contact lens selection demands technical precision: measure limbal ring definition for that signature anime aesthetic, choose 14.5-15mm diameters for enlarged eye proportions, and match gradient designs to your character’s specifications.
Darker natural eyes require opaque lenses; lighter irises work with enhancement variants. Advanced cosplayers leverage scleral lens insertion techniques for complete eye coverage, creating inhuman effects impossible with standard contacts. Strict lens hygiene protocols prove non-negotiable—polymacon materials require oxygen permeability monitoring and rewetting drops during extended wear.
Layer strategic makeup to amplify contact vibrancy: darken periorbital areas to intensify color saturation, highlight strategically to emphasize unusual pupil geometries. Master these technical elements for professional-tier character transformation.
Building Props That Bring Your Character to Life
Your prop construction directly impacts your cosplay’s authenticity, requiring strategic material selection that balances structural integrity with character accuracy.
You’ll need to master scaling techniques using reference images to guarantee your weapons, armor, and accessories maintain proper proportions relative to your body and the source material.
Surface detailing through texturing methods and multi-layer painting systems transforms raw materials like EVA foam into convincing representations of metal, wood, or other character-specific finishes.
Material Selection For Props
When building props that accurately represent your chosen character, material selection directly impacts both structural integrity and visual authenticity. You’ll achieve ideal results by strategically combining materials based on their specific properties.
Core Material Applications:
- EVA Foam Foundation – Deploy 6mm-10mm medium-density sheets for weapons and larger props, utilizing foam layering techniques to build dimensional depth while maintaining manageable weight ratios.
- Thermoplastic Reinforcement – Integrate Worbla for structural rigidity and incorporating thermoplastic details on high-stress points, armor integration, and fine embellishments requiring heat-activated adhesion.
- Internal Framework – Implement PVC pipe skeletons for staffs or wooden dowels for slender elements, ensuring props withstand convention handling without compromising portability.
Select high-density gray EVA foam for intricate detailing where standard foam would compress. Integrate LED strips, foam clay texturing, and specialty fabrics to elevate visual complexity.
Scaling and Proportions Right
Selecting premium materials means nothing if your finished prop towers over you like a Final Fantasy Buster Sword when the character’s weapon measures half their height. Accurate prop scaling demands methodical measurement against reference images. Use ImageJ’s Set Scale function to convert pixel dimensions into real-world measurements, establishing your character’s height as the baseline. Layer reference images in Photoshop at 50% opacity, aligning ruler guides to match your body proportions while maintaining locked aspect ratios.
For proper proportional adjustments, measure your head height, forearm length, and torso in centimeters—these become your scaling anchors. Calculate percentage increases when printing templates, adjusting from 100% baseline. Tools like Cosplay Scale Tool automate proportional math, but understanding the underlying calculations guarantees you’re adapting designs to your physique rather than creating screen-accurate pieces that don’t fit your frame.
Detailing and Paint Techniques
Because even perfectly scaled props fall flat without convincing surface detail, mastering texture application and paint layering separates amateur builds from character-accurate replicas. Faux leather texturing techniques transform plain EVA foam—press tin foil firmly across surfaces, then remove to imprint organic patterns. Score detail lines with sharp blades for segmented armor plates, cutting shallow to preserve structural integrity.
Execute layered distressing and wear through systematic paint application:
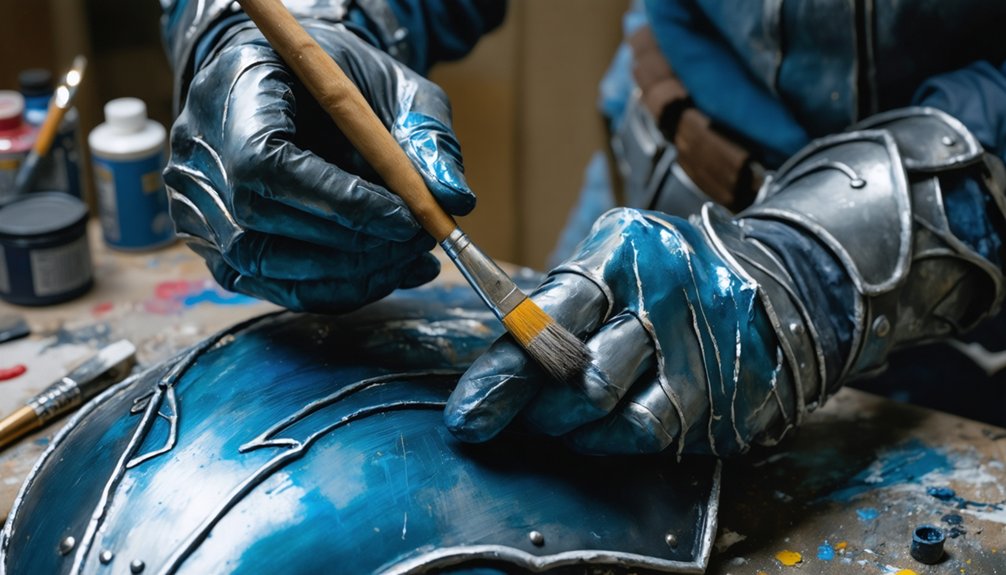
- Apply Plasti Dip base coat, then build three black acrylic layers
- Sponge metallic paint unidirectionally for authentic metal appearance
- Use damp rags with black paint for targeted weathering spots
Deploy Dremel rotary tools and soldering irons for carved textures. Heat-shrink garbage bags create realistic wrinkles. Darken fabric stitching lines and highlight embroidered areas, matching detailing intensity to your character’s canonical appearance.
Finishing Techniques for Professional-Looking Accessories
The difference between a good prop and a professional-grade accessory often comes down to your final finishing work—specifically how you apply protective coatings and weathering effects. Once you’ve achieved a smooth surface through proper sanding and priming, you’ll need to seal your paint with clear coat to withstand the rigors of convention wear.
Strategic weathering techniques, like revealing a metallic base coat through controlled sanding at edges and raised details, transforms a pristine prop into a screen-accurate piece that tells your character’s story.
Sealing and Protective Coatings
After investing hours into crafting foam armor or accessories, proper sealing determines whether your prop looks homemade or professional. Your choice demands cost benefit analysis: Leak Seal delivers superior longevity and firmness despite higher pricing, while Plasti-Dip offers economical entry at five dollars per can.
Consider these proven methods:
- Leak Seal Application: Apply one light coat followed by one heavy coat, avoiding pooling that creates rounded edges requiring excessive sanding.
- PVA Glue Sealing: Brush multiple coats onto styrofoam with two-hour drying intervals, creating chip-resistant paintable surfaces.
- Alternative Coverings: Wrap four-way stretch vinyl around foam pieces for instant professional appearance without top coats.
Material handling safety remains non-negotiable. Use NIOSH-rated respirators blocking oily paint particles, protective goggles, and adequate ventilation when working with toxic sealants.
Weathering and Aging Effects
Pristine armor and accessories immediately signal amateur craftsmanship to experienced convention-goers. Master realistic distress techniques by dry brushing minimal paint across raised edges where natural wear occurs, then apply 50:50 acrylic washes in thin layers to achieve depth in recesses.
Environmental weathering simulation requires strategic pigment selection—whites for dust accumulation, greys for soot, blacks for grime, and rust-toned powders for oxidation effects. Physical alteration using sandpaper, files, and cheese graters creates authentic fabric fraying at stress points like knees and elbows.
Salt crystals applied pre-painting produce convincing paint chips when removed post-cure. Airbrush techniques executed from 4-5 feet generate natural gradients between pristine and weathered surfaces. Upward-directed spray creates gravity-accurate mud splatter patterns. Seal finished weathering to preserve your work’s authenticity.
Testing Accessories for Comfort and Functionality
Every cosplay accessory requires rigorous testing before convention day, regardless of how accurately you’ve replicated the character design. Practical wear testing reveals issues invisible during fabrication—from wrist fatigue during extended wear to unexpected material irritation against skin. Test your completed pieces through full costume runs, evaluating mobility, visibility, and endurance under real conditions.
Comprehensive functionality testing should address:
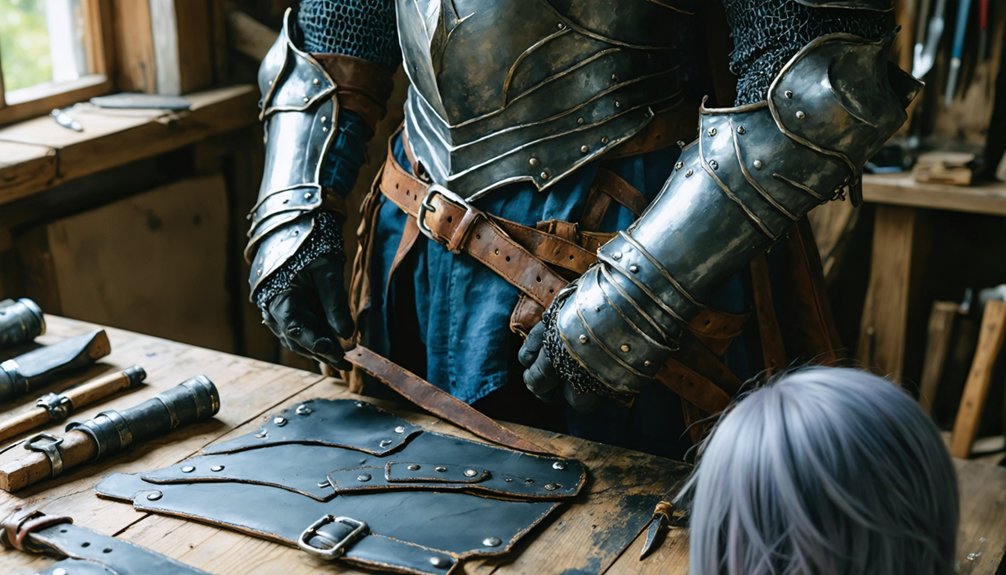
- Material performance: Verify EVA foam flexibility, thermoplastic durability, and adhesive strength on moving components
- Wearability factors: Check weight distribution, secure attachment points, and potential pressure points during extended wear
- Visual accuracy: Compare assembled pieces against character references while worn, seeking feedback from experienced cosplayers
Practice techniques on scrap materials first. Test electronics thoroughly. Iterate based on findings—guaranteeing convention-ready accessories that balance authenticity with practicality.
Coordinating All Elements for a Cohesive Cosplay
Functional accessories mean little if they clash with your costume’s overall aesthetic. Master color palette coordination by establishing base tones or complementary schemes across all components—reference images guarantee accuracy. Store darker-scheme pieces separately from lighter ones for efficient assembly.
Your accessory matching elements should maintain group unity through coordinated weapons, similar details, or repeated motifs like matching boots and embellishments.
Harmonize textures strategically: pair leather belts with leather accessories, experiment with paint finishes on props. Utilize advanced attachment methods—tiny D-rings for shoulder armor, Velcro tape for adjustable holds, hot-glued zippers on tight bracers. Organize storage using clear bags color-coded by character scheme, enabling quick access during convention prep.
Practice group poses while sharing reference materials within cosplay communities. Sketch thorough plans visualizing how each element contributes to your cohesive final product.
Frequently Asked Questions
How Do I Transport Large or Delicate Accessories Safely to Conventions?
You’ll need portable protective cases with proper padding techniques using bubble wrap and foam inserts. Pack heavy armor low for stability, separate delicate components into individual compartments, and always include emergency repair supplies for on-site fixes.
What’s the Best Way to Store Cosplay Accessories Long-Term?
Treat your accessories like museum artifacts: use proper storage containers—stackable plastic bins with clear visibility—paired with moisture control techniques maintaining 45-55% relative humidity. You’ll preserve delicate materials, prevent paint transfer, and safeguard your craftsmanship withstands time’s test brilliantly.
How Can I Repair Accessories That Break During an Event?
You’ll need quick fixes like super glue gel, gaffers tape, and zip ties in your repair kit for on-site repairs. Test stress points immediately, reinforce with contact cement or heat-activated patches, and verify durability before re-wearing accessories.
Where Can I Find Affordable Alternatives to Expensive Cosplay Materials?
Don’t break the bank—explore thrift stores, dollar stores, and fabric remnants for DIY material substitutions. You’ll master sustainable cosplay sourcing through repurposed blankets, EVA foam alternatives, and bulk online suppliers offering professional-grade primers at fraction costs.
How Do I Weatherproof Accessories for Outdoor Photo Shoots?
Apply weatherproofing techniques like PFAS-free coatings and denier nylon to your accessories. You’ll want durable outdoor materials with breathable, waterproof layers. Test cinch straps and sealed closures before shoots—this guarantees your gear withstands rain, wind, and environmental challenges effectively.