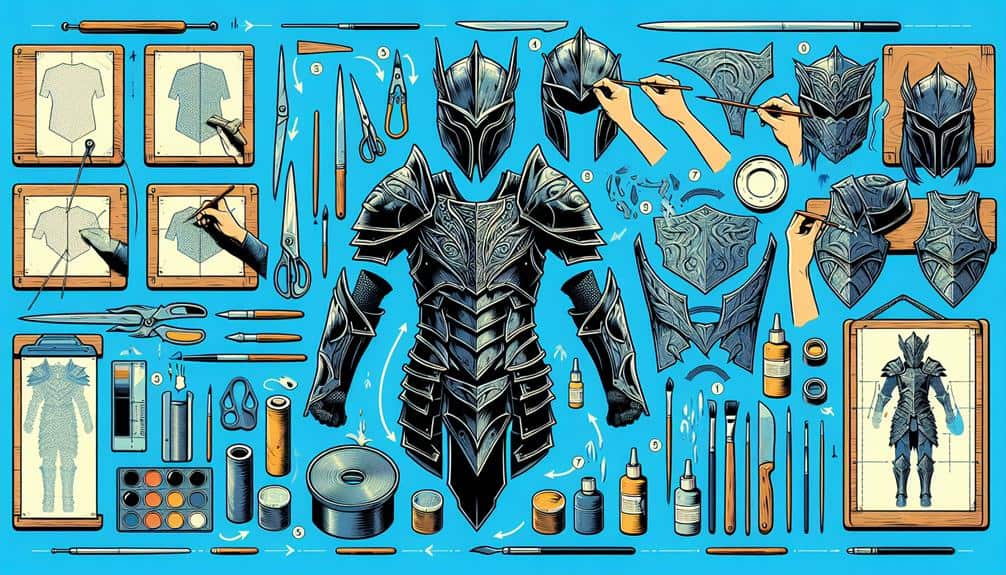
When it comes to crafting cosplay armor accessories, selecting the appropriate materials, drafting precise templates, and mastering the art of working with foam and Worbla are essential steps.
However, the key to truly bringing your armor to life lies in the intricate painting and detailing techniques that can make or break your final look.
But don't stop there; the devil is in the details, and knowing how to add sturdy straps and fastenings will guarantee your creation stays secure and comfortable throughout your adventures.
Key Takeaways
- Material selection influences durability and authenticity of armor pieces.
- Precision in template creation ensures accurate replication of designs.
- Layering foam and Worbla creates textures and depth in armor accessories.
- Painting techniques like airbrushing and weathering effects enhance realism.
Choosing the Right Materials
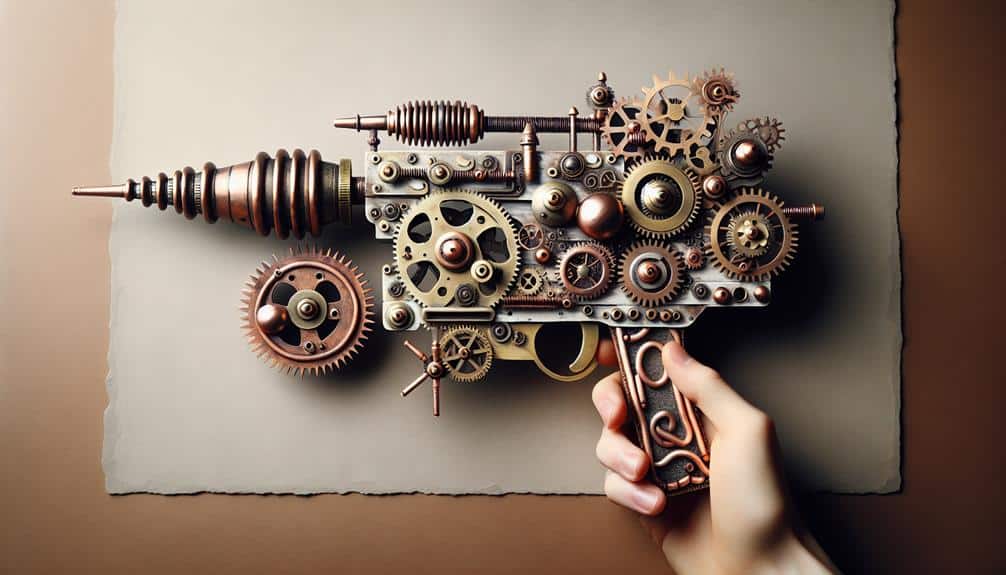
When crafting cosplay armor accessories, your choice of materials plays a significant role in achieving authenticity and durability. One important consideration is deciding between foam and plastic for your armor pieces. Foam is lightweight, easy to shape, and comfortable to wear, making it a popular choice for intricate designs that require flexibility. On the other hand, plastic offers a more rigid structure, ideal for creating sharp edges and detailed engravings that add a realistic touch to your cosplay armor.
To enhance the overall look of your cosplay armor accessories, mastering weathering techniques is essential. Weathering techniques involve adding wear and tear effects to your armor to make it look battle-worn and realistic. You can achieve this by using various methods such as dry brushing, airbrushing, or even applying weathering powders to create a distressed appearance. These techniques can elevate the authenticity of your cosplay armor and bring your character to life in a visually striking manner.
Creating Templates and Patterns
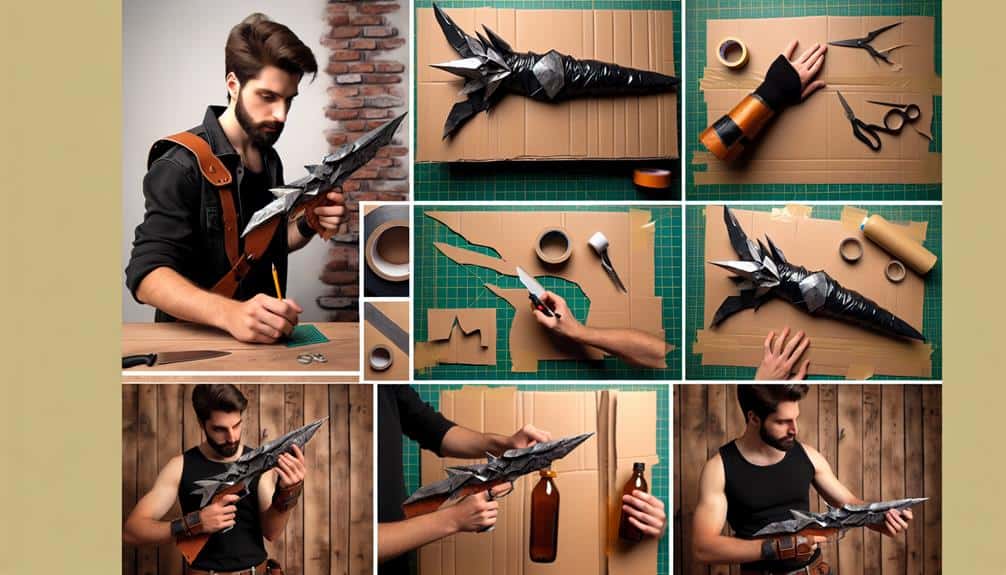
To craft intricate cosplay armor accessories effectively, consider utilizing pre-made templates and patterns to streamline your design process and guarantee accurate replication of intricate details. Custom sizing your templates to fit your body measurements precisely is essential for achieving a comfortable and authentic look. When working with templates, pay close attention to details such as curves, angles, and cutouts to make sure a seamless assembly process.
In addition to custom sizing, mastering the technique of heat shaping is vital for bringing your templates to life. Heat shaping involves using heat guns or other heating tools to soften materials like thermoplastics, allowing you to mold them into the desired shapes. This technique is particularly useful for creating complex curves and intricate designs in your armor accessories.
Working With Foam and Worbla
Consider the versatility and artistic possibilities that working with foam and Worbla can bring to your cosplay armor accessories, elevating your crafting skills to new levels of creativity and detail. When working with foam and Worbla, keep in mind the following tips:
- Heat Shaping: Foam can be shaped by using heat, such as a heat gun, to mold it into intricate shapes for your armor pieces.
- Layering Techniques: Experiment with layering foam and Worbla to create textures and depth in your armor accessories.
- Combining Materials: Utilize both foam and Worbla to take advantage of their unique properties and create dynamic cosplay pieces.
- Adding Details: Use Worbla to add fine details to your foam base, enhancing the overall look of your armor accessories.
- Weathering Techniques: Incorporate weathering techniques like painting, sanding, and adding texture to give your armor a realistic and battle-worn appearance.
Painting and Detailing Techniques
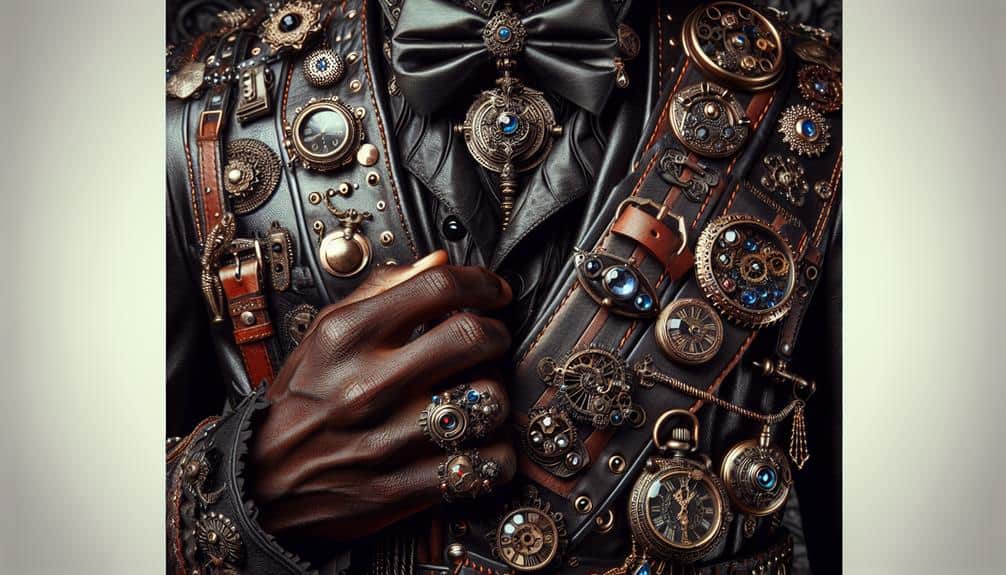
Explore innovative painting techniques and intricate detailing methods to enhance the visual impact of your cosplay armor accessories. When it comes to painting, consider using airbrushing for a smooth and essential finish. Airbrushing allows for gradient colors and intricate designs, giving your armor a unique and polished look. Experiment with metallic finishes to add a touch of realism and shine to your pieces. Weathering effects can also be achieved by using various techniques such as dry brushing or sponging to create a worn and battle-tested appearance.
Detailing is vital in making your armor stand out. Incorporate weathering techniques to add depth and character to your accessories. By strategically applying paints and textures, you can mimic the effects of wear and tear, bringing your armor to life. Pay attention to small details like scratches, rust spots, or dirt build-up to make your cosplay armor look authentically aged and battle-worn. Remember, the devil is in the details when it comes to painting and detailing your cosplay armor accessories.
Adding Straps and Fastenings
Enhance the functionality and aesthetics of your cosplay armor by skillfully attaching sturdy straps and secure fastenings. When adding straps and fastenings to your cosplay armor, attention to detail is essential to guarantee a comfortable fit and a polished look. Here are some tips to help you adjust sizing and secure attachments effectively:
- Measure Twice, Cut Once: Take accurate measurements to determine the required length for your straps before cutting them to avoid mistakes.
- Use Durable Materials: Opt for sturdy materials like nylon webbing or faux leather to make sure your straps can support the weight of the armor pieces.
- Secure with Rivets or Chicago Screws: For a professional finish, consider using rivets or Chicago screws to attach straps securely to your armor.
- Velcro for Adjustability: Incorporate Velcro strips into your design to allow for easy adjustment of strap lengths for a personalized fit.
- Hidden Fastenings: Conceal fastenings within the armor design for a seamless look that maintains the integrity of your cosplay character's aesthetic.
Frequently Asked Questions
How Can I Prevent My Cosplay Armor Accessories From Getting Damaged During Transportation to Conventions and Events?
When transporting your cosplay armor accessories, safeguard their protection with these tips: Pack them with care, use impact-resistant materials, and consider durable storage solutions. Keep your creations safe on the journey to conventions and events.
Are There Any Specific Tools or Equipment That Are Essential for Crafting Cosplay Armor Accessories?
When crafting cosplay armor accessories, essential tools like heat guns, rotary tools, and foam cutters can elevate your creations. Experiment with different crafting techniques such as heat shaping, detailing with dremels, and painting for stunning results.
Is It Possible to Add LED Lighting to Cosplay Armor Accessories, and if So, What Is the Best Way to Go About It?
To illuminate your cosplay armor accessories, adding LED lighting is possible. Carefully wire the LEDs, place batteries strategically for balance, and create enchanting illuminating effects. Prioritize electrical safety by securing all connections and insulating wires.
What Are Some Creative Ways to Incorporate Moving Parts or Mechanisms Into Cosplay Armor Accessories?
To add movement to your cosplay armor accessories, consider incorporating automation like motorized parts. Enhance the look with custom paint finishes for a unique touch. These creative techniques will elevate your cosplay to the next level.
How Can I Ensure That My Cosplay Armor Accessories Are Comfortable to Wear for Long Periods of Time?
To make sure your cosplay armor accessories are comfy, consider padding for pressure points, adjustable straps for a snug fit. Choose lightweight, breathable materials for long wear. Customize with foam inserts, fabric lining. Regular maintenance keeps gear looking sharp.