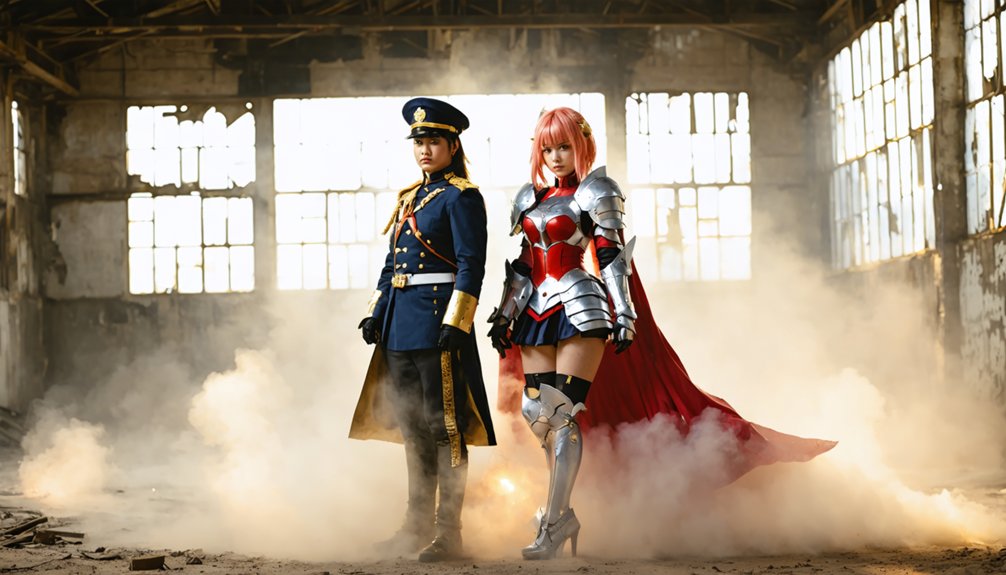
You’ll achieve matching group cosplay props by centralizing reference images in shared documents, creating traced cardboard prototypes that every member replicates, and sourcing materials in bulk with documented product codes to guarantee identical color batches and textures. Cut all pieces using the same printed templates, apply Flexbond and Plastidip in synchronized coating cycles, then coordinate paint mixing ratios and weathering techniques like oil washes and edge highlighting across your team. The sections below break down each coordination point with specific material specifications and timing intervals.
Key Takeaways
- Compile shared reference sheets with color palettes and construction details, then distribute digital templates for unified aesthetic parameters.
- Source materials in bulk using specific product codes to guarantee matched color batches and identical surface textures across props.
- Create cardboard prototypes with exact dimensions, then distribute physical patterns alongside digital files for replication consistency.
- Apply identical sealing and painting sequences using documented coating cycles, ensuring uniform primer layers and weathering techniques.
- Label each component by member and maintain communal documentation tracking assembly sequences and material specifications throughout production.
Gathering and Standardizing Reference Images Across Your Group
When you’re piecing together a group cosplay, reference images function as your blueprint—they determine fabric choices, construction methods, and visual consistency across all participants. Compile multiple angles—front views, close-ups, back shots, and 360-degree rotations—using Pinterest boards, Instagram saves, or specialized repositories like Cosplay Reference Library. These platforms streamline collection while maintaining accessibility across devices.
Transfer curated images into Google Docs for centralizing data storage, enabling real-time editing without platform restrictions. Document each character’s color palette, material specifications, and construction details alongside photos. This standardization prevents mismatched shades or inconsistent finishes during prop fabrication.
For complex builds, include behind-the-scenes shots revealing internal structures and work-in-progress photos highlighting specific techniques. Share character assignments publicly through Instagram stories, attaching group reference sheets that establish unified aesthetic parameters before construction begins.
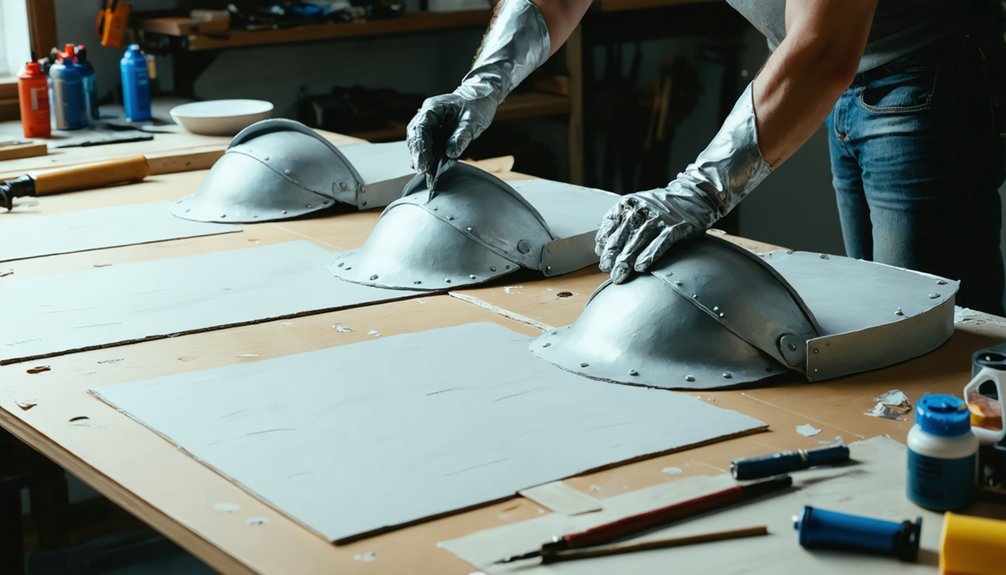
How do you guarantee twenty foam swords match exactly when crafted by different hands? You’ll create a master prototype that serves as your group’s single source of truth. Start by resizing reference images to exact dimensions in Photoshop, then print and trace onto cardboard.
Master prototypes eliminate dimensional drift when multiple crafters build identical props from a single verified template.
Cut your base shape with an X-ACTO knife—precision matters here. Layer craft foam for depth, securing everything with hot glue, then cover with aligned cardboard strips that mimic directional folds.
This prototype becomes your replication blueprint. Each member traces from this identical template, preventing dimensional drift across builds. For organizing communal documentation, distribute digital files alongside physical cardboard patterns.
Test your prototype’s durability through multiple tracings, reinforcing edges as needed. Synchronizing visual quality control starts here: one proven prototype eliminates guesswork and establishes your group’s props achieve uniform geometry and surface treatment.
Selecting Uniform Materials for Matched Appearance
When coordinating multiple props across your group, you’ll need to source all materials from the same supplier and dye lot to prevent visible color variations under convention lighting. Before committing to bulk purchases, order small samples of each material—EVA foam, fabric, or thermoplastic—and test them side-by-side in both natural and artificial light to verify matching hues and textures.
Document your approved sources with specific product codes and batch numbers, as manufacturers can change formulations or discontinue lines between your initial purchase and later restocks.
Source Materials in Bulk
Group cosplay projects demand material consistency across every prop piece, and bulk purchasing from single suppliers guarantees matched color batches, uniform density grades, and identical surface textures. You’ll find Grade A EVA foam sheets starting at $8.00 per unit, while Plastazote LD45 offers light-diffusing properties from $6.50.
Order complete Worbla ranges—Classic, Black, and Meshed—through specialized cosplay suppliers to verify thermoplastic uniformity. Fosshape 400 medium weight fabric ($7.00 per unit) enables specialized fabric treatments across group garments.
Strategic bulk sourcing delivers:
- Matching foam densities prevent rigidity variations between team members’ weapons
- Single-batch thermoplastics enable controlled texture application during simultaneous heat-forming sessions
- Wholesale resin purchases certify identical casting properties for replicated armor components
- Coordinated supplier orders eliminate color shift across black EVA sheets
Test Color Consistency First
Color mismatches between identical props sink group cosplay presentations before you’ve entered the convention floor. Test iteration samples against visual references before committing to full production runs.
The clear-sheet cel-animation approach lets you evaluate matching color schemes across multiple helmet models simultaneously, revealing inconsistencies while materials remain adjustable. For tinted visors, compare iDye Poly‘s bold fifteen-minute results against Rit Dye More‘s superior clarity on PETG sheets. Document your formulas precisely—temperature variations and dye concentrations directly impact uniformity.
Run parallel tests on PLA prints and foam pieces to verify color coherence across different materials. Crush and mix custom eyeshadow weathering compounds in batches large enough for all props. Light tint coats require multiple refinements to achieve even metallic appearances.
Early testing prevents costly material waste and timeline disruptions.
Cutting Base Shapes Using Standardized Patterns
Before you begin cutting, guarantee you’ve created an accurate prototype by finding a reference image online and resizing it to exact dimensions using an image editor like Photoshop. Print and cut this template to establish your tracing foundation.
Select materials strategically—cardboard for rigid bases, EVA foam for pliability, craft foam for lightweight applications. Precise material placement determines your final outcome.
Essential Cutting Protocol:
- Tape prototypes firmly to prevent shifting during group layout techniques
- Use X-ACTO knives for cardboard, scalpel craft knives for EVA foam’s clean edges
- Test blade sharpness on scrap material before committing to final cuts
- Label each piece by member to maintain identical set tracking
Reinforce thinner bases with additional layers for uniform thickness. Sand edges post-cut to achieve consistent finishes across all group props.
Building Layered Structures With Identical Techniques

When constructing props that must appear identical across multiple group members, layered structures form the foundation of dimensional accuracy. Trace your prototype onto craft foam sheets or foamboard, then stack pieces to build natural height variations. Cover each structure with aligned cardboard shapes that mimic specific lines and creases.
For consistent textures, use a Dremel rotary tool with flex shaft to carve identical patterns across all layers. Apply masking techniques with painter’s tape when priming surfaces with spray-on rubber or Mod Podge, ensuring uniform adhesion zones. Heat guns soften EVA foam and thermoplastics like Worbla for standardized hand-shaping.
Secure components with hot glue gun application, maintaining identical assembly sequences. Fill gaps in helmets using pourable foam, then sand with varied grits for matching finishes that replicate perfectly across your entire group.
Shaping and Molding Props as a Team
When your team applies heat guns simultaneously to EVA foam pieces, you’ll achieve identical curves and bends by working from the same templates and timing your shaping sessions together. Synchronized heating prevents dimensional drift—if one member shapes their pauldron at 350°F for 15 seconds while another uses 400°F for 30 seconds, the curves won’t match.
Create shared mold templates from cardboard or bowls so each team member presses their heated foam against the exact same form, ensuring your props maintain visual consistency across all costumes.
Synchronized Heat Shaping Techniques
Heat shaping foam as a team requires precise synchronization to achieve matching curves and angles across multiple prop pieces. Set your heat guns to high and maintain a 4-inch distance while moving continuously across the foam surface. Watch for the matte-to-shiny shift indicating proper pliability—typically 10-30 seconds depending on thickness. Coordinate your workflow by having one member heat while another shapes and holds the form for 10 seconds to 2 minutes until set.
Critical synchronization protocols:
- Coordinate flip timing across team members to guarantee uniform heating on both foam sides
- Practice on test pieces first, synchronizing heating rhythms for consistent results
- Assign specialized roles—dedicated heaters and shapers—maintaining consistent pliability through alternating workflows
- Heat separate pieces simultaneously to match curves precisely before assembly
Avoid re-heating shaped sections, which compromises structural integrity.
Matching Mold Templates
Creating identical props across multiple team members demands exact mold templates that replicate every detail of your master sculpt. You’ll achieve consistency by selecting materials matched to your casting workflow—MoldMax 29NV for large batches requiring minimal degassing, or Rebound 25 when plaster shells provide rigid support.
Build two-part molds with thin unthickened silicone coats capturing fine surface detail, then match the second half using identical layering techniques. Team communication strategies confirm everyone applies Mold Star 15 or Dragon Skin 10 NV at uniform thickness using Thi-Vex thickener.
Pigmented BR75D layers distinguish mold halves for foolproof alignment. Proper mold maintenance includes consistent release agent application and pressure pot curing to eliminate bubbles. This standardized approach guarantees each team member produces interchangeable components from shared templates.
Sealing and Priming for Uniform Surface Finish
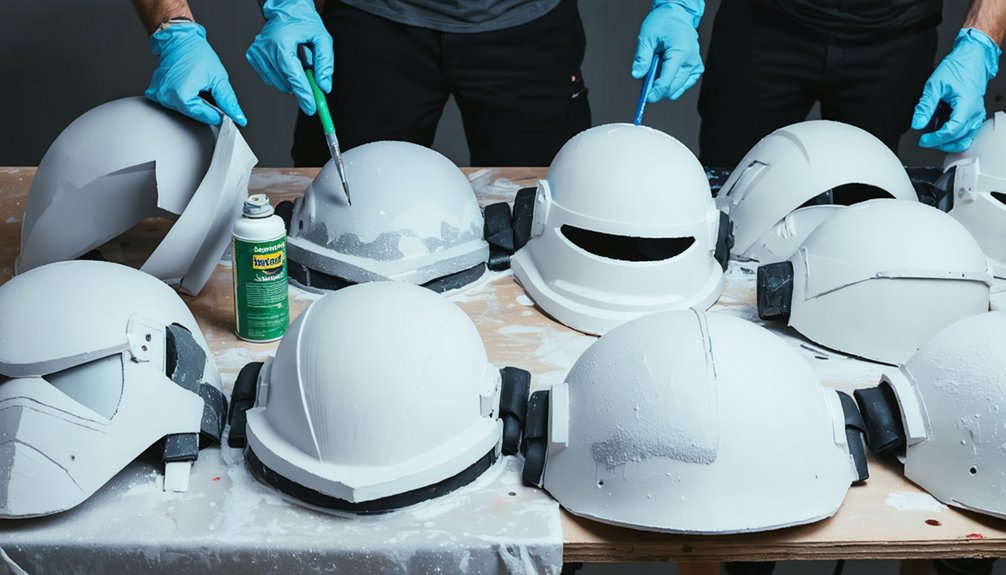
Before you apply paint to foam cosplay props, you’ll need to seal the porous surface through multiple treatment layers that prevent color absorption and create a uniform base across all group pieces. Heat-sealing creates surface sparkle through controlled melting—two passes guarantee complete coverage. After cooling, apply two Flexbond layers, allowing overnight drying.
Plastidip requires proper ventilation requirements and safe handling procedures with organic respirators due to toxic fumes. Warm the canister before spraying three coats with 30-minute intervals between applications.
Advanced Sealing Protocols:
- Gesso application reveals unfilled airholes through black speck formation, necessitating 2-5 additional layers and sanding
- Epoxy tinting exposes missed coverage areas while providing superior durability across three-layer applications
- Adhesion promoter enhances metallic finishes and paint bonding before final clear coat protection
- Rub ‘n’ Buff creates authentic aging effects through finger-applied texture manipulation
Coordinating Paint Colors and Application Methods
A unified color palette transforms individual foam pieces into cohesive group props that photograph as intentional matched sets rather than disconnected components.
Start by establishing base colors across all props using complementary schemes—pair silver with olive green or copper with darker shades for visual interest while maintaining unity. Apply minimum three color variations per main color, layering thinned shades to create dimensional surfaces that avoid flat finishes. Use color interaction strategically, pushing shadows into corners and pulling highlights outward.
Mix oil wash solutions from brown, green, and black diluted with spirit for achieving identical distressing effects across all pieces. Apply weathering liberally before wiping, then add dark brown stippling for character. Determining ideal paint finish requires protective satin or matte clear coatings that preserve mixtures while maintaining photographable consistency.
Adding Matching Details and Weathering Effects
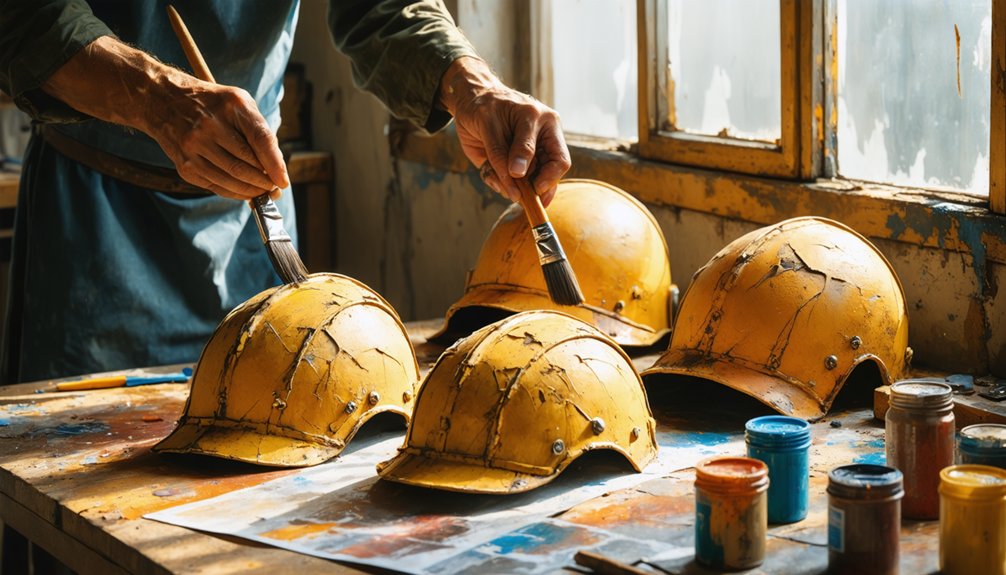
Once your base colors achieve visual consistency, weathering transforms matched props from pristine replicas into battle-worn equipment with shared history. Apply the cavity darkening principle across all pieces—darker paint in recesses, lighter tones on raised surfaces. You’ll create distressed texture variations using sandpaper and graters rather than scissors for refined damage patterns.
Blackwashing techniques add shadowing uniformly: spread dark paint mixtures, then wipe away excess while leaving residue in crevices. Edge highlighting with metallic accents simulates wear on high-contact zones. Time saving tips include batch-processing identical weathering steps across multiple props simultaneously and using spray flicking methods for consistent spatter patterns.
Essential weathering coordination strategies:
- Establish shared wear pattern logic based on character roles and combat positions
- Maintain consistent paint opacity ratios when mixing washes for uniform aging effects
- Document weathering recipes and application sequences for replication across all props
- Layer effects progressively using identical coating cycles for cohesive results
Frequently Asked Questions
How Do We Split Prop Costs Fairly Among Group Members?
Ironically, friendship survives budgets better than hot glue survives foam sealing. You’ll split costs fairly through prop design collaboration upfront, tracking receipts digitally, and dividing expenses by prop material selection complexity—ensuring heavier users compensate proportionally while trading specialized skills.
What if Someone Drops Out Midway Through the Project?
Handling abrupt departures requires reassigning prop duties based on skills and reusing purchased materials like EVA foam. Managing group dynamics means updating your color palette, redistributing tasks via shared checklists, and confirming replacement commitments for visual cohesion.
How Should We Transport Multiple Props Safely to the Convention?
Like Tetris blocks fitting perfectly, you’ll need proper container sizes matching each prop’s dimensions and adequate packing materials needed—foam inserts, bubble wrap, compression bags—to create protective layers that prevent shifting damage during transit.
Can We Store Unfinished Props Together Between Work Sessions?
You can store unfinished props together using proper storage methods like breathable containers and separated compartments. This prevents material interactions while protecting prop materials from dust, color transfer, and adhesive contamination between work sessions.
Who Keeps the Props After the Convention Ends?
You’ll need to establish prop ownership responsibility before construction begins. Decide who keeps each piece based on storage capacity, material investment, and prop storage logistics. Document agreements early to prevent post-convention disputes over your collaborative builds.