To insert cosplay contacts, wash and dry your hands thoroughly, then balance the lens on your fingertip and check it’s correctly oriented. Pull your lower eyelid down, hold your upper lid open, and gently place the lens onto your eye. To remove them, pinch the lens lightly between your thumb and index finger. Always clean and store lenses in fresh solution after each use. There’s much more to know to keep your eyes safe.
Key Takeaways
- Wash and dry hands thoroughly before handling cosplay lenses to prevent contamination and reduce infection risk.
- Place the lens on your fingertip, pull down your lower eyelid, and gently touch the lens to your eye.
- Look slightly upward during insertion, release your eyelids slowly, then blink several times to help the lens settle.
- To remove, pinch the lens gently between thumb and index finger after pulling down the lower eyelid.
- If a lens resists removal, apply fresh solution to lubricate it before attempting to pinch it out again.
What Makes Cosplay Contacts Different From Regular Lenses?
Cosplay contact lenses differ from standard corrective lenses primarily in their design priority: they’re built to alter the eye’s appearance rather than correct vision.
They feature larger diameter prints, opaque pigment layers, and dramatic color variations that standard lenses never incorporate. You’ll encounter multiple cosplay lens types — scleral-style theatrical lenses, circle lenses that enlarge the iris, and fully opaque designs that completely mask your natural eye color.
Because aesthetics drive their construction, the lens material and oxygen permeability often receive less engineering focus than in corrective lenses.
That trade-off matters to you practically: cosplay lenses may fit differently, restrict airflow more, and require stricter wearing-time limits. Understanding these structural differences before insertion helps you handle them correctly and protect your corneal health throughout use.
How to Check Your Cosplay Contacts Before Insertion
Before you place any cosplay lens near your eye, run through three quick physical checks to confirm the lens is safe to insert.
First, inspect for tears, debris, or surface defects—damage risks corneal injury regardless of color selection or lens styles.
A damaged lens risks corneal injury—inspect for tears, debris, or surface defects before every insertion.
Second, verify orientation: a correctly positioned lens forms a clean bowl shape, while an inside-out lens displays outward-flared edges.
Third, confirm the lens stays consistently moist with fresh solution; a dry lens tears more easily and causes irritation on contact.
Hold the lens at eye level under good lighting during each check. If you detect any structural compromise, discard that lens immediately.
No aesthetic outcome justifies inserting a damaged lens. These three steps take under sixty seconds and substantially reduce insertion-related complications.
How to Prepare Your Hands and Workspace

Proper hand preparation directly determines how safely and smoothly lens insertion proceeds. Wash your hands using soap and water, targeting all surfaces, then dry them thoroughly with a lint-free towel. Residual moisture compromises hand hygiene standards and causes lenses to adhere to your fingertips rather than transferring cleanly onto the eye.
Workspace organization matters equally. Set up a clean, well-lit surface before opening your lens case. Arrange your solution, case, and a lint-free towel in a fixed order so you’re not reaching blindly during the process. Avoid carpeted areas where dropped lenses collect debris instantly.
Never handle lenses near sinks with open drains. A structured, deliberate workspace reduces contamination risks, minimizes fumbling, and keeps every step of your cosplay lens routine precise and controlled.
How to Tell If Your Cosplay Lens Is Inside Out
Once your hands are clean and dry, checking lens orientation becomes the next step before anything touches your eye. An inside-out lens causes discomfort and may shift constantly during wear.
Inspect these four indicators:
Inspect these four indicators to confirm your lens is oriented correctly before it ever reaches your eye.
- Bowl shape — A correctly oriented lens forms a clean, upright cup; flared or outward-angled edges signal it’s inside out.
- Edge profile — Correct lenses show edges that point straight up, not outward like a saucer rim.
- Color patterns — Verify that the lens shape positions cosplay color patterns facing outward toward the viewer, not inward.
- The taco test — Gently fold the lens; a properly oriented lens folds cleanly inward without resistance.
If uncertain, flip the lens and recheck before insertion.
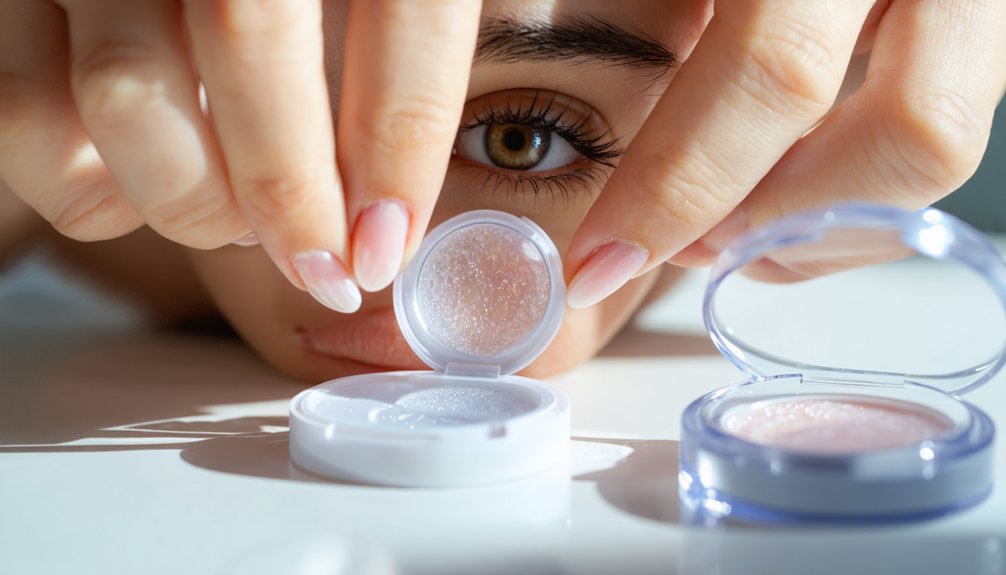
How to Put In Cosplay Contact Lenses
Before inserting your cosplay lenses, wash and dry your hands thoroughly, then inspect each lens for damage and confirm it’s correctly oriented.
Place the lens on the dry tip of your dominant index or middle finger, pull your lower eyelid down, and hold your upper eyelid open to prevent blinking.
Look slightly upward, gently touch the lens to your eye surface, then release your eyelids slowly and blink a few times to help the lens settle and center.
Preparing Your Lenses
Washing your hands thoroughly with soap and water is the first step before handling cosplay contact lenses.
Dry them with a lint-free towel to guarantee proper grip.
Before insertion, complete these critical lens maintenance checks:
- Inspect the lens for tears, debris, or damage that could compromise color vibrancy or eye safety.
- Confirm correct orientation — a properly shaped lens forms a clean bowl; flared edges indicate it’s inside-out.
- Moisten the lens with fresh contact solution to maintain lens integrity during handling.
- Place the lens on your dominant index fingertip, keeping it dry enough to hold its position securely.
Never use fingernails to handle lenses.
A final inspection at finger level before moving toward your eye reduces insertion errors considerably.
Inserting The Lens
Steady your dominant hand and pull down your lower eyelid with a finger from the same or opposite hand, while the other hand holds the upper eyelid open to suppress blinking.
Position the lens on your index fingertip, ensuring it’s dry enough to stay stable. Look upward or slightly away, then gently touch the lens to your eye’s surface without applying pressure.
Improper force compromises both lens materials and eye safety, potentially causing corneal damage. Once the lens contacts the eye, slowly release your eyelids.
Blink gently, then move your gaze left, right, up, and down to center the lens. A correctly placed lens settles into a nearly unnoticeable position.
If discomfort or misalignment persists, consult an eye care professional immediately.
How to Center Your Cosplay Contacts After Insertion
Once the lens is on your eye, blink gently a few times to help it settle into position. If it still feels off, use these lens adjustment steps:
- Look left, right, up, and down to guide the lens toward the center.
- Close your eye and massage the eyelid lightly if the lens remains displaced.
- Avoid rubbing your open eye directly, as this risks dislodging or folding the lens.
- If discomfort persists after centering, remove the lens, rinse it with fresh solution, and reinsert.
These comfort tips guarantee your cosplay contacts perform correctly without irritating the cornea. A properly centered lens should feel nearly unnoticeable.
Persistent discomfort or inability to center the lens warrants professional consultation immediately.
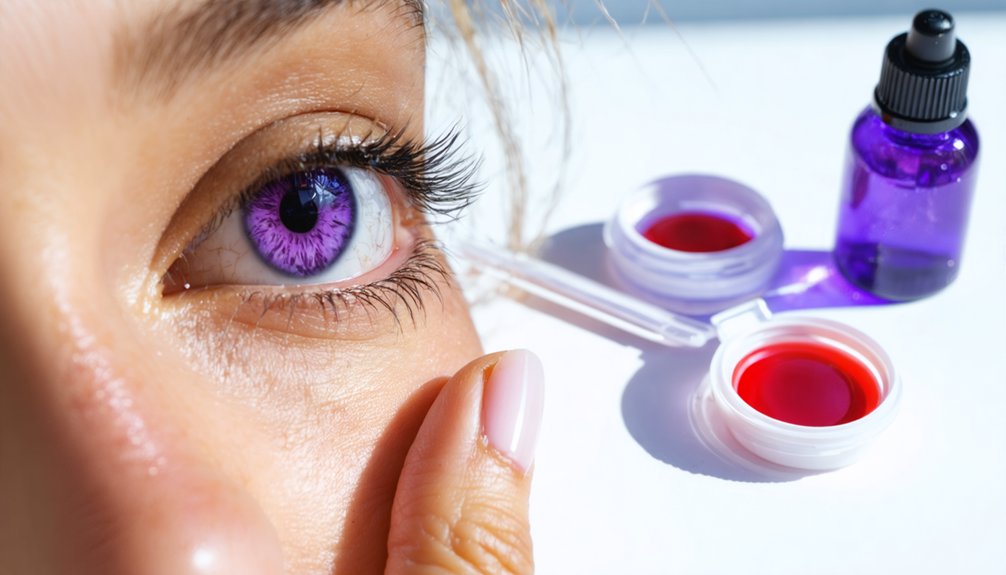
How to Remove Cosplay Contacts Safely
Before removing your cosplay contacts, wash and dry your hands thoroughly to prevent transferring debris or bacteria to your eye.
Pull down your lower eyelid to expose the lens’s bottom edge. Using your thumb and index finger, gently pinch the lens and lift it away from the eye surface. Apply only light pressure — excessive force risks corneal abrasion.
Gently pinch the lens between your thumb and index finger — light pressure only to avoid corneal abrasion.
These contact tips protect both your eyes and your lenses. Avoid letting fingernails contact the lens or eye during removal. If the lens resists, apply a few drops of fresh solution to lubricate it before trying again.
For proper lens care after removal, rub the lens with fresh solution, rinse it thoroughly, and store it in a clean case filled with new solution — never reused fluid.
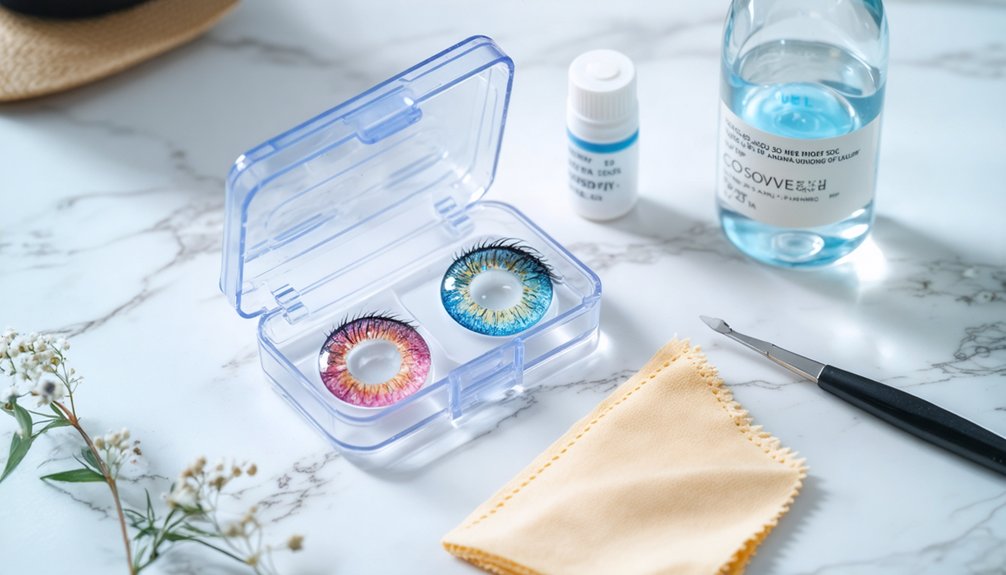
How to Clean and Store Cosplay Contacts
Proper cleaning and storage directly determine how long your cosplay contacts remain safe to wear. Across all lens types, consistent hygiene prevents microbial buildup and preserves optical clarity.
Follow these evidence-based storage tips after every use:
- Rinse and rub each lens with fresh solution using a center-outward motion before placing it in a clean case.
- Fill the case with new solution each time; never reuse old solution.
- Replace your lens case regularly to eliminate bacterial contamination risks.
- Keep stored lenses fully submerged in solution to maintain hydration and structural integrity.
If your lenses feel painful or don’t center properly after cleaning, consult an eye care professional immediately.
Skipping proper storage protocols accelerates lens degradation and increases your risk of corneal infection.
Common Cosplay Contact Problems and How to Fix Them
Even experienced wearers encounter issues like a lens that won’t center, persistent discomfort, or a lens that stubbornly clings to the finger instead of transferring to the eye.
If your lens stays off-center, close your eye and lightly massage the eyelid to guide it into position, then blink gently and move your gaze in multiple directions to help it settle.
A lens that sticks to your finger usually means your fingertip is too wet, so dry it further before attempting reinsertion.
If discomfort persists beyond initial placement, remove the lens immediately and consult an eye care professional.
Lens Won’t Center
A cosplay contact lens that won’t center is one of the most common fit issues you’ll encounter, and it’s usually fixable without removing the lens entirely.
Across lens types and color variations, off-center placement responds well to these four corrective steps:
- Close your eye fully and apply light pressure through the eyelid to shift the lens.
- Look in the opposite direction of where the lens has drifted.
- Blink several times slowly to encourage natural repositioning.
- Massage the outer eyelid gently if the lens remains displaced.
If the lens still won’t center after these steps, remove it, inspect for damage, and reinsert.
Persistent decentration may indicate an improper fit—consult your eye care professional for guidance.
Persistent Discomfort Issues
While decentration is often a quick fix, persistent discomfort signals a more serious problem that won’t resolve on its own.
Lens irritation that continues beyond initial settling typically indicates a torn lens, trapped debris, or poor lens fit. Remove the lens immediately and inspect it for structural damage.
Eye dryness compounds discomfort greatly, particularly during extended cosplay sessions.
Rewetting drops formulated for contact lens wear can restore moisture and reduce friction against the cornea. Avoid drops not specifically designed for lens use.
If discomfort persists after reinserting a clean, undamaged lens, don’t continue wearing it.
Prolonged irritation risks corneal abrasion or infection. Consult an eye care professional before resuming wear, especially if redness, blurred vision, or light sensitivity accompanies the discomfort.
Lens Stays On Finger
One of the most frustrating insertion problems occurs when the lens clings to your fingertip instead of transferring to the eye. Excess finger moisture is the primary driver of lens adhesion failure. Fix it systematically:
- Dry your fingertip completely with a lint-free towel before re-placing the lens.
- Shake off excess solution from the lens, leaving it just moist enough to stay flexible.
- Look slightly upward and touch the lens directly to the white of your eye rather than the iris.
- Release your eyelids immediately after contact to encourage transfer.
If adhesion persists, recheck your hand-drying technique first. Wet fingers consistently override proper insertion mechanics, making this the most correctable variable in your entire contact lens placement process.
Warning Signs You Should Stop Wearing Your Cosplay Contacts
Cosplay contacts are generally safe when used correctly, but certain symptoms signal that you should remove them immediately.
Persistent redness, blurred vision, or sharp pain indicate potential eye infections or lens allergies requiring prompt attention. If you notice unusual discharge or excessive tearing, remove the lenses and consult an eye care professional.
Monitor color fading or design differences during wear, as degraded lenses may release pigments that irritate ocular tissue.
Always respect duration limits specified by the manufacturer; exceeding them compromises eye health considerably. Review your application techniques if discomfort begins shortly after insertion, since improper placement accelerates corneal stress.
Never sleep in cosplay contacts unless explicitly approved for extended wear.
When warning signs appear, prioritize your eye health over costume accuracy without hesitation.
Frequently Asked Questions
How Long Can I Safely Wear Cosplay Contacts in One Session?
You shouldn’t exceed 8 hours per session to maintain safe duration and lens comfort. Monitor your eyes for dryness or irritation, and remove cosplay contacts immediately if discomfort arises. Always follow your eye care professional’s personalized recommendations.
Can I Wear Cosplay Contacts Over My Prescription Glasses?
You absolutely cannot wear cosplay contacts over prescription glasses — they’re worlds apart! You’d instead explore innovative color options and advanced lens materials by consulting your eye care professional about prescription-integrated cosplay lenses tailored specifically for your needs.
Are Cosplay Contacts Safe for Children or Younger Cosplayers to Wear?
Cosplay contacts aren’t recommended for young children. You should follow safety guidelines and age recommendations set by an eye care professional, as minors require supervised fitting, proper hygiene adherence, and a valid prescription to minimize ocular health risks.
You shouldn’t share cosplay contacts with anyone. Sharing violates essential hygiene practices and exposes both parties to serious bacterial and viral transmission risks. Prioritize responsible eye care by using only lenses prescribed or fitted exclusively for your eyes.
Do Cosplay Contacts Expire Faster Than Regular Prescription Contact Lenses?
Over 30% of contact wearers misread expiry labels. Cosplay lens materials often degrade faster, heightening eye irritation concerns. You’ll find they typically expire sooner than prescription lenses, so always check manufacturer dates before wearing them.
References
- https://www.youtube.com/watch?v=DwxHKMmiGzo
- https://www.reddit.com/r/cosplayers/comments/17gpxwf/how_to_put_in_contacts_for_the_first_time/
- https://www.facebook.com/artistjodysteel/videos/costume-contact-lenses-tutorial-/1371889724028653/
- https://www.youtube.com/watch?v=XryH8T78nNk
- https://www.youtube.com/watch?v=yq7bc5_MqMY
- https://mesmereyez.com.au/blogs/news/how-to-put-in-costume-contacts
- https://cosplay.com/archive/thread/9l638n/any-techniques-on-putting-on-contact-lenses
- https://www.youtube.com/watch?v=a3sqaYZMJzo
- https://www.youtube.com/watch?v=8D_XfK1wWFg
- https://www.youtube.com/watch?v=dD9mkyXV0t4