You’ll transform your cosplay into a Halloween costume by weatherproofing materials with additional sealant layers, simplifying assembly systems through velcro replacements for complex fasteners, and reducing armor weight by 30-50% using EVA foam instead of rigid plastics. Prioritize breathable fabric underlayers to prevent skin irritation during extended wear, and conduct 2-3 hour dress rehearsals testing complete mobility in party environments. Your convention piece needs strategic modifications addressing outdoor conditions, simplified donning procedures, and comfort adjustments that accommodate longer wear durations than typical photo sessions require.
Key Takeaways
- Take precise body measurements including chest, waist, hips, and specialized dimensions to ensure accurate costume fit and comfort.
- Modify cosplay armor with lightweight materials like EVA foam and add elastic inserts for enhanced mobility during extended Halloween wear.
- Combine store-bought costume pieces with custom elements using hot glue, fabric paint, and accessories like face paint or themed lenses.
- Test-fit patterns with muslin mockups and scale designs proportionally to accommodate different body types before cutting final materials.
- Conduct a 2-3 hour dress rehearsal to identify comfort issues, assess movement range, and adjust components before Halloween night.
Taking Accurate Body Measurements for Costume Adaptation
Before transforming your cosplay into a crowd-stopping Halloween costume, you’ll need to establish a baseline of precise body measurements that’ll serve as your adaptation blueprint. Use a sewing tape measure to capture chest/bust, waist, and hip circumferences while maintaining natural posture—no stomach sucking allowed.
Record specialized dimensions like inseam, torso length, and shoulder width for exhaustive costume tracking. Keep your tape level and snug without squeezing, double-checking each measurement for precision. Document thigh and upper arm circumferences for tailoring considerations, especially when modifying bodysuits or sleeves.
Cross-reference all measurements against size charts, noting that stretch fabrics permit approximately 5cm flexibility. This meticulous measurement protocol prevents fitting disasters and guarantees your cosplay-to-Halloween transformation achieves professional-grade results.
Selecting and Modifying Materials for Halloween Wearability
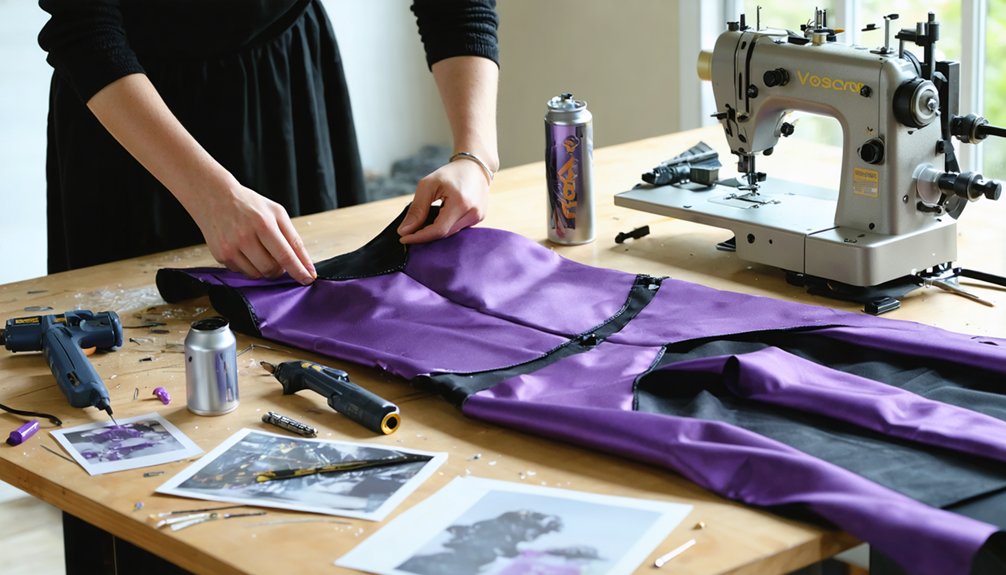
Armed with your precise measurements, you’re ready to source and engineer materials that balance character authenticity with Halloween practicality. EVA foam delivers heat-formable versatility—seal with Plasti Dip before painting for professional durability.
Master no-sew fabric techniques using hem tape, fabric stiffener, and hot glue for draped capes and structured garments. Strategic fabric selection prioritizes thrifted bases: transform $5 plaid shirts or black dress pants into character foundations.
Material affordability peaks when combining accessible resources—burlap ($4), raffia ($3), glow-in-the-dark paint ($5) create impactful effects under budget constraints. Hybrid construction methods merge 3D-printed details with thrifted clothing, while aluminum-wrapped cardboard forms convincing prop weapons.
Synthetic wigs under $30, styled with strategic bobby pinning, complete transformations. This engineering approach maximizes visual impact while maintaining mobility for trick-or-treating marathons.
Adjusting Patterns and Sizing for Different Body Types
You’ll need precise body measurements that align with pattern packet guidelines to determine your starting size, measuring key areas like bust, waist, hips, and torso length.
Pattern grading techniques—including proportional scaling using body ratios and cross-cutting for length adjustments—let you customize commercial patterns for your specific frame.
Verify your modifications against manufacturer size charts before cutting fabric, then test-fit with muslin mockups to catch discrepancies between the pattern’s intended silhouette and your body type.
Taking Accurate Body Measurements
While standard sizing charts provide a helpful starting point, your unique body proportions demand individualized measurement protocols to guarantee professional-grade costume fit. Position yourself in natural posture—standing relaxed with arms at sides—and execute triple-measurement verification for statistical accuracy.
Your tape should maintain one-finger clearance, running level across all circumference points. For bust measurements, bra fit considerations prove essential; wear your typical undergarment to capture realistic contours. Cross-cosplayers should replicate target gender foundation garments during data collection.
Locate your natural waistline by performing lateral torso flexion to identify the crease point. Hip measurements require parallel tape positioning at maximum circumference with legs unified. Mirror verification or partner assistance certifies horizontal alignment throughout the measurement process efficiency.
This systematic approach transforms generic patterns into precision-engineered costume components tailored to your physiology.
Pattern Grading Techniques
Measurement data transforms into wearable costumes through pattern grading—the mathematical refinement that bridges commercial sizing and your documented proportions. The cut-and-spread method excels for rapid modifications: slash horizontal lines through armholes and waist, vertical cuts through necklines and shoulders, then distribute grade increments strategically—¼ near center front, ¼ at shoulder, ½ at armhole.
Pattern tracing adjustments offer cleaner execution by shifting templates incrementally across fresh paper, marking ½–1 inch intervals that follow existing curves. Calculate your additions by subtracting body measurements from desired garment dimensions, maintaining appropriate ease.
Deploy design curve rulers for complex silhouettes; sketch freehand where geometry steepens. CAD software under $500 delivers precision for ambitious projects. Always muslin-test graded patterns before final fabric cutting—dart placements require verification.
Size Chart Verification
Pattern accuracy collapses without methodical size chart verification—the checkpoint where your measurements confront commercial standards and reveal necessary deviations. Your measurement recording demands cross-referencing against manufacturer-specific charts, accounting for that critical 1-2 inch tolerance window in standard sizes versus 1-3 inches for custom work. Execute measurement technique with tape level verification using mirrors or assistance, avoiding common pitfalls like compressed breathing during chest assessment or artificial waist manipulation.
Unisex Halloween adaptations typically run restrictive—size up strategically when hovering between categories. Document discrepancies where your body diverges from chart parameters, flagging areas requiring pattern modifications before fabric cutting.
For cross-gender transformations, your foundation garments alter baseline measurements considerably. This verification protocol prevents catastrophic fit failures—zipper ruptures, mobility restrictions, proportion distortions—that compromise both aesthetic accuracy and functional wearability throughout extended Halloween events.
Incorporating Store-Bought Pieces With Custom Elements
Since Halloween demands a spookier aesthetic than most convention cosplays deliver, you’ll need to bridge the gap between your existing costume pieces and the holiday’s darker requirements. Strategic customized embellishments transform standard cosplays—apply rigid collodion for indented scars, scar wax for raised tissue effects, or skeleton face paint over character makeup. Specialized accessories like lace overlays, Victorian capes, and themed contact lenses add gothic dimension without permanent alterations.
For crossover concepts, hot-glue steampunk goggles onto pirate hats or combine superhero capes with medieval armor pieces. EVA foam cuts and heat-forms into weapons; seal with Plasti Dip before painting. Iron-on patches and fabric paint customize store-bought bases without sewing. Hem tape cleans edges while fabric stiffener shapes capes. Execute dress rehearsals testing complete integration—ensuring fangs, blood effects, and haunting makeup cohesively merge with your original costume foundation.
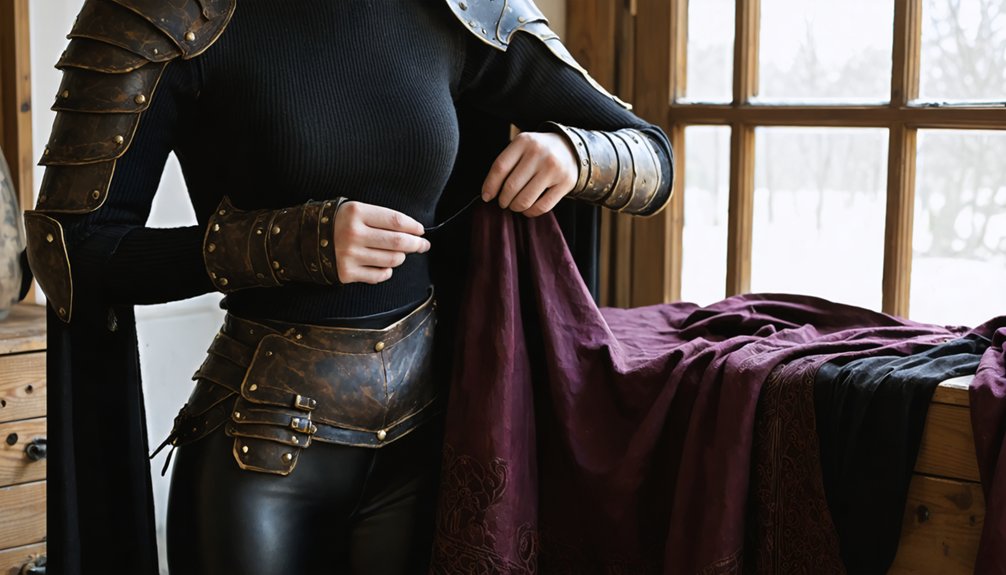
Adapting Armor and Protective Components for Comfort
When adapting cosplay armor for Halloween wear, you’ll need to prioritize material selection that permits full range of motion while maintaining structural integrity. Proper sizing prevents circulation restriction and pressure points—your chest piece shouldn’t create blood cutoff, and bracers must allow independent donning without assistance.
Strategic layering between armor and skin using protective clothing blocks chemical contact from sealants and prevents abrasion from foam edges during extended wear.
Material Selection for Mobility
Most cosplayers discover that convention-ready armor becomes a liability during Halloween’s extended outdoor wear—but strategic material swaps transform rigid protective components into comfort-focused alternatives without sacrificing visual impact. Replace standard Worbla with its Lite variant for 40% weight reduction while maintaining sculptural integrity. EVA foam delivers 30-50% lighter armor pieces compared to rigid plastics, with perforated patterns enabling breathability integration that increases airflow by 25%. Craft foam layered with moisture-wicking fabric produces chest plates under one pound each.
For flexible joint design, incorporate elastic fabric inserts at armor seams to gain 20-30° additional bend radius. Ball-and-socket foam connectors in shoulder pauldrons replicate natural movement patterns. Neoprene padding beneath rigid plates provides essential stretch without restricting your stride, while Velcro-fastened PVC strips replace restrictive metal bracing at wrists.
Sizing Armor Components Properly
Halloween’s marathon trick-or-treating sessions demand armor that moves with your body rather than against it—a goal achievable only through precise component sizing that balances character accuracy with wearability thresholds. Element scaling formulas begin with height-to-reference ratios: divide your stature by printed character measurements to generate multipliers (6-foot wearer ÷ 1-foot figure = 6x). Apply this coefficient to individual pieces through pattern alteration guidance:
- Torso components: Widen seams 1cm under bust, sides, and back for breathing room without compromising silhouette
- Limb armor: Add horizontal spacing to shin guards for extended legs while maintaining proportional width
- Helmet verification: Test-fit scaled mockups before final fabrication to confirm head shape compatibility
Armorsmith Designer’s digital avatars streamline complex calculations, though budget-conscious builders achieve equivalent precision through percentage-based Pepakura adjustments.
Layering for Skin Protection
Properly scaled armor becomes a liability the moment it grates against bare skin during a six-hour candy collection route. Deploy breathable fabric underlayers as your primary defense—velcro-covered bodysuits serve dual functions by separating dermis from foam while anchoring multiple components simultaneously.
Engineer detachable skin protectors for high-friction zones: fabric bracers with velcro strips create removable interfaces between upper arms and armor shells, while shin guards mount onto similar textile barriers rather than direct leg contact.
Strategic finishing amplifies protection beyond fabric layers. Apply plastidip to flex zones where foam creasing threatens skin irritation, building thickness sufficient for sanding to eliminate abrasive edges. Mod Podge-filled seams require complete curing before surface refinement—avoid excessive brushwork that generates problematic buildup. These rigid finishes transform rough foam perimeters into skin-safe surfaces.
Understanding Size Charts and Manufacturing Variations
One of the trickiest aspects of converting cosplay into wearable Halloween costumes involves traversing the bewildering landscape of manufacturer size charts—each brand maintains its own measurement standards, leaving costumers to decipher competing numerical systems. Rubies, Leg Avenue, Smiffy’s, and Fun World each interpret body dimensions differently, creating substantial fit discrepancies across identical numerical sizes.
Essential sizing strategies include:
- Body-based measurements rather than garment dimensions form the foundation of accurate size selection
- Pattern scaling calculators convert existing designs to accommodate plus-sized and non-standard proportions
- Hybrid construction approaches blend store-bought components with custom-fitted pieces
Remember that costumes typically run smaller than expected. When uncertainty arises between sizes, scale upward. Color variations and material thickness further complicate fit predictions, demanding strategic measurement verification before committing to purchases or pattern modifications.
Testing Your Converted Costume Before the Event
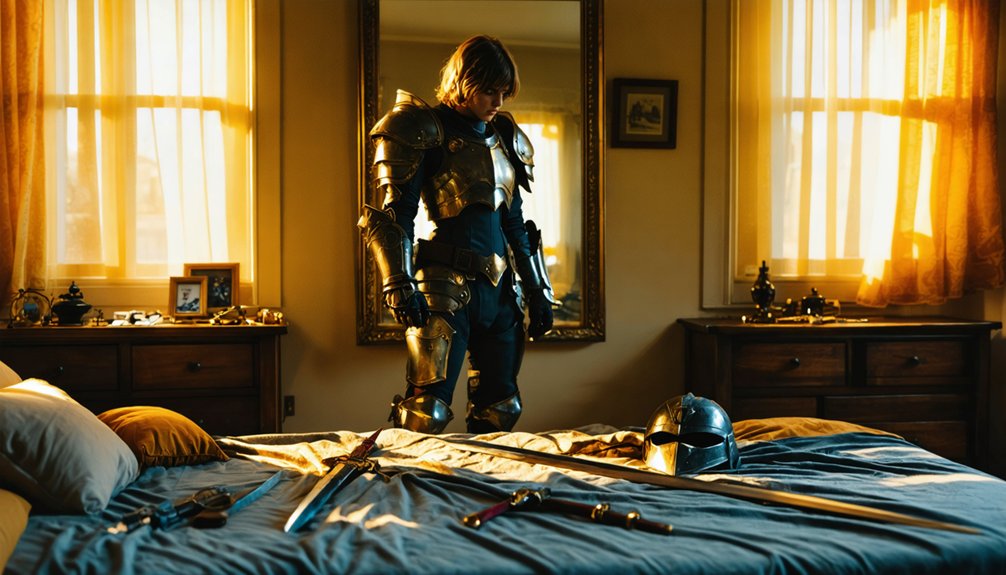
Your converted cosplay deserves a thorough trial run at least 72 hours before Halloween night—this buffer allows sufficient time for emergency alterations and component replacements. Execute a complete dress rehearsal incorporating full costume assembly, makeup application, and wig integration.
Your wear testing duration should extend 2-3 hours minimum to identify pressure points, restriction zones, and structural failures. Document every angle through photography and video for exhaustive documentation review, capturing potential visual inconsistencies invisible to the naked eye.
Assess range of motion with armor pieces, test cape dynamics during various movements, and verify accessory security under stress conditions. Solicit feedback from experienced costume builders through online communities, implementing their technical insights. This systematic validation protocol transforms potential Halloween disasters into flawless character presentations.
Frequently Asked Questions
Can I Reuse My Halloween-Converted Cosplay for Future Convention Events?
You’ll absolutely maximize costume versatility by reverse-engineering your Halloween adaptation back to convention-ready specs. Convention accessibility improves when you’re strategically designing modular elements—detachable props, interchangeable accessories—that’ll shift seamlessly between casual Halloween wear and competition-grade cosplay presentations.
How Do I Store My Adapted Costume to Prevent Damage?
You’ll want to give your costume a “rest period” using proper storage methods in climate-stable locations. Implement humidity control measures through silica packets, avoid temperature-extreme zones, and utilize acid-free containers with strategic compartmentalization for ideal preservation.
What Makeup Techniques Work Best With Cosplay Converted to Halloween Costumes?
You’ll achieve ideal results by layering high-pigment base coats with strategic contouring that compensates for theatrical lighting effects, while incorporating character-accurate pigments. Secure elaborate hairstyles first, then blend facial prosthetics seamlessly using gradient shadowing techniques for dimensional authenticity.
Should I Bring Repair Supplies to Halloween Events for Costume Emergencies?
Absolutely—you’ll save your entire evening when costume catastrophes strike! Pack compact emergency repairs essentials: fabric adhesive, safety pins, and needle-thread kits. Halloween venues rarely offer on-site assistance, so you’ll need self-sufficient rapid-response capabilities for unexpected wardrobe malfunctions.
How Do Weather Conditions Affect Outdoor Halloween Costume Performance?
Outdoor temperature variations directly impact your costume’s structural integrity—polyester-based elements retain shape through freezing conditions, while costume material durability suffers when drape-y fabrics absorb moisture. LED-equipped storm builds maintain functionality despite atmospheric challenges, ensuring innovative visual performance.