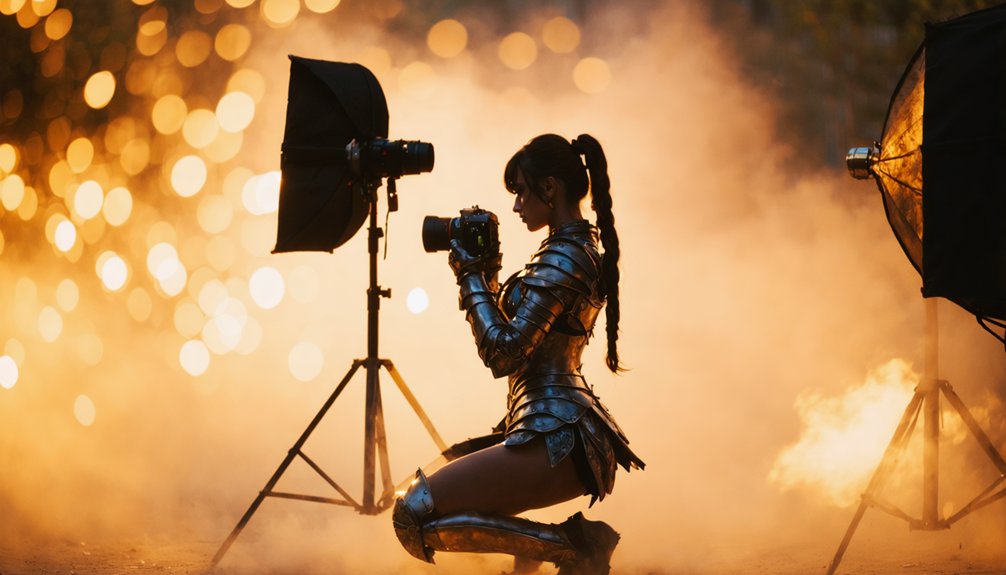
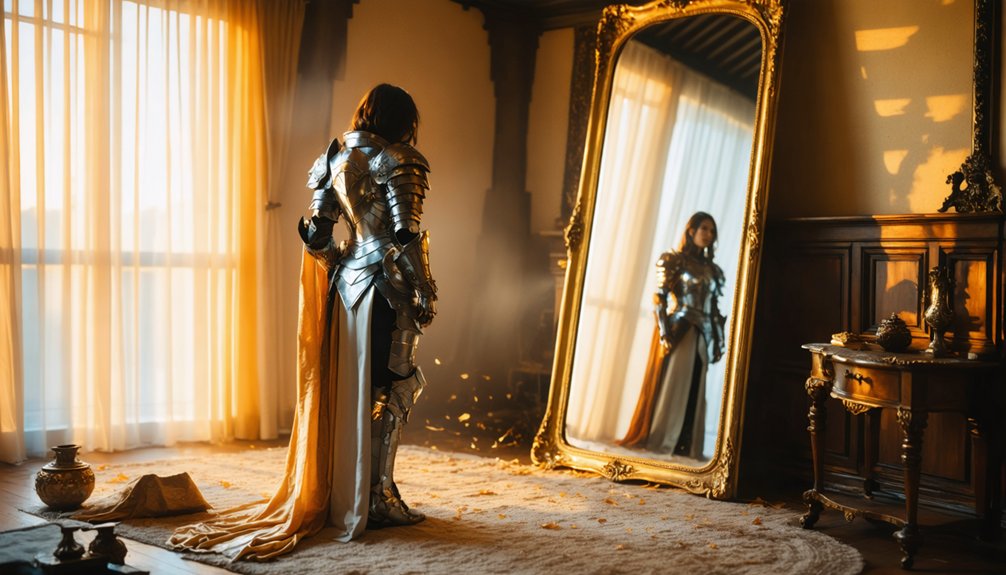
Master cosplay photography poses by positioning your body at a 45-degree angle with a shoulder-width stance, creating strategic gaps between your arms and torso. Execute the “turtling” technique to sharpen your jawline while maintaining a 3/4 face angle toward the light source. Place your hands diagonally rather than symmetrically, and position your gaze using the rule of thirds for maximum impact. Incorporate deliberate prop contact points and experiment with four-point lighting to enhance texture. The following breakdown explores advanced techniques that’ll transform your character portrayals from snapshots into portfolio-worthy work.
Key Takeaways
- Position your body at a 45-degree angle to the camera with feet shoulder-width apart for a flattering, dynamic foundation.
- Point your nose toward the photographer’s shoulder while maintaining eye contact and extending your neck forward to define your jawline.
- Create visible gaps between your arms and torso, avoiding symmetrical hand positions for more interesting, natural-looking compositions.
- Position your eyes in the upper third of the frame and vary your gaze direction to convey specific emotions.
- Use props strategically with deliberate contact points and appropriate lighting to enhance authenticity and visual interest.
Mastering Body Angles and Positioning
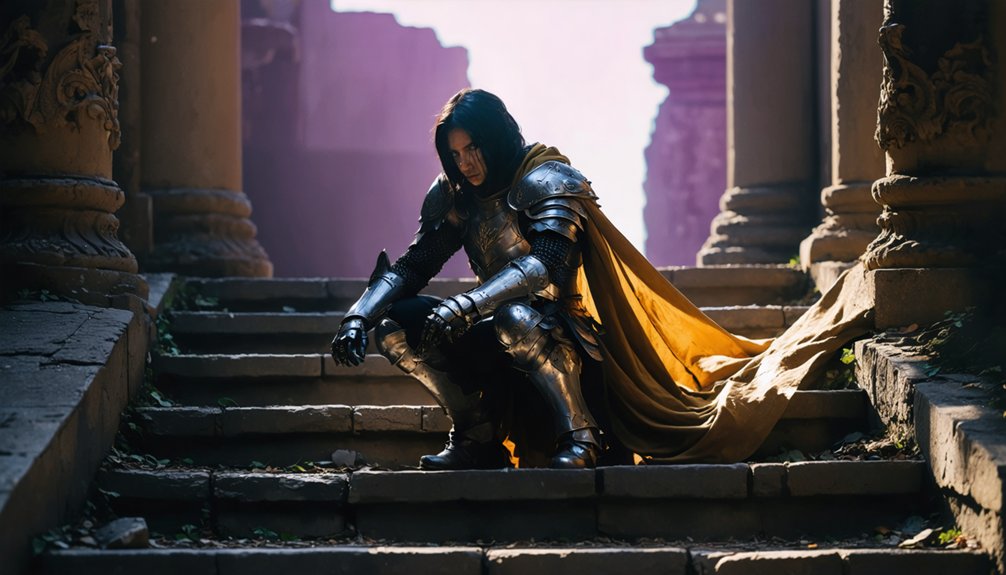
The foundation of compelling cosplay photography begins with understanding how body positioning affects the camera’s perception of form and proportion. You’ll achieve ideal results by positioning your body at a 45-degree angle to the camera rather than squaring up directly—this creates dynamic lines that enhance your silhouette.
Master dynamic cosplay compositions by angling your body 45 degrees to the camera—avoiding flat, head-on positioning that diminishes dimensional form.
Stabilizing lower body mechanics starts with feet shoulder-width apart, establishing your foundational stance. For advanced positioning, place one foot back while raising the opposite hip, creating angular definition through deliberate weight distribution.
Face toward your light source while maintaining the three-quarters turn, with hand placement on hip to accentuate curves. This technique transforms static positioning into dimensional presentation. Remember to create gaps between your arms and torso to prevent body parts from merging together in the final image.
Balancing weight distribution between forward and rear legs generates shifting movement, adding kinetic energy to static frames while preventing flat, uninspired compositions. Maintaining a lifted chin and straight back ensures your character projects confidence and prevents appearing drowsy in photographs.
Perfecting Head and Face Placement
Where your camera captures your face determines whether viewers perceive strength, vulnerability, or mystery in your cosplay character.
Master head tilt variations by pointing your nose toward the photographer’s shoulder while maintaining direct eye contact—this creates dimensional interest without appearing forced. Deploy the “turtling” technique: push your chin forward and tilt down to sharpen your jawline for commanding presence.
Position your face at three-quarters angle rather than straight-on to avoid blocky framing. Place your head along the top third using rule of thirds composition for ideal viewer engagement. Direct your gaze independently from head position, particularly when enhancing facial features through strategic chin dips. Identify your most flattering side through test shots, then favor that angle consistently throughout your photography session.
Execute shoulder rolls backward while adjusting chin positioning to elongate your neck, creating professional-grade character embodiment that transcends amateur photography. Experiment with low and high angles alongside eye-level perspectives to discover which camera position best highlights your character’s defining features.
Creating Flattering Arm and Hand Gestures
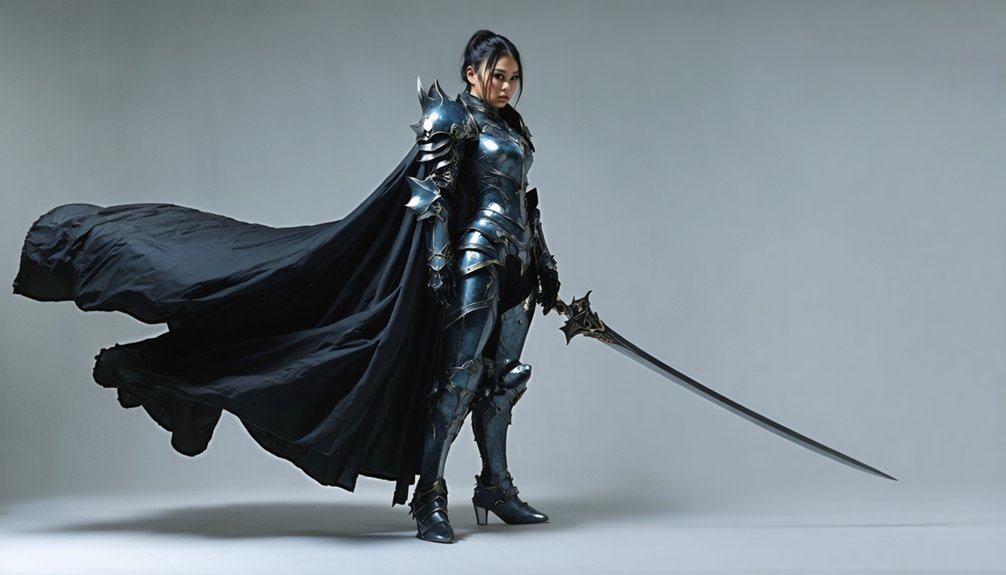
Mastering arm and hand gestures separates compelling cosplay photography from awkward snapshots that undermine your character portrayal. Position hands slightly away from your body, creating visible gaps that allow light passage between arm and torso—verify this spacing through mirror practice.
Avoid symmetrical mirroring; instead, position hands diagonally for visual interest when showcasing character personality. When incorporating props, apply the Glide method: slide your hand upward along holsters, stopping naturally without strained positioning on edges. For wall-supported poses, leave your anchored arm idle to prevent compositional overload.
Experiment with multiple camera angles to prevent frame cutoff while highlighting arm extension. Work with your photographer to plan specific poses that align with your character vision and the desired final image. Dramatic hand gestures require deliberate placement—incomplete mid-pose positioning reads as amateurish rather than dynamic, compromising your character’s authenticity and visual impact. Shake out your hand before each shot to release tension and achieve the soft, natural finger positioning that distinguishes professional-quality character portrayal.
Conveying Character Through Eyes and Expression
Why do certain cosplay photographs immediately capture a character’s essence while others fall flat despite perfect costumes and props? Your eyes serve as the primary conduit for character authenticity. Execute wide-eyed techniques paired with bitten lips or smirks to channel intensity, while maintaining expressive pupil dilation through proper lighting awareness.
Position your gaze 50% downward—keeping eyes visibly open—to create longing without appearing closed. The countdown method eliminates minimized blinking: look away, then snap toward the lens at the decisive moment. Exaggerate eyebrows and mouth positioning while deliberately relaxing orbital muscles to prevent aggressive overtones.
Apply the rule of thirds, positioning eyes in the upper frame third to command viewer focus. Avoid completely closed-mouth presentations that can appear boring or lack emotional interest in your character portrayal. Use a mood board to establish and inspire the specific emotional tone you want to convey through your facial expressions. Master these technical elements through mirror practice, analyzing how your unique facial structure translates emotion into photographic storytelling.
Strategic Use of Props in Your Shots
Your character’s emotional depth means nothing if poorly positioned props sabotage the composition. Mastering prop orientation transforms accessories from static objects into narrative amplifiers.
Position weapons mid-swing at low angles to exploit perspective distortion—magnifying their scale while maintaining compositional balance through rule-of-thirds alignment. Strategic prop interaction demands deliberate contact points: grip staffs during lunges to convey kinetic energy, or establish gentle hand connections with delicate items for softer characterization.
Advanced techniques include acrylic suspension boxes for levitation effects and rim lighting to emphasize contours without camera shake. Deploy four-point lighting configurations to reveal texture while maintaining detail clarity. Critical principle: props must never obstruct facial features or key costume elements.
Props also keep hands occupied during shoots, preventing awkward arm positioning while helping you strike more dynamic poses naturally. Commission custom pieces from local prop makers found through Instagram to ensure authenticity and perfect character alignment. Integrate environmental angles naturally, ensuring custom pieces complete your costume narrative rather than competing with your character’s visual hierarchy.
Bringing Energy With Dynamic Movement
Dynamic movement transforms static cosplay shots into authentic character portrayals by executing signature abilities and combat stances at peak motion. You’ll achieve professional-grade action sequences by synchronizing burst mode with your subject’s practiced movements—whether that’s a weapon swing, spell-casting gesture, or acrobatic leap.
Strategic incorporation of environmental elements like scaffolding, staircases, or atmospheric effects amplifies the kinetic energy while your 1/500th+ shutter speed freezes each decisive moment with technical precision.
Capture Character’s Signature Moves
Nailing down your character’s signature moves separates mediocre cosplay photography from shots that command attention. Reference official artwork and breakdowns to identify key dynamic actions—jumps, strikes, gestures—that define your character’s energy signature. Detailed motion analysis of speed and trajectory guarantees authentic replication during shoots.
Execute poses with technical precision: maintain straight posture unless slouching suits characterization details, roll shoulders back for energy projection, and sink fully into low crouches for committed depth. Prioritize costume mobility matching to avoid movement restrictions.
Employ motion blur techniques shooting toward light sources at low angles for imposing presence. Capture mid-motion with relaxed hands and shallow depth of field isolating your subject. Scout locations contextually aligned with your character’s narrative, then move freely during trials to discover natural dynamic positioning.
Use Environmental Props Creatively
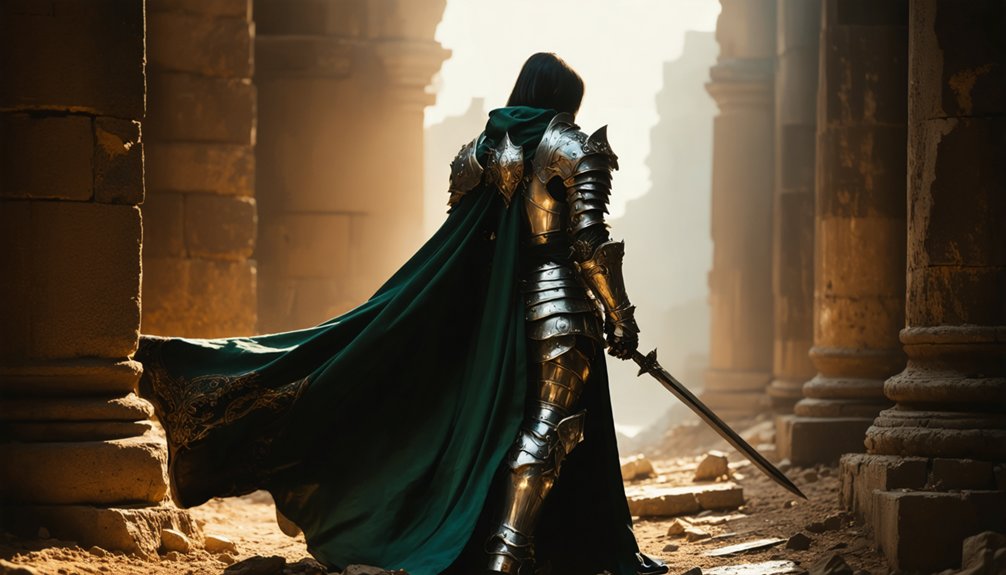
Every exceptional cosplay shot leverages the environment as an active participant in your character’s narrative. Accentuate costume details by positioning your subject against contrasting architectural textures—weathered brick amplifies fantasy armor’s gleam, while industrial metal frames ethereal fabrics dramatically.
Utilize multiple shooting angles around structural elements; frame through gates or walls to create compositional depth that complements environmental textures organically.
Incorporate natural elements strategically—water reflections enhance mystical characters, while sand or soil grounds action-oriented personas with authentic energy. Position the horizon along the upper or lower third to maximize negative space without diluting visual impact.
Burn foam props with soldering irons to match environmental wear patterns, ensuring seamless integration. Scout locations offering natural sunlight variations and architectural diversity, then circle these features continuously rather than shooting from static positions for dynamic, innovative compositions.
Practice Action Pose Timing
When capturing action-driven cosplay characters, timing transforms competent compositions into electrifying imagery that arrests viewer attention instantaneously. Master these synchronization protocols to elevate your dynamic freeze techniques:
- Countdown Synchronization Method: Coordinate with your photographer using verbal cues—close your eyes initially, then open precisely at shutter release. This eliminates blink artifacts while guaranteeing directional eye focus matches your character’s intensity.
- Breathing Control Protocol: Implement breath-hold sequences during balance-intensive poses. This counteracts respiratory-induced stability shifts, signaling your photographer for immediate capture. Pre shoot practice of this technique ensures sharpness in tension-demanding stances.
- Slow-Motion Build Technique: Execute movements deliberately rather than explosively. This controlled pacing grants your photographer best shutter timing windows while generating authentic kinetic energy—no post-processing motion blur required.
Understanding Camera Angles and Distance
Distance requirements vary greatly by lens: 50mm primes demand close proximity for headshots, while 85mm f/1.8 lenses require ten feet of working space. Telephoto 70-200mm options need three yards minimum, limiting convention hall utility.
Wider 24-70mm focal lengths excel in crowded environments. Strategic natural light positioning and selective background framing maximize subject comfort while delivering unique compositional opportunities unavailable to stationary photographers.
Practicing Poses Before the Photoshoot
Perfect camera positioning means nothing if you freeze awkwardly in front of the lens. Your preparation determines photoshoot success, requiring disciplined rehearsal and technical refinement.
Essential Pre-Photoshoot Training:
- Mirror-Based Character Replication – Study reference images while practicing head tilts, shoulder angles, and eye contact. Hold each pose until discomfort builds, simulating convention endurance while exploring comfort levels for extended shooting sessions.
- Posture Mechanics Optimization – Execute the turtling technique by pushing your chin forward for jawline definition. Roll shoulders back, elongate your spine, and create deliberate gaps between torso and arms to enhance silhouette definition.
- Signature Pose Development – Master three shift-ready poses incorporating 45-degree body angles and bent knees for depth. Practice rapid cycling between static and dynamic positions while refining self evaluation through systematic selfie analysis and mirror work.
Frequently Asked Questions
What Should I Wear Underneath My Cosplay for Comfort During Long Photoshoots?
You’ll want breathable base layers and skin-tight undergarments that won’t betray your silhouette. Opt for seamless, moisture-wicking fabrics like dancer’s tights or laser-cut pieces. They’ll provide invisible support while you’re striking those dynamic poses all day.
How Do I Prevent My Makeup From Smudging During Outdoor Photography Sessions?
Apply a setting makeup primer before foundation, then lock everything with mattifying setting powder on your T-zone. Finish with waterproof products and long-lasting setting spray. You’ll maintain flawless coverage through extended outdoor shoots without smudging.
What’s the Best Time of Day for Outdoor Cosplay Photography Lighting?
Shoot during golden hour—one hour before sunset or after sunrise—for ideal soft, directional lighting. Alternatively, you’ll achieve consistently flattering results on overcast days, which eliminate harsh shadows and provide even illumination for detailed costume photography.
How Do I Communicate Pose Ideas Effectively With My Photographer?
Share pose references beforehand—screenshots, fan art, or mood boards—to establish visual alignment. Communicate desired moods clearly using character-specific terminology. During shoots, you’ll streamline direction by referencing pre-discussed concepts, ensuring efficient collaboration and innovative results.
Should I Bring Backup Costume Pieces in Case of Wardrobe Malfunctions?
Like a safety net protecting your performance, you’ll definitely want backup clothing items and extra accessories on-hand. Pack duplicate props, replacement fasteners, and emergency repair supplies—they’re essential insurance against unexpected wardrobe failures during critical shooting moments.
References
- https://www.instructables.com/Cosplay-Posing-101/
- https://cosplay.com/archive/thread/5p8dg0/a-n00b-s-guide-to-posing-for-cameras
- https://aliceincosplayland.com/2013/05/posing-basics-for-cosplay.html
- https://www.lyricalvillaincosplay.com/post/cosplay-photography-101
- https://www.youtube.com/watch?v=cb589EnId_0
- https://www.cosplaytutorial.com/tools/posingtemplate.php
- https://www.lyricalvillaincosplay.com/post/cosplay-photography-posing-basics
- https://foodandcosplay.org/2018/07/12/cosplay-model-tip-for-photographers/
- https://www.youtube.com/watch?v=F4bxCtRPTK8
- https://contrastly.com/cosplay-photography-101-tips-and-tricks/