You’ll create custom cosplay prosthetics by sculpting wounds or features in non-sulfur clay on a flat base, then building a plaster mold around your design. Once cured, you’ll cast the prosthetic using either liquid latex applied in thin layers or silicone like Platsil Gel 10 mixed with pigments. After demolding, you’ll attach the piece using Pros-Aide adhesive and blend edges with 99% alcohol or torn tissue paper for seamless integration. The complete process requires specific techniques at each stage to achieve professional results.
Key Takeaways
- Sculpt custom wound or creature designs using non-sulfur modeling clay on a flat plastic base with wooden tools.
- Create reusable molds by building clay walls around sculptures and pouring Plaster of Paris or Hydrocal mixture.
- Cast prosthetics using liquid latex applied in thin layers or silicone mixed with pigments for skin-like flexibility.
- Attach prosthetics to skin using Spirit Gum or Pros-Aide adhesive after conducting allergen testing for safety.
- Blend prosthetic edges seamlessly using torn toilet paper, adhesive, and color-matched foundation or specialty makeup pigments.
Essential Materials and Tools for Prosthetic Making
Before you sculpt your first prosthetic piece, you’ll need to assemble the right materials and tools—each serving a specific function in the fabrication process. Start with white Plastalina modeling clay—a non-oven-bake, non-air-dry compound that delivers consistent sculpting results. Preparing clay for sculpting involves rolling it into balls, flattening sections, and blending edges with water for seamless shifts.
For mold creation, you’ll require Plaster of Paris or Hydrocal, mixed to lump-free consistency. Your casting arsenal should include liquid latex, foam latex, or silicone options like Platsil Gel 10.
Adhesives—Spirit Gum or professional-grade Pros-Aide—secure prosthetics to skin, while 99% alcohol blends edges invisibly.
Storage and preservation of modeling materials demands attention: keep clay sealed and plaster dry. Gelatin alternatives offer food-grade, reheatable solutions for budget-conscious artists seeking innovation.
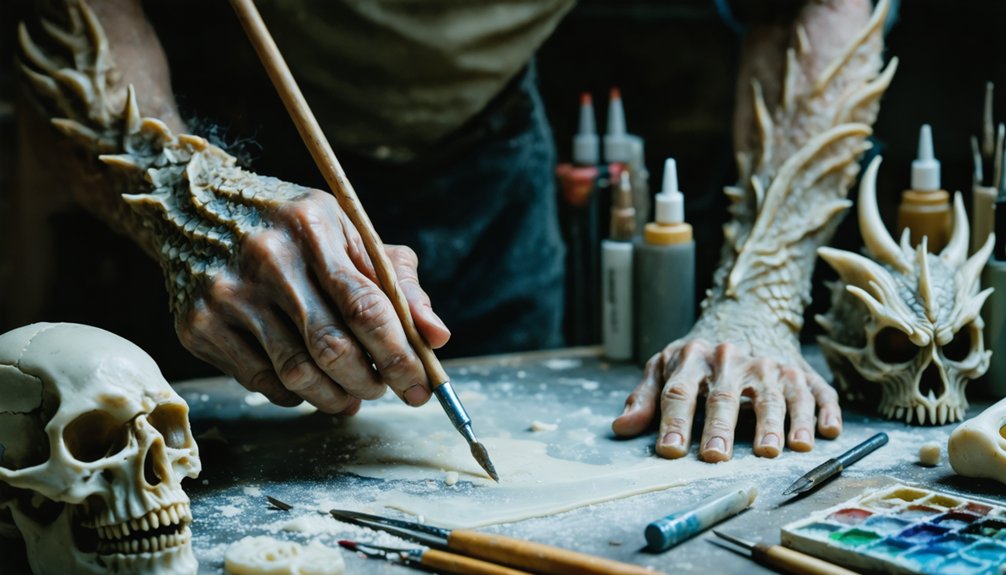
Sculpting Your Custom Wound Design
With your materials prepared and workspace organized, you’re ready to build the wound design that transforms concept into tangible form. Apply non-sulfur clay onto your plastic base, sculpting depth with wooden tools and cotton swabs.
Transform your initial concept into physical reality by layering non-sulfur clay onto the base and shaping texture with simple sculpting implements.
For cuts, carve jagged edges; burns require dabbing with washcloth to achieve irregular, mottled natural textures. Create lacerations by cutting patterns with a butterknife, then pinching closed for raised scarring effects.
Roll monster clay thin for flashing—this prevents mold undercuts when angled correctly. Push sculpting tools downward to simulate sutures. Avoid straight edges; blend borders softly for seamless application.
Add pores matching your target body site using fine implements or experimental mold alternatives like textured objects pressed into clay. Build multiple layers for dimensional depth. Your finished sculpt should exhibit organic irregularities that replicate authentic tissue damage.
Building and Preparing the Plaster Mold
Once you’ve completed your wound sculpture, you’ll need to construct a containment system to create the negative mold. Build clay walls around your sculpture’s perimeter, extending at least one inch above the highest point to prevent plaster overflow during pouring.
Mix your Plaster of Paris to a 2:1 powder-to-water ratio and pour it steadily over the sculpture until it fills the containment area, then allow 1-2 hours for complete curing before removal.
Constructing Clay Containment Walls
Clay containment walls function as temporary barriers that confine liquid molding materials to your sculpture’s perimeter while creating clean, manageable mold edges. You’ll construct these walls by slicing non-hardening, sulfur-free plasticine into 3/8-inch strips using a metal scraper, then stacking them around your sculpture base.
Layering clay for variable thickness allows you to match your sculpture’s height while minimizing material waste. Press each strip firmly onto your plastic or PVC base, butting seams together cleanly without excessive smoothing that creates fingerprints. Applying pressure for proper sealing guarantees water-tight containment against viscous alginates and plasters.
Position walls slightly oversized to accommodate overfill. After setup, you’ll peel away these squishy barriers effortlessly, revealing precise mold edges ready for prosthetic fabrication without requiring cleanup or water exposure.
Pouring and Curing Plaster
After your clay containment walls safeguard the sculpture perimeter, you’ll select your plaster formulation based on durability requirements and detail capture needs. Plaster of Paris works for basic molds, while Hydrocal and Ultracal 30 deliver superior strength and detail resolution.
Mix your plaster slightly below manufacturer’s recommended water ratio to optimize plaster curing methods and reduce setting time.
Pour intentionally over your sculpture, maintaining 1/4 to 1-inch thickness coverage. Managing air bubbles demands consistent tapping of your container sides during pouring—this releases trapped air and certifies void-free molds.
Standard curing requires 24 hours minimum, though complex pieces may demand extended periods up to one month depending on thickness and environmental conditions. Verify complete dryness before proceeding; moisture compromises subsequent fabrication stages and degrades structural integrity.
Creating the Prosthetic With Silicone or Latex
When you’re ready to transform your clay sculpture into a wearable prosthetic, you’ll need to choose between silicone and latex as your casting material. Understanding material properties guides your selection: silicone with Deter added at equal ratio to A+B parts delivers skin-like flexibility, while latex builds thickness through layered application.
Your pouring techniques differ noticeably—fill silicone molds with Platin Gel 25 mixed with pigments and flocking for texture, then sandwich using a life cast. For latex, apply thin layers directly into powder-dusted plaster molds without lubricant, building up form gradually. Wait 24 hours for latex curing before demolding.
Inspect both prosthetic types for bubbles or thin spots, adding corrective layers as required. This technical approach guarantees replicable, professional-grade results.
Attaching Prosthetics to Skin Safely
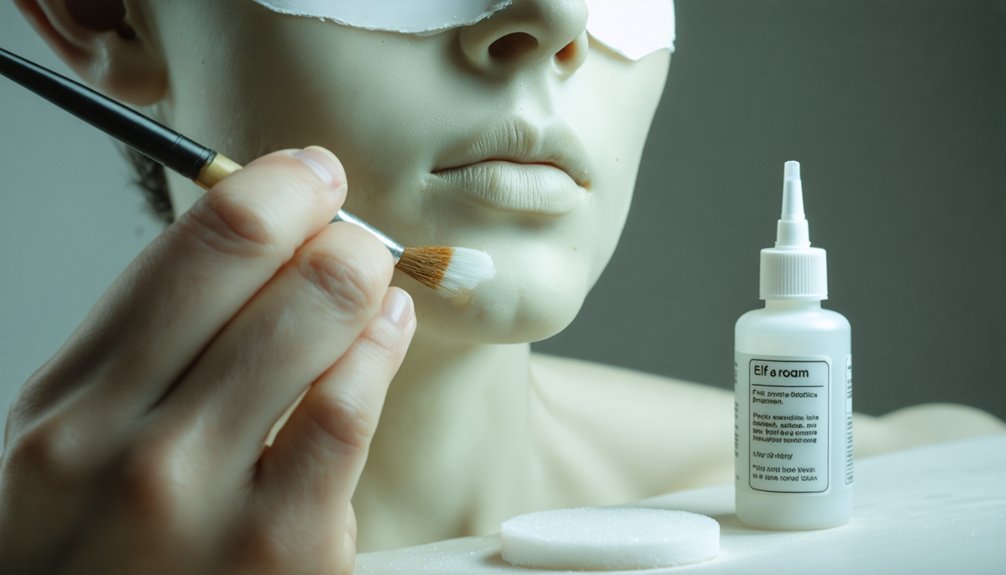
Your finished prosthetic requires proper attachment methods to achieve realistic effects while protecting your skin from irritation or allergic reactions. Proper skin preparation begins with allergen testing—apply a small amount of your chosen adhesive to clean skin 24 hours before use.
Adhesive application techniques vary by prosthetic weight and material composition.
- Spirit Gum: Apply to prosthetic backing, wait until tacky (not wet), then press firmly. For heavier pieces, apply a second layer directly to skin before attachment.
- Pros-Aide: Apply water-based formula to both surfaces simultaneously. Avoid using on latex prosthetics—it attracts dust particles.
- Skin Tite: ACMI-certified silicone adhesive bonds directly to skin without release agents, flexing naturally with joint movement.
- Eyebrow Protection: Coat with petroleum jelly, seal with PVA glue, then apply liquid latex after venting ammonia.
Blending Edges for Realistic Results
After securing your prosthetic with adhesive layers, you’ll need to eliminate visible seams through strategic feathering techniques. Apply small pieces of torn toilet paper over the prosthetic edges using liquid latex or prosthetic adhesive, building up thin layers that create a gradual shift between the appliance and your skin.
Once the feathered edges dry completely, you can begin color matching by applying foundation or specialty makeup pigments across both the prosthetic surface and surrounding skin to achieve a unified tone.
Feathering With Toilet Paper
The most critical technique in toilet paper prosthetic construction involves feathering the edges to eliminate visible shifts between the prosthetic and your skin. This process transforms amateur attempts into professional-grade layered prosthetic textures by controlling edge transparency and integration points.
Execute feathering through these precision steps:
- Tear perimeter edges while latex remains partially wet, creating irregular termination points that mimic organic tissue boundaries
- Apply progressively thinner latex layers at outer margins, shifting from full opacity to translucent film
- Incorporate varied strip lengths when simulating torn skin, establishing authentic depth perception through staggered termination
- Dust talc liberally across blended zones, neutralizing latex sheen while optically merging prosthetic boundaries with surrounding dermis
Your feathering precision directly determines whether observers perceive authentic injury simulation or obvious theatrical application.
Color Matching Skin Tones
Feathered edges provide structural invisibility, but color mismatches will expose even perfectly integrated prosthetics. Practical color matching techniques begin with pre-painting prosthetics using foundation matching your model’s skin tone before attachment. Build thin layers to control opacity and color density effectively.
Traditional trial-and-error methods remain prevalent, though spectrophotometers and colorimeters greatly improve matching efficiency. Mix cyan, magenta, yellow, and black to replicate skin’s natural pigment distribution. Start warmer tones (Rose Adjuster) for pale complexions, adding yellow-browns for muting.
Pigment layering methods create dimensional realism. Apply alcohol-activated colors for waterproof buildup in adjustable layers. Vary mixtures slightly between applications for organic variation. Use digital color picker tools to quantify CMYK differences for precise matching. Account for prosthetic thickness affecting final color perception. Seal completed work with translucent powder and setting spray.
Cost-Saving Tips and Time Management
Strategic budget allocation and timeline coordination form the foundation of cost-effective prosthetic fabrication for cosplay applications. You’ll optimize strategic cost allocation by implementing these proven methodologies:
- Material Substitution Protocol: Replace premium silicone with polyfoam substrates and air-dry clay composites, reducing per-piece costs by 60-70% while maintaining structural integrity for foam latex alternatives.
- Reusability Engineering: Design molds and base prosthetics for multi-character adaptation, amortizing initial investments across 3-5 builds through modular component systems.
- Bulk Procurement Strategy: Coordinate group purchases with fellow fabricators to access wholesale pricing tiers and eliminate redundant shipping expenses.
- Efficient Time Distribution: Invest in digital fabrication tools like 3D printers for on-demand production cycles, eliminating lead times and enabling rapid prototyping iterations.
This systematic approach maximizes your creative output while minimizing resource expenditure.
Frequently Asked Questions
Can Prosthetics Be Reused Multiple Times for Different Events?
Yes, you can achieve reusable applications with proper care. Foam latex and silicone prosthetics offer extended shelf life through gentle removal, strategic powder application, adhesive management, and edge reinforcement. You’ll need backup pieces since degradation occurs eventually.
How Long Do Homemade Prosthetics Last Before Deteriorating?
Unlike parchment scrolls, your foam latex prosthetics last 2-3 years with proper storage techniques in low-light conditions. For long-term durability considerations, you’ll find silicone alternatives maintain integrity longer, resisting organic breakdown that naturally degrades latex materials.
What’s the Best Way to Store Finished Prosthetics Between Uses?
Store finished prosthetics in labeled, stackable bins within climate-controlled spaces below 75°F. Proper storage conditions require complete drying pre-storage and separation by material type. Maintenance considerations include periodic inspection for degradation and using foam supports for dimensional stability.
Are There Hypoallergenic Alternatives for People With Latex Allergies?
Yes, you’ll find hypoallergenic materials like professional-grade silicone, neoprene ears, and gelatin prosthetics work perfectly. Use latex free adhesives including spirit gum, pros-aide, cabopatch, and Ben Nye formulations for safe, reliable application without allergic reactions.
Can You Paint Prosthetics Before Application or Only After Attachment?
You’ll revolutionize your workflow by choosing either method! Prepaint detailed designs with PAX mixtures, then cure prosthetics completely for 15 minutes between coats. Alternatively, you can paint post-attachment using Ben Nye or water-based products for seamless blending.