Master Baby Yoda cosplay by crafting elongated ears from green craft foam with fold-over tips and rolled edges, then constructing a dome-shaped fleece hat using 1/2-inch dart seams. Build your faux fur jacket with hand-sewn snaps and topstitched cuffs, while creating an EVA foam head prop with bevel-cut ridges and contact cement assembly. Block your eyebrows with glue stick, outline eye sockets in white and black Paradise AQ, then stipple green layers with brown shadows. The techniques below reveal how each element transforms into screen-accurate details.
Key Takeaways
- Cut green craft foam into elongated points with fold-over material and thick cartilage ridges for signature Baby Yoda ears.
- Execute consistent 1/2-inch dart seam allowances and backstitch endpoints to create the characteristic dome-shaped green fleece hat.
- Attach faux fur cuffs by folding, sewing side seams, and lining with suiting fabric for professional sleeve finishing.
- Build EVA foam head props using 5mm foam with bevel cuts, internal support, and heat-forming over spherical formers.
- Prime skin with Mehron Prep Pro, block eyebrows with glue stick, and stipple green layers with dimensional brown shadows.
Crafting the Signature Ears With Perfect Droop and Dimension
The iconic oversized ears define Baby Yoda’s entire silhouette, and nailing their characteristic forward-slanting droop separates amateur attempts from screen-accurate recreations. Start with green craft foam cut into elongated points, adding extra material at the top for that signature fold-over effect.
Create realistic texture variation by building thick cartilage ridges along the upper edge, tapering toward the pointed tip. Roll the bottom edge upward to achieve natural-looking droop, then curve the base to match your headband’s contour. Glue light pink felt inserts one-quarter inch smaller than the outer template for depth.
Achieve perfect symmetry by positioning both ears at identical angles, splaying them slightly forward. The dimensional approach—combining rolled edges with cartilage detail—transforms flat foam into believable alien anatomy.
Building the Green Fleece Hat With Precise Dart Construction
Everything hinges on proper dart construction when transforming flat fleece into a three-dimensional hat that hugs the crown naturally. You’ll achieve professional results through intricate dart placement on both front and back hat pieces, positioning each precisely to create Baby Yoda’s characteristic dome shape. Fleece fabric properties work in your favor here—the material’s forgiving stretch accommodates minor adjustments while maintaining structure.
Execute your darts with a consistent 1/2-inch seam allowance, backstitching endpoints to prevent unraveling during wear. Align corresponding darts between pieces before assembly; mismatched placement disrupts the smooth curved silhouette you’re engineering.
The batting-reinforced ears you’ve constructed will integrate seamlessly once you’ve mastered this foundation technique, creating dimensional accuracy that elevates your cosplay beyond amateur attempts.
Assembling the Faux Fur Jacket With Enhanced Snap Closures
Start your jacket construction by folding fake fur cuff pieces in half, sewing the side seams, then attaching them right-side-together to the sleeve bottoms—this creates clean, professional-looking wrist closures.
You’ll hand-sew ten large snaps along the front opening, positioning them strategically so one side folds up completely while the other stops halfway for Baby Yoda’s signature layered look.
Since thick fur jams most machines, commit to hand-stitching the collar and front bands where fur meets fleece, using large hidden stitches that won’t show on the exterior.
Attaching Cuffs to Sleeves
Once you’ve prepared your cuff tubes, position each one at the sleeve hem with raw edges aligned and right sides facing together. Machine sew the faux fur directly to the sleeve end, ensuring even tension throughout. For thicker sherpa fabrics, switch to hand sewing on top to avoid machine stress.
Advanced Finishing Techniques:
- Topstitch upward from sleeve bottom after initial attachment to reinforce the seam and create professional-grade structure
- Line the cuff interior with suiting fabric, hand sewing it several inches inside for a polished, finished appearance
- Trim excess base fabric after securing cuff edges and allowing the fur to fold over naturally
This approach maintains Baby Yoda’s oversized proportions while removing excess fabric that could create unwanted bulk. Skip internal foam for authentic drape.
Installing Ten Snap Closures
Before installing your ten snap closures along the jacket’s front placket, reinforce both fabric layers with SF101 fusible interfacing to prevent tearing under the mechanical stress of repeated openings.
Close the placket completely, marking corresponding positions with precision before punching alignment holes through multiple layers with an awl. Press prong settings through the overlapping side’s right surface first, slip caps through from the grain side, then add sockets from the flesh side.
Position each assembly over your setting base’s divot and hammer firmly with controlled strikes. For the underlapping side, press prongs through the wrong side, centering on your transferred marks. Use pliers to compress socket-and-stud assemblies, verifying proper snap locking mechanisms engage smoothly.
Test each closure’s holding strength before proceeding with additional costume elements.
Hand-Sewing Fur Edges
Lay out your faux fur jacket pieces with the backing sides facing up, examining each edge where you’ll hand-sew seams around the collar, cuffs, and hemline. Thread your needle with quadruple-strand, waxed thread to prevent separation during stitching. Pin right-sides together while tucking protruding hairs inward, then baste with straight vertical needle pokes.
Essential hand-sewing techniques for Baby Yoda’s jacket:
- Adjusting stitch size – Lengthen stitches to 1/4-inch intervals, making trapped hair removal effortless after turning seams right-side out
- Securing stitches tightly – Finish each seam with square knots through existing holes, spacing them 1/8-inch apart for maximum edge strength
- Finishing precision – Extract trapped fibers with your needle point, then brush pile directionally for seamless appearance
Your cosplay’s professional finish relies on these controlled, deliberate movements through thick fabric layers.
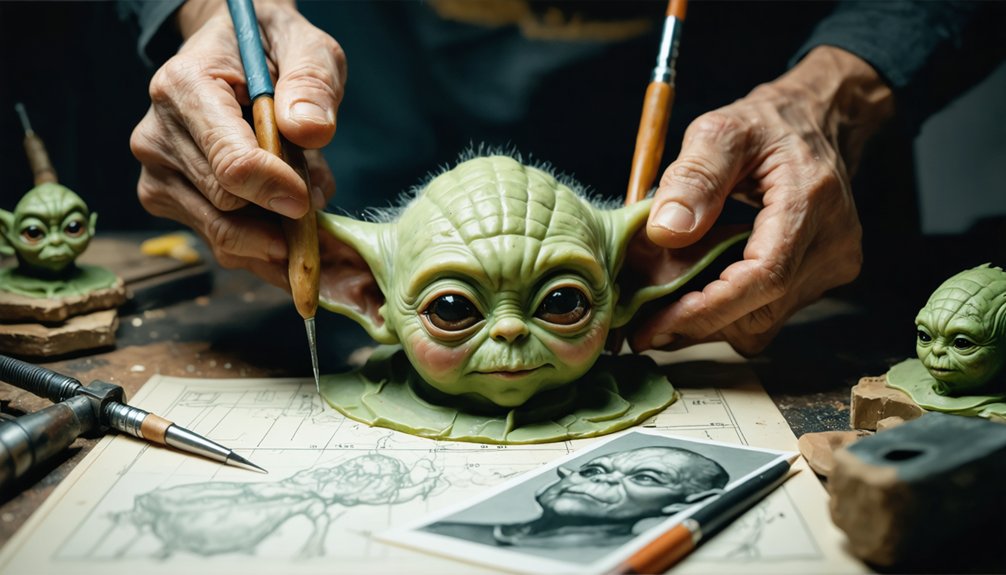
Creating an Expert-Level EVA Foam Head Prop

When building Baby Yoda’s iconic head from EVA foam, you’ll need at least 5mm thickness as your foundation—anything thinner won’t provide the structural integrity required for a prop of this scale. Foam density considerations dictate incorporating internal core support to prevent collapse during wear.
Template your pieces strategically, using bevel cuts to create seamless ridges along the skull’s characteristic contours. When optimizing heat application, use a heat gun—never a hair dryer—moving continuously to seal cell structure without scorching. Shape the warmed foam over spherical formers like ladles, overforming slightly to compensate for bounce-back. Work incrementally, cooling between heating cycles to lock each curve.
Apply contact cement with precision using foam wedges, ensuring perfect alignment to eliminate post-glue sanding. Seal surfaces thoroughly before priming with Flex Bond for paint-ready results.
Designing Expressive Eyes and Facial Features
Transforming your face into Baby Yoda’s expressive features requires meticulous skin preparation that’ll determine your makeup’s longevity throughout convention halls or photoshoots. Prime with Mehron Skin Prep Pro, then block eyebrows using Elmer’s glue stick applied with a spatula, combed through, and sealed with translucent powder layers before concealing.
Master these eye-sculpting techniques:
- Outline eye sockets with White Paradise AQ, positioning features along your nose bridge while referencing character photos
- Prime with green paint before filling outlined areas completely black using Paradise Makeup AQ, setting with black eyeshadow
- Add white details to inner eye corners and iris outlines after the black base dries
Sculpting vibrant skin tones involves stippling thin green layers, then layering dimensional shadows with browns around your face’s perimeter while highlighting with yellows for depth.
Constructing the Tan Felt Cloak With Cream Collar Details
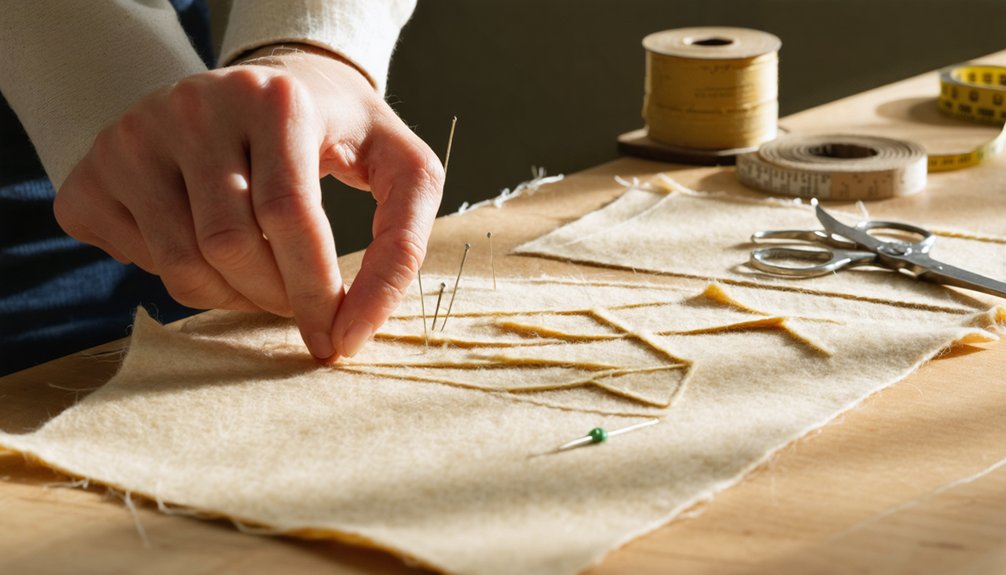
Your Baby Yoda cloak begins with selecting soft tan fleece from craft retailers like Joann’s—this fabric drapes naturally while providing the warmth and texture that defines the character’s signature garment. Trace the cloak shape around your body form, cutting two identical pieces for front-to-back assembly.
Machine-stitch the pieces together, installing Velcro strips down the center for removable closure functionality. Your fabric selection extends to cream fleece for the high-contrast collar, which you’ll attach to the neckline after overlapping front panels slightly.
Add five tube-shaped details to the straps—one at the shoulder, two front, two back—securing them with adhesive hemming tape. Complete your edge finishing by fraying strap ends and topstitching openings for authentic weathered appeal.
Adding Mandalorian Armor Accessories for Complete Authenticity
Weather parachute clips and external leather strapping for battlefield-worn realism.
Frequently Asked Questions
What Type of Thread Works Best for Sewing Green Fleece Fabric?
You’ll want 40wt polyester thread like Meadow Green #509 for ideal thread density matching fleece’s fabric weight. It provides stretch, strength, and seamless color integration while preventing puckering—essential for achieving professional cosplay construction with innovative results.
How Do You Clean and Maintain the Faux Fur Jacket?
Keep your faux fur in tip-top shape by hand-washing with cold water or using delicate cycle settings in a mesh bag. Skip fabric softener usage—instead, add white vinegar for softness. Always air-dry flat to preserve texture.
What Adhesive Should Be Used for Attaching EVA Foam Seams?
You’ll achieve ideal seam bonding using contact cement like DAP Weldwood for large surface areas, then reinforcing with hot glue along seam edges. For gaps and imperfections, apply Flexi Filler putty to create seamless, professional-grade results.
Can the Costume Be Adjusted to Fit Toddlers or Pets?
Like stretching clay to fit any mold, you’ll find adjustable sizing options through popper fastenings and elastic cuffs for toddlers. However, tailoring considerations require custom modifications for pets, as official versions don’t accommodate furry companions.
Where Can You Purchase Authentic-Looking Tan Felt for the Cloak?
You’ll find authentic tan felt at fabric retailers like Joann’s or online shops such as Etsy and Amazon. Look for felt color options ranging from camel to taupe, prioritizing felt texture with subtle fur-like characteristics for screen-accurate results.