Start with EVA foam as your foundation material, then use Pepakura software to convert 3D models into precise templates you’ll scale to your measurements. You’ll need foam-safe primers before painting, and a heat gun for shaping edges at 45-degree angles. Create depth through layered weathering—begin with dark acrylic washes in recesses, then dry-brush highlights on raised surfaces. Always work in ventilated spaces when using adhesives or heat tools. The techniques below will transform basic materials into professional-grade replicas.
Key Takeaways
- Use Pepakura software to convert 3D models into precise templates, ensuring accurate proportions and authentic character dimensions.
- Apply foam-safe primers before painting to prevent melting, then build depth through layered weathering with washes and dry-brushing.
- Create realistic battle damage by engraving with rotary tools, then dragging a soldering iron to simulate scratches and shrapnel marks.
- Combine EVA foam bases with Worbla overlays for intricate detailing that captures comic-accurate textures and embellishments.
- Heat-seal carved details to prevent delamination and reinforce stress points with hand-sewn batting cores for durable construction.
Choosing the Right Materials for Your Build
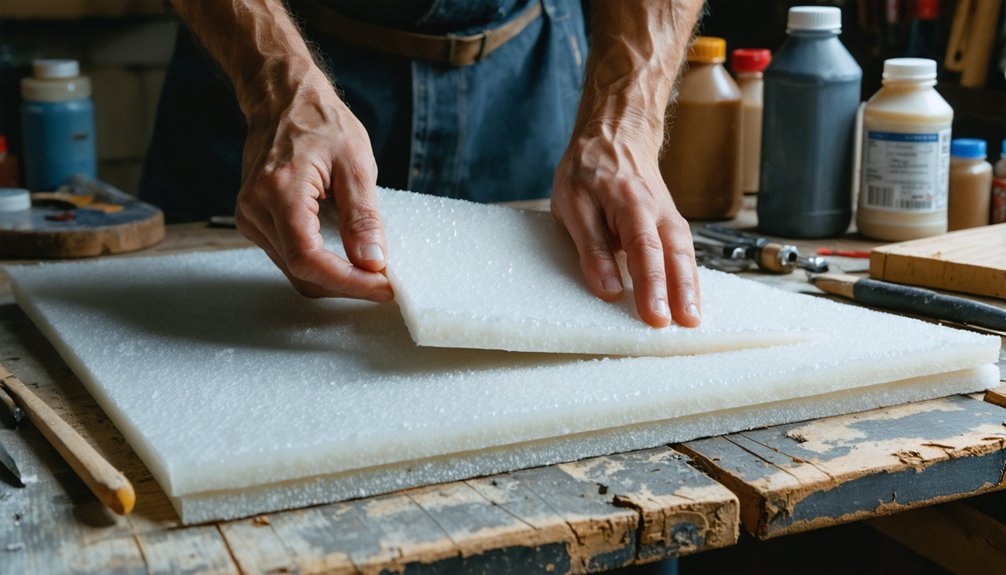
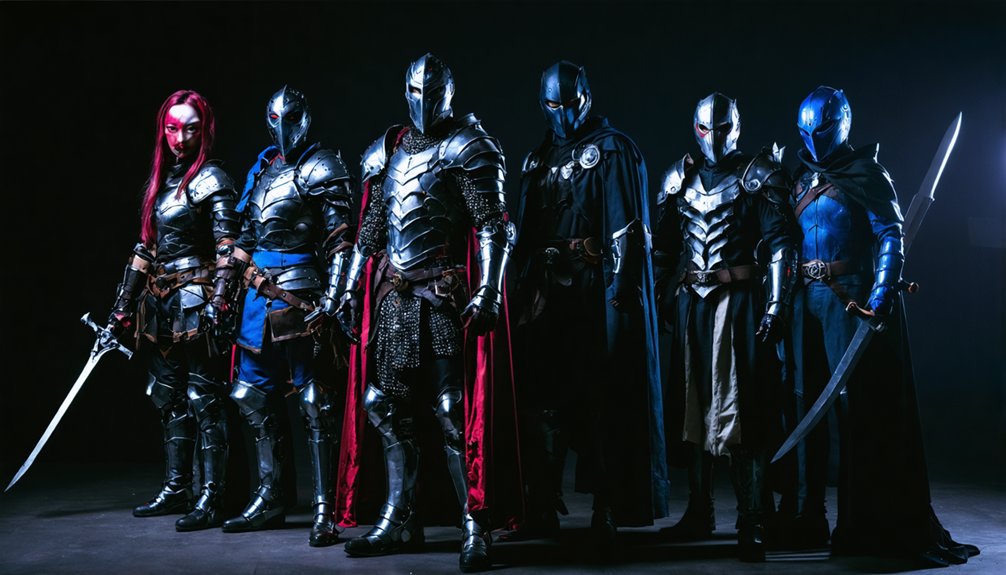
Material selection directly impacts your prop’s durability, authenticity, and construction timeline. When selecting cost effective materials, prioritize EVA foam for large-scale armor pieces—it’s lightweight, heat-formable, and remarkably affordable. You’ll achieve professional results by incorporating mixed media elements: combine foam bases with Worbla overlays for intricate detailing that mimics metal convincingly.
For costume foundations, 4-way stretch spandex offers unmatched flexibility while maintaining form integrity.
Don’t overlook unconventional resources. Anti-fatigue floor mats transform into realistic armor plating, while Bristol board enables precise templating before committing to expensive materials. Hot glue bonds foam components securely without toxic fumes. Consider textured fabrics with screenprinted patterns for authentic superhero aesthetics. Strategic resin casting produces consistent decorative elements across multiple builds, maximizing efficiency without compromising quality.
Shaping and Smoothing Your Prop Components
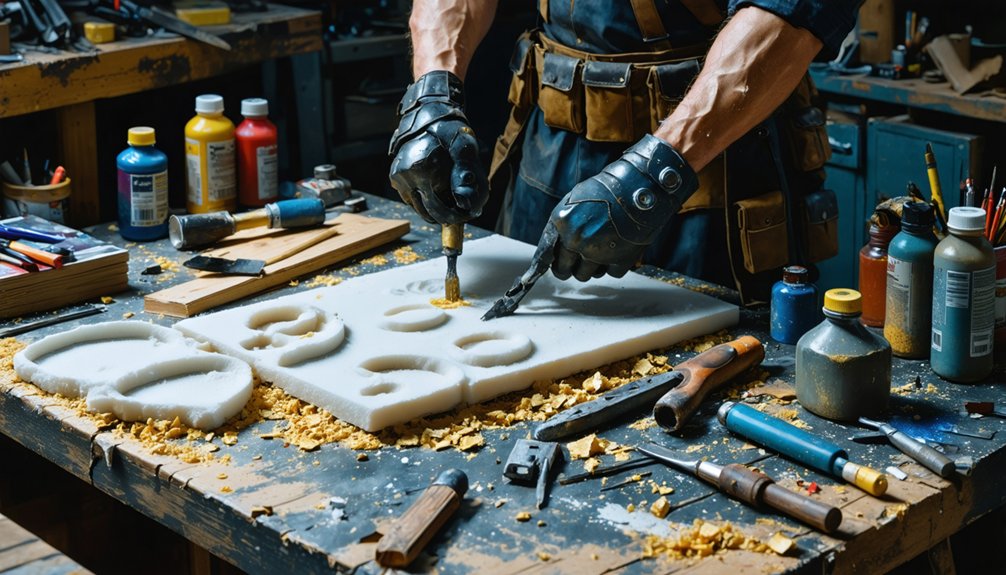
Once you’ve assembled your materials, transforming flat sheets into dimensional prop components requires precise cutting and shaping techniques. Hold your knife at a 45-degree angle for beveled edges, and use a ruler for straight cuts. For curved bevels on complex shapes, you’ll need a sharp blade and steady hand.
Heat shaping is essential—apply a heat gun to bend resistant foam before gluing, improving adhesion on thick layers. A Dremel with sanding mandrels allows detailed techniques for smoothing surfaces post-assembly, while the flexible shaft attachment reduces wrist fatigue during elaborate carving.
For structural integrity, insert PVC piping or dowel rods into thick foam weapons. Sand after gluing to bevel edges and remove excess adhesive, ensuring quality finishes that’ll elevate your prop from amateur to professional-grade.
Creating Accurate Templates and Patterns
Before cutting a single piece of foam, you’ll need accurate templates that translate your chosen character’s design into buildable patterns. Start by downloading reference images from multiple angles, then extract game files using Pepakura software to convert 3D models into unfoldable templates.
Inkscape provides free vector editing for professional blueprint creation with proportional measurements calibrated to your body dimensions.
Create a custom body form using duct tape or alginate molds for precise sizing. Scale your designs through print-to-scale methodology, ensuring Adobe Reader’s settings maintain accurate proportions. Digital pattern modifications allow real-time adjustments before material commitment.
Free PDF patterns and Etsy templates ($2.99-$29.99) offer baseline designs for customization. Always prototype first—testing reveals scaling issues and identifies refinements necessary before final construction begins.
Essential Tools for Professional-Grade Results
Your templates are ready—now you need the right equipment to transform those patterns into wearable props. Tool selection factors include material compatibility, precision requirements, and workspace constraints.
For foam manipulation, a Dremel 8220 with EZ Twist Nose Cap handles sanding and etching, while the Flexible Shaft Attachment (225) provides fingertip control for detail work. Material preparation techniques demand cutting precision: exacto knives suffice for cardboard, but scroll saws enable intricate foam cuts. Integrate a palm sander for surface finishing and needle files for edge refinement.
Digital fabrication accelerates complex builds—Ultimaker 3D printers produce dimensional props while Full Spectrum lasers cut precise patterns. PVC piping reinforces structural integrity in larger pieces. Always prioritize ventilation when sanding synthetic materials and secure proper eye protection during rotary operations.
Primer Application and Surface Preparation
You’ll need to match your primer type to your prop’s material—adhesion promoters work best for flexible urethane rubber, while foam-safe primers prevent EVA foam from melting. Before applying any primer, clean surfaces with acetone for rigid materials or isopropyl alcohol for flexible rubber to remove oils that compromise adhesion.
Sand lightly between primer coats using alternating directions to eliminate imperfections without creating grooves, which saves money on paint correction later.
Choosing the Right Primer
Selecting the correct primer transforms raw materials into paintable surfaces that won’t crack, peel, or absorb color unevenly. For EVA foam props, budget friendly primer options include white glue diluted with water or Mod Podge for smaller pieces, while Plasti Dip spray rubber offers flexibility for high-movement armor.
Professional grade primer considerations involve Flexbond or foam clay for superior adhesion. When working with urethane rubber, you’ll need Duplicolor Plastic Adhesion Promoter paired with Montana Gold, or PlaidFX Primer with PlaidFX Flexible Paints. Pure acetone serves as an alternative base layer.
Color selection matters—white primers brighten vibrant characters, black suits darker aesthetics, and zenithal priming (black base with overhead white) creates instant dimensionality for advanced costume builders seeking efficiency.
Sanding Before Primer Application
Effective pre-primer workflow:
- Deploy palm sanders on flat surfaces for consistent layer line removal while orbital sanders tackle angled sections through controlled heat fusion
- Wet sand throughout the process for sanding dust minimization and superior visibility of remaining surface flaws
- Progress to 220 grit only after layer lines nearly disappear, creating tooth for ideal primer adhesion
Complete multiple sanding iterations before primer application. Inspect surfaces thoroughly under direct lighting to identify pinholes and scratches that’ll telegraph through finished paint.
Mastering the Art of Layered Painting
Your layered painting approach determines whether your prop reads as a cheap toy or screen-accurate costume piece. Start by selecting appropriate base coat colors—silver for metallic surfaces, black for contrast-heavy weathering—then thin your acrylics with water or medium to achieve smooth, controlled application that won’t obscure surface details.
Build depth through strategic shadow placement in corners, followed by targeted weathering techniques like stippling and washes to create the lived-in authenticity that separates professional-grade props from amateur attempts.
Base Coat Color Selection
When building a costume prop’s paint scheme, start with the triad color system to identify midtone colors that you’ll shift one or two steps brighter for your base layer. This triad color harmony approach reduces your highlight workload since elevated brightness already approximates your final appearance.
Your base coat requires multiple layers to achieve opacity that conceals brush strokes. Paint translucency effects demand adequate coverage, preventing underlying imperfections from compromising your work.
Consider these strategic selections:
- Primary bright colors (green, purple) complemented by flesh tones for main character elements
- Neutral darker colors for accessories and equipment details
- Subdued tones for bases that won’t detract from focal points
Second layer application reinforces coverage and strengthens your foundation for subsequent detail work, directly influencing your prop’s professional finish.
Thinning Acrylics for Precision
After establishing solid base coverage, proper paint consistency becomes your primary concern for detail work. Start controlling paint viscosity with a 1:1 paint-to-water ratio for medium consistency, never exceeding 50% water to maintain structural integrity. You’ll preserve adhesion better by incorporating glazing medium at 75% paint to 25% medium instead. This approach protects pigment durability while maximizing transparency for layered effects.
Test mixtures on scrap material before applying to your prop. Thicker ratios enable controlled splashing techniques, while thinner mixes deliver precise line work. Add acrylic flow improver to enhance fluidity without compromising bond strength. For extended blending time, integrate retarder medium—especially valuable in warm environments. Always use primed surfaces and allow complete drying between layers to build dimensional depth effectively.
Weathering and Final Details
Because convincing weathering depends on strategic layering rather than random application, you’ll need to approach distressing as a calculated process building depth through multiple passes. Begin with acrylic washes in black or brown tones, applying darker shades into cavities while reserving lighter tones for protruding surfaces where friction naturally creates wear.
Foundation weathering techniques include:
- Alternating light and dark layers through multiple thin passes to prevent paint buildup
- Using light chipping techniques with latex applied around edges, then peeling after topcoat dries
- Creating realistic texture application by mixing Mod Podge (1/3) with dirt (2/3) for permanent crusty effects
Finish with dry-brushing highlights on raised edges and airbrush light layers strategically around high-wear zones. Test all techniques on scrap materials first, ensuring your budget-friendly methods produce professional results without material waste.
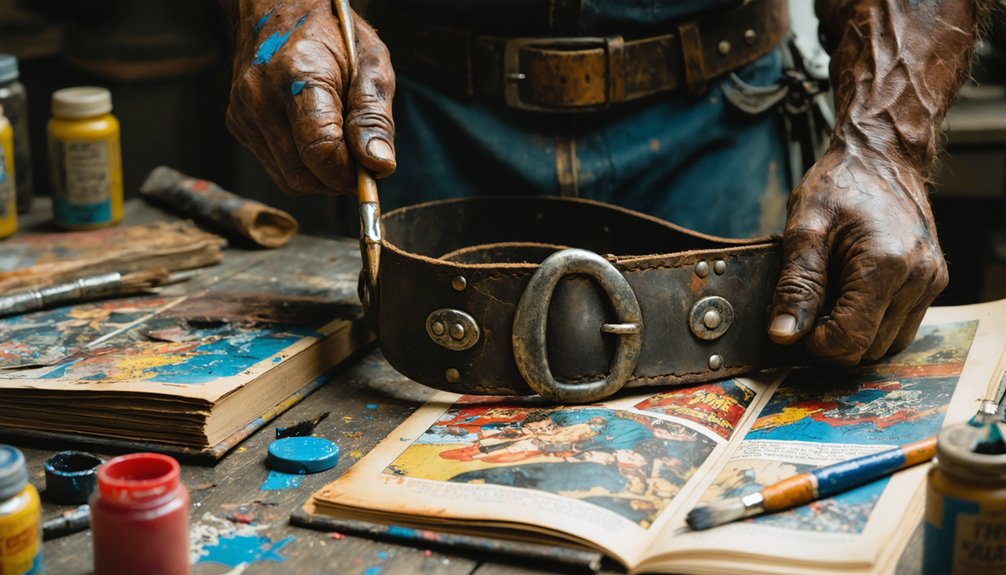
Adding Realistic Details Through Engraving
Heat treatment techniques elevate basic engraving into realistic weathering. Apply heat guns after engraving to seal and enhance cut details.
For battle damage, predetermine scarring locations with marker before creating pits using rotary tools, then drag your soldering iron from these points to simulate shrapnel scratches. Sand engraved surfaces with EZ SpeedClic bands for bevelled edges before painting.
Achieving Authentic Weathering and Aging Effects
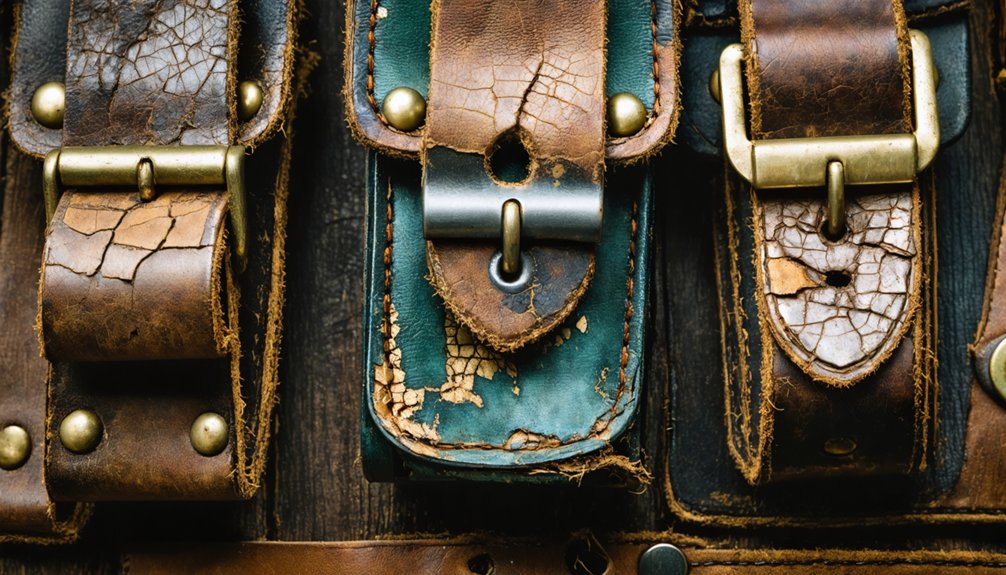
Metal components demand specialized weathering approaches that simulate years of oxidation and physical wear without expensive commercial products. You’ll create convincing rust layers by applying progressively lighter orange-brown paint over dark base coats, building depth through controlled application rather than single-step solutions.
Scuffed metal effects require strategic removal or distressing of metallic finishes at stress points where repeated contact would naturally expose underlying surfaces or create scratches.
Layered Rust and Corrosion
Authentic weathering transforms pristine costume props into battle-worn artifacts through strategic layering of rust and corrosion effects. You’ll achieve professional results by building depth through multiple paint applications—start with dark washes in crevices, then layer lighter tones on raised surfaces where natural wear occurs.
Master these blending techniques for realistic rust:
- Airbrush from 4-5 feet distance using short bursts to simulate gravity-drifted particle deposits without obvious spray patterns
- Apply oil paints into recesses and wipe lightly for superior blending and authentic corrosion streaks
- Focus darker pigmentation on high-contact zones like knees and elbows, with concentrated buildup in sweat-prone areas
The effects of chemical weathering add convincing fiber degradation when applied selectively and heat-activated through ironing, though proper ventilation and drying time remain essential.
Scuffed Metal Simulation Techniques
While rust and corrosion create depth, scuffed metal effects establish the physical history of your prop through visible wear patterns. Begin with metallic paint bases—steel, silver, or chrome—then apply dry brushing to edges where natural contact occurs. Wipe your brush repeatedly on dry surfaces to simulate gradual erosion.
For paint adhesion techniques, load brushes with larger quantities and finger-rub wet paint into high-contact zones, creating uneven distribution that prevents uniform coverage.
Powder integration methods enhance realism through iron and brass applications over wet coatings. Work in contained areas to prevent airborne contamination. Create linear scratches using toothpick-applied paint or Silver Sharpies for simplified chipping. Finish with 1000-grit sandpaper to expose underlying layers. Cross-check isolated sections against overall appearance, ensuring cohesive aging throughout your thirty-minute application process.
Assembly Techniques for Durable Construction
Breaking down your prop construction into modular components will save you time, money, and frustration during convention travel. Design threaded connections in Tinkercad using 30mm or 32mm diameters, then export to Nomad Sculpt for seamless integration into your prop bodies. This approach simplifies troubleshooting common build issues while maximizing durability through reinforcement techniques.
Modular prop design with threaded connections transforms convention travel from stressful to streamlined while reducing repair costs and assembly headaches.
For structural integrity, layer thick foam sheets with quality adhesives, inserting cotton batting before sealing outer layers. Apply these proven methods:
- Heat-seal carved details using your heat gun to prevent foam delamination during handling
- Hand-sew reinforcement elements onto batting cores before final gluing
- Test-fit all modules before adding surface textures or final finishes
Allocate extra assembly time for complex builds, adjusting strapping and fittings after complete assembly to guarantee convention-ready durability.
Finishing Touches That Bring Characters to Life
Once you’ve assembled a structurally sound prop, the finishing process transforms raw materials into screen-accurate replicas. Surface preparation determines your final quality—sand 3D prints post-priming, smooth epoxy-filled seams with silicone tools, and coat cardboard with white glue-water mix before painting. Complex finishing options include flexible shaft attachments for fingertip-controlled detailing and 2.4mm engraving cutters for EVA foam patterns.
Innovative texturing methods elevate authenticity: apply acrylic washes in recesses, dry-brush highlights on raised areas, then add Fuller’s earth for dirt accumulation. Wire brushes distress leather-like surfaces while sanding blocks create worn edges. Masking requires precision—press Tamiya vinyl tape into curves, seal edges first, and allow overnight drying between layers. Liquid chrome pens simulate metal chipping, while Rub ‘n Buff enhances weathered metallic effects cost-effectively.
Frequently Asked Questions
How Do I Safely Transport Finished Props to Conventions Without Damaging Them?
Use lightweight foam materials and strategic packing techniques with protective layering inside wheeled containers. You’ll need to select transportation methods based on prop dimensions—vehicles work best for large pieces, while disassembled props suit public transit and air travel.
What’s the Best Way to Store Costume Props Between Wearing Events?
Store props in cool, dry, dark spaces using clear bins with silica packets for atmospheric storage conditions. You’ll preserve materials through proper display techniques like acid-free wrapping and breathable bags, preventing costly damage while maintaining authenticity affordably.
How Can I Make Props Comfortable for All-Day Convention Wear?
Choose lightweight, durable materials like EVA foam and cardboard. You’ll want secure fasteners—velcro straps or elastic bands—to distribute weight evenly. Add padding at contact points, round sharp edges, and incorporate ventilation holes for safety and all-day comfort.
What Safety Regulations Should I Know Before Bringing Props to Events?
You’ll need to review event regulations before attending—they prohibit projectiles, functional weapons, and sharp objects. Take proper precautions by using foam replicas, keeping props visible during inspection, and ensuring they’re marked with security tags daily.
How Do I Repair Props That Break During a Convention?
Seek savvy solutions swiftly—you’ll find cosplay medics offering proper repair methods like contact cement for foam or hot glue for quick bonds. Master on-site troubleshooting techniques using budget-friendly supplies, avoiding risky adhesive mismatches that compromise your costume’s structural integrity.