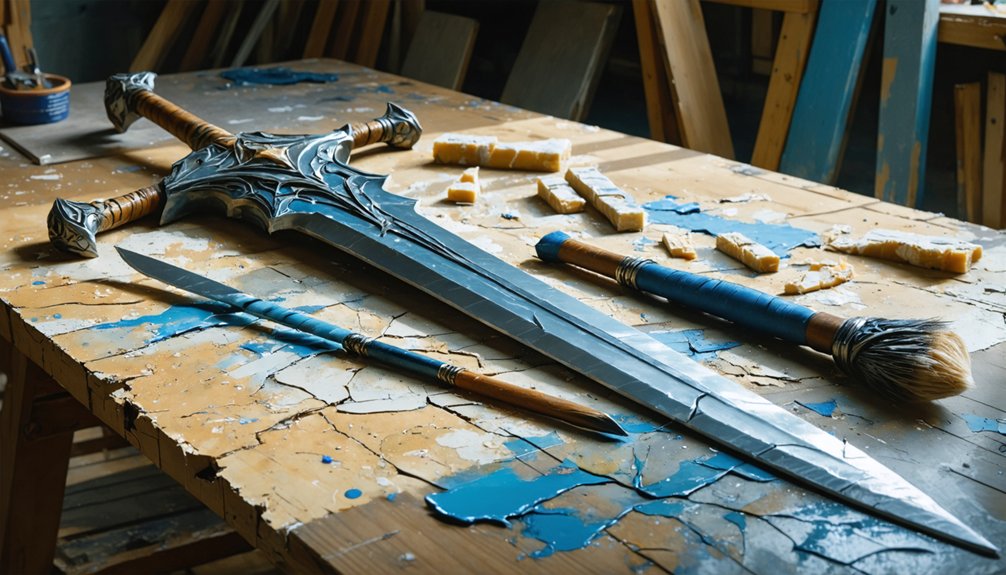
Start by selecting EVA foam for armor pieces and Worbla for intricate details, using heat guns ($10-$25) to shape them precisely. You’ll need sharp blades—exacto knives for thin foam, box cutters for thicker materials—and bevel edges at 45-degree angles for dimensional depth. Combine T-88 epoxy with super glue for durable bonds, rough-sanding surfaces first. Build realistic finishes through multiple thin paint layers, creating metallics by skimming silver paint across raised surfaces. The techniques below will transform your basic patterns into professional-grade components.
Key Takeaways
- Use beveled edges and strategic groove cutting to transform flat foam into three-dimensional shapes with professional depth and detail.
- Layer multiple thin paint coats with progressive shading techniques to create realistic metallic effects and weathered surfaces.
- Reinforce foam structures with internal PVC pipes or fiberglass rods for durability and authentic weight distribution in larger props.
- Combine materials strategically—EVA foam for lightweight armor, Worbla for intricate details, and foam clay for enhanced surface textures.
- Rough sand all surfaces before bonding and clamp firmly during curing to ensure strong, seamless connections between prop components.
Selecting the Right Materials for Your Build
Selecting the right materials transforms your cosplay prop from a flimsy costume piece into a durable, professional-looking replica. You’ll want to ponder plastic composites durability when choosing between EVA foam’s cost-effectiveness and Worbla’s heat-moldable precision.
EVA foam excels for large armor pieces, offering various densities without adding weight. Worbla’s thermoplastic properties let you create intricate details and combine scraps into foam clay-like material.
Choose EVA foam for lightweight armor builds or Worbla when your design demands heat-moldable precision and intricate surface details.
For structural support, PVC pipes provide sturdy skeletons with detachable sections using couplings. Master layering techniques for detailed textures by combining craft foam bases with specialty foams like Plastazote for carved elements.
High-density foams deliver superior results for armor, while foam board and foam clay enhance surface details. Match your material choice to your prop’s structural demands and finishing requirements.
Essential Tools Every Cosplayer Should Own
Once you’ve chosen your materials, you’ll need the right tools to transform them into finished props. Your essential toolkit should include:
- Heat gun ($10-$25) for shaping thermoplastics like Worbla and EVA foam with precision
- Rotary tool (Dremel or equivalent) for sanding, carving, and engraving intricate details
- Hot glue gun with dual temperature settings to bond materials without warping
- Precision craft knife with sharp blade refills for cutting complex patterns
Cordless models offer freedom of movement during detailed work. Invest in proper tool storage solutions to maintain blade sharpness and protect components.
Always prioritize safety precautions: ventilate your workspace when heat-forming materials, wear eye protection during rotary work, and keep blades guarded when not in use.
Cutting and Shaping Techniques for Professional Results
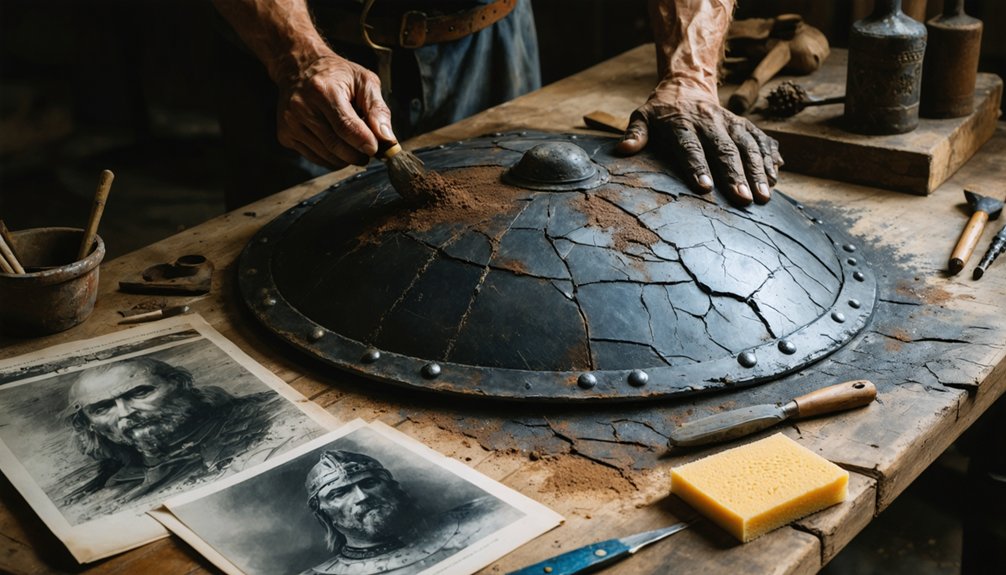
The foundation of professional-looking cosplay props depends on mastering precise cutting techniques that transform flat foam sheets into dimensional components. Sharp blades are critical—use exacto knives for 4-8mm foam and box cutters for 10mm+ materials. Replace blades frequently to minimize sanding time.
For straight cuts, trace patterns first using rulers and cutting mats. Bevel edges at 45-degree angles by piercing halfway through from both sides, creating enhanced three-dimensional shapes. Preserving foam structural integrity requires strategic groove cutting: leave 2mm at the bottom for 4mm foam, scaling proportionally for thicker materials.
Advanced techniques include dart cutting for seamless curve construction and piercing halfway for details before heat-forming. This methodical approach transforms basic patterns into professional-grade components.
Assembly Methods for Durable Props
After cutting and shaping your foam components, proper adhesive selection determines whether your prop withstands convention wear or falls apart mid-photoshoot. Combining T-88 epoxy with fast-set super glue creates superior bonds on thin sections. Heat epoxy gently with a hair dryer to enhance flow before application.
Follow these critical steps for clean adhesive application:
- Rough sand surfaces with 120-grit sandpaper before bonding
- Apply thin epoxy layers, leaving 1.5cm edges uncoated for super glue
- Clamp firmly during curing to prevent alignment shifts
- Allow 24-hour hardening after initial super glue sets
Insert PVC pipe or fiberglass rods into foam cores for rigidity—cut channels with a Dremel before assembly. For 3D prints, apply body filler to seams post-assembly. Maintain optimal glue storage conditions between projects to sustain consistent performance.
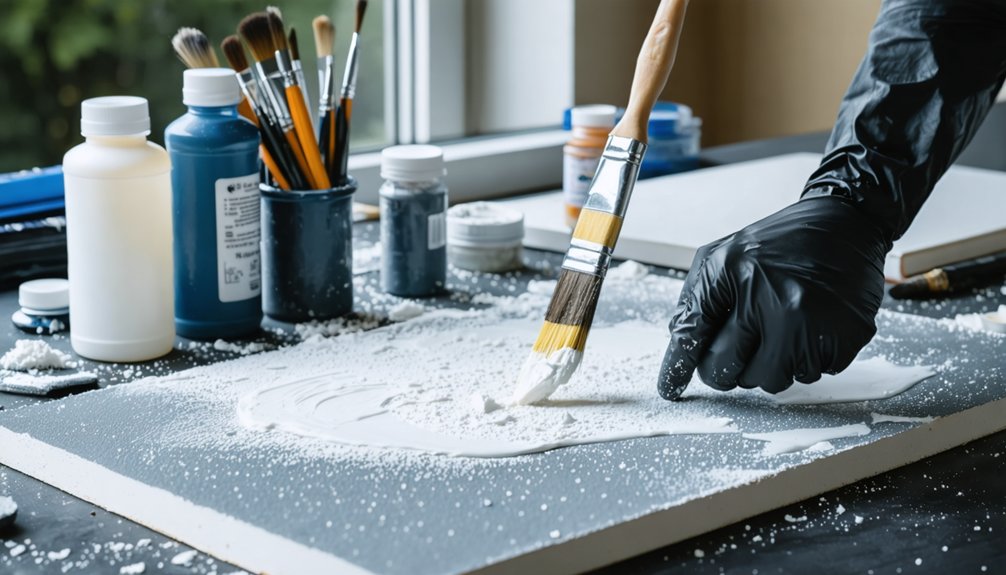
Priming Your Props for Paint Adhesion
Proper surface preparation transforms adhesion failures into durable finishes that survive handling, transportation, and performance wear. Sand your 3D-printed props with 120-grit sandpaper to eliminate layer lines, then clean thoroughly with soap and water. Choosing the right primer depends on your base material—Rustoleum Filler Primer excels at filling gaps, while acrylic primers create micro-textured surfaces for superior paint grip.
Proper priming techniques require patience and precision. Swirl spray cans for 2-3 minutes without shaking to prevent bubbles. Apply thin coats from 8-10 inches using smooth, overlapping strokes. You’ll need 2-4 coats with 15-30 minutes drying time between applications. Sand with 240-grit paper after each dried coat to refine the surface. Allow overnight curing for ideal adhesion before painting.
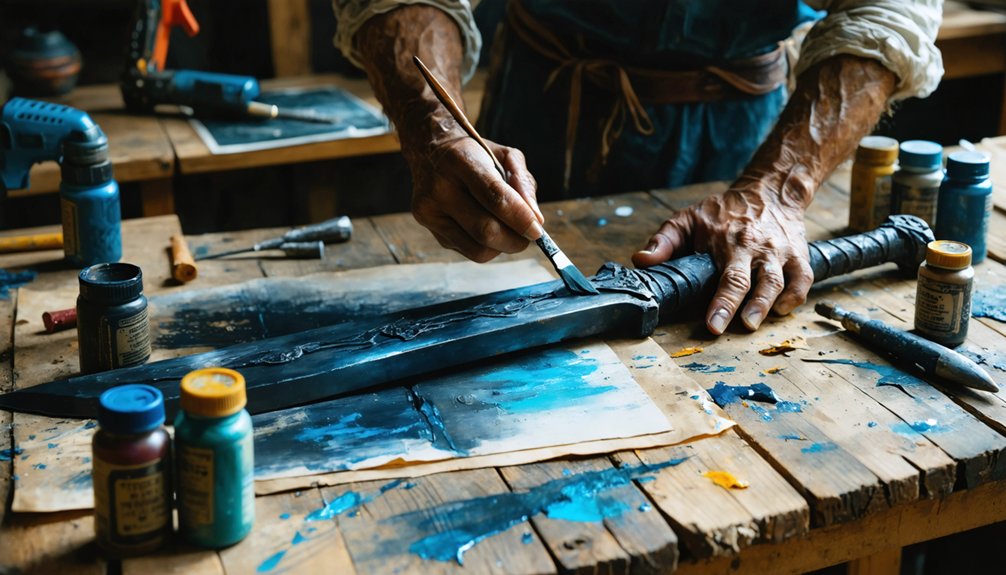
Painting Techniques for Realistic Finishes
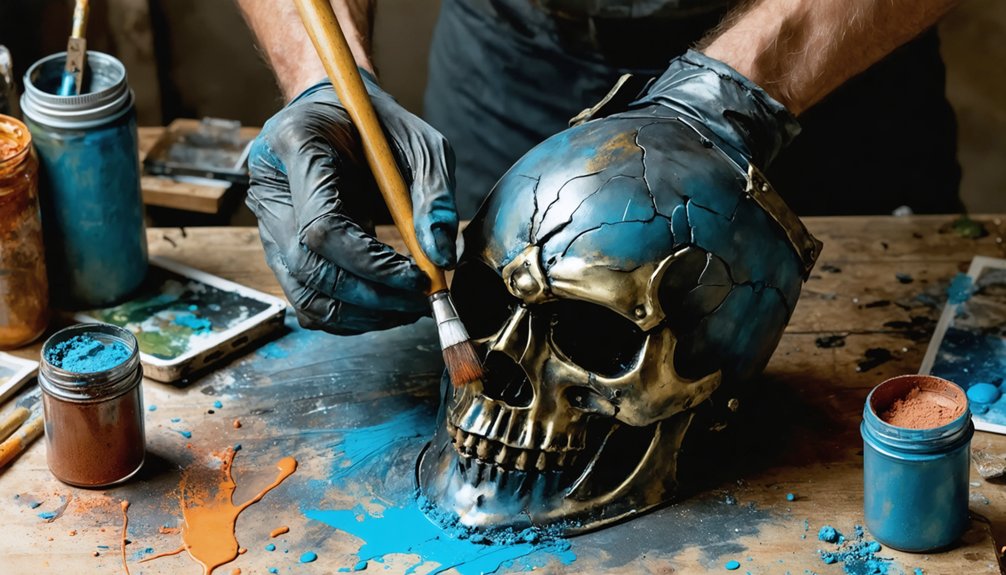
How can you transform a flat, lifeless prop into something that appears battle-worn, authentically metallic, or convincingly ancient? Master these mixed media techniques to achieve distressed surface finishes:
- Build dimensional depth through multiple thin base coats, progressively darkening shadows and lightening highlights to simulate natural light interaction
- Create authentic metallics by skimming foam scrap dipped in silver paint across raised surfaces, exposing underlying “metal” where realistic wear occurs
- Develop convincing corrosion using alternating rust tones applied with dabbing motions, followed by 1:1 paint-to-water washes for aged patina
- Add custom details through masking tape stencils, pre-treated to prevent paint pull
Seal finished work with matte protective coatings like Mod Podge Ultra to preserve your hand-painted details through convention handling and transport.
Adding Weathering and Battle-Worn Effects
Weathering transforms pristine props into battle-tested equipment through strategic application of wear patterns and environmental effects. You’ll achieve authentic damage by dry brushing metallic highlights onto raised edges, creating physical texture for scratches and dents, then layering dirt and grime in areas where debris naturally accumulates.
Master these three techniques to build depth progressively—starting with structural damage, adding metallic wear, and finishing with environmental weathering that reflects your character’s combat history.
Dry Brushing Metallic Highlights
Metallic highlights transform flat props into battle-worn replicas when you apply them through controlled dry brushing techniques. Start with flat black spray paint as your basecoat, then progress through darker metallics before adding brighter highlights. Your brush maintenance matters—wipe excess paint on paper towels until minimal color transfers, testing on your knuckle before application.
Essential Application Steps:
- Load your brush lightly with Liquitex Heavy Body Acrylics or Rub ‘n Buff
- Focus on edges and raised surfaces where natural wear occurs
- Build layers progressively—dark metallic first, then lighter tones on light-exposed areas
- Avoid over-application in recesses to preserve shadow depth
Specialized Dry Brush Paints from Green Stuff World eliminate mixing paint mediums concerns. Seal finished props with Tester’s Metalizer for durability without compromising your weathered aesthetic.
Creating Scratches and Dents
Battle damage tells your prop’s story through strategically placed scratches, dents, and surface distress that mirror real-world wear patterns. Focus your sanding tools on high-impact zones—armor edges, angles, and contact points—where friction naturally occurs. Multiple passes reveal underlying primer layers, mimicking natural wear through building up layers of progressive damage.
For dimensional dents, heat-form thermoplastic materials or strategically compress foam before sealing. Salt crystal pre-weathering creates authentic chip patterns; apply crystals before painting, then dissolve and brush away after curing. Concentrate distressing on lower sections (shins, knees, feet) where battlefield contact intensifies. Wire brushes and files generate varied scratch depths, while controlled sanding exposes “metal” substrates. This graduated approach to building up layers guarantees your weathering reflects authentic combat history rather than random surface abuse.
Applying Dirt and Grime
Authentic dirt and grime accumulation transforms pristine props into battle-tested equipment through controlled layering of translucent washes, pigments, and textured compounds. You’ll achieve superior powder application realism by grinding chalk to match environmental tones, then sealing the particles after gravitational settling.
For permanent weathering, mix dirt powder with Mod Podge at a 2:3 ratio and apply with disposable brushes.
Strategic placement maximizes authenticity:
- Concentrate weathering on lower armor sections (shins, knees, feet)
- Apply oil-based pigments to simulate dust accumulation in recesses
- Execute mud splattering techniques from bottom-up for realistic spray patterns
- Layer transparent acrylic washes (50/50 water-to-paint ratio) in beveled areas
Position spray applications 4-5 feet away, using short bursts to drift particles onto high points and plate junctions where natural wear occurs.
Final Details That Bring Props to Life
After you’ve assembled your prop’s basic structure, the finishing process separates amateur builds from professional-looking replicas. Strategic detailing transforms painted surfaces into authentic character pieces.
Start by adding decals, emblems, and small accessories that match your character’s design specifications. Incorporating lighting elements elevates static props—LEDs embedded within transparent sections create functional weapons or power cores.
Customizing surfaces for texture requires specialized paints: apply Imperiflex or Alumaluster for high-gloss metallic finishes on urethane rubber components, or use specific formulations to guarantee simulation of materials like rusted iron and shining glass. Multi-color brush techniques add dimensional realism that flat coats can’t achieve.
Consider material properties when attaching flexible elements to costumes post-painting—this confirms secure integration without compromising finish integrity. Faux metal accents and battle damage effects complete the transformation from replica to screen-accurate prop.
Frequently Asked Questions
How Do I Transport Large Props to Conventions Without Damage?
You’ll protect large props by using proper storage methods like padded bins and modular designs. Follow transportation tips including extensive wrapping, sturdy crates, and shipping ahead to your convention hotel. Consider wheeled containers with TSA locks for maximum security.
What Safety Equipment Should I Wear When Working With These Materials?
Like a knight donning armor before battle, you’ll need respiratory protection for toxic fumes, eye protection against flying debris, and work gloves—disposable for chemicals, cut-resistant for blades, heat-resistant for thermal tools.
How Much Does It Typically Cost to Build a Full Prop Set?
Your full prop set’s cost depends on material selection and budget planning, ranging from $100-$500 for DIY beginner builds to $500-$1,000 for convention-ready pieces, or exceeding $5,000 for professional-grade commissioned sets with advanced materials.
How Long Does a Complete Prop Project Usually Take From Start to Finish?
You’ll need 1-2 weeks for simple props, but complex builds take 6-12 months. Material selection and prototype development occur first, followed by construction, hardening, detailing, and painting—each stage requiring precise technique and proper safety protocols.
Can I Make Props Waterproof for Outdoor Photoshoots or Rainy Conventions?
Let props weather any storm—you’ll achieve waterproofing through strategic weatherproofing techniques like urethane coatings and Plasti Dip sealants. When working with waterproof materials, prioritize EVA foam with flexible primers or invest in silicone for premium moisture resistance.