You’ll need to master three essential elements: shoot RAW at ISO 400-800 with shutter speeds between 1/250-1/1000 seconds to freeze dynamic poses, position strobes at 45-degree angles with diffusers to soften harsh shadows, and apply rule-of-thirds composition while adjusting camera height to match your character’s stature. Always secure explicit consent before shooting, research character-specific poses from source materials, and test your exposure settings immediately upon arrival. The techniques below will transform your convention floor captures into professional-grade portfolio pieces.
Key Takeaways
- Use ISO 400-800 indoors and 200-400 outdoors with shutter speeds of 1/250-1/1000 seconds for sharp, dynamic poses.
- Shoot during golden hour or in shaded areas with diffused lighting to create flattering, professional-looking cosplay photographs.
- Position subjects along rule-of-thirds lines and adjust camera angles to enhance character presence and storytelling impact.
- Research character references beforehand to capture authentic poses, expressions, and signature details from source materials.
- Always request permission before photographing cosplayers and maintain respectful boundaries while navigating convention spaces.
Master Your Camera Settings and Equipment
Mastering your camera settings separates amateur snapshots from professional-grade cosplay photography. Start with ISO 400-800 indoors, dropping to 200-400 for outdoor daylight scenarios. Deploy shutter speeds of 1/250-1/1000 seconds to freeze dynamic poses, while low-light stages demand 1/60 second at fully open apertures (f/1.4-f/2.8). Leverage aperture priority mode for automatic exposure compensation as lighting conditions shift.
Understand equipment compatibility before conventions—whether you’re wielding a Canon 6D with 50mm f/1.2 glass or your phone’s rear camera, shoot RAW format for maximum post-production flexibility. Master file organization protocols immediately; chaotic image management destroys workflow efficiency.
Set custom white balance using gray cards, though RAW capture permits post-correction. Execute test shots upon arrival to verify your configuration matches ambient conditions. Budget constraints shouldn’t deter you—borrowed gear yields professional results when settings are properly dialed.
Understand Lighting Techniques for Dynamic Shots
While equipment mastery establishes your technical foundation, lighting execution determines whether your cosplay shots achieve professional impact or fall flat. Natural light exposure works ideally in shaded areas during sunny conditions, where even distribution eliminates harsh contrast. Golden hour and overcast skies deliver universally flattering illumination, while convention skylight windows provide excellent ambient opportunities.
Artificial light control demands strategic placement—sandwich your subject between two strobes at 45-degree angles for dimensional coverage. Employ shoot-through umbrellas and diffusers to soften output, avoiding direct on-camera flash that produces flat results. Bounce techniques off ceilings create sophisticated top-down illumination.
Advanced setups incorporate grids for focused beams and colored gels for thematic enhancement. Experiment with exposure balance and multiple flash configurations to illuminate both subject and background atmospherically.
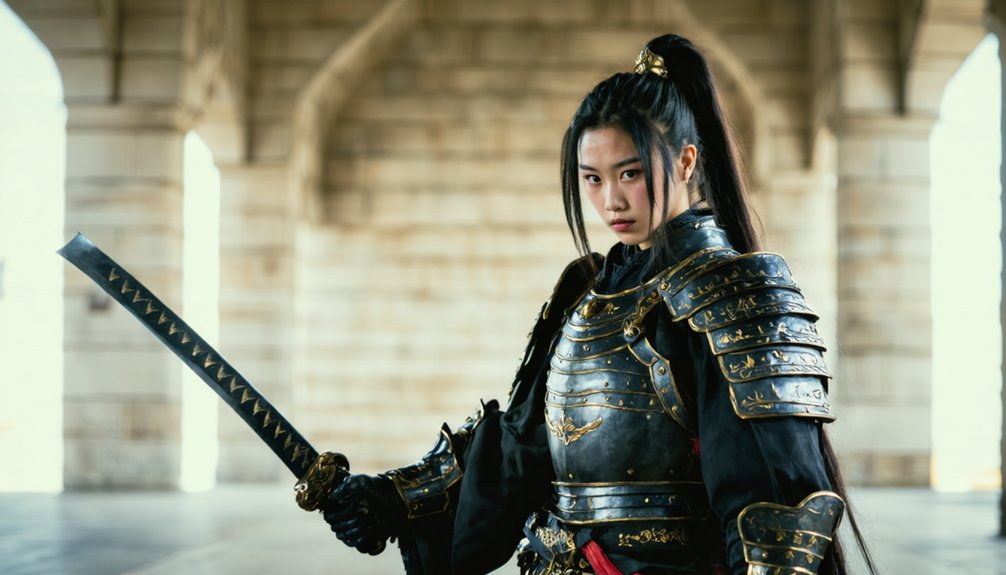
Perfect Your Angles and Perspectives
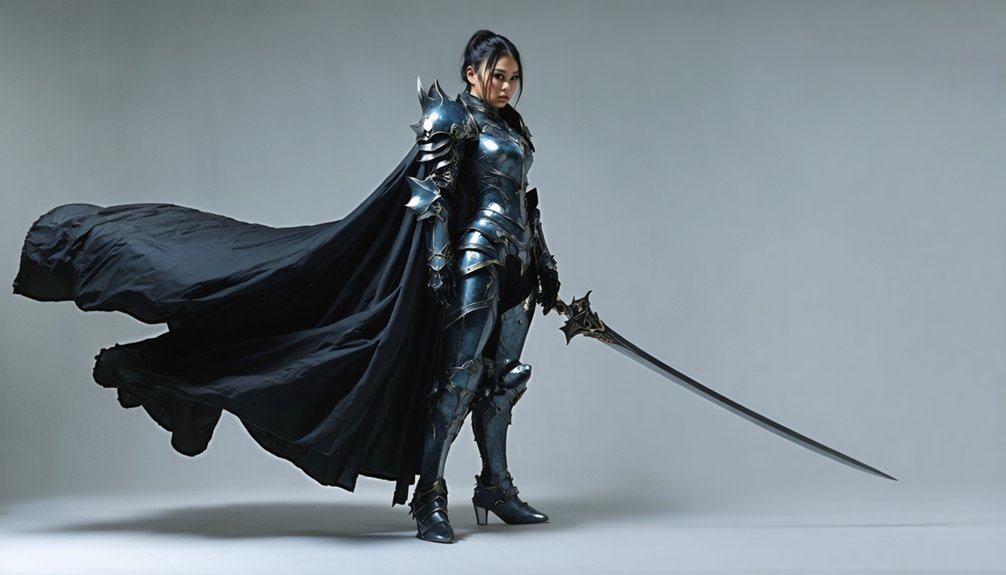
Once lighting establishes your exposure parameters, angular positioning separates compelling character portrayal from pedestrian documentation. Strategic camera positioning transforms shorter cosplayers into towering characters through upward angles that enhance perceived height and presence.
Conversely, elevated perspectives diminish subjects for dramatic narrative impact.
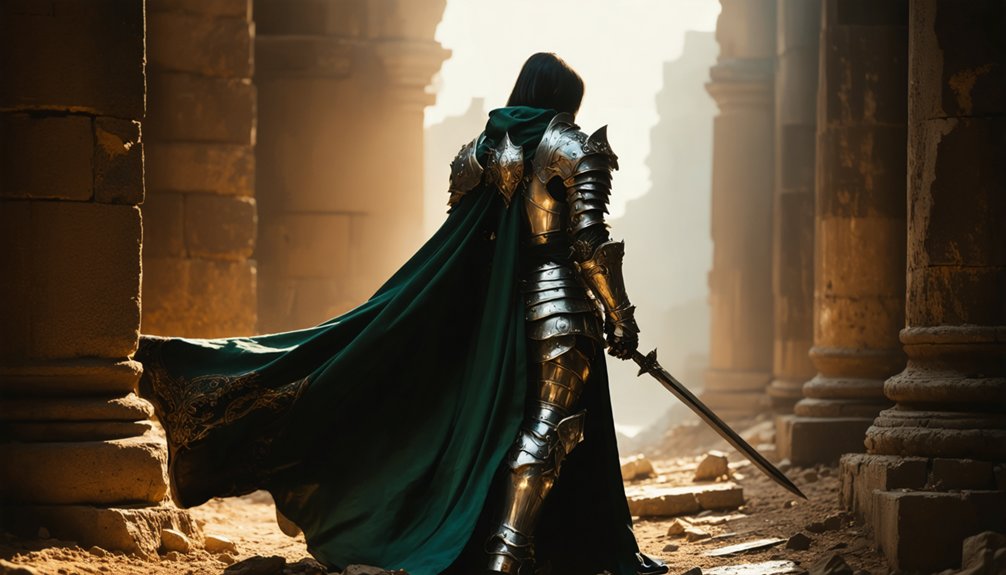
Apply rule of thirds by positioning your subject along vertical lines rather than centering—place focal points at grid intersections to guide viewer attention through composition. Environmental framing leverages architectural elements as leading lines that create depth and movement. Walls, staircases, and structural curves direct eyes through your narrative layers.
Manage perspective deliberately: wide apertures blur backgrounds to isolate foreground subjects, while perceived distance between characters constructs story dynamics. Execute multiple angles from single locations to maximize varied looks. Prevent common errors by visualizing headroom rectangles and allocating proper spacing below feet in full-body compositions.
Research and Prepare Before the Shoot
Before you arrive on set, you’ll need to build a detailed visual reference library that includes character-specific poses, expressions, and signature gestures from the source material.
Run test shots in similar lighting conditions to establish your baseline camera settings—ISO, aperture, and shutter speed—so you’re not troubleshooting exposure during the shoot.
This prep work eliminates technical guesswork and lets you focus on capturing the character’s essence when the cosplayer’s in front of your lens.
Study Character Visual Details
Successful cosplay photography starts with detailed character analysis. You’ll need to deconstruct signature colors, iconic accessories, and facial features from source materials. Study reference images thoroughly—examine clothing layers, armor weathering, fabric gradients, and even concealed elements like undergarments.
Source text challenges include translating hyper sexualized depictions and exaggerated proportions into realistic dimensional forms.
Focus on character-defining elements: precise wig styling adapted to facial structure, colored contacts for authentic gaze replication, and makeup contouring that mimics unique anatomical features. Document every angle—front, sides, and back views matter equally. Utilize hashtags like #cosplaydetails to analyze successful interpretations.
This technical preparation enables you to anticipate lighting requirements, pose dynamics, and compositional strategies that’ll honor the character’s essence while pushing creative boundaries in your photographic execution.
Organize Reference Image Library
After identifying every character-defining element through visual analysis, you’ll need a methodical approach to storing these references for shoot-day access. Utilize organizational software to create distinct folder hierarchies—separate personal captures from internet-sourced inspiration to prevent confusion during pre-shoot planning. Establish a “NET” designation for inspirational content not intended for direct replication.
Categorize by subject matter using character-specific subdirectories containing promotional artwork, concept art, in-game screenshots, and permitted fan interpretations. Prioritize high-resolution files enabling detailed examination of costume textures and pose mechanics. Leverage dedicated cosplay reference sites like Cosplay Reference Library as your centralized hub, eliminating redundant searching across fragmented sources. This systematic architecture guarantees rapid reference retrieval during location shoots, allowing real-time pose adjustments and photographer communication without workflow interruption.
Test Camera Settings Early
Once you’ve cataloged your character references, technical verification becomes paramount—hundreds of frames become unusable when mismatched settings collide with environmental realities. Execute test shots immediately upon arrival to achieve instant exposure verification before committing to your primary sequence.
Deploy shutter speeds strategically: 1/250–1/1000 seconds freeze dynamic movement, while dealer halls demand 1/30 second paired with 1/8 flash power at 15-foot distances. Configure ISO 400-800 indoors, dropping to 200-400 for outdoor sessions. Implement aperture priority mode with f/1.8–f/2.8 for background separation and low-light adaptation.
Custom white balance using gray cards prevents skin tone contamination from vibrant costume elements. Confirmed gear settings eliminate reshoot scenarios—check your LCD panel after each test sequence, adjusting brightness and contrast parameters before full production begins.
Practice Proper Convention Etiquette
Convention photography demands strict adherence to community standards that protect both photographers and subjects. You’ll maintain spatial awareness by avoiding corridor bottlenecks, vendor booth obstructions, and panel doorways during shoots. Request explicit consent before capturing images, and secure social media handles when planning digital distribution. You must respect personal boundaries—never initiate physical contact with costumes, props, or cosplayers without prior authorization.
Implement harassment-prevention protocols by recognizing that cosplay doesn’t constitute consent. Distinguish between character portrayal and reality when interacting with subjects. Document parental permissions for minor participants.
Execute proper crowd management by preventing prop collisions and costume damage in high-density areas. Report violations through established convention channels. Your technical expertise means nothing if you’re compromising community safety standards or creating hostile documentation environments.
Direct Poses That Capture Character Essence
Before directing any cosplay shoot, you’ll need to review the character’s canonical poses, expressions, and mannerisms from their source material—whether that’s manga panels, game cutscenes, or animated sequences.
During the session, use precise terminology when requesting adjustments: specify which shoulder to drop, how much to rotate the torso, or where to shift weight distribution rather than offering vague direction.
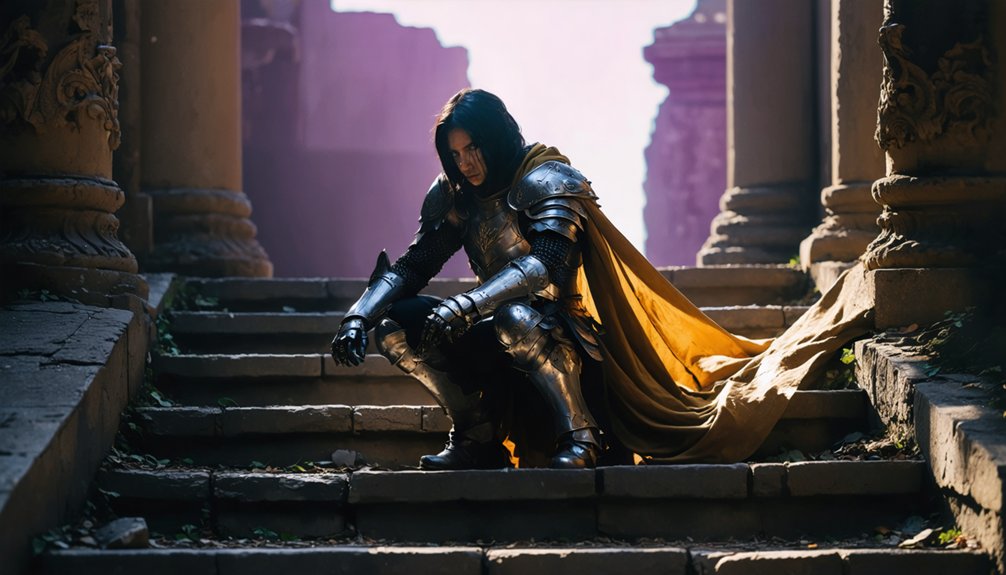
Focus your composition on capturing the character’s defining moments—their battle stance, victory pose, or emotional beats—since these iconic frames instantly communicate who they’re portraying to viewers familiar with the property.
Study Character Source Material
When you’re preparing for a cosplay shoot, studying your character’s source material determines whether your photos capture genuine essence or fall flat. Thorough reference collection requires mining official artwork, press releases, and character data sheets systematically.
Conduct detailed character analysis by identifying signature poses that recur across multiple pieces—these repetitive stances define your character’s visual identity.
Dig deeper into concept art, in-game screenshots, and event materials to uncover subtle posing nuances. Reference pivotal story moments that showcase your character’s personality through body language. Key items deserve special attention—integrating props naturally elevates authenticity.
This research phase separates mediocre cosplay photography from exceptional work. You’ll recognize which poses emphasize unique traits, whether ethereal grace or warrior aggression, translating two-dimensional references into three-dimensional performance that resonates with your audience.
Communicate Pose Adjustments Clearly
Your research transforms into actionable photography once you direct your cosplayer into positions that manifest character traits. Verbalize specific instructions rather than vague suggestions—”rotate your shoulders 45 degrees toward the left softbox” outperforms “turn a bit.” Demonstrate the pose yourself when verbal cues aren’t landing. Discuss timing of pose adjustments between shots to maintain workflow efficiency and avoid disrupting the cosplayer’s focus during active shooting.
Emphasize consent-based guidance before physical corrections occur. State your intention—”I’d like to adjust your hand placement on the prop”—and wait for acknowledgment. When poses require awkward positioning, explain the compositional purpose so your subject understands the creative rationale. This transparency builds trust and yields authentic character embodiment. Brief holds during balance-intensive poses prevent motion blur while respecting physical limitations.
Capture Signature Character Moments
Every successful cosplay photograph hinges on translating a character’s defining visual language into frozen frames. You’ll need to master their signature gestures—whether that’s L’s slouched posture or a spell-casting hand configuration—while maintaining technical fundamentals like proper body angling and lighting alignment. Study your character’s canonical moments: their emotive expressions during pivotal scenes, their combat-ready or contemplative stances, their characteristic head tilts and hand placements.
Execute these dynamic stances by combining movement with strategic freezing. Shift through slow-motion sequences that build toward the character’s iconic pose, then hold breath briefly for sharp capture. Position yourself at three-quarters angles while incorporating character-specific modifications—aggressive forward-facing for intimidating personalities, or asymmetrical positioning for mysterious archetypes. Your goal: achieve instant character recognition through deliberately composed visual markers that transcend mere costume accuracy.
Create a Comfortable Shooting Environment
Before you fire a single frame, location assessment determines whether your cosplay shoot succeeds or fails. Scout multiple room options within your venue, evaluating natural lighting opportunities through window placement and environmental diffusion. Prioritize spaces without visual clutter that detracts from costume focus.
Location scouting isn’t optional—it’s the foundation that separates amateur snapshots from professional cosplay photography.
When you work with subjects, establish clear communication about positioning and movement constraints before initiating capture sequences.
Maintain safety protocols by securing equipment, managing cable runs, and ensuring adequate ventilation when operating continuous lighting systems. Position LED panels or softboxes to create even illumination without generating excessive heat.
For outdoor sessions, analyze how sunlight hits your subject and adjust orientation accordingly. Implement shadow positioning strategies when direct light produces unflattering contrast. Your preparation directly impacts model comfort, which translates to authentic character portrayal and superior image quality.
Build Your Reference Library and Test Regularly
Successful cosplay photography demands extensive visual documentation that extends beyond casual image searches. You’ll need systematic organization across platforms—Pinterest boards for character-specific angles, Instagram saved folders for spontaneous discoveries, and dedicated repositories like Cosplay Reference Library.
Selecting quality references requires prioritizing clear, multi-angle shots with natural lighting that reveal accurate colors without post-production distortion. Behind-the-scenes production photos often provide superior costume detail analysis compared to promotional materials.
Essential reference library practices:
- Break down costumes element-by-element, analyzing fabrics sequentially until complete accuracy
- Compile promotional artwork specifically for communicating desired shots with photographers
- Practice referenced poses pre-shoot to streamline execution and direction
- Update collections continuously with community-sourced contributions
Verifying reference accuracy through methodical testing guarantees your photoshoot preparation translates into professional results without wasting valuable shooting time.
Frequently Asked Questions
How Do I Handle Photo Editing and Post-Processing for Cosplay Images?
You’ll streamline your cosplay editing by establishing efficient workflow processes: start with background removal, apply proper lighting techniques through dodge/burn adjustments, execute frequency separation for skin retouching, then finish with targeted color grading and strategic sharpening for professional results.
Like delivering a polished portfolio, you’ll want to share images online through cloud-based galleries with direct download links. Provide digital downloads via Dropbox, Google Drive, or WeTransfer, ensuring full-resolution files reach collaborators efficiently for their promotional needs.
Should I Watermark My Cosplay Photography and How Prominently?
Yes, watermark strategically with semi-transparent logos in lower corners for theft deterrence without compromising aesthetics. Your watermark placement should protect while maintaining visual appeal; watermark design must balance branding visibility with image integrity, particularly for portfolio-quality shots.
How Do I Price My Services for Professional Cosplay Shoots?
You’ll establish your pricing structure based on experience tier—$50-150/hour entry-level, scaling to $250-500+ for professionals. Always formalize contract agreements specifying deliverables, session duration, finished photo counts, and usage rights before accepting payment.
What Backup Equipment Should I Bring to Conventions?
You’ll need a secondary body like the GH6, multiple battery backup units (minimum 2-3 per system), and adequate storage space considerations—pack redundant fast cards plus a portable SSD for immediate on-site backup workflows during extended convention coverage.