Pulling off convincing animal character cosplay comes down to layering the right techniques in the right order. Start by cleansing and priming your skin, then match your foundation to your animal’s fur tone rather than your natural skin. Build depth with contouring, stipple sponges for fur texture, and precise liner work for nose, whiskers, and eyes. Set everything with translucent powder and setting spray for all-day durability. Keep going to master every detail.
Key Takeaways
- Match foundation shades to your animal’s fur tone, blending two or three shades to replicate realistic multi-toned fur patterns.
- Use stipple sponges and fine brushes to create hair-stroke details, layering light to dark shades for convincing fur texture.
- Sculpt a dimensional snout by highlighting the muzzle center and shading the sides with deeper contour shades.
- Choose false lashes based on your animal type—dramatic winged styles for felines, wispy lashes for deer or bunnies.
- Lock in your finished look with 2–3 layers of setting spray held 6–8 inches from your face.
Start With the Right Base for Animal Makeup
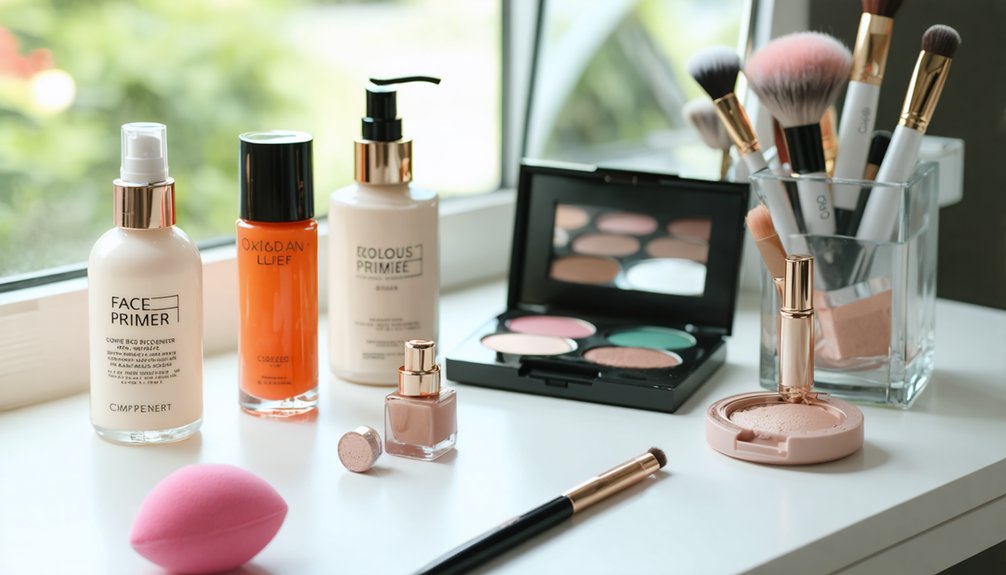
Before anything else, your skin’s condition directly affects how well animal makeup performs throughout the day. Cleanse and dry your face completely, then apply a primer or lightweight moisturizer to create a smooth, receptive surface.
Healthy, well-prepped skin is the foundation of flawless animal makeup that lasts all day.
Skipping this step compromises color blending precision and causes foundation to shift or crack under layered applications.
Match your foundation to your chosen animal’s fur tone rather than your natural skin color. This strategic choice unifies the overall design and strengthens character accuracy.
Apply a blended foundation on one side to soften transitions, then use a harder outline on the opposite side to define the animal’s shape.
Brighten the eye area with a light base shade before eyelash application to ensure the eye design reads cleanly under stage lighting or flash photography.
Pick the Right Foundation Shade for Your Animal Fur Color
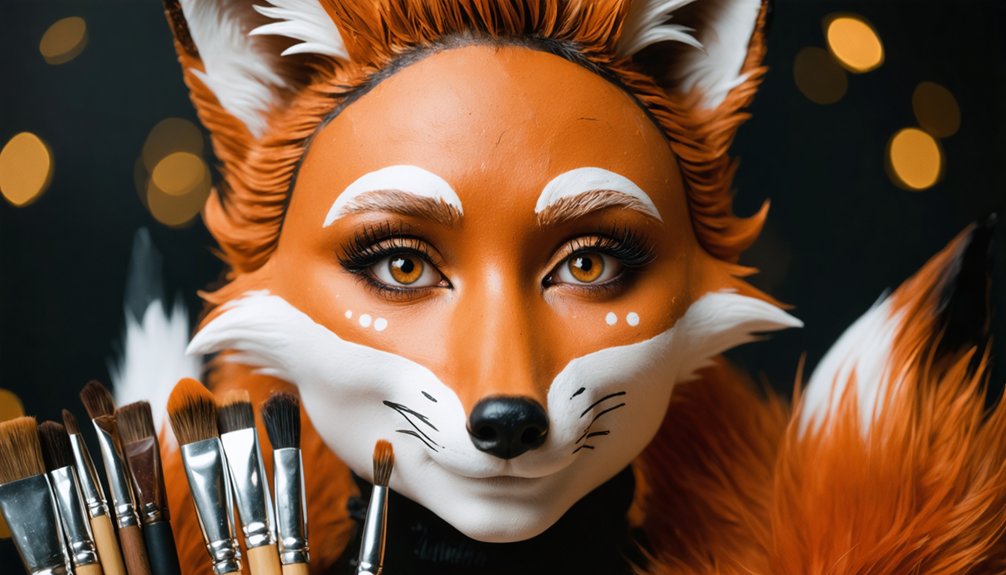
Choosing the right foundation shade starts with identifying your animal’s dominant fur color rather than defaulting to your natural skin tone. For a wolf or fox character, pull warm tawny or cool ash tones. For feline looks, amber or golden-brown shades work best.
Color blending becomes critical when your animal features a multi-toned fur pattern. Mix two or three foundation shades directly on your hand before applying, then layer them strategically across your face to mirror where natural fur transitions occur.
A darker shade on the outer face and lighter tones toward the center accurately replicates depth within a fur pattern.
Always test your blended shade against your neck and jawline under stage or event lighting to confirm accurate color accuracy before fully committing to the application.
Contour Your Face Into a Believable Animal Structure
Once your foundation base is locked in, contouring transforms a flat human face into a structured animal silhouette. Strategic shadow and highlight placement rewires your facial geometry to match your chosen creature’s proportions.
Apply these three techniques precisely:
- Sculpt the muzzle and chin using highlighter to push those areas forward, creating dimensional snout-like structure.
- Shade the outer V zones around your eyes with deeper tones to activate animal eye techniques that elongate and intensify your eye shape.
- Layer bronzer along cheekbones and temples to simulate fur pattern variations, mimicking natural shadow depth found across different animal coats.
Strong contrast between light and dark zones drives character believability. Don’t blend everything softly—defined edges sharpen the illusion and hold better under stage or event lighting.
Use Liner to Build Dramatic Animal Makeup Eyes
Liner does the heavy lifting when it comes to shaping your eyes into a convincing animal form. Start by applying white eyeliner along your waterline and beneath the lower lash line to dramatically widen the eye’s appearance. Extend black or brown liner into the inner corner to sharpen feline intensity.
For depth, pull darker liner toward the outer V while keeping inner corners bright — eye shadow blending reinforces this contrast seamlessly. Define your crease with precision to amplify character dimension.
Don’t isolate your eye work; lip color coordination ties the full look together, ensuring your chosen animal concept reads cohesively from eyes to mouth. Finish with layered mascara blended into false lashes for a polished, stage-ready result that holds its structural integrity throughout wear.
Build Realistic Animal Fur Texture With the Right Tools
To build convincing fur texture, you’ll need to layer multiple shades of the same color family, applying lighter tones first and building darker values on top to create depth and dimension.
Grab a stipple sponge to break up solid color fields into irregular, spotted patterns that mimic the natural variation of animal coats.
Once you’ve established your base texture, use a fine brush to pull hair-stroke details outward from the muzzle, brow line, and cheek edges, reinforcing the illusion of real fur growth direction.
Layering Colors For Depth
Achieving realistic animal fur texture starts with layering colors strategically rather than applying a single flat shade. Color blending and texture layering work together to simulate depth, dimension, and natural variation found in actual animal coats.
Follow this sequence for maximum impact:
- Apply your base fur color as a full-coverage foundation layer, matching your animal’s dominant tone.
- Add mid-tone shadows using hair-like brush strokes along fur direction, building dimension through color blending.
- Finish with highlight strokes on raised areas—muzzle, brow ridge, cheekbones—to complete the texture layering effect.
Use a fine detailing brush for precision strokes and a stipple sponge for broken-color progression. Dust translucent powder between layers to set each stage without muddying your color work.
Stipple Sponge Fur Effects
Three tools separate amateur animal cosplay from a convincingly textured finish—and the stipple sponge is the most important one. Unlike flat brushes, its irregular surface deposits color in broken, layered patterns that mimic actual fur structure.
For color blending across fur zones, dab—never drag—the sponge to preserve texture integrity. Apply your darkest shades first, then layer mid-tones and highlights in successive passes, building dimension without muddying the palette.
Brush selection matters equally for detail work. Use a fine, stiff-bristled brush to reinforce individual hair-like strokes around the jawline and brow edges after stippling.
This two-tool combination creates contrast between broad texture fields and precise fur lines. Finish with translucent powder to reveal the full textured effect without flattening the layered color beneath.
Hair Stroke Detailing Techniques
While stipple sponges build broad texture fields, hair stroke detailing requires a different approach—one that prioritizes control over coverage. Use a fine, stiff-bristled brush to pull thin, directional strokes through semi-dry product, mimicking natural fur growth patterns around the brows, muzzle, and jawline.
Precision improves markedly when you follow these three steps:
- Map fur direction first—strokes must follow anatomical growth lines, not random angles.
- Apply color blending between stroke layers to create depth, avoiding flat, one-dimensional results.
- Integrate texture stamping selectively to anchor stroke clusters and reinforce density where fur naturally thickens.
Build strokes in staggered layers, alternating light and dark tones. Each pass adds dimension. Rushing this stage collapses the illusion—patience and deliberate technique separate convincing fur texture from superficial pattern work.
Paint Leopard Spots, Stripes, and Animal Prints Accurately
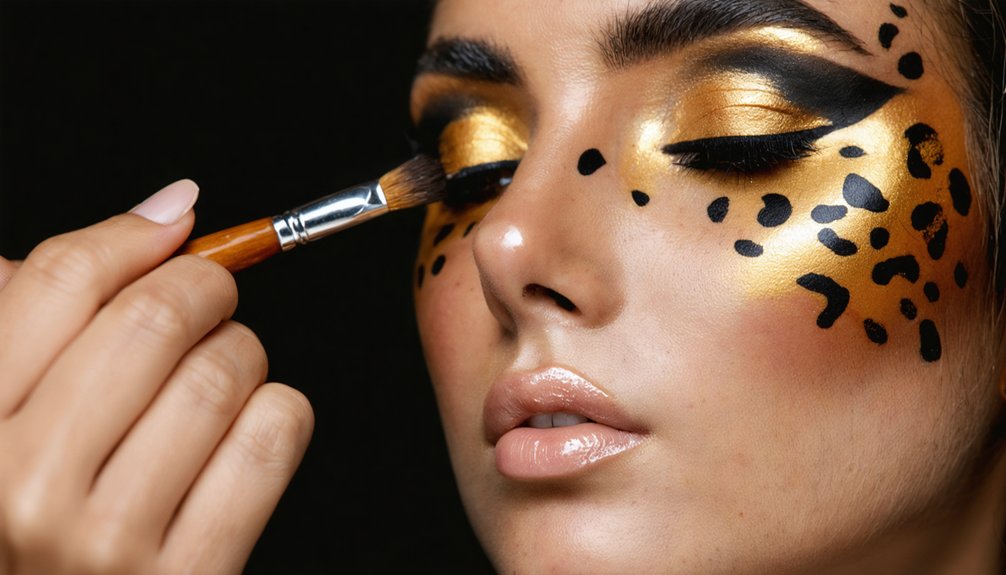
Painting animal prints accurately starts with understanding the core shapes that define each pattern. For leopard spots, you’ll build clusters of half-C shapes, rounded squares, and open circles, mimicking the irregular rosette formations studied in wildlife conservation research. Don’t scatter them randomly — actual animal behavior patterns in movement and camouflage dictate asymmetrical clustering, so replicate that intentionality.
Use a fine brush loaded with black gel liner for sharp-edged stripes on tiger-inspired looks, pulling strokes outward from a central axis. For leopard rosettes, layer a warm brown center before outlining in black.
A stipple sponge breaks up hard edges, adding organic texture. Seal each section with translucent powder to prevent smearing, then build additional contrast with a second liner pass for maximum definition.
Nail the Nose, Muzzle, and Whisker Details in Animal Makeup
To define the animal nose, use white eyeliner to outline the shape first, then fill it with black gel liner or black lipstick for sharp contrast and character accuracy.
Sculpt the muzzle by applying a lighter highlight shade to the center and contouring the surrounding area with a darker tone, pushing the muzzle structure outward for a three-dimensional effect.
Finish whiskers by dotting black eyeliner at the sides of the nose and drawing thin, outward-extending lines with a steady, light hand to keep strokes clean and convincing.
Defining The Animal Nose
The nose, muzzle, and whisker details are what anchor an animal look and separate a polished cosplay from something half-finished. Understanding animal behavior helps you replicate authentic facial structure with precision.
Follow these makeup artist tips to define the nose convincingly:
- Outline the nose shape using white eyeliner to map the muzzle boundary before filling it in with color.
- Strengthen the nose-to-lip line by drawing a clean vertical stroke downward with black gel liner, mimicking natural animal anatomy.
- Layer pink or black tones over the nose tip depending on your animal concept, then set with translucent powder for a skin-like texture.
These steps build structural accuracy directly onto your face, giving your cosplay a character-driven, technically refined finish.
Sculpting The Muzzle Area
Once you’ve defined the nose, sculpting the muzzle area gives your animal cosplay its structural depth and dimensional realism. Using targeted contouring, apply a deeper shade along the sides of the muzzle to push the center forward, mimicking the protruding structure found in cats, foxes, or wolves.
Use precise makeup brushes — a small contour brush for placement and a fluffy blending brush for seamless blending progression. Highlight the center ridge to amplify projection and contrast.
For your animal costume to read convincingly at performance distance, the muzzle’s light-and-shadow contrast must be deliberate and strong. Set contoured areas with translucent powder to prevent migration.
This structural shaping transforms a flat foundation base into a believable, character-defining facial zone that anchors every surrounding detail you’ve built.
Drawing Realistic Whiskers
- Dot placement first — use black gel liner to place three to four symmetrical dots on each side of the muzzle before drawing lines.
- Stroke outward — pull thin, slightly curved lines from each dot toward the cheeks, mimicking natural whisker growth direction.
- Layer for dimension — add a secondary white liner whisker beside each black line for realistic depth.
These techniques integrate seamlessly across diverse animal costume ideas, from feline to rodent characters, elevating your finished look with professional-grade authenticity.
Add False Lashes That Match Your Animal Makeup Character
False lashes can dramatically shift the character of your animal makeup, so you’ll want to choose a style that reinforces the creature you’re building.
For feline animal eye techniques, select dramatic, winged lashes with tapered outer corners to elongate and sharpen the eye’s silhouette.
Deer or bunny concepts benefit from wispy, flared false lash styles that emphasize roundness and softness.
Once applied, blend your natural lashes into the false ones using mascara, eliminating any visible transition line.
Layer mascara before and after application for seamless integration.
Place lashes as close to the lash line as possible to maintain precision.
A well-matched lash style doesn’t just add drama—it anchors your entire animal character, making every other makeup element read with stronger, more cohesive impact.
Set Your Animal Makeup So It Lasts All Day
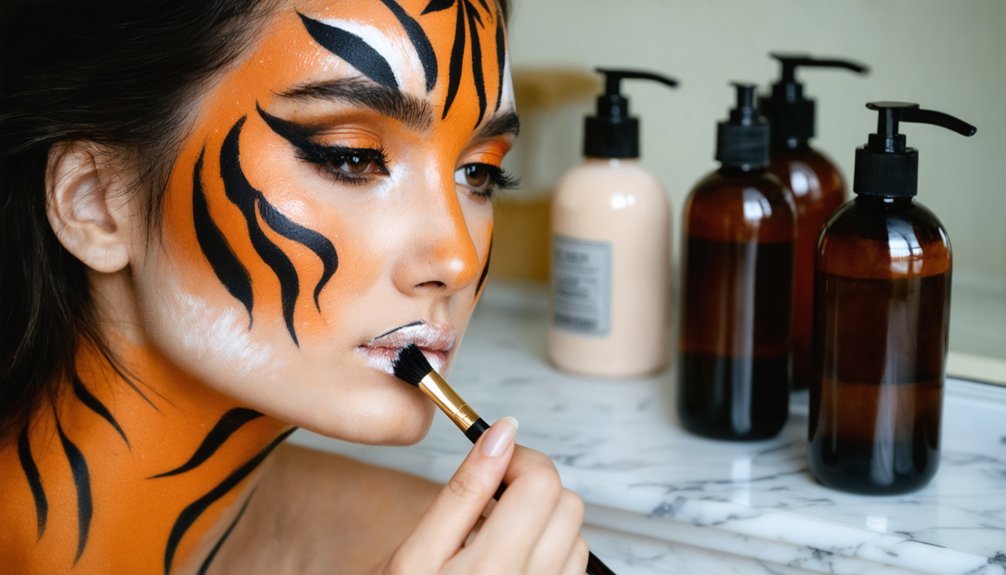
Once your animal makeup design is complete, dust a translucent or skin-toned setting powder over the entire face, paying extra attention to white-lined areas and detailed pattern work to lock pigment in place.
Use a clean, fluffy brush to press—not swipe—the powder so you don’t disturb sharp liner edges or fur-stroke details.
Finish with two to three light layers of setting spray, holding the bottle six to eight inches from your face, to seal the full look and extend wear through hours of cosplay activity.
Lock In With Powder
Setting powder is the step that separates a makeup look that lasts from one that melts, smears, or fades mid-event. After completing your color blending and texture enhancement work, locking everything down with powder preserves your design’s integrity through hours of wear.
Apply it strategically:
- Dust translucent powder over white liner areas and painted zones immediately after application to prevent transfer.
- Press powder into detailed pattern work, including fur strokes and spots, using a small puff for precise contact without disturbing lines.
- Layer lightly over high-movement zones like the mouth and eye corners where breakdown starts fastest.
Don’t skip setting spray afterward. Powder controls oil and sets pigment, but a finishing spray seals everything together, giving your animal character design a polished, stage-ready hold.
Finish With Setting Spray
After locking in your design with powder, a finishing spray is what actually bonds all the layers together into a single, durable surface. Hold the bottle 10–12 inches from your face and mist in an “X” then “T” motion to distribute coverage evenly.
This step matters especially during extended wear, where natural animal behavior like emoting, eating, or reacting physically can break down even well-set makeup. Choose a long-wear or waterproof formula for maximum hold.
Let each mist layer dry completely before applying a second pass. Strong costume coordination depends on your makeup lasting as long as your outfit does—a compromised face during performance undermines the entire character illusion.
Setting spray isn’t optional; it’s your final technical safeguard against wear, humidity, and movement.
Finish With Accessories That Complete the Animal Look
Your makeup won’t reach its full animal character potential without the right accessories to anchor the look. Even flawless contouring loses impact without structural reinforcement beyond the skin. Accessories bridge animal behavior cues with visual storytelling, completing the transformation precisely.
- Ears and headpieces — Match color and texture directly to your fur palette for cohesive character continuity.
- Tails and body attachments — Reinforce movement-based animal behavior signals that static makeup alone can’t communicate.
- Costume clothing — Coordinate fabric patterns with your spotted, striped, or solid makeup design for full-body consistency.
Maintain makeup hygiene throughout your wear time by avoiding touching face accessories against freshly set areas. Use setting spray before attaching any headgear to protect your finished design from friction disruption.
Frequently Asked Questions
Can Animal Makeup Be Applied Safely Over Sensitive or Acne-Prone Skin?
Yes, you can apply animal makeup safely on sensitive or acne-prone skin by prioritizing animal skin safety—use non-comedogenic primers, patch-test products to minimize makeup allergy risk, and always prep with a gentle moisturizer first.
How Do You Remove Heavy Animal Makeup Without Irritating Your Skin?
Use a gentle micellar water or oil-based cleanser for effective makeup removal—it breaks down heavy pigments without causing skin irritation. You’ll want to press, not rub, then follow with a hydrating, fragrance-free cleanser to restore your skin’s barrier.
Are There Budget-Friendly Product Alternatives for Professional Animal Cosplay Makeup?
Like treasure hidden in plain sight, affordable alternatives exist everywhere. You can use drugstore eyeliners, craft store face paints, and DIY solutions like homemade setting sprays to achieve professional-quality animal cosplay makeup without draining your budget.
Can Animal Makeup Techniques Work on Different Skin Tones and Undertones?
Yes, animal makeup techniques adapt across diverse skin tones by adjusting your foundation shade to match fur colors and modifying contour contrast. You’ll achieve precise makeup adaptation by selecting undertone-matched pigments that enhance your natural complexion while maintaining character definition.
How Long Does a Full Animal Character Makeup Look Typically Take to Complete?
You’ll invest one to three hours crafting your transformation, depending on complexity. Intricate fur textures and patterns demand precision. Prioritize makeup durability with setting spray, and finalize costume accessories last to protect your finished artistry.
References
- https://starstruckpanda.com/makeup-tips-for-creating-animal-characters/
- https://www.snapchat.com/topic/easy-animal-makeup
- https://www.youtube.com/watch?v=ONBcR4ToyW8
- https://www.youtube.com/watch?v=kZD-tucrQl8
- https://www.youtube.com/watch?v=SqIyuu9j4J0
- https://www.hgtv.com/lifestyle/holidays/drug-store-makeup-looks-for-halloween
- https://www.youtube.com/watch?v=ns25dTnfkvA
- https://www.youtube.com/watch?v=jNbQNnABp-A
- https://www.lemon8-app.com/experience/animal-inspired-makeup-looks-tutorial?region=us
- https://www.peta.org/living/personal-care-fashion/last-minute-cat-makeup-tutorial-using-cruelty-free-products/