You’ll need golden elven pauldrons with premium finishes, steel-boned corsets featuring grommets at 1-inch intervals for adjustable cinching, and D-rings riveted at hip stress points for weapon attachment. Essential materials include EVA foam reinforced with Worbla layers, sheet copper for relief work, and sulfur-free plasticine for molds. Finish with airbrushed metallics using Pearl-Ex pigments and seal with acrylic varnish. Master the duct tape method for precise 3D pattern drafting, then explore advanced techniques for battle-worn distressing that’ll elevate your armor beyond convention.
Key Takeaways
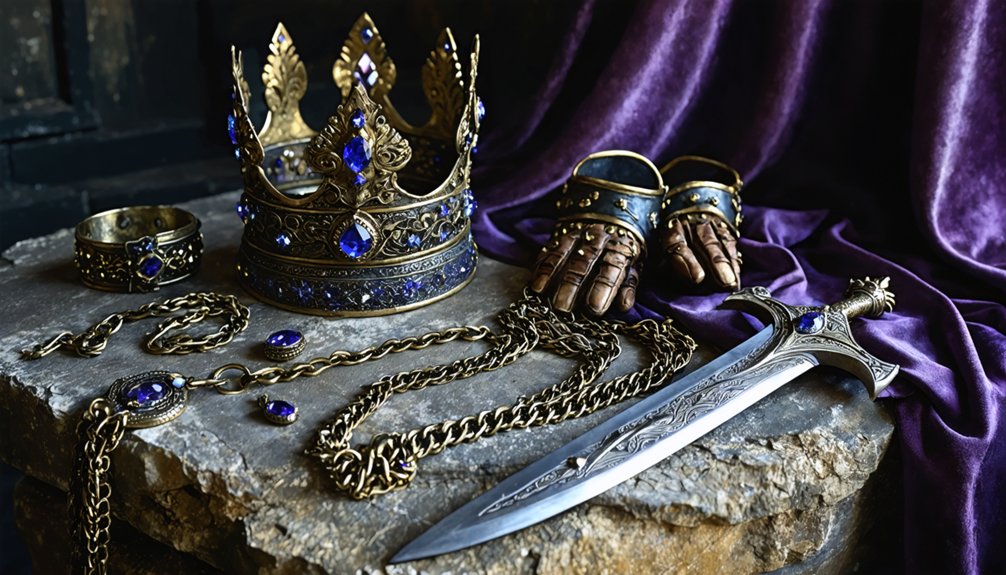
- Essential armor pieces include golden crown, ornate shoulder pauldrons, decorative waist belt, and statement necklace for complete warrior princess aesthetics.
- EVA foam layered with Worbla creates lightweight breastplates, while sheet copper enables durable relief-sculpted armor components.
- Steel-boned corsets with grommet lacing and riveted D-rings provide authentic warrior silhouette and functional weapon attachment points.
- Airbrush systems deliver professional metallic finishes, weathering effects, and Pearl-Ex pigment accents across all armor materials.
- Duct tape body templates enable precise pattern drafting for custom-fitted pleather and foam armor construction.
Golden Elven Armor Set Components and Details
Authenticity transforms ordinary cosplay into legendary presence, and the Golden Elven Warrior Princess set delivers this transformation through meticulously crafted components. You’ll receive a stunning golden crown featuring intricate scrollwork, elegant shoulder pads with decorative spikes, a complementary waist belt with detailed engravings, and an ornate necklace—all harmonizing in premium gold finish.
The material cost breakdown positions this complete ensemble at $760, though individual pieces offer flexible entry points: elven circlets at $25, pauldrons at $50, and tassets matching the circlet price. Pattern customization options span male and female variants, incorporating advanced techniques like fluting and filigree cutting.
Each lightweight component guarantees extended comfort during conventions, while the durable construction withstands rigorous LARP sessions. Expect 30-45 day shipping with tracking to USA and European destinations.
Essential Materials for Sculpting Xena-Style Armor
Successful Xena-style armor construction demands four distinct material categories working in strategic combination. You’ll need metals like sheet copper for durable copper shaping techniques using relief methods to achieve authentic 3D contours.
Four material categories unite for authentic armor: metals, foam foundations, sculpting compounds, and assembly hardware working in strategic combination.
EVA foam breastplate construction forms your structural foundation—carve details with a Dremel and reinforce with Worbla layers for maximum durability.
Your sculpting phase requires sulfur-free plasticine for initial molds, while foam clay adds intricate surface reliefs (though you’ll need reinforcement due to post-drying brittleness). Create rigid casting shells using Ultra-cal 30 plaster strengthened with burlap, then slush latex inside for flexible armor pieces.
Finally, assembly hardware includes 150 silver rivets, E600 adhesive, and hot glue with silicones. Finish with silver spray paint and pitch sealing for professional-grade warrior aesthetics.
Corset Construction: Structure and Hardware Requirements
You’ll need steel boning inserted through dedicated channels in your corset’s canvas layer to maintain that signature warrior silhouette under combat stress.
Install grommets at 1-inch intervals down the center back panel, threading grosgrain ribbon or leather cord for adjustable cinching that accommodates armor overlays.
For chakram attachment, rivet D-rings or heavy-duty O-rings to reinforced stress points on the hip panels, ensuring they’re secured through all three fabric layers with backing washers.
Steel Boning Installation Methods
Mastering steel boning transforms a costume corset from flimsy fabric into armor-grade structure that’ll hold up through convention halls and photo shoots. Strategic steel boning reinforcement begins with proper channel construction—sandwich bones between seam allowances during panel assembly, or stitch dedicated casings with 7mm spacing for insertion afterward.
Cut your bones 1.5cm shorter than edges using tin snips, then immediately sand those razor-sharp ends with a Dremel tool. Seal exposed steel with Plastidip or crimped metal tips to prevent rust breakthrough during wear.
Mix spiral boning in side seams for optimizing corset mobility while reserving flat steel for vertical support channels. Insert tipped bones through casings using pliers on blunt ends, securing them between dual fabric layers for maximum hold during dynamic movement sequences.
Grommet and Lacing Setup
Mapping out your grommet placement separates amateur corset construction from professional-grade armor that’ll survive aggressive lacing tension. Before installing hardware, create duct tape patterns for aligning lacing panels precisely on your three-layer construction (leather, canvas, lining). Cut rectangular modesty and lacing panels from measurements, then test mock-ups before committing to final leather.
Your hardware installation sequence requires:
- Punch holes next to side seams using leather punchers for eyelet positioning
- Affix grommets with rivets or spots through pre-punched metal ends
- Incorporate 4 O-rings at strategic points for functional closure support
- Thread cord through installed eyelets for adjustable lacing
Heavy cotton canvas between layers provides essential structure for securing lacing elements under tension. Laser-cut uniform incisions guarantee professional stud placement, while pliers assemble hardware components efficiently.
Chakram Attachment Hardware Solutions
Securing functional chakram props to your warrior corset demands specialized mounting hardware that balances weapon accessibility with structural integrity. You’ll need eight wooden rods with pre-drilled holes positioned through your reinforced polystyrene design, creating anchor points that distribute weapon weight evenly.
The ideal blade attachment system integrates eight nails per chakram, embedded strategically where your 42cm polystyrene base meets the 15cm inner circles. Hot glue bonds these layered components while masking tape reinforces stress points. Your mounting hardware must accommodate the chakram’s wire-wrapped newspaper core, secured with extensive taping for rigidity.
Consider dowel-reinforced handles wrapped in removable pleather, allowing quick weapon deployment. This configuration guarantees your throwing weapons remain stable during movement while maintaining the authentic aesthetic warrior princesses demand.
Fabric Armor Assembly Techniques and Best Practices
The foundation of convincing fabric armor lies in precise pattern creation before you cut a single piece of material. Master 3D silhouette drafting using the duct tape method—wrap your torso in plastic, layer duct tape, then draw seam lines with Sharpie. Mark boning channels with 3/8″ painter’s tape strips to accommodate 1/4″ steel spirals.
Precise pattern-making is non-negotiable—the duct tape method transforms your body into a perfect three-dimensional template for armor construction.
Your pleather sculpting techniques require strategic layering:
- Cut 12 dark brown pleather pieces for shoulders and arm guards
- Sandwich heavy cotton canvas between leather outer and cotton lining
- Test patterns with mock-up fabric before final assembly
- Apply foam clay details over EVA foam bases for dimensional armor
For breastplates, create cardboard templates first, sculpt modeling clay over them, then slush-cast liquid latex for lightweight, flexible armor that moves with you.
Painting and Finishing Supplies for Professional Results
Once your fabric armor pieces sit assembled before you, raw construction transforms into battlefield-ready authenticity through strategic paint application and finishing techniques. Airbrushes deliver precision gradients and weathering effects across EVA foam, leather, and stretch materials without cracking. You’ll need adjustable pressure control for acrylics, enamels, and specialized formulas like Angelus Leather Paint or Maker Pro Paint™ (pints from $19.99 USD). Master airbrush maintenance techniques—regular nozzle cleaning and pressure calibration—to prevent clogs during critical detailing work.
Layer base coats, metallics, and battle-worn distressing before sealing with Acrylic Varnish Gloss or Josefine Very Matte (375ml $31.99 USD). Pearl-Ex Pigments create luminous metallic accents. Always employ proper protective equipment: respirators for solvent-based paints and ventilated workspaces guarantee safe application of ProAiir Hybrids and Alphanamel enamels.
Custom-Made Silver Fantasy Warrior Princess Sets
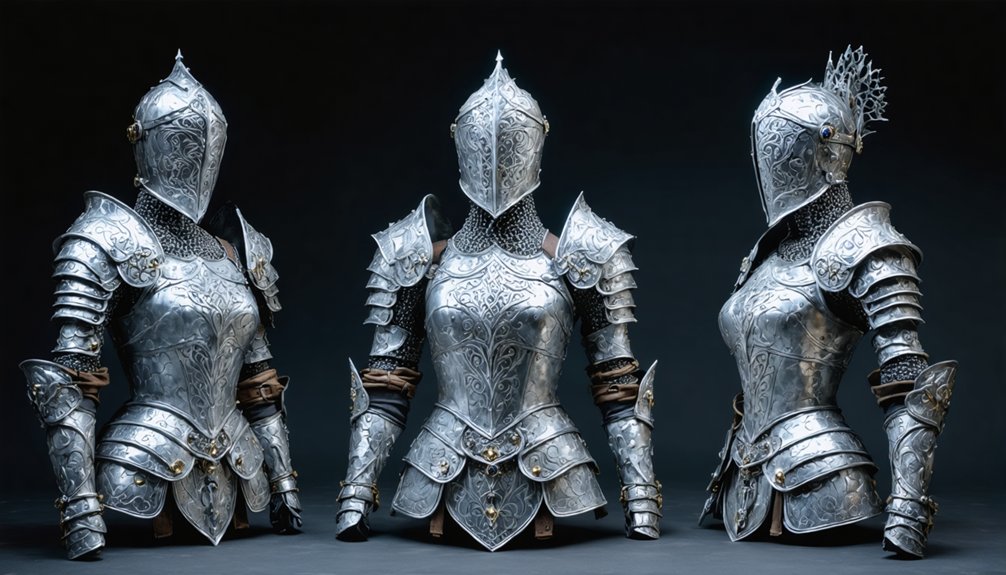
Silver-plated steel transforms into wearable fantasy through custom-made warrior princess armor sets that balance authentic medieval construction with character-specific design elements. You’ll find XIV-XV century-inspired articulation paired with female-specific proportioning in these $130+ collections from specialized makers like Armstreet.
Premium customization options include:
- Finish selections: shiny silver steel, blackened steel, or golden brass coating
- Fabric dye treatments for integrated textile components like surcoats and underlayers
- Embroidered design elements on leather straps and decorative panels
- Component flexibility: individual pauldrons, breastplates, gauntlets, or complete harnesses
These spring steel constructions withstand repeated LARP combat, Renaissance fairs, and photography sessions. Handmade chainmail bodices integrate seamlessly with plate armor, while gorgets and shin guards complete the authentic medieval aesthetic your character demands.
Pattern Resources and Tutorial Guides for Armor Crafting
Creating your own warrior princess armor patterns requires strategic methodology that transforms raw materials into fitted, combat-ready pieces. You’ll find beginner friendly pattern drafting approaches through the duct tape method—wrapping yourself in plastic, then tape, before marking seams directly onto the surface. This captures precise measurements without commercial limitations.
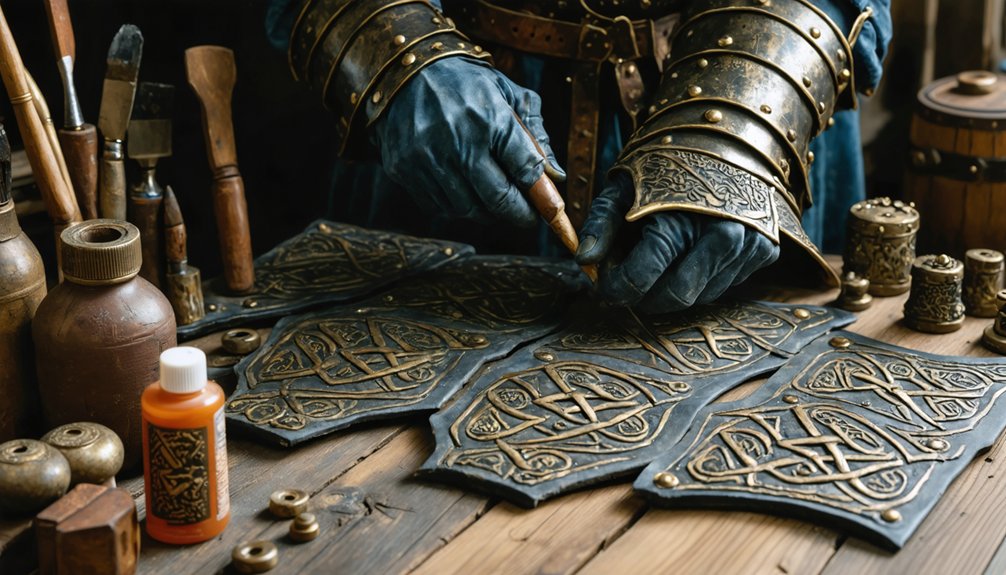
For alternative foam layering techniques, craft foam provides testing grounds before committing to expensive materials. Trace your foam patterns onto leather with 2-centimeter spacing allowances, enabling structural overlap. Ball-point pens transfer designs onto rigid surfaces like sheet copper without damage.
Digital STL files accelerate accessory production through 3D printing, while online repositories offer tested patterns from established designers. Symmetrical half-patterns maximize efficiency, ensuring balanced visual impact across armor components while reducing development time considerably.
Weapon Accessories: Swords and Daggers for Warriors
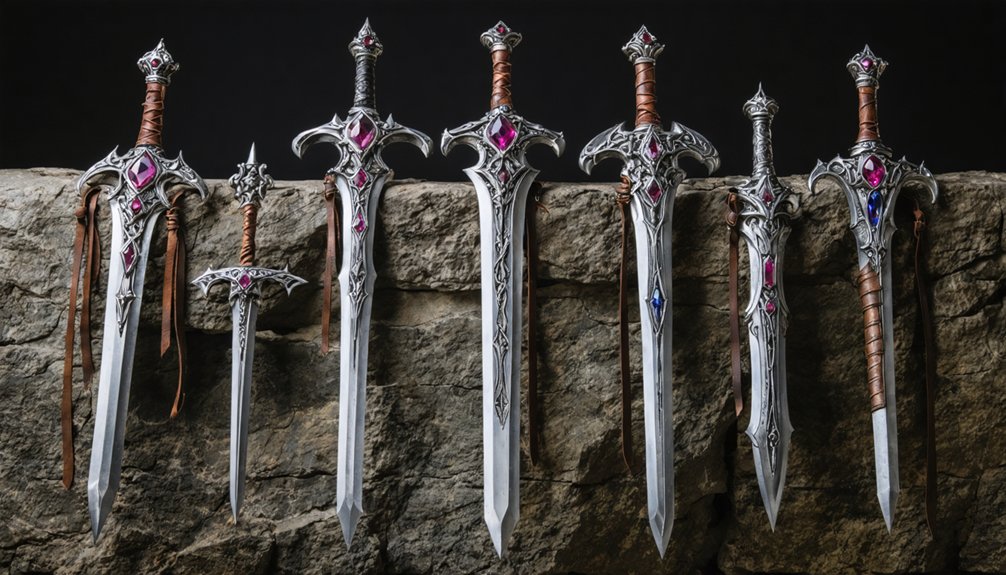
When assembling your warrior princess arsenal, weapon accessories demand the same meticulous attention as your armor components—balancing visual authenticity with convention safety requirements. Your material selection determines both functionality and compliance.
Construction tier options include:
- DIY approaches: balsa wood blades with spray-paint finishes, repurposed toy handles, and styrofoam scabbards with leather coverings
- EVA foam builds: Hard-Lite foam structures (10mm base, 5mm details) with wooden dowel cores for rigidity
- Display replicas: stainless steel blades with cast metal guards and leather-wrapped grips for medieval weapon display stands
- Premium pieces: Toledo-crafted models featuring hardened AISI 440 steel, zamak hilts, and bronze finishes
Master the DIY scabbard creation process through foam forming, hot-glue embellishments, and fabric wrapping techniques that complement your warrior aesthetic while maintaining portability.
Hardware Kits and Specialized Components for Dress Assembly
You’ll need a thorough hardware kit to properly assemble your warrior princess dress, featuring essential components like 20-30 antique gold grommets, four 1.5-inch O-rings, and specialized setting tools. The installation process requires precision—use an eyelet hole puncher to create clean holes for grommets, then secure them with a rubber mallet to guarantee they withstand the tension of corset lacing.
Specialized kits from suppliers like Todd’s Costumes ($130) streamline procurement by bundling these critical fasteners with rivets and attachment hardware in coordinated finishes.
Essential Hardware Kit Contents
Every authentic warrior princess costume requires a thorough collection of specialized hardware components that transform raw materials into battle-ready regalia. Your comprehensive kit should include approximately 150 silver rivets for rivet placement across leather skirt segments, alongside steel boning cutters for boning customization within corset structures.
Professional-grade setting tools enable precise installation of 20-30 size 0 antique gold grommets, paired with rubber mallets for secure fastening.
Essential components include:
- Structural rings: Four 1.5-inch silver O-rings for corset attachments and chakram mounting systems
- Fastening hardware: Twenty eyelets plus specialized hooks for weapon integration
- Bonding agents: Hot glue gun with 20-25 silicone sticks for medallion attachment
- Cutting equipment: Steel boning trimmers for custom bodice reinforcement
These precision components replace standard kit versions, elevating your costume’s authenticity and durability.
O-Rings and Grommet Installation
Installing grommets and O-rings demands methodical precision to achieve the structural integrity your warrior princess ensemble requires. Begin grommet hole preparation by marking positions with tape, ensuring even spacing across your fabric. Punch clean holes matching your grommet’s diameter, then strengthen thin materials with fusible interfacing to prevent tearing under tension.
Insert the top flange through from the front, sandwich with the bottom ring, then position on your anvil. Align your setter tool and hammer with gentle, swirling motions—this creates uniform flange bending. For grommet troubleshooting tips, inspect each crimp’s tightness before moving forward. If pieces separate, you’ve under-hammered; crushed flanges indicate excessive force. Test every installation by threading cord through—properly set grommets withstand substantial pulling without compromising your costume’s battle-ready aesthetic.
Frequently Asked Questions
How Do I Properly Store and Maintain Latex Armor Between Convention Appearances?
Store your latex armor in cool, ventilated spaces at proper latex storage temperature (60-75°F). Apply silicone spray regularly, use latex armor cleaning techniques with mild soap, avoid moisture-trapping containers, and dust with talcum powder between conventions for ideal preservation.
What Body Measurements Are Needed Before Starting a Custom Warrior Princess Costume?
You’ll need ideal bust, waist, and hip measurements taken in proper posture for costume fitting. Maintain natural stance while measuring underbust, biceps, wrists, and shoulder-to-waist length. Don’t forget height and back measurements for your custom warrior design.
Can Armor Pieces Be Modified to Fit Over Different Costume Base Layers?
Like Xena’s adaptable battle gear, you’ll achieve customizable fit options through adjustable straps, buckles, and Velcro attachments. Advanced layering techniques including heat-shaping foam and elastic strips guarantee your armor seamlessly accommodates various costume base layers with precision.
How Long Does a Complete Warrior Princess Armor Set Take to Create?
Creating a complete warrior princess armor set requires 100-200 hours total. Your material selection and crafting techniques directly impact timeline—EVA foam processes faster than leather, while mastering grommet installation and Worbla shaping demands patience for precision results.
What Safety Precautions Are Necessary When Working With Craft Adhesives and Paints?
You’ll need proper ventilation requirements—work outdoors or use fans—and essential safety equipment usage including fume-rated respirators, disposable gloves, and safety goggles. Always read product labels before applying adhesives or paints to prevent toxic exposure.