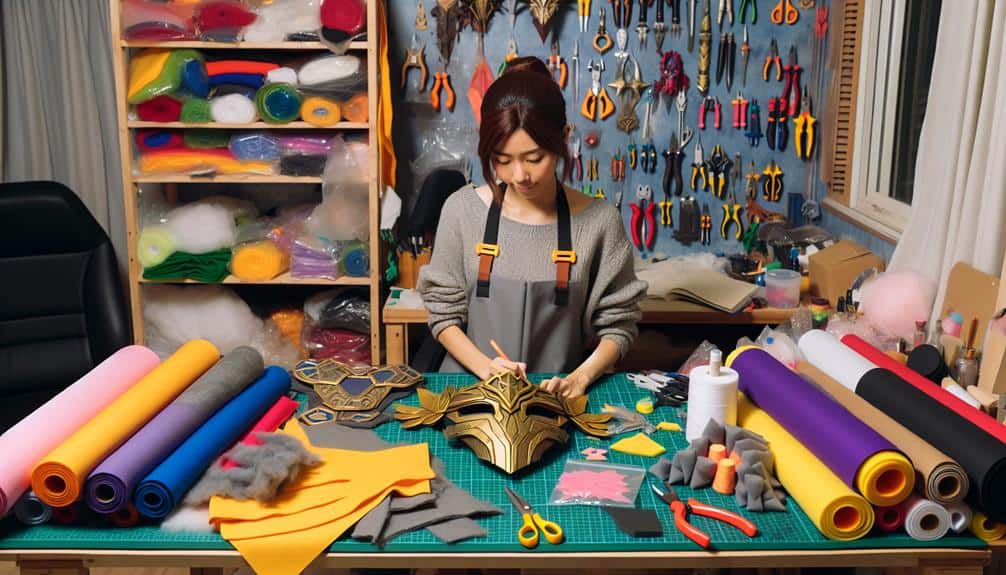
Have you ever wondered what it takes to create stunning video game cosplay armor that looks like it's straight out of the game world? From intricate detailing to realistic weathering effects, mastering the art of crafting cosplay armor requires a combination of skill and creativity.
In this discussion, we will explore ten essential techniques that will elevate your cosplay armor to the next level, helping you achieve that professional finish you've always admired. Get ready to reveal the secrets behind some of the most impressive video game armor cosplays out there.
Key Takeaways
- Precision shaping and molding for seamless fit using foam crafting techniques
- Shaping Worbla thermoplastic with precision and vacuum sealing for flawless results
- Mastering resin casting for detailed pieces and aging effects for realism
- Incorporating LED integration, leatherwork, painting, and 3D printing for advanced armor enhancements
Foam Armor Molding
Crafting foam armor requires precision in shaping and molding to achieve a seamless fit for your cosplay character. When it comes to foam armor detailing, the devil is in the details. Small embellishments like rivets, etchings, and intricate designs can truly elevate your cosplay to the next level. Crafting accessories, such as belts, buckles, and pouches, can add depth and authenticity to your overall look.
To start, sketch out the design of your armor on paper to serve as a guide. Next, cut the foam pieces according to your design using a sharp craft knife. Heat shaping the foam can help create curves and angles for a more ergonomic fit. Once your base pieces are cut and shaped, it's time to add the finer details. Use a heat gun to create textures like weathering effects or battle scars. Finally, assemble all the pieces together using contact cement for a sturdy finish. Mastering foam armor molding takes practice, but the results will be well worth the effort.
EVA Foam Heat Shaping
When shaping EVA foam through heat, make sure to carefully apply heat evenly to achieve desired curves and angles for your cosplay armor. Foam armor sculpting requires precision and patience, especially when using heat gun techniques.
Begin by holding the heat gun around 6-8 inches away from the foam surface to prevent scorching or burning. Move the heat gun in a circular motion, ensuring that all areas receive equal heat distribution. As the foam starts to heat up, you'll notice it becoming more pliable and easier to mold.
Focus on one section at a time, gradually shaping the foam into the desired form. If you need sharp angles, use a heat gun to soften the foam before bending it to create crisp edges. Be cautious not to overheat the foam, as this can lead to deformities or burns.
Experiment with different heating times and distances to find the best technique for your specific cosplay armor design. With practice and attention to detail, you'll master the art of EVA foam heat shaping for your next cosplay project.
Worbla Thermoplastic Molding
Imagine crafting intricate armor pieces by molding Worbla, a thermoplastic sheet that can be shaped with heat. Discover the basics of working with Worbla, from heating it to forming it into unique shapes.
Learn about advanced shaping techniques, as well as tips for painting and finishing your Worbla creations for the perfect cosplay armor.
Worbla Basics
To master the art of shaping thermoplastic materials like Worbla, envision yourself as a sculptor molding clay into intricate forms with just the heat of your hands. When working with Worbla for your cosplay armor, here are some essential basics to keep in mind:
- Worbla Sculpting: Use your hands or tools to shape Worbla while it's warm and pliable. Press, bend, and mold it to create the desired shape.
- Heat Gun Techniques: Apply heat evenly to the Worbla sheet to make it soft and malleable. Keep the heat gun at a safe distance to prevent burning or overheating.
- Cooling Process: Allow the Worbla to cool and harden naturally or use cool water to speed up the process for a sturdy final form.
Shaping Techniques
Shape your Worbla thermoplastic material with precision and finesse by employing a series of expert molding techniques that bring your cosplay armor vision to life.
Utilize a heat gun to heat the Worbla, making it pliable for shaping. Experiment with foam cutting to create intricate details or add volume to your armor pieces.
For larger, more complex shapes, consider vacuum forming, a technique that involves heating the Worbla and then using a vacuum to mold it over a form for a smooth finish.
To guarantee a professional look, finish off your creations with vacuum sealing, which helps to remove any imperfections and achieve a flawless surface.
Master these techniques, and watch as your cosplay armor transforms into a masterpiece.
Painting and Finishing
For a stunning final touch to your meticulously crafted Worbla thermoplastic armor pieces, elevate your creations with expert painting and finishing techniques that will bring out the intricate details and flawless surfaces you've worked hard to achieve.
Painting and Finishing Tips:
- Weathering effects, aging techniques: Use techniques like dry brushing with darker shades to create a weathered and worn appearance, adding depth and realism to your armor.
- Airbrushing, detailing tips: Utilize an airbrush for a smooth and even application of paint, allowing for intricate details to stand out. Consider using masking techniques for clean lines and precise designs.
- Sealing and protecting: Finish off your masterpiece by sealing the paint with a clear coat to protect it from wear and tear, ensuring your armor stays vibrant and impressive for longer.
Resin Casting Techniques
Get ready to elevate your cosplay armor game with resin casting techniques.
Master the intricate mold-making process to bring your designs to life with precision.
Discover resin mixing tips and demolding strategies that will take your creations to the next level.
Mold-Making Process
Crafting high-quality cosplay armor often involves mastering the intricate art of mold-making and resin casting techniques. When it comes to creating detailed armor pieces, using silicone molding and vacuum forming techniques can help you achieve professional results.
Here are three essential steps to master the mold-making process:
- Prepare Your Model: Start by creating the base model of your armor piece, ensuring it's flawless and ready for molding.
- Silicone Molding: Apply silicone rubber around your model to capture all the intricate details accurately.
- Vacuum Forming: Utilize a vacuum forming machine to shape heated thermoplastic sheets over your mold, creating lightweight and durable armor pieces.
Resin Mixing Tips
To enhance the durability and detail of your cosplay armor pieces, expert resin mixing tips can elevate your resin casting techniques to a professional level.
Start by mastering resin application techniques and optimizing mixing ratios for a flawless finish. When mixing resin, guarantee precise measurements to maintain the integrity of your armor pieces.
Additionally, incorporating resin curing tricks will help prevent imperfections and guarantee a smooth, glossy surface.
To further perfect your resin casting, employ bubble prevention methods such as slowly stirring the resin and using a heat gun to remove any bubbles that may form.
Demolding Strategies
When demolding your resin-casted armor pieces, guarantee a gentle and precise approach to preserve intricate details and prevent any damage to the finished product. To make certain successful demolding, consider the following techniques:
- Silicone Molding Demolding Techniques:
- Carefully peel back the silicone mold from the resin piece, starting from the edges and moving inwards to avoid tearing delicate parts.
- Use a release agent before pouring resin into the mold to facilitate easier demolding without sticking.
- Vacuum Forming Demolding Tips:
- Apply even pressure when separating the armor piece from the vacuum-formed mold to prevent warping or distortion.
- Utilize flexible mold materials to ease the demolding process and maintain the shape of the final piece.
Weathering and Aging Effects
As you explore the domain of creating realistic armor for your video game cosplay, infusing weathering and aging effects can elevate your craftsmanship to a whole new level of authenticity and character depth. Essential effects techniques are vital in adding a sense of history and wear to your armor. One method is dry brushing, where you lightly brush a darker shade over edges and raised areas to simulate wear and tear. Another technique involves using sandpaper or a Dremel tool to create scratches and dents, adding a battle-worn look.
For weathering effects tutorials, consider using techniques like sponge painting to create a rusted or dirty appearance. Applying washes of diluted paints can give a grimy, aged effect to your armor. You can also experiment with using powders or pastels to add depth and texture. Remember, subtlety is key when weathering your armor; less is often more, so start with a light hand and build up layers gradually to achieve a realistic and convincing aged look.
LED Integration for Armor
Integrating LEDs into your armor can transform your cosplay into a dynamic and eye-catching masterpiece, adding a futuristic touch to your character portrayal. To achieve this, consider the following LED wiring and armor illumination techniques:
- Choose the Right LEDs: Opt for small, lightweight LEDs that won't weigh down your armor. Select colors that match your character's aesthetic and mood. LEDs come in various forms, such as strips, bulbs, or individual lights, so pick the type that suits your design best.
- Plan Your Wiring Carefully: Map out where you want the LEDs to go on your armor and plan the wiring accordingly. Conceal wires within the armor for a clean look. Secure the wiring to prevent it from moving around during wear, ensuring durability.
- Experiment with Lighting Effects: Play around with different lighting effects, like pulsing, fading, or strobing, to enhance the visual impact of your armor. Consider using a remote control or programmable microcontrollers to customize the lighting sequences for added flair.
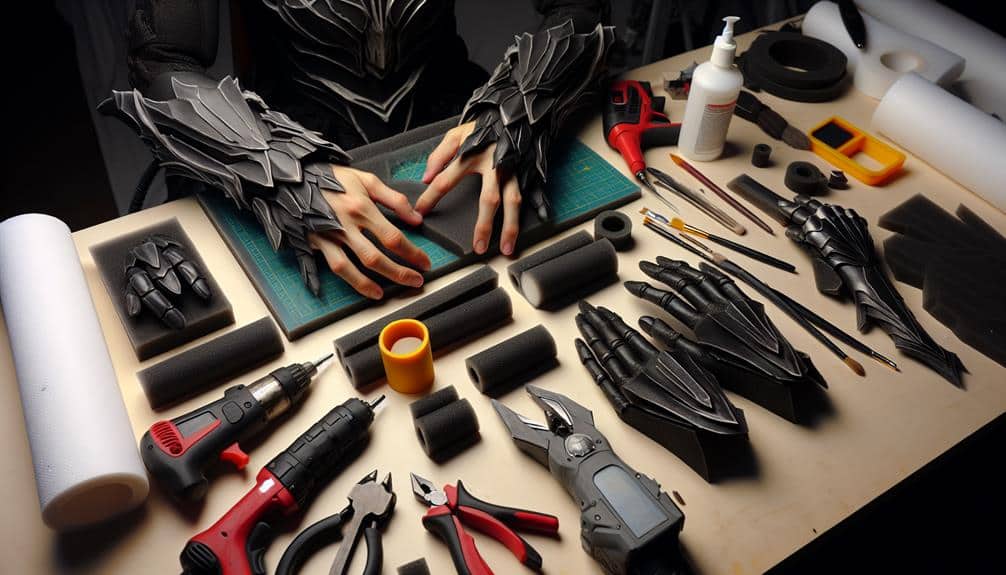
Leatherwork for Cosplay Armor
Crafting leatherwork for your cosplay armor requires precision, creativity, and a keen eye for detail. When working with leather, mastering the art of leather stitching is paramount. Whether you use traditional hand-stitching methods or opt for a sewing machine, ensuring strong, neat stitches will elevate the overall quality of your armor.
Experimenting with different dye techniques can add depth and realism to your leather pieces. Techniques like dip-dyeing, sponge painting, or using leather dyes can help achieve the desired color and texture for your armor.
To create intricate designs on your leather armor, consider tooling the leather. This involves carving patterns or shapes onto the leather surface using specialized tools. Tooling adds a unique touch to your armor, making it stand out at conventions or competitions.
Additionally, incorporating leather straps, buckles, and other hardware can enhance both the aesthetics and functionality of your cosplay armor. By mastering leatherwork techniques, you can bring your favorite video game characters to life with authenticity and style.
Painting and Airbrushing Tips
Enhance the vibrancy and realism of your cosplay armor by mastering painting and airbrushing techniques. When it comes to adding color to your armor pieces, blending techniques and color gradients are essential to create depth and visual interest. Here are some tips to help you achieve professional-looking results:
- Preparation is Key: Before painting, make sure to clean and prime your armor surface to confirm the paint adheres properly. Sanding the surface lightly can also help create a smoother finish for painting.
- Mastering Color Gradients: Practice blending techniques by starting with a base color and gradually mixing in small amounts of a lighter or darker shade to create a smooth shift. This technique is particularly useful for creating realistic shadows and highlights on your armor.
- Airbrushing Precision: Invest in a good quality airbrush for more intricate details and smoother finishes. Practice control and pressure to achieve the desired effect, especially when working on intricate designs or patterns.
Detailing With Worbla Accents
To elevate the intricacy of your cosplay armor, consider incorporating Worbla accents for added detail and dimension. Worbla is a versatile material that can be molded and shaped to create intricate designs on your armor. When detailing with Worbla accents, you can experiment with weathering techniques to give your armor a battle-worn look. Adding metallic finishes to the Worbla accents can enhance the overall appearance, giving your armor a realistic and polished finish.
Incorporating fabric and leatherwork into your Worbla accents can further enhance the detail of your cosplay armor. You can use fabric to create intricate patterns or designs that complement the overall aesthetic of your armor. Leatherwork integration adds a tactile element to your armor, making it stand out even more during conventions or photo shoots.
3D Printing for Armor Parts
Consider stepping into the zone of advanced armor crafting by exploring the innovative world of 3D printing for creating intricate and customized armor parts that can elevate the complexity and authenticity of your cosplay designs. 3D printing optimization and material selection for printing are vital aspects to master when delving into this cutting-edge technique.
- 3D Printing Optimization: To make sure your armor parts are accurately and efficiently printed, make use of software that allows you to fine-tune settings such as layer height, infill density, and print speed. Experiment with these settings to find the perfect balance between detail and printing time.
- Material Selection for Printing: Choose the appropriate filament material based on the durability and finish you desire for your armor parts. Options like ABS for strength or PLA for easier printing and a smoother surface can impact the final look and feel of your cosplay armor.
- Post-Processing Techniques: After printing, consider techniques such as sanding, priming, and painting to enhance the appearance of your 3D printed armor parts, giving them a professional and polished finish that truly brings your cosplay to life.
Frequently Asked Questions
Can You Recommend Any Specific Brands or Types of Foam for Armor Molding?
When molding armor, you should look for EVA foam from brands like Yaya Han or TNT Cosplay Supply. This type of foam is great for creating intricate designs and durable pieces. Experiment with heat shaping techniques for perfect results.
Are There Any Safety Precautions to Keep in Mind When Heat Shaping EVA Foam?
When heat shaping EVA foam for armor crafting, prioritize safety precautions. Provide proper ventilation, wear eye protection, and master heat shaping techniques. Remember, safety first to guarantee a successful and secure crafting experience.
What Are Some Common Mistakes to Avoid When Working With Worbla Thermoplastic for Armor Crafting?
When working with Worbla thermoplastic for armor crafting, common mistakes to avoid include heating it unevenly, not priming surfaces properly, and rushing the cooling process. Troubleshooting techniques involve reheating for adjustments and using heat-resistant tools.
How Can Beginners Start Learning Resin Casting Techniques for Cosplay Armor?
Ready to plunge into resin casting for your cosplay armor? As a beginner, start by mastering foam molding and heat shaping techniques. Add flair with LED lights. With practice, you'll craft stunning armor that shines.
Are There Any Special Considerations for Incorporating LED Lights Into Cosplay Armor Pieces?
When incorporating LED lights into your cosplay armor, consider the placement for best effect. Make sure correct wiring to avoid malfunctions. Experiment with different light distribution techniques to create stunning visual effects that enhance your overall cosplay look.