To start sewing cosplay, you don’t need advanced skills — just a solid foundation. You’ll need to know how to set up and operate a sewing machine, cut fabric accurately, and sew basic stitches like straight, zigzag, and backstitch. Understanding tension adjustment and seam finishing will also keep your costumes looking polished. Master these core techniques, and you’ll have everything it takes to bring your first character to life — and plenty more waiting ahead.
Key Takeaways
- A mid-range mechanical sewing machine with straight, backstitch, and zigzag stitches covers most cosplay fabric needs effectively.
- Sharp fabric scissors, a rotary cutter, and a self-healing mat ensure clean, precise cuts for costume pieces.
- Mastering tension adjustment and presser foot control helps achieve neat seams across varied cosplay fabrics.
- Always start and end seams with a backstitch to securely lock stitching and prevent unraveling during wear.
- Accurate fabric cutting, using pattern weights and proper grainline alignment, prevents distortion in finished costume pieces.
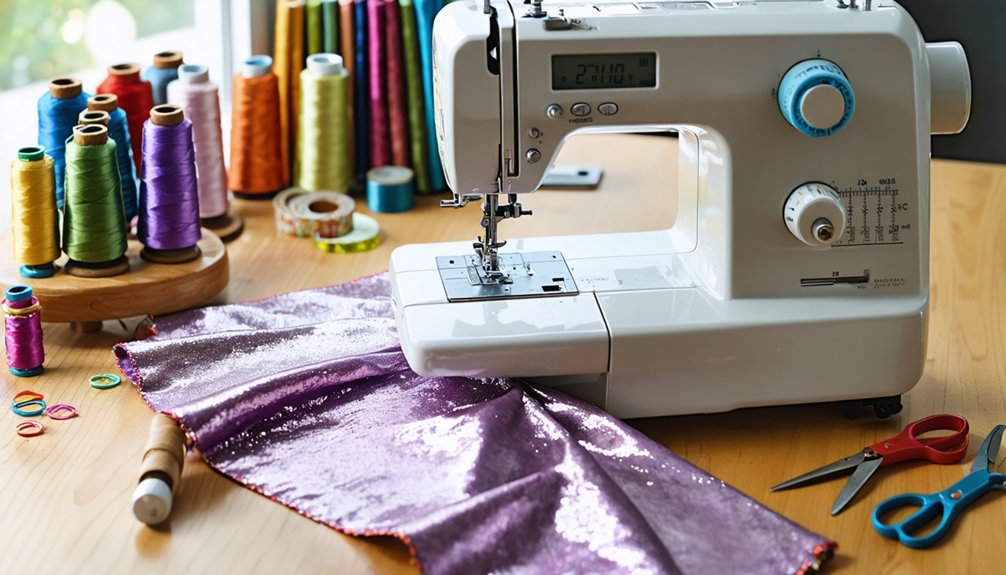
The Sewing Machine Features Every Cosplay Beginner Actually Needs
When choosing your first sewing machine for cosplay, you don’t need every bell and whistle—you just need three core stitches: straight, backstitch, and zigzag. These stitch options cover nearly every cosplay construction challenge you’ll face.
Among machine types, a mid-range mechanical model delivers reliable performance without overwhelming complexity. Speed control lets you sew slowly through tricky curves, while tension adjustment guarantees clean seams across different fabrics. Basic foot attachments, like a standard presser foot, handle most tasks effectively.
For setup basics, always start with the needle at its highest point before threading. Regular maintenance tips include cleaning lint from the bobbin area and replacing needles frequently.
Understanding each feature benefit—speed, tension, stitch variety—transforms your machine from intimidating tool into your most powerful cosplay asset.
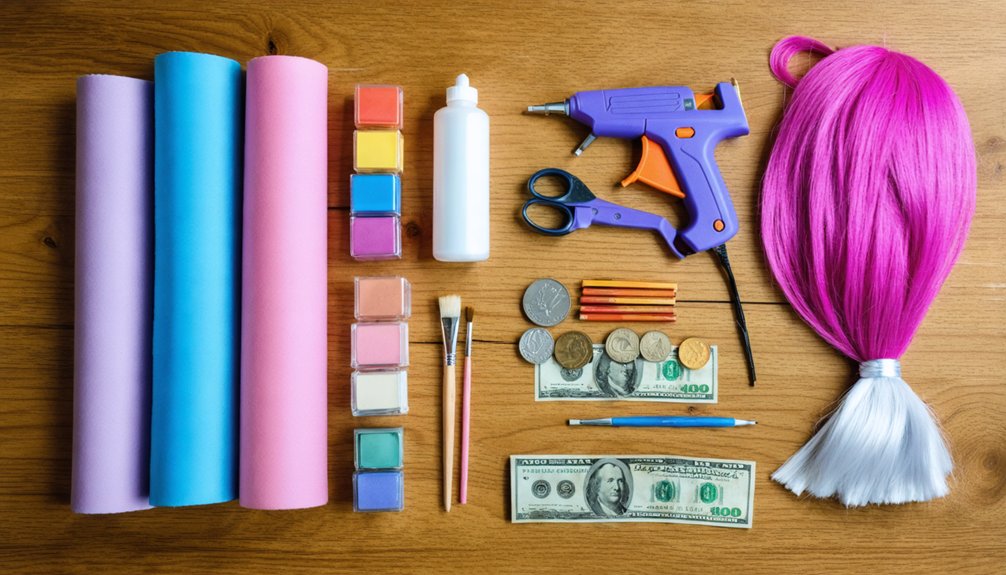
The Cutting and Finishing Tools That Make Cosplay Sewing Easier
Beyond your sewing machine, the right cutting and finishing tools will dramatically improve your cosplay results. Invest in sharp fabric scissors and a rotary cutter paired with a self-healing cutting mat for precise, clean edges.
Use pattern weights instead of pins to hold pieces flat without distortion, streamlining your cutting tools workflow.
For finishing techniques, a seam ripper corrects mistakes quickly, while a quality iron transforms your pressing methods—press every seam before sewing the next. Proper seam finishes, like zigzag edges or serged seams, prevent fraying and guarantee fabric safety throughout wear and movement.
Keep your workspace efficient through smart tool organization—store everything within reach. These essentials aren’t optional extras; they’re what separate polished, professional-looking cosplay from frustrating, unfinished projects.
How to Set Up Your Sewing Machine Before Your First Cosplay Project
Before you sew a single stitch, setting up your machine correctly protects you from costly mistakes and frustrating mid-project fixes. Start by rotating the handwheel until the needle reaches its highest point.
Lower the presser foot to grip your fabric evenly, then position both hands at a right angle, keeping them clear of the needle.
Use your machine’s plate guides to maintain straight, consistent lines throughout each seam. Proper machine calibration guarantees your stitches form correctly from the very first pass.
Check your thread tension before starting — incorrect tension causes loose loops or puckered seams that compromise your costume’s structure.
Thread your machine carefully, following its specific guide sequence. These foundational steps build confidence and precision, giving your cosplay project a professional, polished start.
How to Cut Fabric Accurately for Cosplay Projects
With your machine set up and ready to go, accurate cutting is your next step toward a clean, professional-looking costume. Your fabric layout matters enormously — smooth your fabric flat, then focus on pattern placement by aligning each piece’s grainline parallel to the selvage using a ruler.
Different fabric types demand smart tool selection. Use sharp fabric scissors for wovens and a rotary cutter with a cutting mat for precision cutting on slippery or stretchy materials like Lycra.
Never use dull blades, as they’ll shred your fabric’s edges.
Follow a deliberate cutting order, tackling larger pieces first. Apply marking methods like chalk or tracing paper to transfer notches and construction lines accurately.
These cutting techniques collectively protect your fit, structure, and final costume quality.
How to Align Grainlines So Your Cosplay Costume Fits Right
Accurate cutting sets you up for success, but grainline alignment is what makes your costume actually fit and drape the way it should.
Grainline importance can’t be overstated — it directly controls fabric behavior and how your finished piece moves on your body.
To nail pattern placement, lay your pattern piece on the fabric and align the grainline arrow parallel to the selvage edge. Use a ruler to measure both ends of the arrow, guaranteeing equal distance for true sewing accuracy. Pin it securely before cutting.
Different fabric types respond differently when cut off-grain, causing twisted seams and poor fitting techniques.
Correct cutting direction guarantees seam alignment stays true through construction. Take your time here — it’s a small step that transforms your entire result.
The Only Stitches You Need to Start Sewing Cosplay
Mastering just three stitches will carry you through most cosplay projects: the straight stitch, the zigzag stitch, and the backstitch.
Use the straight stitch for structured, non-stretch fabric types like woven cotton, adjusting your stitch length to match your seam allowances.
The straight stitch is your foundation — reliable, clean, and perfectly suited for structured woven fabrics.
Switch to the zigzag stitch when working with stretch fabrics like Lycra — it flexes with movement, preventing snapped threads.
Your backstitch technique anchors every seam securely, whether you’re sewing by machine or practicing hand sewing for finishing details like buttons and snaps.
Start each seam with a backstitch to lock your stitching in place.
You don’t need a complex stitch library to create impressive costumes — you just need these three executed with consistency and precision.
How to Sew Straight Seams on Cosplay Projects

Straight seams define the fit and finish of any cosplay project, so getting them right from the start saves you frustrating rework later.
Begin by adjusting your machine’s speed control to a slower setting, giving you greater control over seam accuracy as you guide the fabric through.
Keep your eyes focused on the marked seam line rather than the needle itself. This approach helps you make small, real-time adjustments that maintain consistency throughout each pass.
Monitor fabric tension carefully, ensuring the material feeds evenly without bunching or pulling.
Use your machine’s plate guides as alignment references for clean, repeatable lines.
Practice on scrap fabric before committing to your main project pieces. Repeated practice builds muscle memory, turning precise straight seams into a reliable skill you’ll use on every cosplay build.
How to Read and Follow Cosplay Patterns as a Beginner
Once you pick up a commercial pattern from Burda, Simplicity, or McCall’s cosplay lines, you’ll notice it includes printed instructions, numbered pieces, and grainline markings that guide every step of construction.
Decode pattern symbols, respect seam allowances, and match notches markings precisely for accurate assembly.
- Study the cutting layout before touching your fabric types, ensuring fabric grain aligns correctly.
- Transfer all notches markings onto fabric using chalk or a tracing wheel.
- Follow assembly instructions sequentially; skipping steps creates fitting problems.
- Make pattern adjustments on traced copies, never on originals.
Tracing pieces onto scrap fabric first lets you test seam allowances and fit before committing to your main material.
Each pattern symbol communicates something specific—treat them as a technical language you’re actively learning to master.
Frequently Asked Questions
How Do I Fix a Cosplay Costume That Does Not Fit Properly?
Imagine your costume hugging your body perfectly! You can tackle fit adjustments by using a seam ripper, then resew seams tighter or looser. Try pattern modifications, tracing new shapes on scrap fabric before altering your main cosplay piece.
What Fabrics Are Easiest for Beginner Cosplayers to Work With?
Start with cotton blends and stretchy fabrics—they’re forgiving and easy to handle! Avoid faux leather initially. Use basic patterns, beginner tools, and experiment with different fabric types to build your confidence and skills effectively.
How Long Does It Typically Take to Complete a Beginner Cosplay?
Like a marathon, not a sprint, your first cosplay typically takes weeks. Embrace time management and project planning—you’ll break tasks into stages, practice stitches, and steadily build confidence, transforming fabric into something extraordinary through consistent, innovative effort.
Can I Alter an Existing Costume Instead of Sewing From Scratch?
Yes, you can absolutely alter an existing costume! Use alteration tools to reshape it, apply fabric glue for quick fixes, explore costume layering for depth, and add embellishment techniques to make it uniquely yours.
How Do I Find Accurate References for Recreating a Specific Character?
Start your character analysis by sourcing images from official artwork, game screenshots, and fan wikis. You’ll find precise details on costumes, colors, and textures. Compile references into a mood board to guide your recreating process confidently!
References
- https://www.firststopcosplay.com/blogs/fsco-blog/wip-fundamental-sewing-techniques-every-cosplayer-should-know
- https://www.kamuicosplay.com/2018/07/18/sewingbasics/
- https://foodandcosplay.org/2018/09/25/tutorial-sewing-tips-for-cosplay-beginners/
- https://www.youtube.com/watch?v=VrDbvfsHx1Q
- https://www.arrowsewing.com/blog/cosplay-101
- https://www.youtube.com/watch?v=TF4Zj4uZxME
- https://www.youtube.com/c/cosplaysewingschool