Want to take your cosplay wig from flat to fabulous? Whether you're aiming for sleek beach waves or bouncy ringlets, these 10 best wig curling techniques will elevate your character portrayal to a whole new level.
But before you start styling, there's one important factor you need to keep in mind that can make or break your wig game.
Stay tuned to discover the secret behind achieving long-lasting curls that will steal the show at your next cosplay event.
Key Takeaways
- Create natural waves with twist braids for unique and organic cosplay looks.
- Achieve mermaid curls using a straightener and colorful extensions for vibrancy.
- Style boho waves with a crimper for a textured and natural appearance.
- Experiment with retro waves and defined ringlet patterns for elegant and precise cosplay styling.
Heatless Curls With Flexi Rods
To achieve heatless curls using flexi rods, begin by selecting the appropriate rod size based on the desired curl tightness and hair length. For tight curls, opt for smaller rods, while larger rods will give looser curls. Start with clean, slightly damp hair. Section the hair and wrap small sections around the flexi rods, rolling them up towards the scalp. Secure the rods in place with bobby pins to prevent them from unraveling while you sleep. Make sure the rods are comfortable enough to sleep in, so you wake up to beautifully formed curls.
For overnight curls, it's important to let the hair fully dry before removing the flexi rods. In the morning, gently unravel the rods and separate the curls with your fingers for a natural look. To maintain the shape of the curls, avoid brushing them out. After use, clean the flexi rods with mild soap and water, making sure they're completely dry before storing them in a cool, dry place to prolong their lifespan.
Beach Waves With a Flat Iron
For achieving effortless beach waves using a flat iron, adjust the temperature settings according to your hair type before starting the styling process. Beach waves can add a touch of casual elegance to your cosplay look, and with the right flat iron techniques, you can achieve that perfect tousled style.
Here's how to master the art of creating beachy texture with your flat iron:
- Prep Your Hair: Begin by applying a heat protectant spray to shield your hair from the heat of the flat iron.
- Section and Clamp: Divide your hair into small sections for better control, then clamp the flat iron near the roots.
- Twist and Glide: Twist the flat iron away from your face as you glide it down the hair shaft to create natural-looking waves.
- Alternate Directions: For a more organic look, alternate the direction in which you twist the flat iron with each section.
Tight Ringlets With Curling Wand
To create tight ringlets with a curling wand, start by mastering the wand curling basics. Pay attention to the size of the wand barrel and the temperature settings to achieve the desired ringlet patterns.
Experiment with different techniques such as twisting the hair before wrapping it around the wand for unique and defined curls.
Wand Curling Basics
Achieve perfectly defined ringlets using a curling wand with these expert techniques.
- Prepare Your Curling Wand:
- Make sure your wand is clean and in good condition for best results.
- Store it properly to prevent damage and maintain its effectiveness.
- Section Your Hair:
- Divide your hair into small sections for easier curling and better control over the tightness of the ringlets.
- Apply Heat Protectant and Styling Product:
- Protect your wig from heat damage by applying a heat protectant spray.
- Use a styling product like mousse or hairspray to help the curls last longer and maintain their shape.
- Curling Technique:
- Wrap small sections of hair around the wand, holding for a few seconds before releasing for tight, defined ringlets.
Styling Ringlet Patterns
As you create tight ringlets with a curling wand, focus on mastering the technique to achieve precise and defined patterns in your wig's curls. To enhance curl definition and avoid frizz, make sure your wig is detangled and apply a heat protectant before styling.
Divide your wig into small sections, wrapping each tightly around the curling wand to create uniform ringlets. Hold for a few seconds before releasing, allowing the curls to cool in shape. For added shine and to prevent tangling, lightly apply a wig-friendly shine spray or serum.
Gently separate the curls with your fingers for a more natural look. Practice different wrapping techniques and experiment with varying curl sizes to create dynamic and eye-catching ringlet patterns for your cosplay wig.
Voluminous Curls With Rollers
When aiming for voluminous curls with rollers, it's essential to pay attention to roller size selection.
Make sure to master the proper sectioning technique to achieve a balanced and full look.
The curl setting duration will determine the longevity and bounce of your cosplay wig's curls.
Roller Size Selection
Consider selecting a larger roller size to achieve voluminous curls for your cosplay wig styling. When choosing the right roller size, keep in mind the following tips:
- Barrel Size Comparison: Opt for rollers with a diameter of at least 1.5 inches to create big, bouncy curls that will stand out in your cosplay look.
- Hair Length Factor: Longer wigs will benefit from larger rollers as they provide more space to wrap the hair around, resulting in fuller curls.
- Heat Distribution: Larger rollers allow for better heat distribution, ensuring that the entire section of the wig gets evenly curled.
- Styling Versatility: With larger rollers, you can easily achieve a variety of styles, from glamorous waves to voluminous curls, adding versatility to your cosplay wig.
Proper Sectioning Technique
To achieve voluminous curls with rollers for your cosplay wig, make precise sectioning of the hair to facilitate even curl distribution and best styling results. Sectioning efficiency is key to creating a flawless look.
Begin by dividing the hair into small, manageable sections using clips or hair ties. Guarantee sectioning accuracy by keeping each part uniform in size to achieve seamless curls.
Take time to comb through each section to prevent tangles and assure the rollers can easily glide through the hair. Remember, proper technique in sectioning will set the foundation for a stunning final look.
Curl Setting Duration
For achieving voluminous curls with rollers on your cosplay wig, the key to perfecting your look lies in mastering the ideal curl setting duration. Here are some tips to help you achieve stunning curls:
- Overnight Curls: For long-lasting curls, consider setting your wig overnight for a more defined and voluminous look.
- Quick Curls: If you're short on time, opt for a quick curl setting method that can still give you beautiful results.
- Wet Setting: Wet setting involves curling your wig while damp and allowing it to dry, resulting in bouncy curls.
- Dry Setting: Dry setting is ideal for a faster process where you set the curls on a dry wig for a more natural look.
Defined Curls With Pipe Cleaners
Achieve defined curls for your cosplay wig using pipe cleaners as a versatile and effective method for styling. Pipe cleaners offer a fantastic alternative to traditional curling methods, allowing you to create unique and creative options for your wig.
To begin, select pipe cleaners in a color that matches your wig to seamlessly blend them in. Take small sections of hair and wrap them around the pipe cleaner, securing the ends to hold the curl in place. Once all sections are wrapped, use a steamer or hot water to set the curls.
Caring for pipe cleaner curls is essential to maintain their shape and longevity. Avoid brushing the curls vigorously, as this can cause them to lose their definition. Instead, gently finger comb or use a wide-tooth comb to style and detangle.
When not in use, store your wig with pipe cleaner curls in a clean and dry place to prevent them from getting flattened or tangled. With proper maintenance, your cosplay wig with pipe cleaner curls will stay defined and ready for your next event.
Retro Waves With Pin Curls
Ready to elevate your wig styling game?
Let's master the art of pin curls for that timeless retro wave look.
Get ready to learn the pin curl basics, perfect your technique for styling those glamorous waves, and discover the secrets to maintaining those curls for long-lasting cosplay perfection.
Pin Curl Basics
To achieve stunning retro waves with pin curls, master the art of precision and patience in your wig curling technique. When focusing on pin curl basics, remember these key points:
- Sectioning: Divide your wig into small, manageable sections for easier curling.
- Direction Matters: Alternate the direction of your pin curls for a more natural and voluminous look.
- Pin Size: Use smaller pins for tighter curls and larger pins for looser waves.
- Setting Time: Allow your pin curls to set completely before unraveling for long-lasting retro waves.
Styling Retro Waves
Crafting elegant retro waves with pin curls demands meticulous attention to detail in sectioning your wig and alternating pin curl directions for a natural, voluminous finish.
To achieve vintage glamour reminiscent of Old Hollywood, start by parting your wig into small sections. Take a section, comb it out, then wrap it tightly around your finger to create a pin curl. Secure the curl to the wig cap with bobby pins, making sure each curl is consistent in size and direction. Repeat this process for the entire wig, ensuring the curls are uniform.
Once set, gently release the curls and use your fingers to shape them into luxurious retro waves. This technique will give your cosplay a timeless elegance that captures the essence of Old Hollywood.
Maintaining Pin Curls
For best maintenance of your retro waves with pin curls, meticulous care and attention to detail are crucial in preserving the shape and volume of each curl. To guarantee your pin curls remain flawless, follow these expert tips:
- Opt for an overnight setting to allow the curls to fully dry and set.
- Embrace wet styling techniques for a longer-lasting hold and defined curls.
- Wrap your hair in a silk scarf before bed to prevent frizz and maintain shape.
- Sleep on a satin pillowcase to reduce friction and preserve the integrity of your pin curls.
Spiral Curls With a Curling Iron
Achieve stunning spiral curls effortlessly with a curling iron by following these expert techniques. To create ribbon curls with a curling iron for elegant updos, start by sectioning your wig into small parts. Take a small strand, wrap it around the curling iron away from your face, hold for a few seconds, then release. Repeat this process for each section, ensuring all curls go in the same direction for a cohesive look.
For a more modern chic style, opt for twisted curls with a curling iron. Begin by twisting a small section of hair before wrapping it around the curling iron. Hold for a few seconds, then release the curl. Continue this technique throughout the wig, making sure to twist in alternating directions for a natural and dynamic effect.
Remember to use heat protectant spray before curling and allow the curls to cool before styling for long-lasting results. With these tips, you'll rock gorgeous spiral curls that will elevate your cosplay to the next level.
Natural Waves With Twist Braids
To effortlessly create natural waves with twist braids that exude a touch of whimsical charm, intertwine small sections of hair into tight twists before letting them set. This technique infuses your wig with a relaxed and beachy vibe, perfect for characters with a carefree aura. Here's how to achieve this look:
- Twist Braid Variations: Experiment with different twist braid styles such as rope twists, fishtail braids, or three-strand twists to create unique patterns and textures in your waves.
- Natural Wave Styling: After unraveling the twist braids, gently tousle the waves with your fingers for a more organic and effortless appearance, mimicking the natural movement of hair.
- Setting the Waves: For long-lasting waves, consider using a light-hold styling product or sea salt spray to enhance the texture and hold of the waves throughout your cosplay event.
- Accessorize: Add hair accessories like ribbons, flowers, or pins to complement the natural waves and elevate your character portrayal with a touch of flair.
Mermaid Curls With a Straightener
To achieve stunning mermaid curls using a straightener, intertwine small sections of hair before gliding the tool down the strands for a seamless and voluminous look. Start by sectioning your wig into manageable parts, ensuring each piece is smooth and free of tangles. For added flair, consider incorporating colorful hair extensions strategically throughout the wig. Custom wig styling allows you to tailor the curls to your desired length and shape, creating a unique and vibrant appearance that complements your cosplay character perfectly.
When using the straightener, twist the hair as you glide the tool downwards, gently releasing the curl for a natural bounce. The key is to maintain a consistent rhythm and pressure to achieve uniform curls. Remember to let the curls cool and set before loosening them up for a softer finish. By combining precision with creativity, you can transform your wig into a cascading mane of mermaid-inspired curls that will elevate your cosplay to the next level.
Boho Waves With a Crimper
For a bohemian-inspired look, master the art of creating effortless boho waves using a crimper, infusing your wig with a touch of free-spirited charm and texture. To achieve those perfect boho waves, follow these steps:
- Prep Your Wig: Before using the crimper, make sure your wig is clean and detangled. Apply a heat protectant spray to prevent damage.
- Sectioning: Divide your wig into small sections. Working with smaller sections allows for better control and guarantees all parts are curled evenly.
- Crimping Technique: Hold the crimper vertically and clamp down on a small section of hair. Leave the crimper on for a few seconds before releasing. Continue this process throughout the wig.
- Final Touches: Once all sections are crimped, gently tousle the waves with your fingers for a natural, effortless look. Complete the boho chic style with a headband or floral accessory for a modern twist.
With these steps, you'll rock those boho waves with a crimper, exuding festival vibes and a carefree attitude.
Frequently Asked Questions
Can I Use These Techniques on Synthetic Wigs or Only on Human Hair Wigs?
You can use these techniques on synthetic wigs too. Proper wig maintenance and styling are essential. When heat styling synthetic wigs, follow care instructions to avoid damage. Embrace creativity and attention to detail for fabulous results in your wig styling endeavors.
How Long Will the Curls Last When Using These Techniques?
To maximize curls longevity, consider humidity effects. Use heat protectants and proper curl maintenance for lasting results. Remember, with the right care, your curls can hold up well in different conditions and stay vibrant.
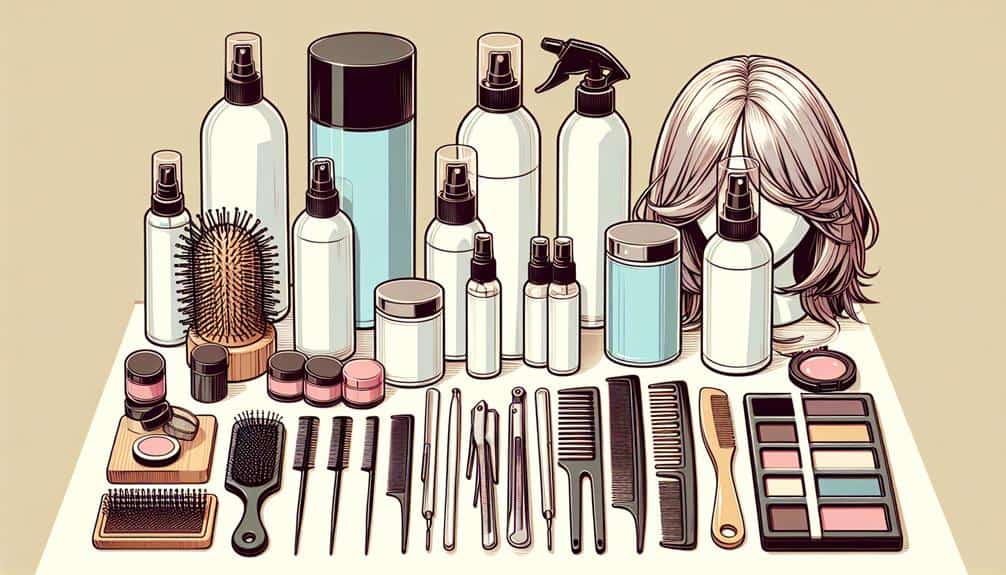
Are There Any Specific Products or Tools Recommended to Enhance the Curling Results?
To enhance your curling results, consider using curling products like heat protectant spray and styling mousse. Invest in quality heat styling tools such as a curling wand or hot rollers. Proper wig care and regular curling maintenance will help maintain your desired look.
Can I Sleep in the Curls Created With These Techniques to Preserve Them for Longer Periods?
You can enhance your wig curls by incorporating overnight styling. To maintain curl longevity, guarantee sleep-friendly curls by loosely braiding or pinning your curls before bed. These preservation tips will help you wake up with fabulous curls!
How Can I Prevent Frizz or Tangling When Styling Wigs With These Curling Techniques?
To prevent frizz and keep your wig tangle-free when styling, use a gentle touch and work in small sections. Prioritize using a high-quality detangling spray and a wide-tooth comb. Finish with a light mist of hairspray for added hold and smoothness.