To make demon horns for fantasy creature cosplay, you’ll start by choosing your material—EVA foam, paper mache, or cardboard tubes—since each one shapes differently. Cut your foam using a Stanley knife with clean single strokes, bevel the edges at 45 degrees, then bond them with contact cement. Texture with gesso, layer acrylics from red to black, and seal everything with Mod Podge. There’s a lot more to master in each step ahead.
Key Takeaways
- EVA foam is the best material for demon horns, offering durability and easy shaping with a Stanley knife and heat gun.
- Match your horn shape to your material: triangular shapes suit foam, curved shapes suit paper mache, and tubes suit cardboard.
- Score ridge lines and layer acrylic paints from bright red at the base to black at the tips for realistic texture.
- Apply 2–3 thin coats of gesso primer, sanding lightly between layers, before adding any acrylic paint or detail work.
- Attach finished horns securely using a plastic headband, embedded magnets, or Pros-Aide skin adhesive for all-day wear.
Best Materials for Making Demon Horns
Choosing the right materials can make or break your demon horns project, so it’s worth knowing what works best before you plunge into it. For lightweight options, EVA foam in 3mm or 5mm sheets outperforms cardboard in durability assessments, though cardboard tubes work well for budget considerations.
The right materials are the foundation of great demon horns — EVA foam leads the way in durability.
Tinfoil excels at base shaping, offering quick design inspirations with minimal cost. When exploring alternative adhesives, contact cement bonds foam edges reliably, while hot glue handles structural assembly.
For finishing techniques, gesso primer guarantees paint adhesion, and Mod Podge seals color variations from acrylic reds and blacks beautifully. Always follow safety precautions when using heat guns for shaping and Stanley knives for cutting.
Comparing these crafting tools and material comparisons helps you build horns that are both durable and visually striking.
Which Demon Horn Shape Works Best for Your Build Method?
Your build method should drive your horn shape choice, not the other way around.
Foam handles tight angles well, so triangular horns with clean 45-degree edge bevels are your best match; paper mache’s flexibility suits gradual curves that would crack rigid materials.
Cardboard tubes roll naturally into cylindrical, tubular horns that stack and taper with minimal cutting.
Match your shape to your material, and you’ll cut your build time and frustration in half.
Triangular Horns for Foam
Triangular horns are the most beginner-friendly shape you can cut from EVA foam, and they’ll push you toward cleaner seams and sharper tips than almost any other silhouette.
Your triangular horn design starts with a flat template traced twice onto 5mm EVA, flipped for a mirror pair. Use a Stanley knife for your foam cutting techniques — one confident stroke beats multiple passes that fray edges.
Bevel each interior edge at 45 degrees before applying contact cement, letting it tack for ten minutes before pressing seams together. Work from tip to base, aligning points precisely.
A heat gun lets you coax subtle curves into otherwise rigid panels, transforming flat geometry into something genuinely menacing.
Sand any raised seams smooth before priming with gesso.
Curved Horns for Paper Mache
Foam holds edges beautifully, but paper mache rewards curves — and if you want sweeping, ram-style horns or dramatic spiraling silhouettes, sculpting over an aluminum foil core is the smarter starting point.
Crush and twist foil into your desired curved horn shape, then lock that form with masking tape.
From there, layering methods matter: apply newspaper strips soaked in equal-parts glue and water, working one layer at a time and letting each dry completely before adding the next.
These paper mache tips keep warping minimal and horn surface textures sharp.
Once dry, seal with a top-coat glue layer, prime with gesso, then sponge red and black acrylics inward from the tip.
Your curved horn techniques determine everything about the final silhouette.
Tubular Horns for Cardboard
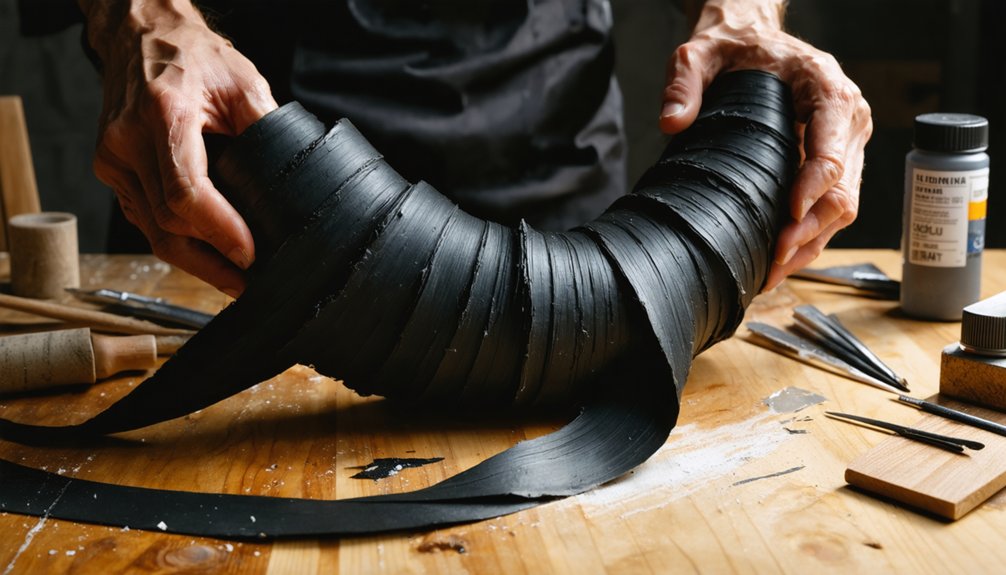
Cardboard tubes release a horn-building method that’s cheaper and more structurally forgiving than foil or foam — cut strips about 2 inches wide from a small box, roll them tightly, and glue the edges down to form a rigid cylindrical core.
These lightweight materials punch above their weight in structural integrity, especially once you apply layering techniques using paper mache over the exterior.
Taper your tube by trimming a wedge from one end, then pinch and glue the tip closed.
Design variations emerge naturally here — spiral wrapping, stacked rings, or angled cuts create dimensional crafting opportunities that flat foam can’t replicate.
Reinforce attachment points as stability solutions using hot glue internally, then add decorative elements like textured paint or origami paper strips to elevate your final build.
Build Your Demon Horn Base With Foil or Foam
Start your demon horn base by crushing tinfoil into a tight triangular cross-section, working from the wide base up to a sharp tip.
If you’re running low on foil, swap in foam core to build out the bulk without sacrificing structural integrity.
Either way, you’ll want a firm, well-defined form before you move on to covering and refining.
Shaping Your Foil Base
Whether you’re working with a full roll or just scraps, tinfoil is your go-to material for roughing out the horn’s core shape. Compress and twist the foil tightly, building toward your target horn proportions while maintaining symmetry between both pieces.
- Foil shaping: Twist layers inward, creating a triangular cross-section for structural integrity.
- Base reinforcement: Compress multiple foil layers at the base for added density.
- Horn symmetry: Shape both horns simultaneously, comparing them frequently.
- Material selection: Switch to foam core when foil supplies run low.
- Design aesthetics: Refine curves using crafting tools like pencil handles for precise indentations.
Once your core holds its shape, wrap the entire form with masking tape, locking in texture techniques and preparing the surface for paper mache application.
Foam Core Alternatives
When your foil supply runs short or you want a sturdier foundation, foam core and cardboard become your best alternatives for building demon horn bases. Both lightweight alternatives offer distinct foam core benefits, including structural integrity that aluminum simply can’t match for larger, more complex designs.
For cardboard, cut 2-inch strips, roll them into tubes, and secure with hot glue. This cost-effective option provides impressive durability comparison against foil, especially for horns exceeding six inches.
Foam core’s versatility factors allow you to carve, layer, and heat-shape complex geometries with a Stanley knife and heat gun.
These crafting techniques reveal serious design flexibility, letting you prototype aggressive, twisted, or branching horn structures that foil construction would struggle to support reliably.
Cover and Strengthen Your Demon Horn Structure
Once your tinfoil base is shaped to your liking, cover it tightly with masking tape to lock in the form and give the surface some tooth for the next layer. This process helps reinforce the base, stabilize horns, and build integrity before applying paper mache.
- Wrap masking tape in overlapping strips to strengthen structure and protect edges.
- Mix equal parts all-purpose glue and water to create your paper mache solution.
- Apply one layer of newspaper strips to cover layers evenly and enhance durability.
- Smooth each strip carefully to support the framework and control layer thickness.
- Let it dry completely to secure fittings and establish a solid, workable surface.
Once dry, add a final glue wash to seal everything and prepare for priming.
How to Cut and Shape EVA Foam Horns That Fit?
Cutting EVA foam into horn shapes that actually fit takes a bit of planning, but it’s a straightforward process once you have a solid template.
Start with horn sizing by drawing your template on painter’s tape, then trace it twice onto 3mm or 5mm foam, flipping one piece for a mirror image.
Use a Stanley knife for precise cutting techniques that keep edges clean. Trim 45-degree bevels along each edge to maximize the glue surface, which improves base stability once assembled.
Foam flexibility lets you test the curve against your head before committing to contact cement.
Apply layering methods to build thickness at the base for structural strength.
Make fitting adjustments by trimming the base after assembly, and explore design variations like tapering or spiraling for unique results.
Texture Your Demon Horns for a Realistic Look
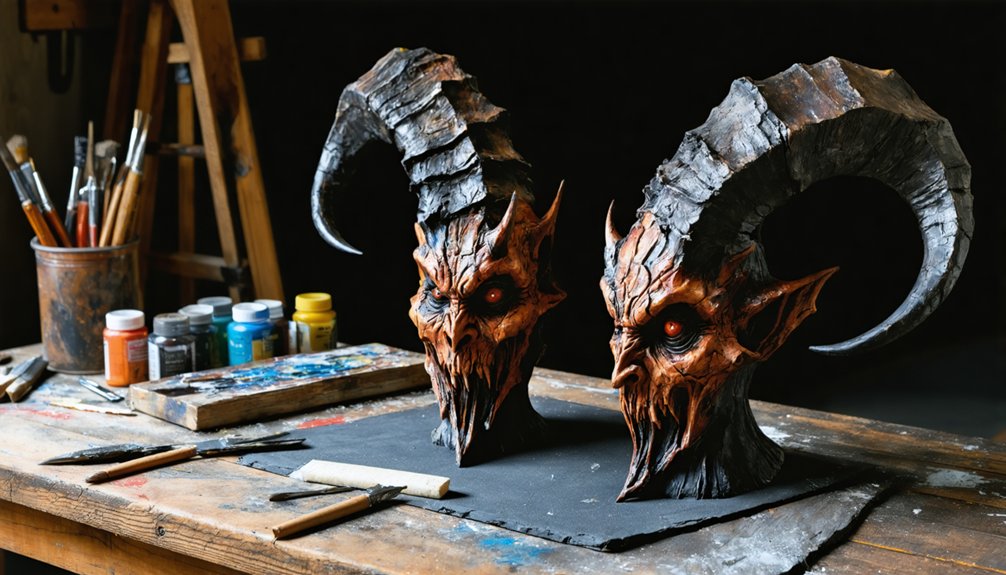
Texturing your demon horns transforms a smooth foam shell into something that looks genuinely menacing. Applying realistic textures and surface detailing elevates your build from craft project to creature feature. Use these layering techniques and sculpting methods strategically:
- Prime first: Brush gesso evenly across the horn surface, sealing foam pores before paint application begins.
- Carve organic detail: Use a Stanley knife to score ridge lines, mimicking natural horn growth patterns.
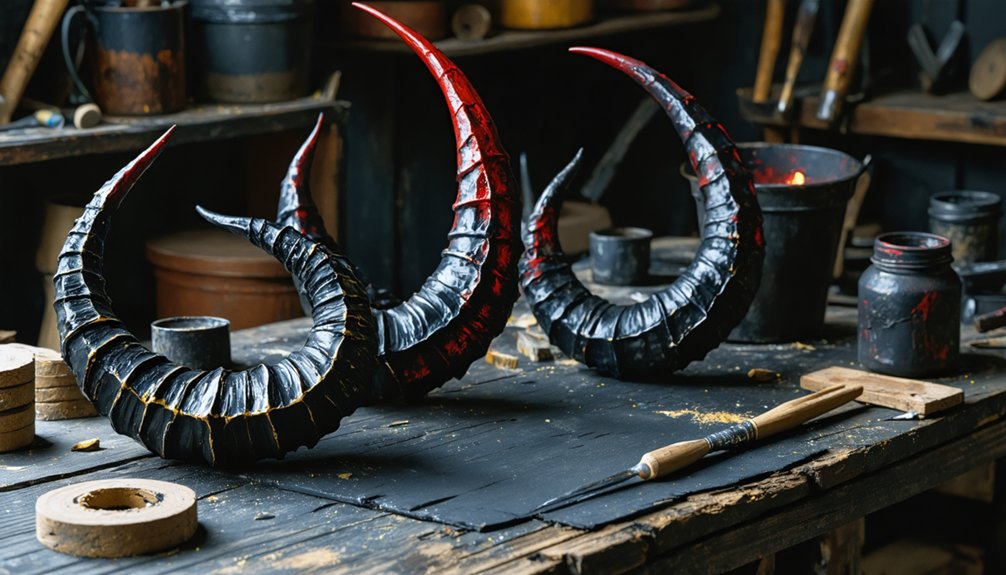
- Build color depth: Sponge bright red acrylic from the base upward, then layer black toward the tip for dramatic color blending.
- Add grip texture: Press crumpled foil against wet gesso to stamp irregular surface patterns.
- Seal everything: Coat completed horns with Mod Podge, locking in your paint application and protecting finished details.
Prime and Paint Demon Horns for Cosplay
Once your horns are fully dried and textured, brush on a coat of gesso primer to create a smooth, even base that’ll help your paint adhere properly.
Next, use a sponge to dab bright red acrylic from the base upward, then layer black from the tips inward, blending the two colors for a fiery, dimensional effect.
Seal everything with a coat of Mod Podge to protect your paintwork and give the horns a polished, durable finish.
Applying Gesso Primer Coat
Before painting your demon horns, apply 2–3 thin coats of gesso primer to create a smooth, even surface that’ll help your acrylics adhere properly. Mastering gesso application techniques and understanding primer benefits will elevate your finished piece considerably.
Follow these steps for best results:
- Thin each coat with a few water drops for better spreadability
- Brush in one direction to minimize streaking across the surface
- Allow full drying time between coats, roughly 20–30 minutes each
- Sand lightly between layers using fine-grit sandpaper to eliminate brush marks
- Check coverage by holding horns under direct light, spotting any missed areas
Once your final coat dries completely, you’ll have a consistent, paint-ready surface that makes acrylic colors appear vivid and professional.
Sponging Red And Black
With your gesso fully cured, grab two sponges and load one with bright red acrylic and the other with black. Begin sponging techniques from each horn tip, working inward with the red, building color blending gradually through layering methods.
Acrylic properties allow fast drying between coats, so you can apply successive layers without muddying tones. Your paint application should stay deliberate — dab rather than drag, exploiting texture variations the sponge naturally creates.
Push black into recessed areas and carved grooves, reinforcing depth and shadow. Brush choices matter here; a fine detail brush tightens edges after sponging. Continue alternating layers until you achieve rich, dimensional finish effects that suggest an otherworldly, organic surface.
Step back frequently to evaluate tonal balance before sealing.
Sealing With Mod Podge
Seal your painted horns with a generous coat of Mod Podge, brushing it evenly across every surface to lock in your acrylic layers and add a durable protective finish.
Layering methods matter here — apply two to three thin coats, allowing adequate drying times between each pass for maximum adhesion and texture enhancement.
- Choose glossy vs matte finishes depending on your desired aesthetic — glossy amplifies vibrancy, matte feels organic.
- Explore Mod Podge alternatives like clear acrylic sealant spray for faster application.
- Press origami paper strips using fabric adhesion techniques before sealing for decorative finishes.
- Follow sealing tips: always brush in one direction to prevent streaking.
- Apply maintenance tips: store sealed horns away from humidity to prevent peeling.
Seal and Decorate Demon Horns With Mod Podge and Fabric
Once your paper mache has fully dried, brush a generous coat of Mod Podge over the entire horn surface to seal and smooth it. This Mod Podge application creates an ideal foundation for decorative techniques that elevate your build.
Seal your dried paper mache with a generous Mod Podge coat—the perfect foundation for stunning decorative techniques.
While it’s still tacky, layer torn origami paper strips for stunning layering effects that mimic reptilian scales or cracked obsidian. Your fabric choices matter here—velvet scraps add rich texture enhancements near the base, while felt creates cleaner geometric patterns.
Experiment with color combinations by mixing metallic and matte origami papers for dimensional depth. Apply additional sealant options like gloss or matte Mod Podge topcoats to control your final sheen.
These finishing touches transform basic horns into professional-quality cosplay pieces that genuinely command attention.
How Do You Attach Demon Horns Securely?
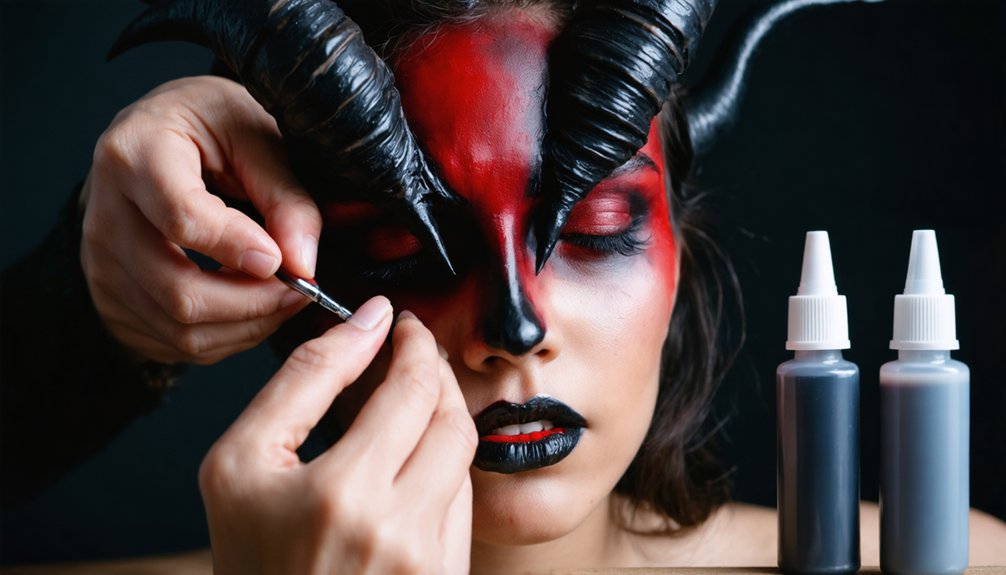
Attaching your demon horns securely depends on your build material and how long you’ll wear them. Choose your attachment techniques based on wearability needs:
- Headband options: Glue horns onto a plastic headband with teeth for all-day grip, then use hair styling to conceal it naturally.
- Magnet use: Embed magnets inside foam horns and pair them with scalp-safe adhesive backing for seamless, tool-free removal.
- Pros-Aide application: Mount horns onto a gelatin forehead base, then apply Pros-Aide for a skin-bonded, professional-grade hold.
- Blending edges: Feather seams using spirit gum, mastix, or latex so horns read as organic extensions of your skin.
- Secure methods for EVA: Hot glue reinforced contact points prevent shifting during high-movement performances.
Match your method to your costume’s intensity level.
How Do You Fix Demon Horn Problems Before the Event?
Fixing demon horn problems before your event saves you from last-minute disasters that can’t be undone under pressure. Conduct a full test run 48 hours ahead, giving yourself room for horn repair without panic.
Address fitting challenges by adjusting your headband attachment or adding foam padding to redistribute weight. For structural support issues, reinforce weak joints with hot glue or contact cement, letting each layer cure completely.
Apply paint touch-ups using dry-brushing techniques, ensuring color blending shifts remain seamless between your red and black acrylic layers. Seal everything with Mod Podge afterward.
If seams look rough, texture enhancements using sandpaper or a heat gun can salvage uneven EVA foam surfaces. Attachment adjustments using spirit gum or additional tape backing prevent embarrassing mid-event horn failures you simply can’t afford.
Frequently Asked Questions
Can Demon Horns Be Made Without Any Crafting Experience or Prior Skills?
“Practice makes perfect!” You can absolutely make demon horns with zero experience. Start with easy crafting basics: shape tinfoil, apply masking tape, then paint. These beginner tips guarantee even first-timers create stunning, innovative fantasy creature cosplay horns successfully.
How Long Do Demon Horns Typically Last Before Needing Replacement or Repair?
Your demon horns’ lifespan depends on durability factors like materials and handling—EVA foam lasts years with proper care. You’ll use repair techniques like re-gluing seams with contact cement or repainting chipped acrylics to extend their innovative longevity.
Are Demon Horns Safe for Children to Wear During Halloween Events?
Yes, demon horns can be safe for children when you prioritize child safety and costume comfort. Use lightweight EVA foam, avoid sharp edges, secure attachments firmly, and guarantee they’re breathable so your little one enjoys Halloween worry-free!
Can Demon Horns Withstand Outdoor Weather Conditions During Cosplay Events?
“An ounce of prevention is worth a pound of cure!” Conduct durability testing by sealing your demon horns with Mod Podge, ensuring weather resistance. You’ll protect EVA foam and paper mache from moisture during outdoor cosplay events.
How Much Do Materials for Making Demon Horns Typically Cost Overall?
You’ll typically spend $15–$40 overall, depending on your material alternatives. Budget-friendly options like recycled cardboard, tinfoil, and basic acrylic paints keep costs minimal, while premium EVA foam and professional-grade adhesives push your investment toward the higher range.
References
- http://chrixdesign.blogspot.com/2013/08/demonic-horns-how-to-make.html
- https://www.youtube.com/watch?v=lhmv99F8Y4k
- https://www.instructables.com/Foam-Cosplay-Horns/
- https://www.youtube.com/watch?v=dDzM_sVPcmo
- https://makezine.com/projects/sculpt-demon-horns-from-foam-and-paper-towels/
- https://www.youtube.com/watch?v=uA_842DX6jg
- https://www.youtube.com/watch?v=JPlYbSTT2SQ