Creating a stunning fantasy creature cosplay starts with choosing a creature that matches your skill level and gathering multi-angle references. You’ll use EVA foam, Worbla, and textured fabrics to build durable, realistic components. Sculpt features with layered clay or thermoplastics, secure prosthetics with patch-tested adhesives, and paint with flexible acrylics sealed for durability. Prioritize comfort through moisture-wicking layers and reinforced seams. Everything you need to master this build process is covered ahead.
Key Takeaways
- Choose a fantasy creature aligned with your skill level and gather multi-angle reference images for accurate structural understanding during construction.
- Use EVA foam for lightweight armor and Worbla for heat-moldable features, ordering specialty materials early to avoid delays.
- Seal and prime all sculpted horns, claws, and features before painting to achieve a professional, durable finish.
- Layer costumes strategically with moisture-wicking base layers, reinforced seams, and stretch fabrics in high-movement areas for comfort.
- Pack a repair kit with spirit gum, hot glue, acrylic touch-up paint, and a needle for quick event fixes.
Pick a Fantasy Creature That Fits Your Vision
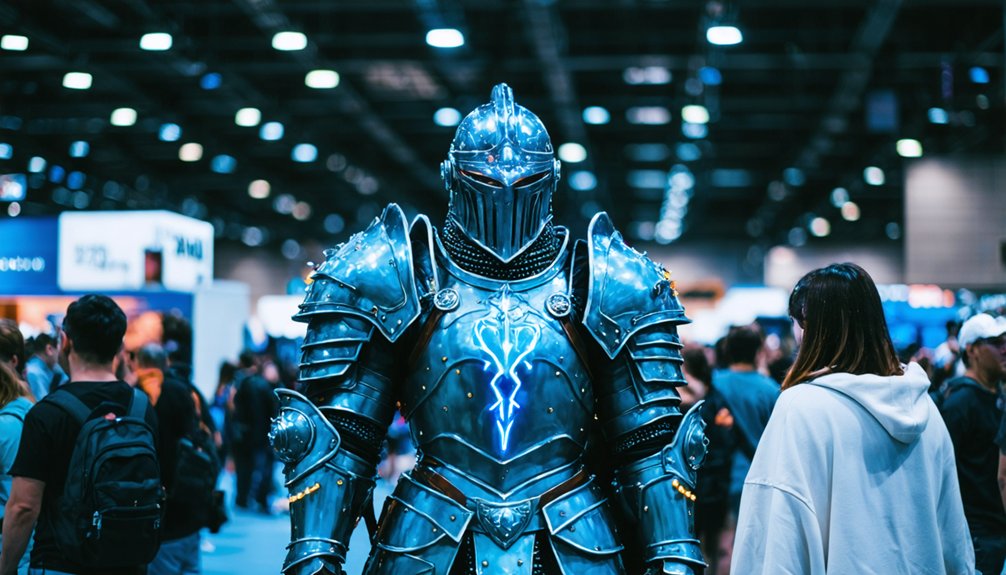
What kind of fantasy creature speaks to your imagination? Your selection drives every construction decision ahead, so choose deliberately. Draw mythical inspiration from established fandoms like dragons, fae, or sea creatures, but don’t stop at surface-level references. Study creature evolution across multiple source materials — games, films, concept art — to identify design elements that resonate most strongly with your aesthetic goals.
Align your creature choice with your actual skill set. An intricate dragon demands advanced armor-building and scaling techniques, while a forest fawn requires refined prosthetic horn work and fabric draping. Consider your body type, mobility requirements, and event environment before committing. Pulling reference images from every angle guarantees you understand the full structural scope before purchasing a single material.
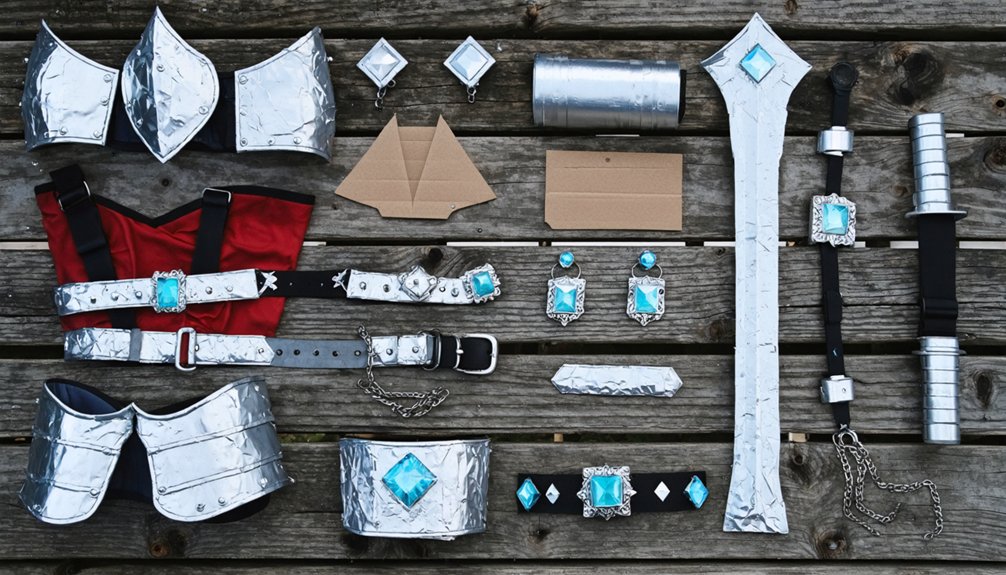
Choose the Right Materials for Fantasy Creature Cosplay
Material selection determines whether your fantasy creature cosplay holds up under stage lights or falls apart by noon. You’ll need to evaluate material types based on durability, flexibility, and visual impact.
EVA foam delivers lightweight structural support for armor plating and horns, while thermoplastics like Worbla offer superior heat-moldable precision for intricate creature features.
Your texture choices directly influence realism. Faux fur, scaled fabric, and textured latex each create distinct creature aesthetics that photographs dramatically under event lighting.
Pair acrylic-sealed foam with metallic pigments for iridescent fantasy finishes that catch stage light effectively.
Prioritize breathability for wearables touching skin directly. Spandex underlayers regulate temperature during extended wear.
Order specialty materials like silicone, professional-grade latex, or overseas fabrics early, since shipping delays derail your entire production timeline.
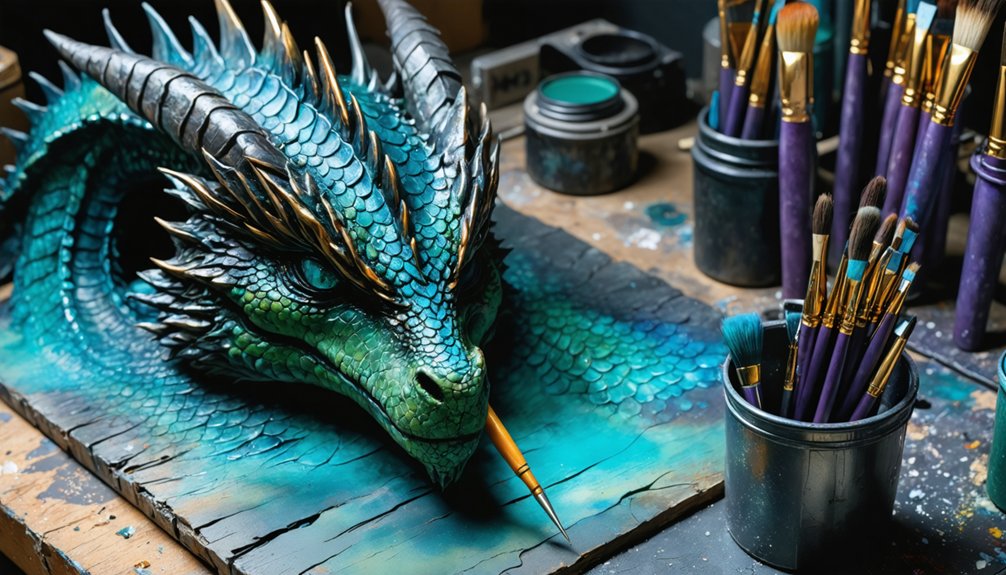
Sculpt and Shape Horns, Claws, and Creature Features
To sculpt realistic horn bases, you’ll want to start with a lightweight armature of aluminum wire or foam. Then build up layers of air-dry clay or thermoplastic like Worbla to define the core shape.
Once your base is solid, use sculpting tools to carve in ridges, spirals, or organic surface details that match your reference photos precisely.
For claws, shape craft foam or Worbla into tapered forms. Score the surface with a heat tool or knife to create knuckle lines and texture. Then seal everything with a flexible primer before painting.
Sculpting Realistic Horn Bases
For curved or spiraled designs, build your sculpting techniques around an internal wire armature, which prevents cracking during shaping and drying. Score the clay’s surface before adding additional layers to guarantee strong adhesion between sections. Smooth seams using silicone-tipped tools or damp fingers for a seamless finish.
Once fully cured or dried, sand progressively from coarse to fine grit, eliminating imperfections before priming. Apply a sealant coat before painting to prevent absorption and guarantee crisp, professional color application across the entire horn structure.
Shaping And Texturing Claws
Once your horns are shaped and sealed, claws follow the same foundational sculpting logic but demand sharper attention to tapered geometry and surface texture.
Understanding claw anatomy is critical — each claw narrows from a broad base to a pointed tip with a subtle dorsal curve. Use polymer clay or thermoplastics to build that curvature accurately.
For texture techniques, start with a coarse dental tool to score longitudinal ridges along the outer surface, mimicking keratin growth patterns.
Then dry-brush acrylic paint in layered tones — dark base, mid highlights, sharp edge accents — to amplify dimensional depth. Sand between layers for a refined finish.
Seal everything with matte or gloss varnish depending on your creature’s aesthetic. Test flex and durability before attaching claws to gloves using Pros-Aide or contact cement.
Secure Prosthetics and Creature Features Without Skin Damage
Securing prosthetics and creature features to your skin requires the right adhesives and preparation to avoid irritation, tearing, or allergic reactions.
Prosthetic safety starts with clean, oil-free skin — apply isopropyl alcohol before any adhesive contact. Patch-test Spirit Gum, Pros-Aide, or medical-grade silicone adhesive 48 hours before your event to rule out sensitivities.
Clean, oil-free skin is your foundation — always patch-test adhesives 48 hours before wearing prosthetics.
For attachment methods, apply thin adhesive layers, pressing firmly and holding each section until fully bonded. Use a prosthetic sealer around edges to prevent lifting during wear.
For removal techniques, never peel prosthetics dry — saturate edges with adhesive remover like Detachol or isopropyl alcohol, then gently lift. Follow with a gentle cleanser and moisturizer to restore your skin barrier.
Proper skin preparation before and after protects your skin throughout extended wear.
Paint and Finish Fantasy Creature Parts Like a Pro
Once your creature parts are secured, start with a flexible acrylic base coat, applying thin, even layers to prevent cracking on latex or foam surfaces.
Build depth by dry-brushing darker shades into recessed areas and pulling lighter tones across raised edges to achieve professional-grade shading and highlights.
Seal everything with a matte or gloss flexible sealant, like Plasti-Dip or Mod Podge, to lock in your paintwork and protect it against sweat, handling, and event wear.
Base Coat Application Techniques
Before you paint any fantasy creature part, applying a proper base coat is the critical step that determines how well your final colors adhere and how professional your finish looks.
Understanding base coat types prevents paint cracking, peeling, and uneven pigment absorption.
For foam or latex pieces, use flexible acrylic primers specifically formulated for porous surfaces. Rigid resin components require a standard spray primer.
Your application tools greatly impact results — foam brushes minimize brush strokes on smooth surfaces, while stipple sponges create organic texture on creature skin.
Apply thin, even layers rather than one thick coat, allowing complete drying between applications.
Sand lightly between coats on rigid pieces for maximum adhesion.
Two to three base coat layers guarantee superior pigment coverage during your detailed painting phases.
Shading And Highlighting Methods
Shading and highlighting transform a flat, uniformly painted surface into a convincing three-dimensional creature feature. Apply shading techniques using a darker tonal value of your base color, concentrating pigment into recessed areas like horn ridges, scale grooves, and indented textures.
Use a dry brush loaded minimally with paint, then wipe it nearly clean before dragging it across raised surfaces. This controlled technique prevents muddy blending.
For highlighting techniques, load a fine brush with a lighter complementary tone or metallic pigment and stroke it precisely along protruding edges and peaks. Layering multiple passes builds realistic depth incrementally.
Iridescent pigments applied over dried highlights create fantasy-specific luminosity that catches event lighting dramatically. Seal completed work immediately with a matte or satin fixative to preserve your layered shading and highlight definition permanently.
Sealing For Durability
Sealing your painted fantasy creature parts locks in every shading layer and metallic pigment you’ve built up, protecting them against sweat, handling, and event wear.
Choose sealing techniques matched to your base material. For foam and Worbla pieces, apply Plasti-Dip or Mod Podge as a flexible undercoat before your final sealant. For rigid resin or hard foam, use matte or satin varnish sprays like Krylon or Rust-Oleum.
These durability materials resist cracking under movement and humidity fluctuations common at conventions. Apply thin, even coats rather than one heavy layer, allowing full drying between applications.
For iridescent or metallic finishes, use a UV-resistant clear coat to prevent fading under stage lighting. Always test sealants on scrap material first to confirm compatibility with your specific paints and surfaces.
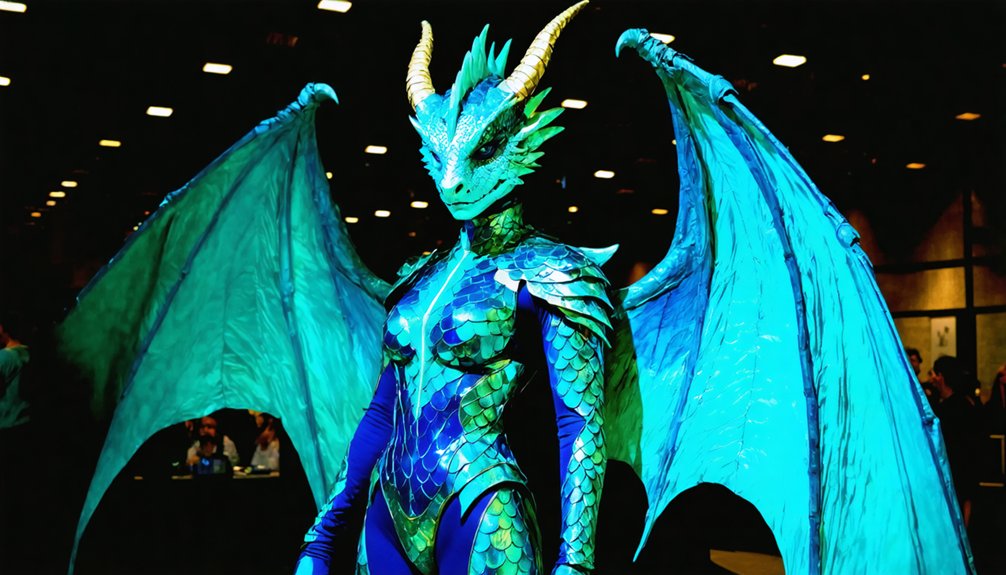
Construct Your Fantasy Creature Costume for Comfort and Durability

When constructing your fantasy creature costume, prioritize comfort and durability by selecting materials that match both your character’s aesthetic and the demands of extended wear.
Apply costume layering strategically, starting with moisture-wicking base layers, then structural mid-layers, and finishing with decorative outer materials. This approach distributes weight evenly while preventing overheating during long convention hours.
Mobility considerations demand equal attention. Reinforce high-stress seams at joints using double-stitching or bonding tape, ensuring movement doesn’t compromise structural integrity.
Opt for stretch fabrics at elbows, knees, and shoulders where flexibility is critical.
Integrate hidden closures like hook-and-eye fasteners or magnetic snaps for quick adjustments.
Test your complete costume through full range-of-motion exercises before your event, identifying and correcting any restrictions well in advance.
Choose Props and Accessories That Complete Your Creature Look
Props and accessories transform a well-constructed costume into a fully realized creature character, so you’ll want to approach their selection with the same precision you applied to your base build.
Prop significance extends beyond aesthetics—each item must reinforce your creature’s identity while maintaining accessory balance across your silhouette.
- Assign props based on character lore and functional necessity
- Verify weight distribution prevents strain during extended wear
- Choose materials matching your costume’s texture and finish palette
- Test articulated pieces like claws or tails for full range of motion
- Secure accessories with reliable fasteners—magnets, snaps, or Velcro
Prioritize props that photograph well under event lighting.
Avoid overcrowding your design; strategic restraint strengthens visual impact.
Every accessory you select should serve a deliberate narrative or structural purpose within your creature’s overall presentation.
Fix Creature Cosplay Damage Quickly During Events
Even the most meticulously constructed creature cosplay will sustain damage at events, so you need a compact repair kit tailored to your build’s specific vulnerabilities.
Pack spirit gum and Pros-Aide for reattaching prosthetic horns or scales that loosen under sweat and heat. Quick fixes for structural failures include hot glue sticks, a travel-sized glue gun, and gaffer tape in matching colors.
Carry acrylic paint touch-up pots for damage repair on painted surfaces, especially horn tips and textured overlays prone to chipping. Monofilament, a curved needle, and matching thread address torn seams instantly.
Seal repaired paint layers with a portable matte or satin finishing spray to restore cohesion. Organizing supplies into labeled compartments accelerates your response time during high-traffic convention hours.
Strike Poses That Bring Your Fantasy Creature Cosplay to Life
Once your repairs are secured and your creature cosplay is structurally sound, your physicality becomes the next performance layer that separates a static costume from a living character.
Mastering pose dynamics and character expression transforms your appearance into an immersive narrative.
Study your character’s movement vocabulary before the event. Apply these techniques deliberately:
- Root your stance low and wide for predatory or powerful creatures
- Extend extremities fully to showcase wings, claws, or tails
- Isolate facial muscles to project character expression through heavy prosthetics
- Use negative space intentionally to frame your silhouette in photos
- Sequence fluid movements between poses for cinematic continuity
Practice each position in full costume beforehand.
Your body mechanics communicate character identity faster than any single costume element ever will.
Frequently Asked Questions
How Do You Coordinate Fantasy Creature Cosplay Looks Within a Group?
You’ll coordinate fantasy creature cosplay by aligning character selection with each member’s skills and body type, ensuring group dynamics remain cohesive. Assign roles, match materials, and verify props function seamlessly for a unified, visually striking ensemble.
Which Online Tools Help Organize Fantasy Creature Cosplay Project Timelines Effectively?
Why not streamline your workflow? You’ll find CosPlanner and Trello offer powerful project management features, while Google Sheets provides customizable timeline templates to track milestones, material orders, and construction deadlines for your fantasy creature cosplay effectively.
How Do You Assign Fantasy Creature Characters Based on Individual Body Types?
You’ll assign fantasy creature characters by matching body proportions to iconic character traits; tall builds suit dragons, petite frames complement fairies, and muscular physiques enhance warriors, ensuring each cosplayer’s natural silhouette authentically amplifies their chosen creature’s defining visual identity.
Which Overseas Materials Require the Earliest Ordering for Creature Cosplay Projects?
Surprise — international shipping won’t wait for your procrastination! Prioritize ordering wigs and specialty cosplay materials requiring international shipping first. You’ll thank yourself when iridescent pigments, latex, and silicone arrive weeks before your event deadline.
How Do You Engage Online Communities for Fantasy Creature Cosplay Feedback?
Post progress photos in dedicated forums, requesting cosplay critiques on construction techniques. You’ll gain character inspiration from experienced creators who’ll actively evaluate your creature’s horn sculpting, material choices, and overall design innovation systematically.
References
- https://eyecandys.com/blogs/news/what-to-pack-cosplay-event
- https://www.lemon8-app.com/@forevertreble/7454397817994461738?region=us
- https://www.youtube.com/watch?v=CxfhiB1W0jY
- https://creedleather.com/blogs/costume-guide/adventure-and-fantasy-cosplay-costumes
- https://www.cinemamakeup.com/blogs/how-to-make-horns-for-cosplay-with-special-effects-makeup/
- https://d20collective.com/blogs/divinations-from-the-collective/designing-dungeons-and-dragons-characters-to-cosplay
- https://www.youtube.com/watch?v=hvAz3eOoMNM
- https://www.youtube.com/watch?v=_Qi-XOeEEk8