To master realistic dragon scale creation for cosplay, you’ll need 2 mm EVA foam, a heat gun, and DecoArt X-treme Flex acrylics that won’t crack during wear. Cut individual scales at 22 mm x 29 mm, layer them with consistent 5 mm overlaps, and build depth by blending iridescent colors over a black gloss base. Add distressing with dry-brushing and heat-gun indentations for a battle-worn finish. There’s much more technique ahead to bring your armor to life.
Key Takeaways
- Use 2 mm EVA foam for lightweight, shapeable dragon scales measuring 22 mm x 29 mm for consistent, realistic results.
- Apply a black gloss acrylic base coat, then blend iridescent colors and navy accents for depth and realism.
- Shape foam using a heat gun for curves and score edges with craft knives for realistic etched details.
- Layer scales from bottom to top with 5 mm overlaps, using hot glue or contact cement for secure assembly.
- Incorporate D-rings and Velcro closures with side splits to ensure adjustable, comfortable fitting during wear.
Choose the Right Materials for Lightweight Dragon Scales
When building dragon scale armor for cosplay, you’ll want to start with 2 mm EVA foam as your primary material—it’s lightweight, easy to shape with a heat gun, and holds paint well.
Its material properties balance flexibility needs with durability factors, making it ideal for wearable armor. For paint adhesion, DecoArt X-treme Flex acrylics bond directly to foam without cracking during movement.
Consider weight considerations carefully—thinner 2 mm foam works for raised edge details, while resin suits 3D printed skirting components.
Thinner 2 mm foam handles raised edge details beautifully, while resin better supports heavier 3D printed skirting components.
Evaluate texture options by layering materials strategically. For color selection, black gloss creates a strong base.
When sourcing suppliers, compare cost analysis across foam and resin vendors. Choosing sustainable materials also reduces environmental impact without compromising your build’s structural integrity.
Design and Measure Your Dragon Scales Before You Cut
Before you make a single cut, establish your scale dimensions at 22 mm x 29 mm to maintain consistency across all 800 scales in your set.
Use plastic wrap and painter’s tape on a dress form to create accurate breastplate templates, labeling each piece flat so you can add details before assembly.
Plan your overlap layout carefully, using the templates to map how scales will layer across the chestplate and guarantee the finished piece approximates a 40×40 cm coverage area.
Choosing Your Scale Dimensions
Deciding on your scale dimensions before cutting saves time and prevents wasted materials. For a balanced chestplate, individual scales measuring 22 mm x 29 mm offer strong size proportions that support both visual balance and design function.
These measurements directly affect dimension impact, influencing scale aesthetics across the finished piece. Your artistic choices here shape aesthetic cohesion throughout the armor.
Smaller scales improve scale flexibility for curved body areas, while larger ones reinforce structural integrity on flat panels. EVA foam at 2 mm thickness supports scale durability without adding unnecessary weight, keeping your build wearable and precise.
One set yields 800 scales across 50 strips, approximating a 40×40 cm finished surface. Plan your layout intentionally — every sizing decision you make drives the final armor’s performance and appearance.
Patterning With Templates
Use these assembly strategies to refine your workflow:
- Label each template piece flat before curving — edge detailing is easier on flat surfaces.
- Check pattern alignment and scale symmetry across both sides to avoid mismatched overlaps.
- Build template variations for side splits, accommodating D-rings and Velcro closures.
Transfer your ZBrush-designed scale dimensions — 22 mm x 29 mm — directly onto templates for consistent layering methods.
Design adjustments happen at the template stage, not after cutting, saving both material and time.
Planning Scale Overlap Layout
Planning your scale overlap layout starts with locking in your measurements before a single piece of foam gets cut. Each individual scale measures 22 mm x 29 mm, so map your layout planning across the full 40×40 cm finished surface first.
Use your chestplate template as the foundation, then calculate how your scale overlap techniques will distribute across 800 scales from 50 strips. Overlap each row so the upper scale covers roughly one-third of the scale beneath it, creating clean layering without bulk.
Mark your template in sections before cutting, labeling each piece flat for easier detailing later. This flat-first approach lets you refine spacing, adjust row alignment, and identify gaps before committing to cuts, saving both material and time during the full build.
Pattern Your Dragon Scale Chestplate the Right Way
To create your chestplate pattern, wrap plastic wrap and painter’s tape directly over your dress form’s torso. Then cut and mark the shape you need.
Add side splits where you’ll attach D-rings and Velcro closures for an adjustable fit.
Before you curve any piece into its final form, label every flat section clearly so detailing and assembly stay organized and mistake-free.
Chestplate Patterning Techniques
Patterning your dragon scale chestplate starts with wrapping your dressform in plastic wrap. Then, layer painters tape directly over it to create a custom-fitted template. This method captures precise scale curvature techniques unique to your body shape.
Once you’ve traced and cut your pattern pieces, label each one flat before assembly for easier detailing.
Here’s what to build into your pattern from the start:
- Add side splits to accommodate D-rings for adjustable closures using Velcro.
- Mark raised edge detail placements using painter’s tape before cutting foam.
- Note scale overlap directions to maintain consistent armor flow across the chestplate.
Working flat lets you refine details before heat-shaping the foam into its final curved form, saving significant rework time.
Labeling Pieces For Assembly
Once you’ve cut your pattern pieces from the plastic wrap and painters tape template, label every piece flat before you do anything else. Use a marker for foam identification — note orientation, left or right side, and position on the chestplate.
Apply color coding with different ink colors for scale categorization, separating chest panels from side splits and D-ring sections. Marking edges clearly prevents misalignment during heat-shaping.
Reference your ZBrush designs or printed templates while adding material tags directly onto each foam section, ensuring you’re always cross-referencing designs accurately.
Assembly organization becomes effortless when every piece carries its purpose before curving begins. These labeling techniques eliminate guesswork, letting you focus on detailing raised edges and layering scales without losing track of where each component ultimately belongs.
Cut and Shape Dragon Scale Foam Like a Pro

Cutting and shaping EVA foam into convincing dragon scales starts with choosing the right thickness—2 mm foam strikes the ideal balance between flexibility and structure for individual scales measuring 22 mm x 29 mm.
Master these three critical techniques:
- Heat molding — Apply a heat gun evenly across both foam sides, then curve each scale immediately into your desired contour before it cools.
- Edge finishing — Score foam edges using precise cuts to create etched detail lines that enhance realistic texture detailing.
- Scale layering — Overlap scales systematically using templates, ensuring consistent assembly techniques throughout your chestplate construction.
Tool selection matters greatly—sharp craft knives guarantee clean scale cutting, while contact cement secures layered pieces permanently.
Complete all foam shaping and flat detailing before heat-molding everything into its final three-dimensional form.
Layer Foam for Dragon Scale Raised Details and Etched Edges
Layering foam transforms flat EVA pieces into dimensional dragon scales with convincing depth and texture. You’ll achieve raised effects by cutting thinner 2 mm foam strips and applying them along scale edges using contact cement or hot glue.
These layering techniques add immediate scale realism without complex tooling.
For edge detailing, score your foam with a sharp blade before heat-forming. This foam manipulation creates etched lines that define each scale’s boundary convincingly.
Your design choices here directly impact texture enhancement, so plan scoring patterns before assembly while pieces remain flat.
Apply raised foam details to non-curved sections first, then heat-shape the assembled piece. These construction tips prevent detail distortion during molding.
Painter’s tape helps you map precise edge placement before committing foam layers permanently.
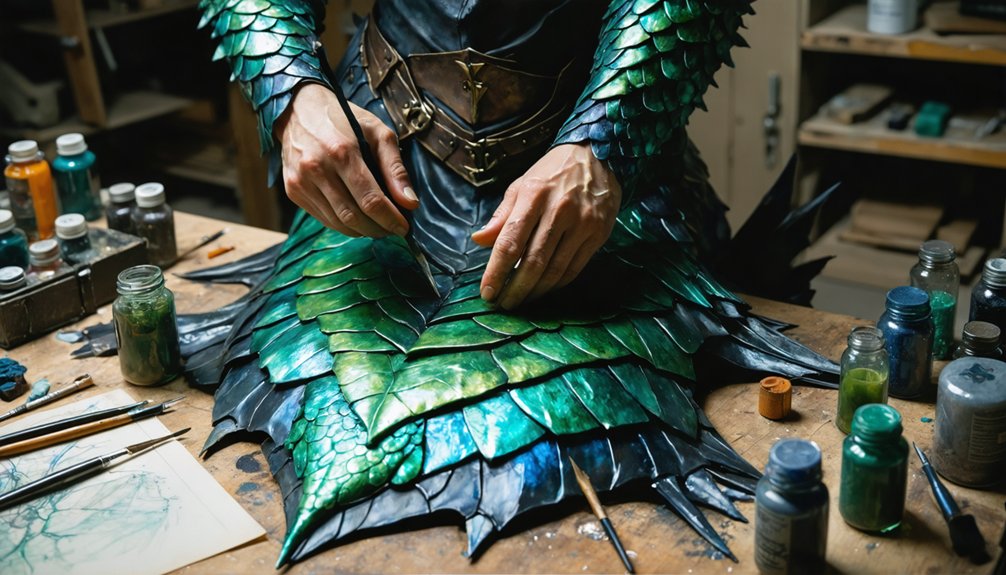
Paint Dragon Scales for Maximum Realism and Depth
Your foam’s raised details and etched edges create the foundation that paint will now bring to life. Layering techniques transform flat surfaces into dimensional scales using DecoArt X-treme Flex acrylics.
Foam’s carved texture becomes the canvas where layered acrylics breathe life into every sculpted scale.
Follow this paint application sequence:
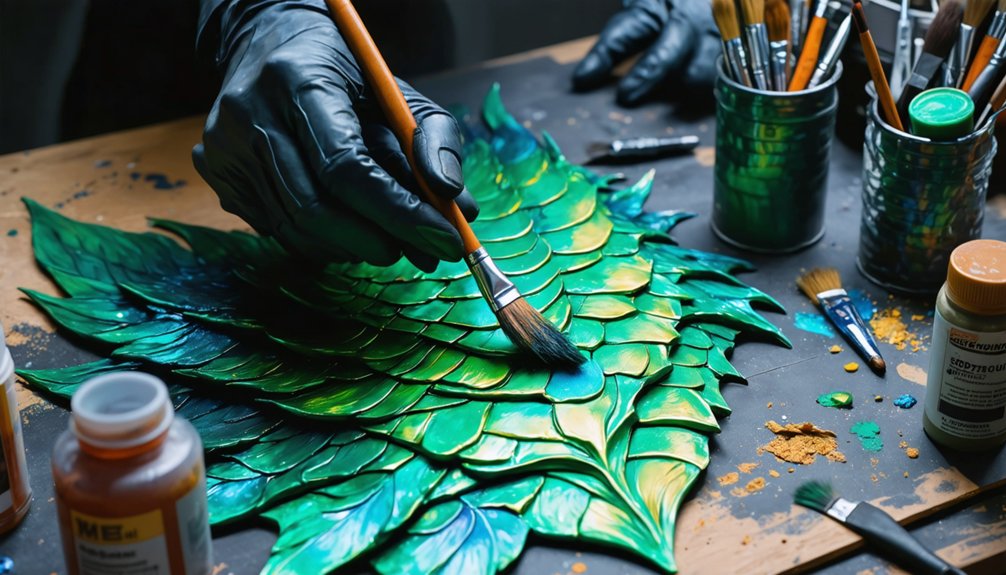
- Apply black gloss acrylic base coat across all scales, working top to bottom for consistent coverage and shading methods that define depth.
- Build iridescent color blending over the black base, adding navy accents to non-scale areas for contrast and light effects.
- Execute finishing touches using brown leather tones along edges, then sand-damaged areas for texture variations with worn, fuzzy battle damage.
Detailing tips matter here: keep each layer thin and flexible. X-treme Flex prevents cracking when your armor curves, maintaining realistic scale movement throughout wear.
Glue and Layer Your Dragon Scale Armor the Right Way
Every painted scale you’ve created now needs secure bonding to transform individual pieces into cohesive armor. Your adhesive choices determine long-term durability, so select hot glue for rapid assembly or contact cement for superior bond strength on larger panels.
Master your layering methods by working bottom-to-top, mimicking natural scale overlap. Press each piece firmly for proper scale alignment, maintaining consistent 5 mm overlaps throughout.
Material compatibility matters enormously — EVA foam bonds differently than resin-printed components, so test your glue techniques on scrap pieces first.
Respect drying times completely before handling bonded sections; rushing destroys clean edges. For cleanup tips, keep rubbing alcohol nearby to dissolve excess contact cement immediately.
Hot glue strings peel cleanly once fully cooled — never pull them while warm.
Adjust Your Dragon Scale Chestplate for Any Body Size
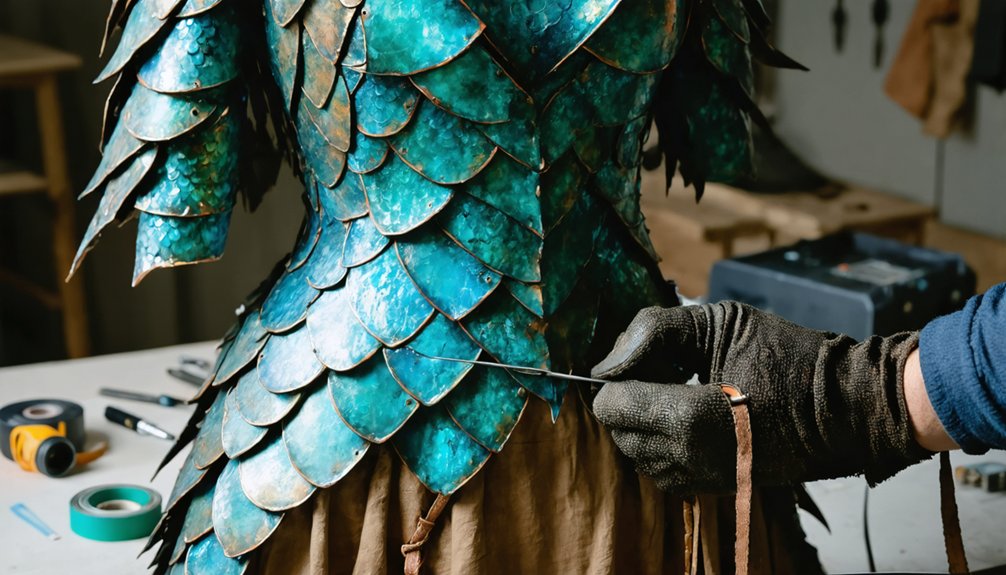
Two simple hardware components — D-rings and adjustable Velcro — give your finished chestplate the flexibility to fit multiple body sizes without rebuilding the entire piece.
Strategic side splits accommodate size adjustments across varying body shapes while maintaining scale flexibility throughout the design.
Strategic side splits create seamless size adjustments across body shapes while preserving the design’s overall scale and visual harmony.
Follow these fitting techniques for ideal results:
- Cut side splits into your patterned foam before final assembly, positioning D-rings at each opening for secure closure options.
- Thread adjustable Velcro through D-rings, allowing up to several inches of movement to address comfort considerations across different bust sizes.
- Test design variations by fitting the piece on a dressform first, then refine curves using your heat gun for aesthetic enhancements that conform naturally to body contours.
These steps guarantee your chestplate adapts without compromising structural integrity or visual impact.
Distress and Weather Your Dragon Scale Armor for a Battle-Worn Finish
Once your chestplate fits correctly across body sizes, you can shift focus to making it look like it’s survived actual combat.
Battle damage techniques start with dry sanding foam edges to create worn, fuzzy texture that mimics real wear. Use a heat gun selectively to indent surface areas, simulating dents and impact points.
For aging effects, layer black gloss acrylic across individual scales first, then dry-brush brown leather tones along raised edges. This contrast creates depth and visual history.
Apply DecoArt X-treme Flex paints because they’ll flex with foam movement without cracking during wear.
Sand raised detail strips from thinner foam to suggest metal fatigue. Work systematically across sections, keeping distressing consistent so damage reads as authentic rather than accidental.
Frequently Asked Questions
How Long Does a Completed Dragon Scale Chestplate Typically Last Before Deteriorating?
With proper care, your EVA foam chestplate’s scale durability can last 3–5 years. Follow these maintenance tips: store it flat, avoid excess heat, and touch up X-treme Flex paint to prevent cracking or peeling.
Can Dragon Scale Armor Be Safely Worn in Outdoor Heat or Rain?
your armor’s heat resistance depends on EVA foam’s limits. You’ll find rain protection varies—seal it well! Consider breathability features and material choices like X-treme Flex paint to guarantee outdoor durability.
How Do You Store Dragon Scale Cosplay Pieces Without Damaging the Foam?
Store your dragon scale pieces flat using protective measures like acid-free tissue between layers. Avoid compressing EVA foam during storage techniques, as you’ll permanently deform scales. Keep pieces in cool, dry containers away from direct sunlight.
Are Dragon Scale Designs Suitable for Children’s Cosplay Costumes?
Surprisingly, tiny hands *can* handle dragon scales! You’ll want child friendly materials like thin EVA foam and adjust scale size considerations—swap 22mm x 29mm pieces for smaller cuts, ensuring safe, flexible, heat-gun-shaped armor kids’ll love wearing.
How Much Does a Full Dragon Scale Chestplate Project Typically Cost?
You’ll spend $50–$150 on scale materials like EVA foam, resin, and X-treme Flex paints. Budget considerations include heat tools, hot glue, and 3D printing costs, which can push innovative builds toward the higher range.
References
- https://www.youtube.com/watch?v=zjP1S1M6NJ0
- https://www.youtube.com/watch?v=7IWaoisEa7U
- https://www.youtube.com/watch?v=jaL4gWU-8lo
- https://niveraswings.wordpress.com/2015/07/22/dragon-scale-armour-cosplay-skyrim-part-1/
- https://www.youtube.com/watch?v=q74Pr7X4Usc