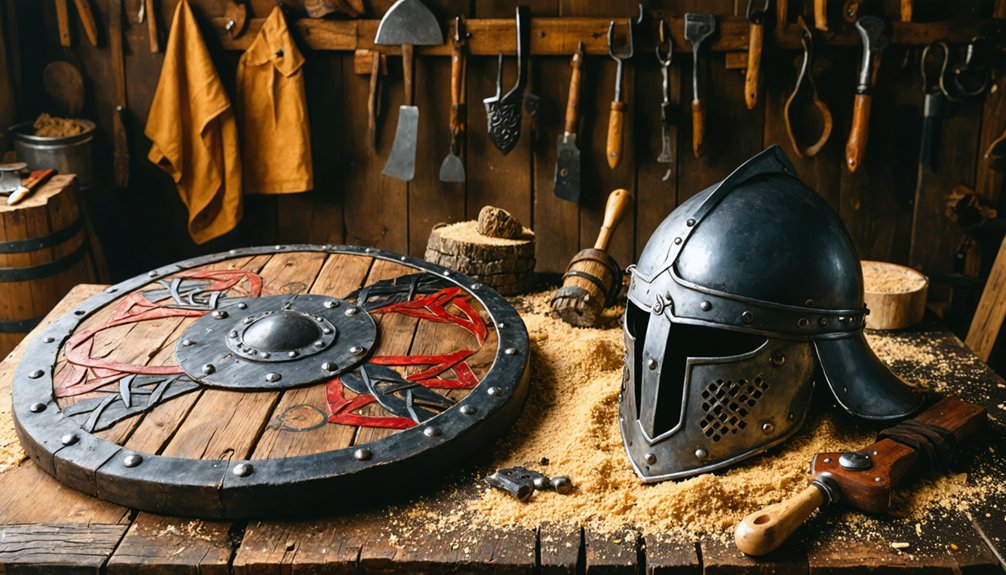
To make a Viking shield and helmet for cosplay, you’ll need EVA foam, cardboard, and hardboard as your base materials. Cut your shield into a circular shape between 28-40cm in diameter, layering three bonded pieces for strength. Shape a craft foam boss for the center, attach a leather grip behind it, and build your helmet from four scored cardboard panels reinforced with PVA-saturated strips. There’s much more technique involved in getting the details right.
Key Takeaways
- Cut a circular shield base (28-40cm) from EVA foam or cardboard layers, bonded together with PVA glue or contact cement.
- Shape a convex shield boss from heated 2mm craft foam, then center and secure it over a pre-cut central hole.
- Attach a 2-inch leather strip through parallel slots behind the boss to create an adjustable, secure grip handle.
- Build the helmet dome using four scored cardboard pieces, reinforcing edges with PVA-saturated strips for added durability.
- Paint finished pieces with acrylic paints in brown, tan, white, and black to achieve an authentic Viking aesthetic.
Gather Your Viking Shield and Helmet Materials
Before diving into construction, you’ll need to gather the right materials for both your shield and helmet. Your material options include EVA foam, cardboard, and hardboard, each offering distinct advantages depending on your safety standards and budget.
For moldable components like the shield boss, grab 2mm craft foam, which heat-forms easily into convex shapes. Steel flat stock works well for decorative accents and boss reinforcement.
Essential construction tools include a jigsaw, blow dryer, heat gun, and pyrography tool for authentic weathering techniques.
You’ll also need PVA glue, contact cement, and hot glue for assembly techniques. Stock up on acrylic paints in brown, tan, white, and black to achieve realistic design elements.
Leather strips and decorative tack heads complete your material list.
Cut and Layer Your Viking Shield Base
With your materials ready, it’s time to cut your shield base to the historically accurate dimensions used by Norse craftsmen. Aim for a circular diameter between 28-40cm, reflecting authentic shield design proportions documented in archaeological findings.
Using a jigsaw or sharp knife, cut your primary cardboard layer cleanly. Then trace and cut two additional identical pieces. Stack these layers, bonding each with PVA glue or contact cement, applying consistent pressure during curing to eliminate air pockets.
Once dried, mark your center point and cut a 6-10cm hole for the boss mount. This layered construction dramatically increases structural rigidity while maintaining lightweight portability.
Historical accuracy demands clean edges, so sand any rough perimeters before proceeding to surface preparation and detailing stages.
Build and Mount Your Viking Shield Boss
The shield boss serves 2 critical functions: protecting your fist and anchoring the handle system beneath it. Master your boss design and mounting techniques with these precise steps:
- Shape the boss: Apply heat via blow dryer to 2mm craft foam, molding it into a convex dome. Use a silicone baking sheet to eliminate seam irregularities during forming.
- Add period-accurate detailing: Press thermoformed foam clay around the boss perimeter, spacing decorative rivets approximately two inches apart for historically authentic proportions.
- Mount securely: Center-align the boss over your pre-cut 6-10cm hole, then bond it using hot glue and contact cement for maximum adhesion integrity.
Once mounted, your boss unifies the shield’s structural and aesthetic systems simultaneously.
Attach Your Handle, Straps, and Leather Trim
Completing your shield’s grip system transforms a decorative disc into a functional piece of kit. Cut two parallel slots through your base material, positioning them centrally behind the boss. Thread a 2-inch leather strip through both slots, securing ends with contact cement for superior bonding.
Transform a decorative disc into functional kit by threading leather strips through parallel slots secured with contact cement.
For handle adjustments, drill additional slot pairs to accommodate different arm sizes, making your build versatile for child and adult cosplayers alike. Leather treatments using contact cement prevent edge fraying while maintaining authentic period aesthetics.
Enhance strap designs by incorporating decorative tack heads spaced two inches apart along your shield’s perimeter. These comfort enhancements include sanding handle edges smooth before final adhesion.
Sand contact points particularly thoroughly, as rough edges compromise grip quality during extended convention wear.
Paint Wood Grain Texture Onto Your Viking Shield
Four acrylic paint colors—brown, tan, white, and black—give your shield its authentic wood-grain appearance.
Dilute each color slightly with water before beginning your paint application, allowing the pigments to flow naturally across the surface.
Follow these wood grain techniques sequentially:
- Apply your base brown coat across the entire shield face, letting it dry completely before adding subsequent layers.
- Drag diluted tan streaks horizontally across the surface using a dry brush, mimicking natural wood plank variation.
- Add fine black and white accent lines sparingly to deepen contrast and simulate aged timber authenticity.
Work in consistent directional strokes throughout every stage.
This methodical layering approach creates dimensional depth that transforms flat foam or cardboard into convincingly realistic Viking-era wood construction.
Shape Your Viking Helmet From Cardboard
Now that your shield’s complete, you’ll turn your attention to cutting cardboard helmet pieces using the same sharp knife or jigsaw techniques you’ve already mastered.
Layer and glue your structural components together with PVA or contact cement, building up thickness for a rigid, period-accurate form.
Reinforce your helmet’s edges securely by pre-drilling holes positioned 1/2 inch from the edge and spacing them 1 inch apart before threading your chosen fastening material through.
Cutting Cardboard Helmet Pieces
Shaping your Viking helmet begins with cutting four cardboard pieces that’ll form the dome structure. Use 3-4mm cardboard thickness to guarantee structural integrity while maintaining workable flexibility for your helmet design.
- Measure and mark two identical curved side panels and two curved front-to-back panels, each approximately 15cm wide at the base, tapering toward a central apex point.
- Score the inner surfaces lightly with a sharp knife to encourage controlled bending without compromising structural strength during assembly.
- Cut precise notches at each panel’s midpoint, allowing interlocking connections that create a self-supporting dome framework before adhesive application.
Overlap your panels at perpendicular angles, confirming symmetry before committing to gluing.
Sharp craft knives outperform scissors here, delivering cleaner edges that bond more effectively with contact cement or PVA.
Gluing Structural Components Together
Apply your chosen adhesive using proven adhesive techniques: coat both mating surfaces, allow brief tack time, then press firmly for 30-60 seconds.
Reinforce every interior seam with glue-saturated cardboard strips approximately 2cm wide, bridging panel intersections for maximum structural integrity.
Work methodically from the crown downward, maintaining symmetrical alignment throughout assembly.
Once fully cured, apply two additional exterior cardboard layers using PVA, offsetting seams to eliminate weak points and create the multi-layered density your helmet requires for convention-grade durability.
Reinforcing Helmet Edges Securely
Once the structural layers have fully cured, reinforce all exposed helmet edges with tightly wound strips of PVA-saturated cardboard approximately 2cm wide.
Fold them over each raw edge and press firmly to eliminate lifting or delamination. These edge reinforcement methods greatly extend helmet durability, preventing premature breakdown during active convention wear.
Apply these helmet durability tips systematically:
- Layer saturation – Soak each cardboard strip completely in undiluted PVA before application, ensuring deep fiber penetration for maximum bonding strength.
- Overlap seams by 1cm – Stagger joining points around curved edges to distribute stress loads evenly.
- Clamp or tape edges for 24 hours – Sustained pressure during curing prevents curl-back and maintains tight conformity to the helmet’s contoured profile.
Frequently Asked Questions
Can Children Safely Use These Shields at Renaissance Faires?
Yes, you can guarantee child participation safely by using EVA foam construction, which meets renaissance faire safety measures. Adjust handle slots for smaller arms, keeping shields lightweight at 28-30cm diameter.
How Long Does Contact Cement Take to Fully Cure?
you’ll wait 15-30 minutes before joining surfaces, but full adhesive curing time takes 24-72 hours. Don’t rush it—premature stress weakens your shield’s structural integrity permanently.
Are These Props Allowed at Comic Conventions With Strict Policies?
You’ll need to verify each convention’s prop regulations directly, as policies vary. EVA foam and cardboard constructions typically pass safety concerns checks, since they’re lightweight, non-rigid, and meet most strict venue compliance standards.
How Do I Store Foam Shields Without Warping Them?
Ironically, your battle-hardened foam storage solution is simple: store shield materials flat, never stacked vertically. You’ll prevent warping by keeping shields horizontal in cool, dry conditions, avoiding prolonged heat exposure that’d deform your EVA construction.
Can I Wash or Clean My Finished Shield After Events?
You can clean your finished shield using shield maintenance tips like damp cloth wiping with mild soap. Avoid soaking—your cleaning materials should stay minimal to protect acrylic paint, foam integrity, and contact cement bonds effectively.
References
- https://model.shop/guides/how-to-make-a-viking-shield
- https://www.youtube.com/watch?v=zOCHrllWft0
- https://www.youtube.com/watch?v=rLgkgzZBYPE
- https://www.instructables.com/Viking-Inspired-Shield/
- https://www.youtube.com/watch?v=u2JoupOn1ik
- https://www.zygotebrowndesigns.com/post/diy-cardboard-viking-shield