You can craft stunning cosplay props using surprisingly simple materials — EVA foam shaped with a heat gun becomes a Master Sword, layered cardboard reinforced with metallic tape transforms into a battle-worn shield, and repurposed plastic bottles turn into futuristic blasters or steampunk goggles. Painting, weathering, and sealing techniques then elevate raw builds into professional-looking pieces. Whether you’re a beginner or mixing multiple fandoms into crossover props, there’s far more to discover ahead.
Key Takeaways
- Beginners can craft shields, swords, and wands using simple household materials like cardboard, paper mâché, and repurposed plastic bottles.
- Heat guns and EVA foam allow cosplayers to create professional, character-accurate props with dynamic curves and detailed textures.
- Painting techniques like base coats, weathering, and sealing with Plasti-Dip transform raw materials into realistic, visually striking props.
- Crossover props can merge multiple fandoms by combining shared visual elements, such as carving Mandalorian sigils onto a Hylian Shield.
- Budget-friendly builds using EVA foam, cardboard, and reflective vinyl can produce impressive steampunk, sci-fi, and fantasy costume props.
Which Cosplay Props Are Easiest to Build for First-Timers?
Whether you’re gearing up for your first convention or just diving into the craft, starting with household materials keeps the learning curve manageable while still delivering impressive results.
Easy prop making begins with cardboard shields and swords — cut two layers, glue them together, and reinforce the edges for durability.
Cardboard shields and swords are your best starting point — layer, glue, and reinforce for surprisingly sturdy results.
Paper mâché weapons offer another beginner friendly material option, letting you sculpt lightweight axes or hammers using flour paste and newspaper over balloon or cardboard armatures. Once dried, paint transforms them completely.
Plastic bottles become wands, potions, or futuristic guns with basic cutting and embellishment techniques.
Each method teaches core skills — layering, shaping, and finishing — that transfer directly into more advanced builds. Master these fundamentals first, and complex foam or electronics-integrated props become far more approachable later.
Build Cosplay Props From Everyday Household Materials
Once you’ve got those foundational skills locked in, your kitchen pantry and recycling bin become a surprisingly well-stocked prop workshop.
DIY crafting transforms overlooked materials into striking costume pieces through smart material selection and intentional design inspirations.
- Paper mâché weapons — layer newspaper strips with flour paste over balloon or cardboard armatures, then apply painting techniques like drybrushing metallic acrylics for weathering effects.
- Cardboard shields — stack two cut layers, glue firmly, reinforce edges with metallic tape for prop customization and structural integrity.
- Plastic bottle replicas — slice, reshape, and embellish bottles into wands or potions using tool essentials like X-Acto knives.
- Foam armor pieces — sand edges carefully following safety measures, then collaborate with fellow crafters for creative storage solutions and efficient production.
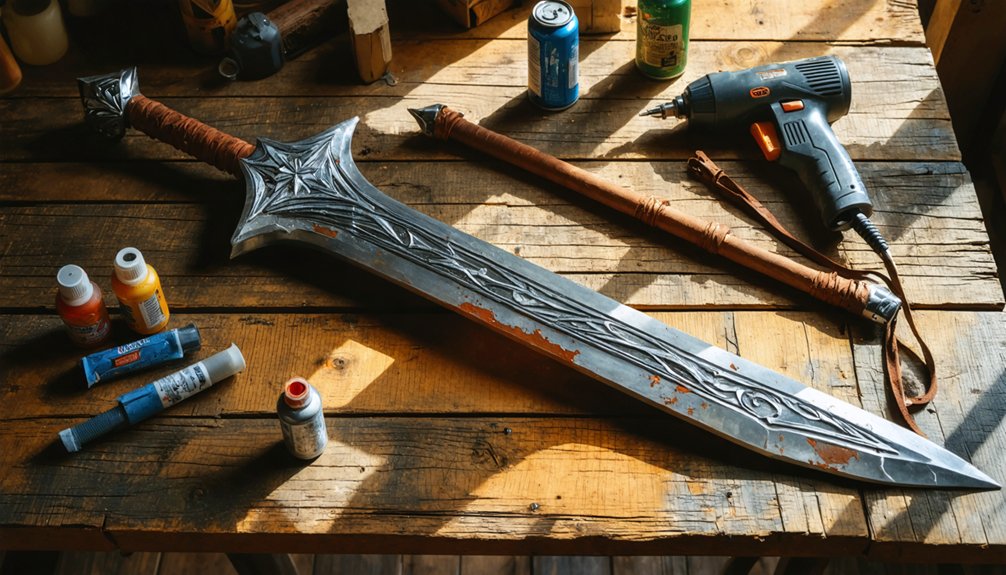
Foam Techniques That Give Cosplay Props a Professional Finish
Once you’ve cut your EVA foam into the desired shape, a heat gun transforms flat, rigid pieces into dynamic curves by softening the material just enough to mold it around aluminum tools or your own hands.
You can then push your prop’s realism further by burning woodgrain lines or etching decorative patterns using a Dremel, X-Acto knife, or heat tool pressed deliberately across the foam’s surface.
These two techniques—heat shaping and surface detailing—work together to give your finished prop the kind of dimensional, textured quality that separates professional-looking cosplay builds from flat, obviously crafted ones.
Heat Shaping Foam Techniques
Heat shaping is the technique that separates amateur foam builds from professional-looking cosplay props, and it starts with a heat gun and a steady hand. Mastering foam techniques reveals prop versatility you can’t achieve cold-cutting alone.
- Tool selection matters: Use aluminum-backed molds to guide crafting curves into sword guards or armor pauldrons.
- Advanced shaping: Apply direct heat evenly, bending foam against rounded forms for smooth, durable finishes without cracking.
- Texture detailing: Press heated foam against mesh or leather scraps to emboss realistic surface patterns instantly.
- Layered construction: Stack and heat-bond multiple foam sheets, then shape them together for structural reinforcement.
Work quickly once heat’s applied — foam has a narrow shaping window before it solidifies permanently into position.
Detailing With Foam Tools
Shaping foam gets you the form — detailing is what sells the illusion. Once your piece holds its structure, you’ll use advanced foam tools to carve character into every surface.
Drag a heat gun across scored lines to open woodgrain textures naturally. A Dremel lets you cut crisp grooves for panel lines, runes, or mechanical etchings with surgical precision.
For finer work, an X-Acto knife followed by controlled heat seals and raises edges beautifully. These foam detailing techniques transform flat surfaces into layered, dimensional storytelling.
Burn shallow rivets for armor plating, or etch spiral patterns into weapon handles. Each mark you make adds visual depth that paint alone can’t achieve.
Detail intentionally — every groove should serve the character’s aesthetic logic.
Character-Specific Cosplay Props You Can Actually Build at Home
Whether you’re crafting Link’s iconic Master Sword from layered EVA foam or assembling Marceline’s Axe Guitar to pair with blue leggings and a red tank top, character-specific props ground your cosplay in recognizable detail that elevates the entire look.
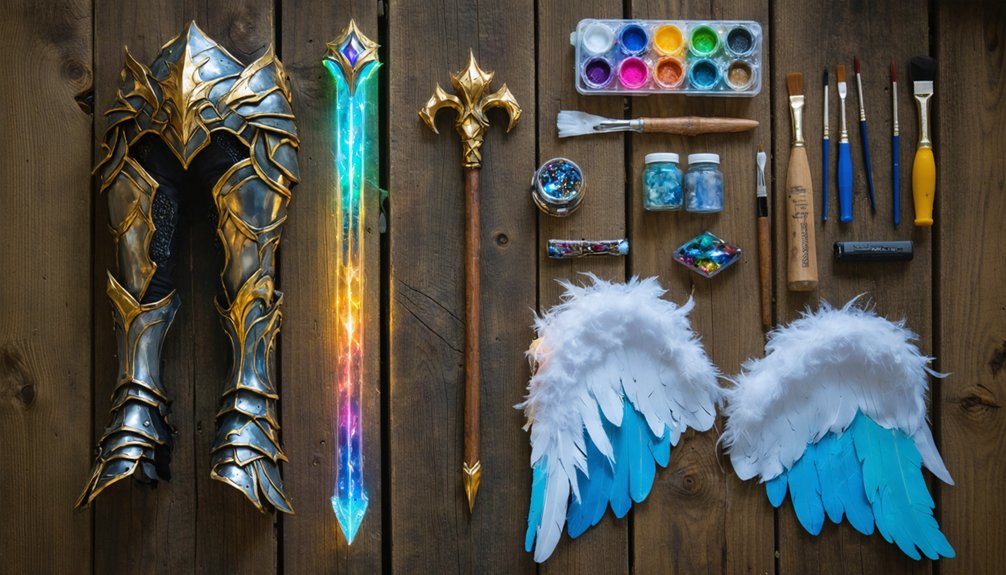
- Master Sword & Rose Quartz Shield — heat-shaped EVA foam with metallic paint and vinyl detailing
- Meliodas Sword & Monado Sword — carved foam layers, weathered finishes, anime-accurate proportions
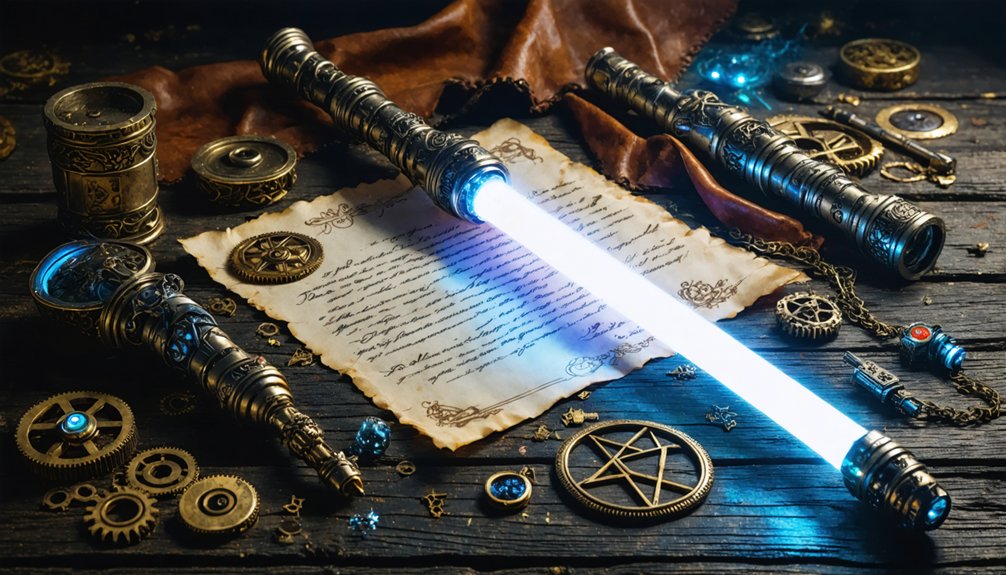
- Futuristic Weapons & Steampunk Goggles — plastic bottles transformed with gears, reflective tape, painted embellishments
- Rustic Axe with Budget Accessories — cardboard reinforced with duct tape, faux leather wrapping, Norse rune detailing
Advanced construction techniques like multi-layer gluing and heat shaping make each build structurally sound while maintaining visual authenticity.
How Do You Make Weapon Props on a Budget?
Building character-accurate props doesn’t have to drain your wallet — once you’ve mastered foam and cardboard construction for specific characters, you can apply those same techniques to stretch every dollar further.
Budget weapon crafting starts with affordable materials like EVA foam, newspaper, flour paste, and cardboard pulled from recycled packaging.
Cut two cardboard layers per blade, glue them together, then reinforce edges with metallic tape for structural integrity.
Transform plastic bottles into wands or futuristic guns by cutting, painting, and adding vinyl embellishments.
For foam swords, stack and carve layers, then use a heat gun to shape curves convincingly.
Wrap handles in fabric strips for tactile realism.
Weathering effects using duct tape and watered-down paint complete the illusion without expensive specialty products.
How to Paint, Weather, and Seal Cosplay Props Like a Pro
Once your prop’s structure is solid, the real transformation happens in the paint and finishing stage — where raw foam or cardboard stops looking like craft materials and starts resembling actual metal, wood, or stone.
Master these four finishing techniques:
- Base coat first — apply dark, flat painting techniques using black or brown before layering paints upward toward metallic highlights.
- Texture application — dab sponges or crumpled foil onto surfaces to mimic aged stone or hammered steel through color choices.
- Weathering effects — streak diluted burnt sienna along edges, simulating rust, battle wear, and finishing touches that suggest history.
- Sealing methods — brush on matte or gloss protective coatings like Plasti-Dip or Mod Podge, locking every detail permanently.
Your prop won’t just look crafted — it’ll look *earned*.
How to Build Crossover Props That Combine Multiple Fandoms
When you’re building crossover props, you’ll want to start by identifying the core visual signatures of each fandom — a lightsaber’s sleek cylindrical hilt paired with a steampunk gear overlay, for example, immediately signals two distinct universes in one build.
You can use EVA foam as your structural base, then layer contrasting thematic elements like futuristic metallic tape details onto a rustic Viking axe shape, letting each fandom’s aesthetic compete and complement simultaneously.
Keeping your budget tight means prioritizing one premium material per fandom — foam for shaping, reflective vinyl for sci-fi accents, or hand-painted runes for fantasy elements — so your mash-up reads as intentional rather than accidental.
Mixing Fandom Design Elements
Crossover props let you merge two or more fandoms into a single, cohesive build that tells a story no single franchise could tell alone.
Fandom blending works best when you anchor each design integration around shared visual language—color, silhouette, or material texture.
- Carve a Hylian Shield base, then paint Mandalorian sigils over the Triforce symbol using metallic acrylics.
- Mount steampunk brass gears onto a foam Monado blade, replacing clean edges with industrial rivets.
- Wrap a lightsaber hilt with Viking leather strips and Norse rune engravings burned using a heat tool.
- Attach reflective gold vinyl moon emblems from a Rose Quartz shield onto a pirate cutlass crossguard.
Each layer should feel intentional, not accidental—every borrowed element must earn its structural and visual place.
Thematic Mash-Up Techniques
Building a crossover prop that holds together visually requires you to treat each fandom’s design language as a material—something you can cut, layer, and bond rather than simply reference.
When crafting thematic mash up costumes, identify each fandom’s core visual signature: Lord of the Rings favors organic texture; steampunk demands brass geometry. Layer these intentionally—mount copper gears onto carved foam woodgrain, or weld a sci-fi gun profile onto a pirate flintlock silhouette.
For crossover weaponry, consistency in finish unifies conflicting aesthetics. Apply a single metallic palette across both elements, then use weathering techniques—dry-brushed silver, faux rust, aged leather wrapping—to suggest the prop exists in one coherent world rather than two competing ones.
Shared distressing makes disparate sources feel inevitable together.
Budget Crossover Build Tips
Three materials carry most budget crossover builds: EVA foam, cardboard, and duct tape. Combine them using creative layering techniques to merge distinct fandoms into one cohesive prop.
- Steampunk-Pirate Blaster: Cut cardboard into a flintlock silhouette, layer EVA foam gears across the barrel, wrap the handle in leather strips secured with duct tape.
- Sci-Fi Fantasy Sword: Shape EVA foam into a sleek blade, embed cardboard circuit patterns, seal edges with metallic duct tape.
- Post-Apocalyptic Wand: Stack foam cylinders onto a dowel, wrap joints in duct tape, add scavenged bottle cap accents.
- Viking-Futuristic Shield: Cut multilayer cardboard rounds, glue reflective vinyl runes, border edges with silver duct tape.
Budget-friendly materials reward bold, unconventional thinking.
Frequently Asked Questions
How Do You Safely Store Cosplay Props Without Damaging Them?
Like a museum curator protecting treasures, you’ll want to wrap prop materials in bubble wrap, store them in labeled bins, and use climate-controlled storage solutions to prevent warping, cracking, or color fading over time.
Can Children Participate in Building Cosplay Props With Supervision?
Yes, children can absolutely build cosplay props with proper child supervision! You’ll boost their creativity boost while developing teamwork skills. Use foam and cardboard safely, ensuring cosplay safety by guiding cutting tools and heat guns throughout every imaginative build session.
How Long Does It Typically Take to Complete a Cosplay Prop?
Like a river’s flow, your timeline varies! Simple props using basic prop materials take 1–2 hours, while complex crafting techniques—foam shaping, layering, weathering—demand days. You’ll invest more time chasing perfection beautifully.
Are Cosplay Props Allowed at All Conventions and Events?
Props aren’t universally allowed—you’ll need to check each event’s cosplay rules beforehand. Most conventions prioritize prop safety, banning sharp edges or functional weapons, so craft your innovative builds with lightweight, non-threatening materials to guarantee smooth entry.
How Do You Transport Large Cosplay Props to Convention Venues?
Imagine transporting a massive Master Sword — you’d disassemble it into sections. For smooth convention logistics, you’ll want padded cases, telescoping tubes, or rolling carts to handle prop transportation efficiently without damaging your carefully crafted foam creations.
References
- https://eyecandys.com/blogs/news/diy-cosplay-props
- https://creedleather.com/blogs/costume-guide/top-20-creative-cosplay-ideas-for-every-skill-level
- https://alltru2u.com/easy-diy-costume-ideas/
- https://www.halloweencostumes.com/blog/p-1634-cosplaying-on-a-budget-try-these-diy-costume-ideas.aspx
- https://www.youtube.com/watch?v=rewCL624QOs
- https://www.instructables.com/craft/costumes-and-cosplay/projects/