Realistic scar makeup requires layered texture, accurate color progression, and materials that flex with your skin. You’ll want to stipple liquid latex for raised, uneven texture, then build color in transparent layers — saturated reds for fresh wounds, muted purples for healing, and desaturated browns for older scars. Asymmetry and feathered edges are what separate convincing effects from obvious fakes. Master these foundational principles first, and every technique ahead becomes considerably more powerful.
Key Takeaways
- Stipple liquid latex onto skin for raised, uneven texture, then seal with matte powder before adding layered color for depth.
- Layer colors strategically: saturated reds for fresh scars, muted purples for healing, and desaturated browns or grays for older scars.
- Incorporate asymmetry and irregular edges into scar designs, as real biological scars lack smoothness and perfect symmetry.
- Feather wax or silicone edges with a dampened sponge and stipple surrounding skin to blend scars seamlessly into natural skin.
- Use silicone prosthetics for professional-level realism, especially for close-up camera shots, flexible areas, or multi-day continuity requirements.
What Actually Makes Scar Makeup Look Realistic?
Realistic scar makeup depends less on expensive materials and more on understanding how real scars actually look and behave on skin. You need to study how tissue heals — the irregular edges, the subtle color shifts, the way skin contracts or raises.
Texture techniques like stippling break up flat surfaces, creating the uneven topography that sells the illusion. Scar realism collapses the moment edges look too clean or colors read as uniform.
Layer your pigments — red beneath purple beneath muted brown — mimicking actual healing stages. Asymmetry matters too; biological scars aren’t symmetrical or smooth.
You should also consider how the scar moves with the skin. A technically applied scar that shifts naturally with facial movement reads as far more convincing than a rigid, painted imitation.
How to Choose Colors for Fresh, Healing, and Old Scars
Color selection is one of the most technically demanding parts of scar makeup, requiring you to match pigment choices to the specific biological stage of healing you’re imitating.
For fresh scars, you’ll layer reds and pinks to suggest active inflammation and new tissue formation, while healing scars shift toward purples and deeper bruised tones as the wound progresses through recovery.
As scars age, you shift your palette into muted browns, grays, and desaturated skin tones that communicate fading and tissue maturation.
Fresh Scar Color Selection
Whether you’re recreating a fresh wound or a decades-old scar, selecting the right colors determines how convincingly the effect reads on camera or in person.
Fresh scar techniques rely heavily on scar color psychology to trigger an immediate physiological read from viewers. Fresh tissue demands saturated reds and pinks, which signal active inflammation and new skin formation.
You’ll want to layer a bright crimson base first, then push cooler pinks along the raised edges where tension pulls the tissue. Add concentrated red-brown tones toward the scar’s center to suggest deeper dermal disruption.
Avoid using a single flat red, as it reads artificial immediately. Instead, build transparent layers using cream pigments, letting each layer dry before adding the next for dimensional, credible depth.
Aging Scar Tone Progression
Three distinct color stages define scar aging, and matching the right tones to each stage is what separates a convincing effect from a flat one.
Fresh scars demand saturated reds and pinks, reflecting active inflammation and new tissue formation. As scar aging progresses into the healing stage, you’ll shift toward cooler purples and muted violets, mimicking bruising beneath recovering skin.
Older scars require desaturated browns, grays, and softened skin-matched tones that suggest collagen remodeling and pigment loss.
Executing a convincing tone shift means layering these colors rather than applying them flat. Use small brushes to push deeper shades into recessed areas and lighter tones along raised edges.
This gradient approach replicates how real scar tissue reflects light unevenly, adding immediate dimensional credibility to your work.
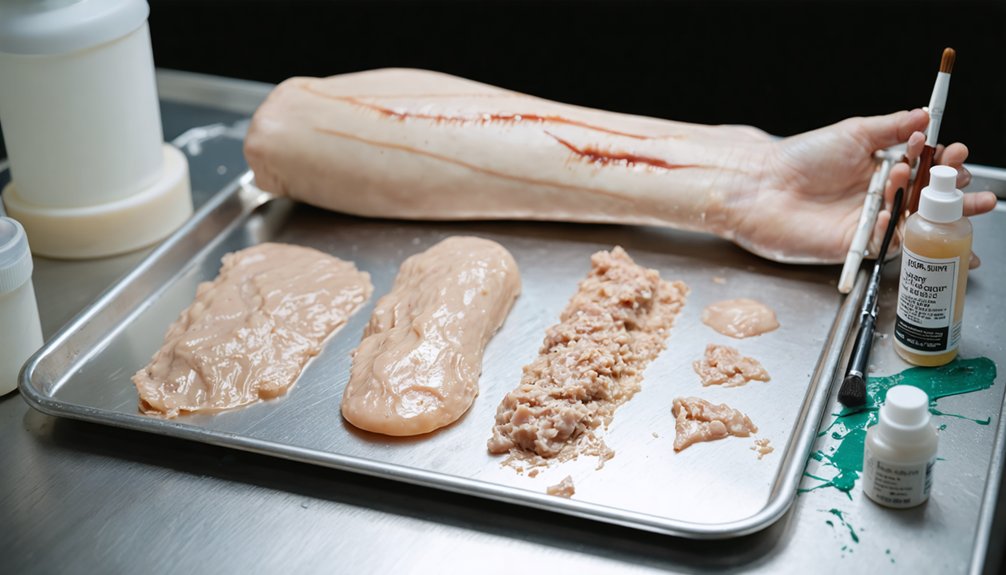
Makeup-Only Methods for Quick, Convincing Scars
For quick scar effects without prosthetics, you’ll want to stipple liquid latex onto skin using a sponge, building up thin layers to create uneven, raised texture that mimics real scar tissue.
Once the latex sets, you can apply matte foundation to match your base skin tone, then layer red, purple, and brown cream pigments to simulate different stages of healing with dimensional depth.
Work in irregular strokes rather than flat, even coats, since asymmetrical color placement and varied saturation are what make the finished scar look convincing rather than painted on.
Liquid Latex Application Tips
Liquid latex remains one of the most accessible and effective tools for building convincing scar texture directly on skin. Mastering application techniques separates mediocre results from genuinely striking effects.
- Stipple layers: Apply thin coats using a torn sponge edge, building scar texture gradually between each drying time interval.
- Monitor skin sensitivity: Patch-test first, since latex contains ammonia and proteins that irritate reactive skin.
- Shape strategically: Pinch or scrunch skin during drying to create natural puckering and irregular surface detail.
- Plan your removal process: Peel edges slowly using oil-based remover to avoid pulling or damaging skin.
You’ll achieve dimensional, realistic results by working in multiple thin layers rather than one thick application, keeping control over texture and finish throughout.
Layering Colors Realistically
Color layering separates flat, unconvincing scar makeup from something that reads as genuinely damaged tissue. For strong scar realism, you’ll build tone in deliberate stages rather than applying a single color.
Start with a deep red or burgundy base to simulate underlying vascular damage. Then stipple purple over raised edges to suggest bruising and inflammation. Follow with muted brown tones across the scar body to indicate tissue change. Finally, dust gray or desaturated skin-tone shades toward the outer edges to replicate fading.
Color layering works best when each stage is partially dried before the next application. Use small brushes for precision and a beauty blender to soften shifts. Asymmetrical color distribution reinforces organic irregularity, pushing your scar makeup beyond costume-grade into genuinely convincing territory.
How Liquid Latex Builds Raised Scar Makeup Texture
When building raised scar texture with liquid latex, you’ll want to apply it in thin, deliberate layers using a sponge, stipple sponge, or torn cotton to create uneven surface buildup.
These liquid latex techniques rely on repetition—each dried layer adds dimension and irregular texture that mimics real scar tissue.
Key scar texture tips include:
Layer latex thin, dry fully between coats, and embed torn cotton for convincing, dimensional scar texture.
- Letting each layer fully dry before adding the next
- Tearing cotton into the wet latex to embed fibrous material for skin-like texture
- Pinching or wrinkling the latex while drying to create contracted, pulled-skin effects
- Sealing finished texture with a matte setting powder before applying color
Once built up, the raised surface accepts cream pigments and eyeshadows naturally, allowing realistic depth through layered color application.
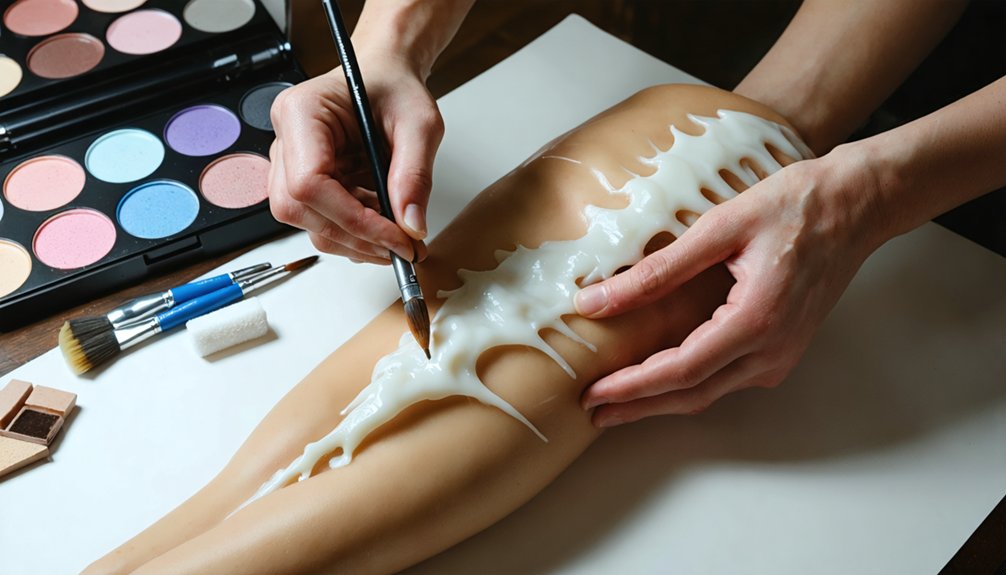
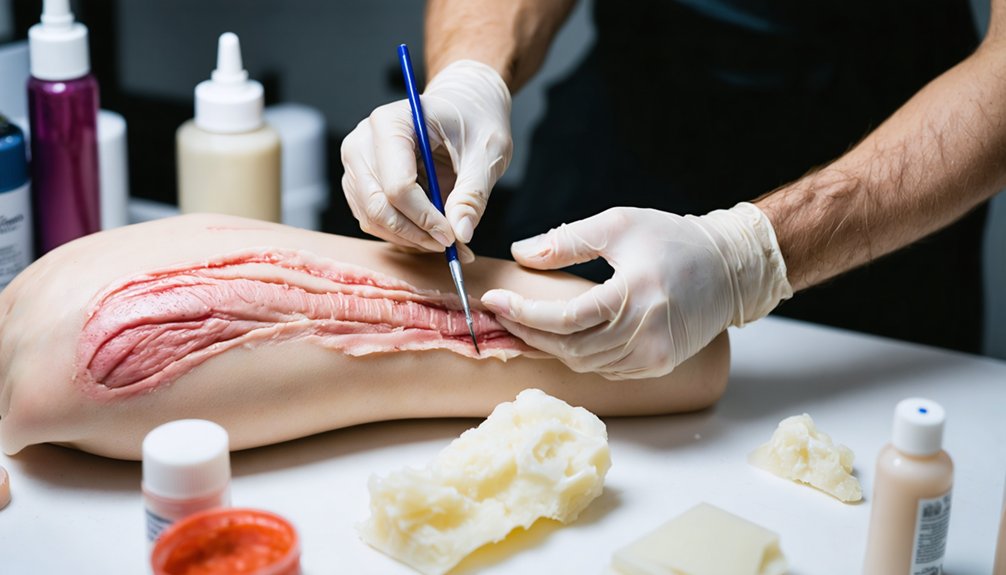
How Scar Wax and Collodion Build More Convincing Raised Scars
Scar wax and rigid collodion each solve different structural problems that liquid latex can’t address as effectively. When you need bulkier, raised shapes, scar wax lets you mold custom forms directly on skin, blending edges with a spatula for seamless shifts.
It’s ideal for larger, dimensional scar texture techniques where latex would flatten or lose definition.
Rigid collodion works differently. You brush it onto clean skin in thin layers, letting each coat dry fully before adding the next. As it tightens, it contracts the underlying skin, pulling inward to create a puckered, indented effect.
Among collodion application tips, keeping strokes narrow and controlled produces cleaner contraction lines. Combining both materials strategically gives you both raised and depressed scar types within a single cohesive makeup design.
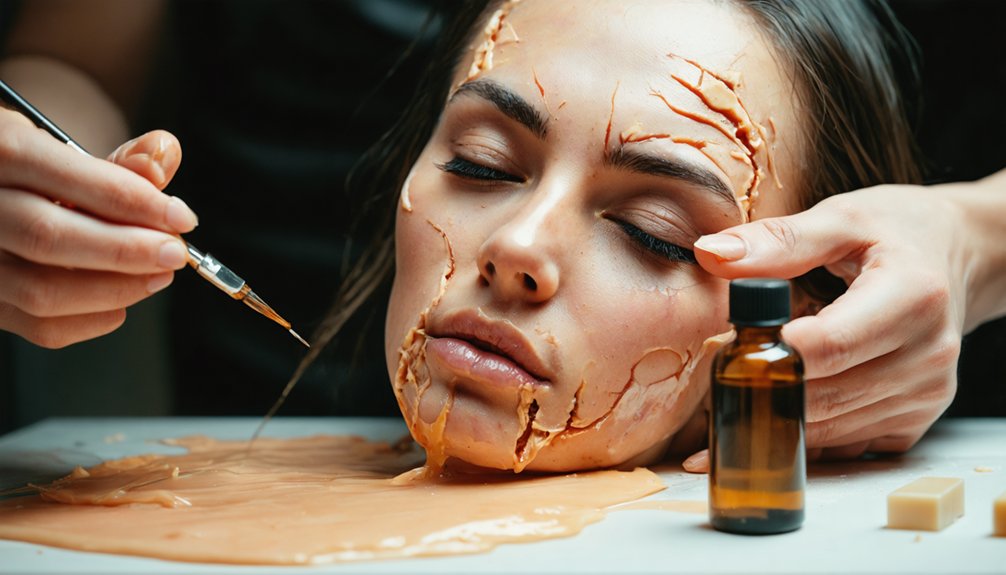
How to Blend Scar Edges So They Disappear Into Skin
Building convincing raised and indented shapes means nothing if hard edges give the prosthetic or wax away. Scar edge blending determines whether your effect reads as skin or costume. Seamless shifts require deliberate technique at every boundary.
Work these steps consistently:
- Feather wax or silicone edges outward using a slightly dampened sponge, thinning material gradually until it disappears.
- Apply alcohol-activated or cream foundation over the entire blended zone, unifying prosthetic and surrounding skin tone.
- Stipple texture across the edge boundary using a torn sponge, breaking up any remaining visible line.
- Layer color — red, purple, and brown — past the scar boundary to simulate natural bruising and tissue variation.
Never treat the edge as a stopping point. Carry every color and texture decision outward into surrounding skin.
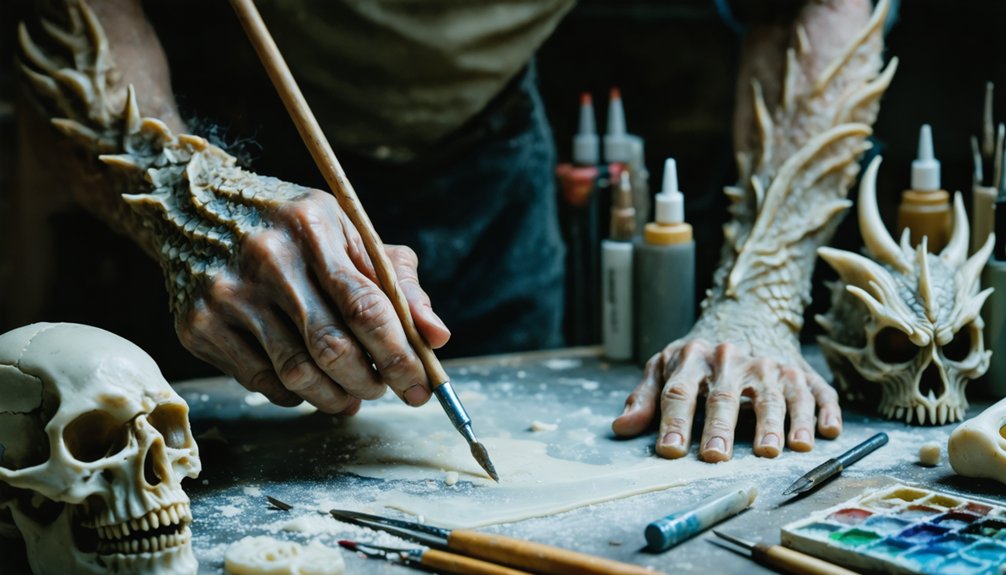
When Scar Makeup Isn’t Enough and Prosthetics Are Worth It
Flat makeup and wax hit a ceiling fast once camera distance closes or movement becomes a factor. At that point, prosthetic advantages become impossible to ignore.
Silicone prosthetics deliver scar realism that flat applications simply can’t replicate — capturing fine skin texture, subsurface light diffusion, and natural edge movement under stress. You’ll want prosthetics when your shot demands extreme close-ups, when the scar must flex across joints, or when continuity across multiple shooting days matters.
Silicone prosthetics capture what flat applications never can — texture, light, and movement that hold up under any lens.
Gelatin works for body pieces needing stretch, while silicone handles high-definition facial work. Secure everything with Pros-Aide, then paint intrinsically using silicone pigments for seamless color integration.
If your production budget allows it, and the camera will expose every detail, prosthetics aren’t optional — they’re the only honest choice.
Which Scar Makeup Method Fits Your Budget and Skill Level?
Matching your method to your budget and skill level decides whether your scar reads as convincing or embarrassing.
Skill assessment and budget considerations should guide every material choice you make.
- Beginner, low budget: Rigid collodion and cream makeup deliver fast, serviceable results with minimal technique.
- Intermediate, moderate budget: Liquid latex and scar wax let you build dimensional texture and practice edge blending.
- Advanced, higher budget: Gelatin and latex prosthetics reward sharper sculpting and painting skills with realistic payoff.
- Professional, premium budget: Silicone prosthetics demand precise application and color matching but produce unmatched close-up detail.
Start where your skills honestly sit, then push one level higher as your technique develops.
Overspending on silicone before you’ve mastered blending wastes materials and produces worse results than simpler methods executed well.
What to Know Before Applying Scar Materials to Skin
Before you apply any scar material to skin, you need to run a patch test on a small area and wait at least 24 hours to check for irritation or allergic reaction. Skin sensitivity varies markedly between individuals, so never skip this step regardless of the material you’re using.
These scar application tips apply across all methods. Keep the skin clean, oil-free, and dry before applying latex, wax, collodion, or any adhesive. Oil disrupts bonding and weakens edges. Avoid broken, sunburned, or compromised skin entirely.
Work in a well-ventilated space when using collodion or solvent-based adhesives, as fumes can cause discomfort.
Keep removal solvents nearby, and never force prosthetics off without properly dissolving the adhesive first to prevent tearing or damaging the skin beneath.
Frequently Asked Questions
How Long Does Scar Makeup Typically Last Before Needing Touch-Ups?
Coincidentally, you’ll find long lasting formulas like silicone and Pros-Aide hold four to six hours. You’ll need touch up techniques every two to three hours when using wax or latex-based applications.
Can Scar Makeup Be Safely Removed Without Damaging the Skin?
Yes, you can safely remove scar makeup using oil-based cleansers or specialized adhesive removers. Always consider your skin sensitivity, as gentle removal techniques prevent irritation, especially when removing latex, wax, or silicone prosthetics bonded with strong adhesives.
Which Scar Methods Work Best for Dark or Deeper Skin Tones?
Forget slapping on generic red — you’ll look painted, not scarred. For deeper skin tones, you’ll nail scar color matching using brown, burgundy, and ashy undertones, while stippling builds convincing skin texture simulation that honors your skin’s natural depth.
How Do You Protect Scar Makeup From Sweat During Outdoor Events?
Seal your scar makeup using waterproof products like setting sprays and barrier coats. Apply sweat resistant techniques such as powder-locking layers and silicone-based sealants to maintain edge integrity and color accuracy throughout prolonged outdoor wear.
Can Realistic Scars Be Created on Areas With Heavy Body Hair?
Hair’s a battlefield — you can create realistic scars there. Trim or shave for hair management, cleanse thoroughly for skin preparation, then apply scar wax or silicone prosthetics, blending edges seamlessly for convincing, professional-grade results.
References
- https://www2.parklanejewelry.com/how-to-make-a-scar-with-makeup/
- https://www.cinemamakeup.com/blogs/how-to-create-realistic-wounds-and-scars-with-prosthetics/
- https://uroparis.com/creating-realistic-scars-sfx-makeup-guide/
- https://www.youtube.com/watch?v=KhC3qWyPsTA
- https://www.youtube.com/watch?v=wegZ38Y0kLM
- https://www.tiktok.com/@artistjodysteel/video/7287781139203263786
- https://www.reddit.com/r/CosplayHelp/comments/1blvfh1/cheapest_way_to_make_fake_scars/
- https://www.tiktok.com/@theartge/video/7632149390706216206
- https://www.youtube.com/shorts/LFWPF1ekTZc
- https://www.facebook.com/groups/804338236437193/posts/1393047120899632/