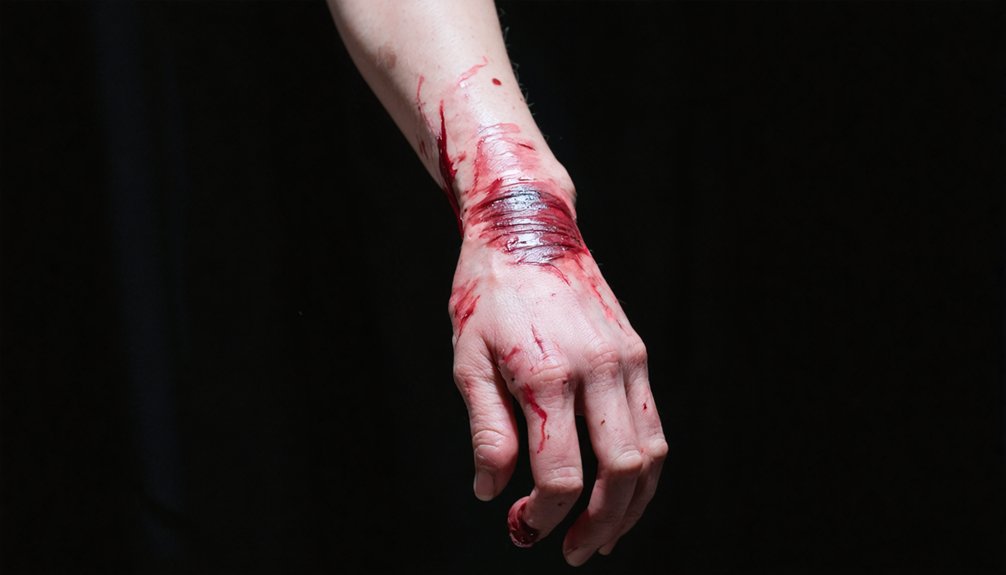
To create realistic scars and wounds for cosplay, you’ll need scar wax, liquid latex, or silicone compounds depending on your skill level. Start by cleaning and prepping your skin, then sculpt or layer your chosen material to build texture and depth. Blend the edges using a stipple sponge and match your skin tone with foundation. Each material produces dramatically different results, and the techniques you choose will determine just how convincing your final effect becomes.
Key Takeaways
- Liquid latex suits beginners, scar wax works for quick applications, and silicone delivers professional-grade realism for advanced users.
- Prepare skin by cleaning and drying it thoroughly, applying petroleum jelly over body hair before using liquid latex.
- Build realistic texture by applying three to five layered coats of liquid latex, scrunching between layers for raised edges.
- Sculpt scar wax with dental tools after pressing onto spirit-gum-prepped skin, then seal with flexible sealant for durability.
- Blend wound edges seamlessly using a stipple sponge and mix foundation into the final latex layer for natural skin-tone matching.
Best Materials for Realistic Cosplay Scars and Wounds
When creating realistic scars and wounds for cosplay, your material choice directly determines the quality and longevity of your final result.
Three primary options exist: scar wax, liquid latex, and silicone compounds.
Scar wax benefits include rapid sculptability and quick application, making it ideal for time-sensitive costume preparation.
Liquid latex delivers textured, torn-skin effects with extended working time, blending seamlessly with surrounding skin tones — a solid choice for beginners.
For maximum authenticity, silicone application techniques produce ultra-realistic, long-lasting results that outperform other materials.
However, silicone demands more complex application methods, making it better suited for experienced artists.
Specialty cosplay retailers also offer custom prosthetic pieces, giving you pre-built options when hands-on fabrication isn’t practical.
Match your material to your skill level and desired outcome.
Liquid Latex vs. Scar Wax vs. Silicone: Which Should You Use?
Choosing between liquid latex, scar wax, and silicone comes down to three factors: your skill level, available application time, and desired realism.
Liquid latex advantages include extended working time and seamless skin blending, making it ideal if you’re newer to special effects makeup.
Scar wax limitations become apparent during longer wear—it breaks down faster and suits quick costume applications rather than extended events.
When tackling wound realism challenges that demand professional-grade authenticity, silicone compound techniques deliver superior results, though they require advanced application knowledge and preparation time.
Here’s how to decide: choose liquid latex for versatility and ease, scar wax for rapid Halloween applications, and silicone when your cosplay character demands uncompromising detail.
Match your material to your specific performance requirements.
How to Apply Liquid Latex for Torn Skin Effects
Before applying liquid latex, you’ll want to clean and dry your skin thoroughly. Then apply a thin barrier layer of petroleum jelly over any body hair to prevent painful removal later.
Once your skin is prepped, brush on your first latex layer in the direction of the wound’s intended shape. Let it dry to a tacky, semi-transparent film before adding subsequent coats.
Each additional layer builds texture and opacity, so scrunch or pinch the drying latex between applications to create the irregular, raised edges that mimic realistically torn skin.
Preparing Your Skin
Proper skin preparation takes just a few simple steps but makes a significant difference in how well liquid latex adheres and blends. Prioritizing skin hydration and allergy testing beforehand guarantees both superior results and personal safety.
- Conduct a patch test 24 hours before full application to confirm no allergic reaction occurs.
- Cleanse the target area thoroughly, removing oils, lotions, and debris.
- Trim or cover any body hair, since latex bonds aggressively to hair follicles.
- Maintain adequate skin hydration by moisturizing surrounding areas outside the application zone.
- Allow skin to dry completely before applying latex, guaranteeing maximum adhesion.
Following these steps systematically eliminates common application failures. Clean, prepped skin gives liquid latex the ideal surface to grip, blend seamlessly, and produce convincingly realistic torn-skin effects.
Layering For Texture
Once your skin is prepped and dry, you’re ready to begin building realistic torn-skin texture through strategic latex layering.
Apply a thin initial coat using a sponge or brush, then allow it to partially dry before adding subsequent layers. These layering methods create dimensional depth that mimics genuine wound tissue.
For advanced texture techniques, lift and fold the semi-dry latex edges while applying each successive coat. This manipulation produces authentic torn-skin irregularities.
Apply three to five layers minimum, pinching and wrinkling each application deliberately.
Between layers, use a hair dryer on low heat to accelerate drying without fully curing the material. This maintains workability throughout the process.
Once you’ve achieved your desired depth and texture, allow the final layer to cure completely before applying pigment.
Sculpting Wounds With Scar Wax Step by Step
Before applying scar wax, you’ll need to clean and dry the target skin area, then apply a thin layer of spirit gum or skin-prep solution to improve adhesion.
Once the surface is prepped, pinch off a small amount of scar wax, warm it between your fingers, and press it firmly onto the skin, feathering the edges outward to blend seamlessly.
Use a sculpting tool or orange stick to carve realistic wound details—jagged cuts, torn flesh lines, and depth variations—directly into the wax before sealing the surface with liquid latex or a flexible sealant.
Preparing Skin For Application
Preparing your skin correctly takes just a few simple steps and makes a significant difference in how well scar wax adheres and blends. Proper skin preparation guarantees durability and realistic results throughout your cosplay event.
- Skin protection: Apply a thin barrier cream to shield sensitive areas before product contact.
- Hair removal: Clear application zones using a razor or wax strips for seamless adhesion.
- Patch testing: Test scar wax on a small area 24 hours beforehand to identify reactions.
- Moisturizing techniques: Lightly hydrate skin, then allow complete absorption before applying wax.
- Clean surface: Remove oils, sweat, and residue using an alcohol-based cleanser.
Following these steps systematically prevents lifting, uneven blending, and premature wax separation during wear.
Sculpting Realistic Wound Details
Sculpting realistic wound details with scar wax requires a methodical approach that builds depth and texture gradually. Start by pressing a small amount of warmed scar wax onto your prepped skin, blending edges outward using a silicone tool or fingertip.
For advanced sculpting methods, carve the wound’s center deeper while keeping surrounding areas shallow, mimicking natural tissue displacement. Use a toothpick or dental tool to create irregular tear lines — symmetry kills wound realism techniques.
Layer additional wax strategically to build raised scar tissue or jagged skin edges. Press lightly with a textured sponge to replicate porous skin patterns.
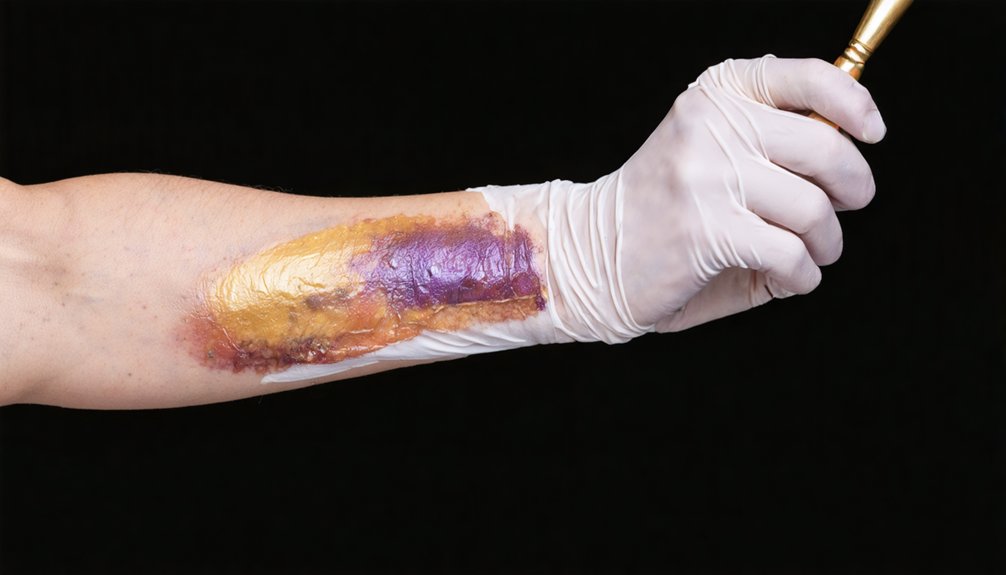
Once satisfied with your sculpt, seal everything with a thin liquid latex coat before moving into painting, which locks your detailed work firmly in place.
How to Blend Cosplay Wound Edges So They Look Real
Blending the edges of a cosplay wound is what separates a convincing effect from an obviously fake one. Apply edge softening techniques by feathering liquid latex outward using a stipple sponge, breaking the hard boundary between prosthetic and skin.
Precise blending techniques guarantee seamless shifts across varied skin tones.
Follow these critical steps:
- Stipple outward from the wound edge in irregular, organic patterns
- Layer thin coats of liquid latex rather than applying one thick pass
- Use acetone sparingly to dissolve harsh silicone edges when needed
- Pat powder over blended areas to eliminate unwanted shine
- Match skin tone by mixing foundation directly into your final latex layer
Each technique builds imperceptible shifts that withstand close scrutiny throughout extended wear.
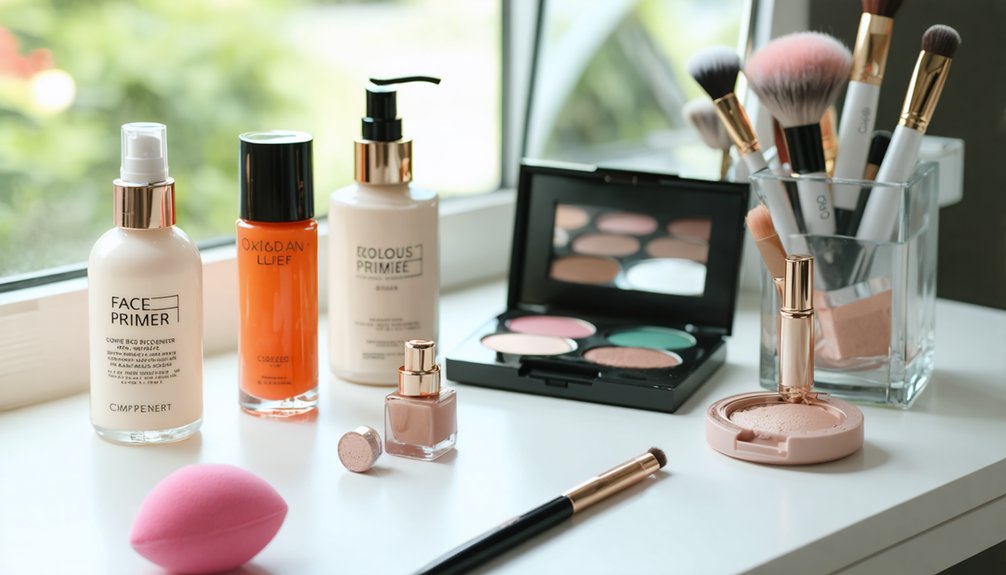
Essential Tools for Liquid Latex and Scar Wax Application
Whether you’re working with liquid latex or scar wax, having the right tools on hand determines the quality and efficiency of your application.
For liquid latex tips, use silicone brushes or foam applicators to build layered texture without pulling dried edges. A hair dryer on low heat accelerates drying between coats, giving you precise control over skin-like buildup.
For scar wax techniques, invest in a wax spatula or dental tool to sculpt defined edges and wound depth. Seal wax applications with setting powder to prevent lifting during wear.
Both materials benefit from a high-quality stipple sponge, which creates organic skin texture. Keep isopropyl alcohol nearby for tool cleanup and edge refinement throughout your application process.
Where to Buy Cosplay-Specific Wound and Scar Supplies
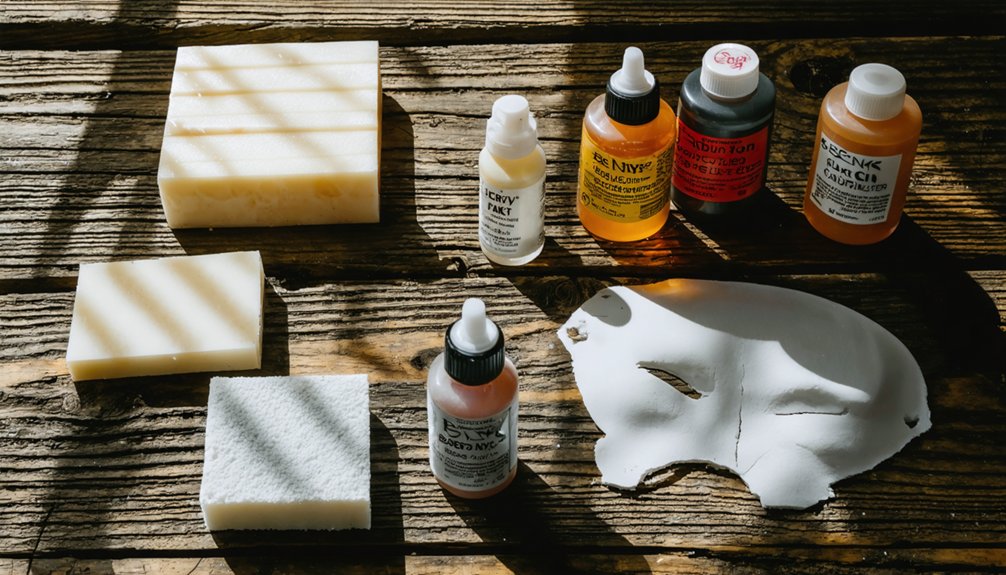
Finding cosplay-specific wound and scar supplies is straightforward once you know where to look. Online retailers offer extensive catalogs with product reviews and material comparisons, helping you make informed purchasing decisions. Specialty stores provide hands-on access to budget options and premium materials alike.
Consider these targeted sourcing strategies:
- Online retailers like Amazon and Mehron carry broad inventories with verified brand recommendations.
- Specialty stores stock professional-grade silicone compounds, liquid latex, and scar wax.
- Cosplay conventions feature vendor halls offering unique, handmade prosthetic pieces unavailable elsewhere.
- Makeup workshops provide direct access to instructors who demonstrate product effectiveness firsthand.
- Community forums aggregate product reviews and material comparisons from experienced artists.
Cross-referencing budget options against professional materials guarantees you’re selecting supplies that match your specific wound and scar requirements.
Frequently Asked Questions
How Long Do Silicone-Based Cosplay Wounds Typically Last During Extended Wear?
Silicone durability guarantees your wounds withstand extended wear throughout full convention days. You’ll find silicone-based compounds outlast alternative materials considerably, maintaining ultra-realistic appearance while resisting sweat, movement, and friction during prolonged cosplay events.
Can People With Latex Allergies Safely Use Alternative Wound-Making Materials?
If you’ve got a latex allergy, you can safely explore alternative materials like silicone-based compounds or scar wax. These skin safe options deliver professional-grade, realistic wound effects without triggering allergic reactions during your cosplay wear.
How Do You Remove Scar Wax Without Damaging Your Skin Afterward?
Over 60% of cosplayers report skin irritation from improper removal! For safe scar wax removal and skin care, you’ll gently lift edges with oil-based makeup remover, dissolving the adhesion without pulling, then cleanse thoroughly to protect your skin afterward.
Are Liquid Latex Wound Effects Waterproof Enough for Outdoor Cosplay Events?
Liquid latex durability isn’t fully waterproof, so you’ll want to seal your outdoor cosplay effects with a setting spray or barrier coat to protect against sweat and light moisture exposure during extended events.
Can Cosplay Wound Makeup Withstand Sweating During Long Convention Days?
Like armor against battle, silicone compounds offer superior sweat resistance and makeup durability. You’ll find liquid latex loosens under heavy perspiration, so seal your wounds with setting powder and professional-grade topcoats for all-day convention wear.
References
- https://www.youtube.com/watch?v=jM4YmbARn7k
- https://www.fantasycostumes.com/wound-scar-makeup/
- https://www.etsy.com/market/cosplay_scars