The 5 best 3D makeup effects for cosplay are prosthetic wounds and scars, burn effects, silicone creature appliances, edge blending techniques, and professional adhesive finishes. You’ll build each effect using gelatin, silicone, or modeling wax, then layer reds, browns, and blacks for brutal realism. Medical-grade Pros-Aide keeps everything anchored while matte sealing powder kills unwanted shine. Master these five techniques, and everything about your cosplay transformation changes completely.
Key Takeaways
- Silicone appliances like gills and brow ridges move naturally with skin, creating seamless fantasy creature features perfect for cosplay characters.
- 3D burn effects using gelatin create dramatic, uneven surfaces with realistic color shifts from deep red cores to blackened edges.
- Prosthetic wounds built with modeling wax and layered red, brown, and black tones add convincing battle-damage detail to any cosplay.
- Edge blending with Pros-Aide and stipple sponges hides appliance seams, making 3D additions look like natural skin extensions.
- Matte sealing powder is essential for locking color work and eliminating shine across all 3D makeup effects.
Prosthetic Wounds and Scars That Look Brutally Real
When it comes to building prosthetic wounds and scars that genuinely unsettle viewers, your material choice determines everything. Liquid latex, gelatin, or silicone builds raised edges and torn skin texture, creating immediate scar depth that flat makeup simply can’t achieve.
Work in thin layers — they dry faster and blend cleaner than heavy single applications.
Use modeling wax to sculpt precise slash marks, ridges, and gouges before painting. Layer red, brown, purple, and black tones systematically to push wound realism beyond surface-level color work. Each shade represents a different tissue depth, so don’t skip steps.
Sculpt slash marks and ridges with modeling wax, then layer colors systematically — each shade represents a different tissue depth.
Finish with fake blood and matte sealing powder to eliminate unnatural shine. That combination transforms a decent prosthetic into something genuinely disturbing and visually convincing.
3D Burn Effects Built From the Right Materials
Burn effects demand a completely different material logic than wound builds, even though both rely on dimensional layering. For convincing heat damage, you’ll need gelatin or silicone to build irregular, uneven surfaces that mimic blister formation authentically.
Unlike clean cut edges, burn texture requires deliberate surface chaos — collapsed pockets, tightened ridges, and stretched skin tension all working simultaneously.
Your color shifts matter enormously here. Start with deep reds at the burn’s core, then push outward through yellows and browns before finishing with darkened, irregular borders.
Black edge shading anchors the damage and signals tissue death convincingly.
Clear skin-tension products applied over your gelatin base create that characteristic tightened, contracted appearance as they dry.
Matte sealing powder kills unwanted shine, making your heat damage read as brutally authentic under any lighting condition.
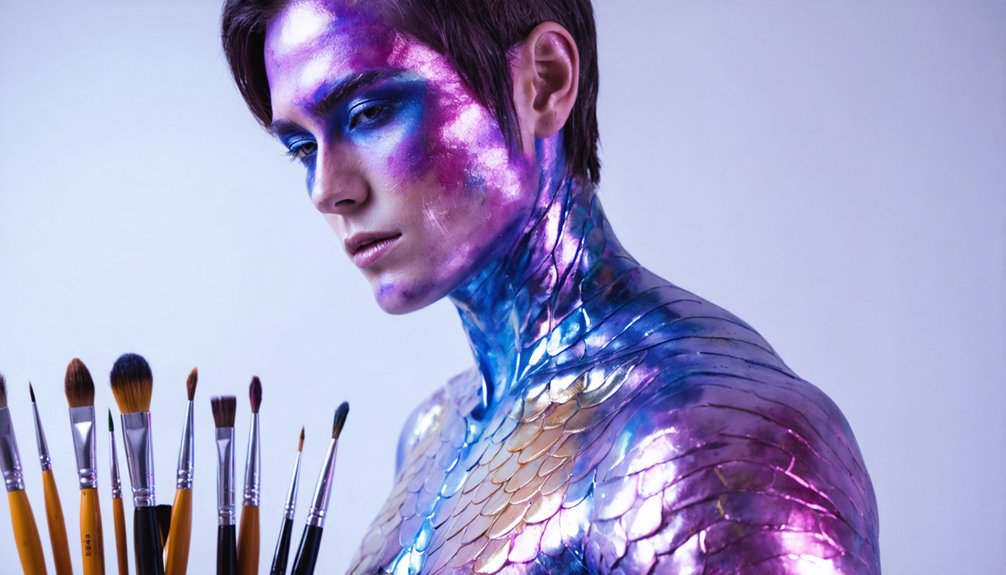
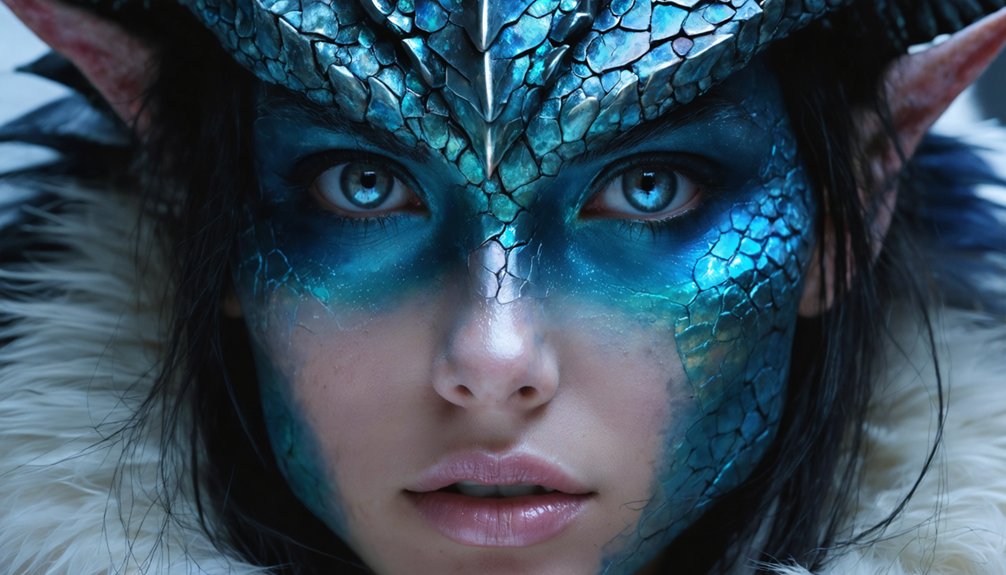
Silicone Appliances for Creature and Fantasy SFX

Silicone appliances push creature and fantasy SFX into a completely different tier of realism because two-part silicone moves with your skin rather than against it.
Silicone appliances elevate creature SFX into genuine realism — because the material moves with your skin, not against it.
For fantasy transformations involving gills, brow ridges, chin extensions, or cheekbone plating, silicone delivers flexibility that foam latex and gelatin simply can’t match under dynamic movement.
You’ll want to use Pros-Aide or a comparable medical-grade adhesive to secure each piece cleanly, applying thin layers for maximum hold without edge lifting.
Creature features benefit most when you pre-paint intrinsic color directly into the silicone before application, then layer extrinsic tones afterward for dimensional depth.
Blend the edges meticulously using a stipple sponge and matching foundation to erase the seam line completely.
Precision here determines whether your transformation reads as costume or character.
Edge Blending Techniques That Hide Every Seam
The most convincing silicone appliance in the world falls apart the moment a visible seam catches the light, so your blending work at the edges carries just as much weight as the sculpt itself.
Start by feathering thin edges with Pros-Aide mixed with a small amount of silicone, pressing the boundary flat against skin. Use a damp stipple sponge to texture the boundary area, matching the surrounding skin’s natural irregularity.
Seamless integration depends on layering translucent color in short, directional strokes rather than flooding the edge with a single flat tone. Edge blending succeeds when you work shadow and highlight outward from the appliance, pulling attention toward dimensional detail rather than the seam itself.
Matte powder seals everything cleanly without creating unwanted reflections.
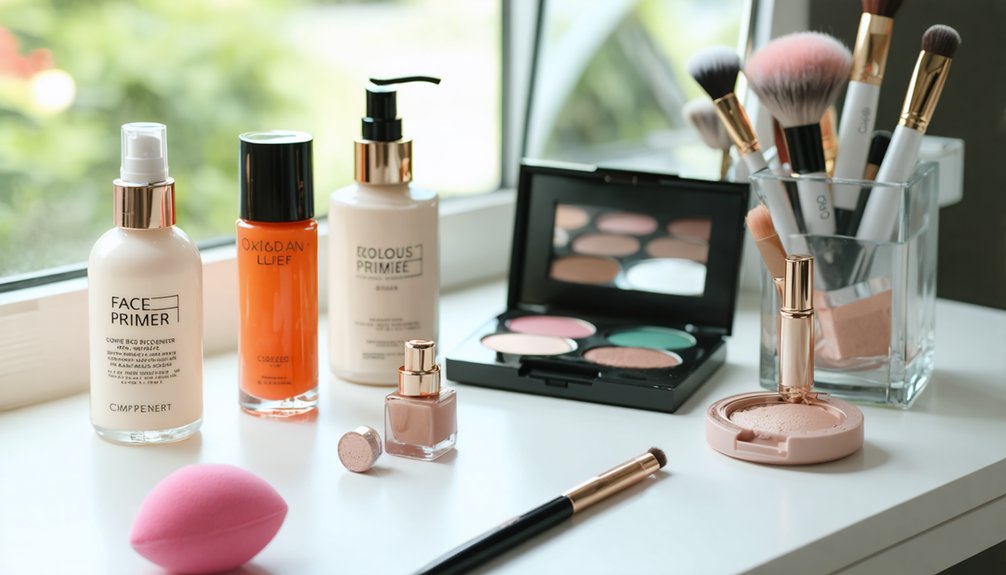
Adhesives and Finishes That Make 3D Makeup Last
Every prosthetic attachment lives or dies by two decisions: what you use to bond it and how you seal it once it’s in place.
For adhesive types, medical-grade Pros-Aide outperforms spirit gum in both hold strength and flexibility, making it ideal for large silicone appliances. Your application methods matter equally — thin, even layers cure faster and grip better than heavy, uneven coats.
Once placed, finish options like matte sealing powder reduce unwanted shine while locking color work. For durability tips, layer a flexible sealant over painted surfaces to resist cracking through movement.
Prioritize skin safety by choosing non-irritating, cosplay-tested products for repeated use.
Finally, smart removal techniques — adhesive remover applied slowly with a q-tip — protect both your skin and the prosthetic piece itself.
Frequently Asked Questions
Can 3D Cosplay Makeup Be Safely Reused Across Multiple Convention Events?
Like Cinderella’s glass slipper, you can reuse silicone prosthetics across events if you follow proper safety guidelines and cleaning techniques—gently sanitize appliances, store them carefully, and reapply fresh adhesive each time.
How Long Does a Full Prosthetic Cosplay Application Typically Take to Complete?
You’ll typically spend 1–4 hours completing a full prosthetic application. Mastering application techniques like thin adhesive layering and edge blending cuts time considerably. Follow adhesive tips—use Pros-Aide sparingly—and you’ll achieve flawless, convention-ready results efficiently.
What Skin Types Have the Most Difficulty Tolerating Prosthetic Adhesive Products?
Like delicate silk fraying under rough hands, sensitive skin struggles most with prosthetic adhesives. You’ll face adhesive irritation if you have rosacea, eczema, or allergy-prone skin — always patch-test medical-grade products like Pros-Aide beforehand.
Are There Budget-Friendly Alternatives to Professional-Grade Silicone for Beginners?
You can explore budget materials like gelatin and liquid latex as beginner techniques for 3D effects. They’re affordable, skin-friendly, and surprisingly versatile, letting you sculpt realistic wounds, burns, and creature features without professional-grade silicone costs.
Which 3D Makeup Effects Photograph Best Under Standard Convention Lighting Conditions?
Wait until you see how burns and scars steal every shot! Under convention lighting, you’ll find matte-finished wounds dominate using smart lighting techniques and sharp photographic angles, making dimensional silicone textures and irregular edges pop with stunning realism.
References
- https://www.pinterest.com/ideas/3d-makeup-looks/893814251860/
- https://camerareadycosmetics.com/blogs/news/halloween-sfx-makeup-top-10-products-loved-by-pro-makeup-artists
- https://www.cinemamakeup.com/blogs/special-effects-makeup-ideas/
- https://www.youtube.com/watch?v=rTbGzil_1r8
- https://www.tiktok.com/@scortezzbeauty/video/7423196247462333703
- https://www.costumes.com.au/blog/essential-sfx-make-up
- https://www.instagram.com/reel/Cy31PkUPGeD/
- https://www.instagram.com/p/DT2nl9nEaOZ/
- https://www.youtube.com/watch?v=1sAWbh5reYg
- https://www.pinterest.com/bloodredhoney/cosplayspecial-effects-makeup/