To make a magical unicorn horn headpiece, you’ll start with a foam cone as your base, shaping it with a sharp knife for the perfect taper. Cover it with a sewn fabric sleeve, then add a clay spiral for dimension. Paint it with layered glitter coats, press on gemstone rolls, and attach felt flowers or bows. Finally, secure it to a headband with hot glue. Keep going to master every detail.
Key Takeaways
- Use a foam cone as the structural base, shaping it with a sharp knife at a 15-degree inward angle for a smooth taper.
- Sew a fabric triangle cover by folding it right sides together, stitching a ¼-inch seam, then gathering the base snugly.
- Roll clay into a thin, consistent rope and wrap it around the cone to create a uniform spiral detail.
- Apply two base color coats, then layer glitter paint using upward brushstrokes, sealing everything with a clear topcoat for durability.
- Attach the horn to a headband using hot glue, threading elastic through punched base holes cut slightly shorter than head circumference.
What You Need to Make a Unicorn Horn Headpiece
Before diving into the crafting process, you’ll need to gather a specific set of materials and tools to build your unicorn horn headpiece from scratch. Each component serves a deliberate purpose, honoring unicorn symbolism while maximizing crafting creativity.
Start with a foam cone as your structural foundation — it defines the horn’s iconic taper. Grab a sharp knife to refine its shape and length precisely. You’ll also need clay or modeling material to sculpt that signature spiral detail.
A foam cone forms the horn’s core — shape it with a sharp knife, then sculpt spiral details with clay.
A hot glue gun guarantees every element bonds securely, while scissors or a craft knife handles fabric and foam cutting cleanly.
Having these tools ready before you begin eliminates interruptions and keeps your workflow sharp, allowing your creative vision to translate directly into a polished, professional-looking unicorn horn headpiece.
Choose the Right Foam Cone for Your Horn
With your tools assembled, the foam cone you pick becomes the single biggest factor shaping your horn’s final silhouette. Different foam types deliver dramatically different results — dense floral foam holds crisp edges and accepts paint beautifully, while lightweight styrofoam carves quickly but may crumble under pressure.
Evaluate your cone’s proportions carefully. A taller, narrower cone produces an elegant, regal horn aesthetic, whereas a shorter, wider base creates a bolder, cartoonish effect. Both are valid creative directions depending on your vision.
Run your fingers along the surface before committing — smoother foam requires less sanding prep, saving you significant finishing time.
Match the cone’s height to the wearer’s head scale so the horn aesthetics remain proportional and visually striking rather than awkward or overwhelmingly large.
Shape and Taper the Foam Cone to Size
Once you’ve selected your foam cone, three cuts will define the horn’s final proportions — base width, overall height, and taper angle. Using a sharp knife, slice horizontally across the base to establish diameter, then trim the tip to sharpen its point with precision.
Foam shaping techniques matter here — score lightly before committing to full cuts, letting the blade glide rather than drag. This prevents tearing and preserves clean edges throughout.
For tapering methods, angle your blade inward at roughly 15 degrees while rotating the cone slowly. This motion creates a smooth, continuous taper rather than a stepped or uneven surface.
Run your fingertip along the shaved edge to detect inconsistencies immediately. Consistent thickness from base to tip guarantees paint and decorative layers adhere evenly during finishing stages.
Sew the Fabric Horn Cover Step by Step
Cut a single fabric triangle sized to wrap your foam cone, then fold it in half with right sides together so the long diagonal edges meet evenly.
Sew down the angled seam using a 1/4-inch seam allowance, turn the piece right side out, and poke the tip firmly into shape with a chopstick.
Finally, run a gathering stitch around the open base, pull the thread gently to cinch the fabric snug against the cone’s bottom edge, and secure it with a knot.
Cutting The Fabric Triangle
Grab your pattern fabric and lay it flat on your work surface, then use a template or stencil to trace a single triangle directly onto it. Your triangle’s dimensions determine the horn’s final height and base width, so experiment with different triangle sizes before committing to a cut.
Different fabric types behave uniquely during shaping—stretch knits mold smoothly around curved forms, while woven cotton holds crisp edges for cleaner spiral definition. Choose accordingly based on your desired finish.
Once traced, cut precisely along your marked lines using sharp scissors or a craft knife. Clean, accurate edges guarantee your seam allowances remain consistent during assembly.
A slightly elongated, narrow triangle produces a taller, more dramatic horn, while a wider base creates a sturdier, bolder silhouette.
Folding And Sewing Seams
With your triangle cut and ready, fold it in half lengthwise, bringing the two long edges together with right sides facing inward—you’ll see the “good” fabric face disappear inside, leaving the raw seam allowance exposed on the outside.
This orientation locks your fabric choices into position for a clean interior finish.
Pin along the diagonal edge, then sew down the angled side using a ¼-inch seam allowance. Among available seam types, a straight stitch works reliably here, though a narrow zigzag adds stretch if you’re using knit material.
Backstitch at both the wide base and the pointed tip to reinforce stress points.
Trim excess seam allowance near the tip, cutting close without snipping your stitching. This reduces bulk before you turn the piece right-side out.
Turning And Gathering Base
Flip the sewn cone right-side out by pushing the tip through the open base—use a chopstick or blunt pencil to coax the point fully outward without stretching the seam.
You’ll immediately see the spiral silhouette sharpen into dimension.
Now switch to base shaping: thread a hand needle with coordinating thread and run a gathering stitch around the open circumference, keeping stitches evenly spaced at roughly 1/4-inch intervals.
Don’t knot the end yet. Slide your foam cone inside, tip-first, until it seats snugly.
Then pull the gathering thread firmly, cinching the fabric tight against the foam base.
These gathering techniques compress excess material into a clean, puckered ring that hugs the cone without bunching.
Knot securely, trim the tail, and you’ve locked the cover in place.
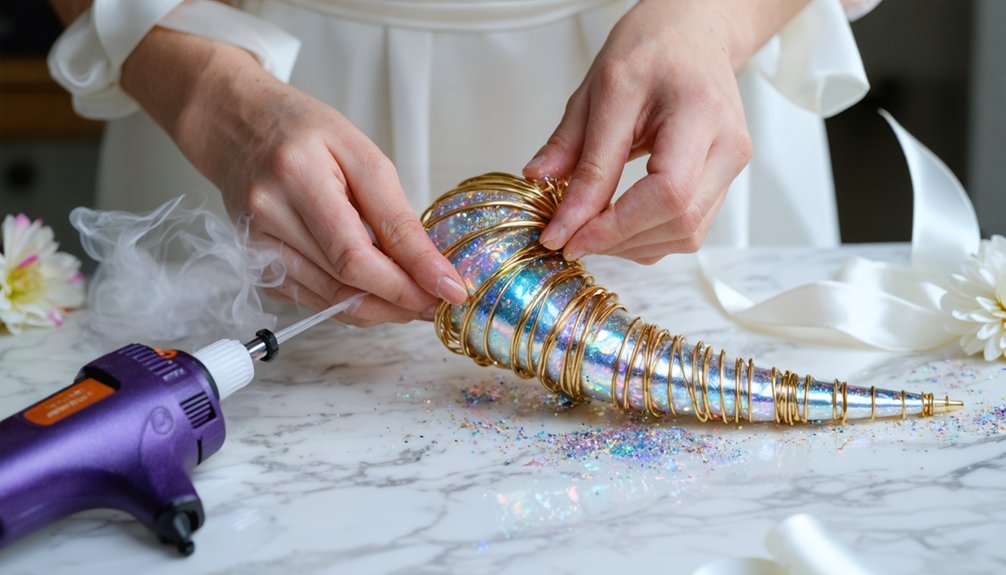
Create the Spiral Horn Effect on Your Horn
Once your base coat is fully dry, roll a thin, even rope of clay between your palms and press it along the cone’s surface in a continuous swirl, starting from the base and spiraling upward toward the tip.
These spiral techniques define your horn aesthetics, transforming a simple cone into something dimensional and dynamic.
These spiral techniques elevate your horn from a basic shape into something textured, expressive, and visually compelling.
Keep these key points in mind:
- Maintain consistent clay rope thickness for a uniform spiral
- Press firmly so the clay bonds securely without cracking
- Space each swirl evenly to achieve clean visual rhythm
- Taper the rope slightly as you approach the tip
- Smooth clay edges with a damp fingertip for seamless blending
Once secured, let the clay cure completely before moving into your painting and decorating phases.
Paint and Glitter Your Unicorn Horn
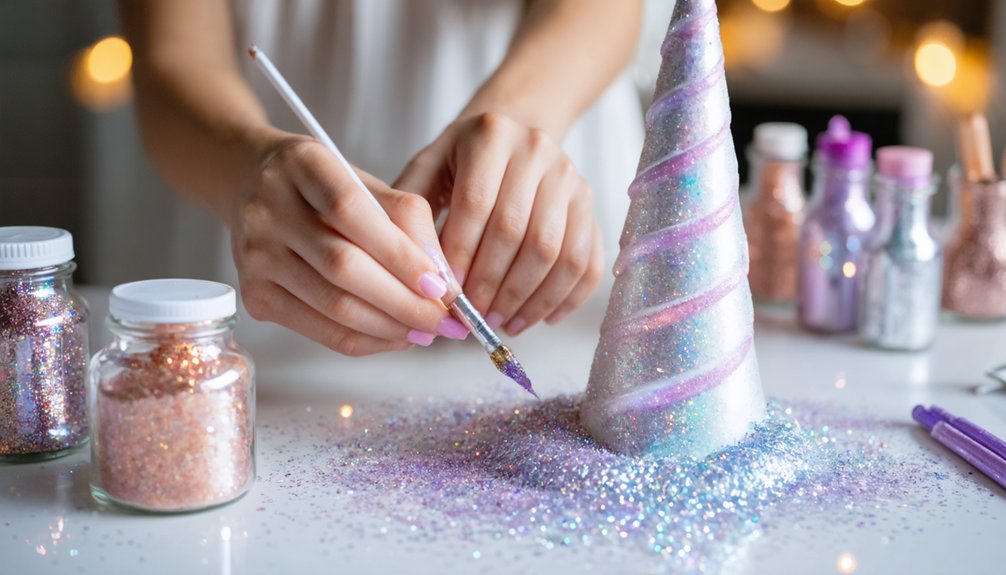
Now that your clay spiral has fully cured, grab your chosen base color and apply two even coats directly over the entire cone, letting the first dry completely before layering the second.
Your color choices dramatically shift the horn’s final personality—ivory creates elegance, rose gold feels modern, and deep purple commands fantasy.
Once your base coats are fully set, layering techniques become your creative advantage.
Apply one to two coats of glitter paint over the dried base, working from tip to base in smooth, deliberate strokes.
This sequencing guarantees maximum shimmer without muddying the underlying hue.
Let each glitter layer cure completely before touching.
The result is a luminous, dimensional surface that catches light dynamically, transforming your structured cone into something genuinely enchanting.
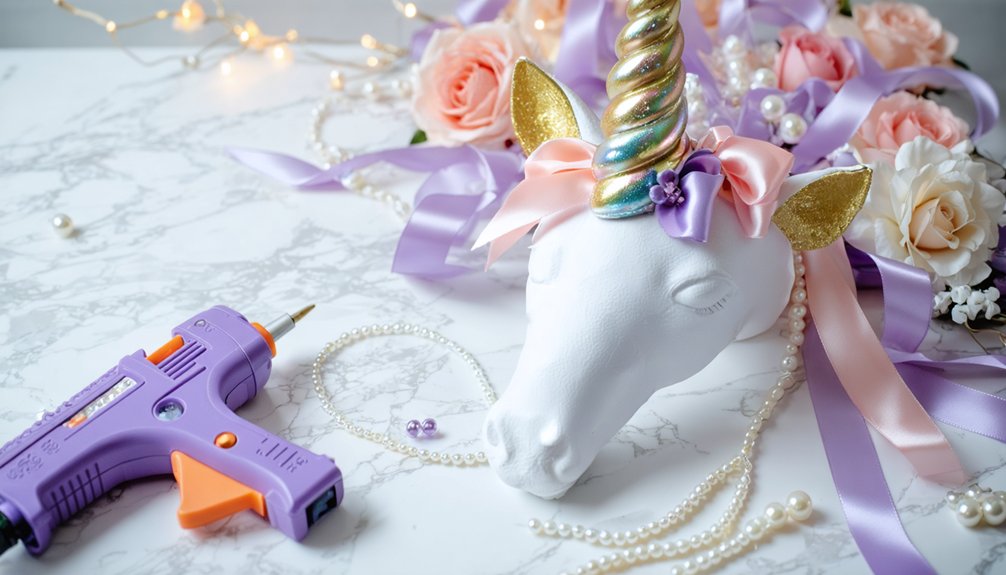
Decorate Your Horn With Gems, Flowers, and Bows
Wrap self-adhesive gemstone rolls around your cone’s surface in spiral patterns, pressing each gem firmly to guarantee it adheres without gaps.
Cut small felt flowers and leaves, then hot-glue them near the base alongside a tiny ribbon or yarn bow for a layered, dimensional effect.
Finally, brush one to two coats of glitter paint over the entire horn, letting each layer dry completely to lock in your decorations with a unified, sparkling finish.
Attaching Sparkling Gemstone Rolls
Sparkling gemstone rolls transform your painted horn into something truly magical — simply attach self-adhesive gemstone rolls by pressing them firmly around the cone’s surface in a spiral or horizontal pattern, working from the base upward toward the tip.
Strategic gemstone placement elevates your design from simple to spectacular. If adhesive options on your rolls feel weak, reinforce with craft glue for durability.
- Choose rolls with varied gem sizes for dimensional visual texture
- Press each gem firmly for 5–10 seconds to activate the adhesive
- Alternate colors between rows for a gradient rainbow effect
- Leave small gaps between rows to let your base color breathe
- Trim excess roll cleanly with scissors at the cone’s narrow tip
Adding Felt Flowers And Bows
Once your gemstones are locked in place, felt flowers and bow tying techniques take your horn’s personality to the next level.
Cut felt into small petal shapes, layering them concentrically to build dimensional felt flower arrangements. Stack three to five petals per bloom, securing each layer with a dab of hot glue at the center.
Position your flowers asymmetrically along the horn’s base, mixing sizes for visual depth. Tuck in small felt leaves between blooms to frame each arrangement naturally.
For bows, cut a narrow ribbon strip measuring roughly six inches, fold it into a loop shape, and pinch the center tightly before wrapping a shorter piece around the middle.
Secure with glue, then attach the finished bow directly beside your primary flower cluster.
Finishing With Glitter Paint
Glitter paint transforms your horn from a simple craft project into something genuinely magical, so apply it strategically rather than randomly. Let your base coat dry completely before layering glitter types over it for maximum vibrancy.
Follow these paint application essentials:
- Choose fine glitter for smooth coverage; chunky glitter creates dimensional texture.
- Brush upward strokes from base to tip to follow the horn’s natural spiral.
- Apply two thin coats rather than one thick layer to prevent cracking.
- Mix glitter types — combine iridescent and metallic for dimensional shimmer.
- Seal with clear topcoat to lock glitter in place and prevent shedding.
Allow each coat to dry fully before handling. This precision guarantees your finished horn catches light beautifully from every angle.
Size the Elastic for a Perfect Fit
To get a snug, comfortable fit, wrap the elastic around the wearer’s head and cut it about half an inch shorter than the measured circumference—this slight tension keeps the horn secure without digging in.
Elastic sizing matters more than most crafters expect; too loose and the horn tilts, too tight and it’s unwearable.
Once you’ve cut your elastic, thread each end through the punched holes at the cone’s base, then tie firm double knots inside.
Tug both knots outward to confirm they won’t slip through. For comfort adjustments, test the fit on the actual wearer before finalizing the knots—everyone’s head shape differs slightly.
If it pinches, recut a slightly longer piece. That small refinement makes the finished headpiece genuinely wearable, not just visually stunning.
Attach the Unicorn Horn Securely to a Headband
Now that your elastic is sized perfectly, it’s time to lock everything in place.
Punch two holes opposite each other near the base of your cone, thread the elastic ends through, and tie secure knots so nothing slips.
Then, for extra stability, press the horn’s base firmly onto your headband with a generous bead of hot glue, holding it steady until it’s fully bonded.
Punching Holes For Elastic
Punching two small holes into your cone is the key step that transforms a decorative horn into a wearable headpiece. Position each hole directly opposite the other near the base, ensuring horn elasticity and headpiece stability remain balanced during wear.
Follow these precise steps:
- Mark both hole positions symmetrically using a pencil before puncturing.
- Use a sharp craft knife or hole punch for clean edges.
- Space holes approximately 1/4 inch from the cone’s base rim.
- Keep hole diameter slightly larger than your elastic width.
- Smooth any rough edges with fine sandpaper to prevent tearing.
Accurate placement prevents the horn from tilting sideways once the elastic threads through.
Consistent hole sizing guarantees your elastic moves smoothly without creating unnecessary stress points on the cone’s structure.
Gluing Horn To Headband
Securing your unicorn horn directly to a headband creates a cleaner, more polished alternative to elastic threading.
Position your horn at the headband’s center point, marking the exact placement with a pencil before committing to adhesion.
For maximum horn stability, choose a high-temperature hot glue gun over standard craft adhesives. Among available glue types, hot glue bonds foam-to-plastic surfaces most effectively, creating a durable connection that withstands movement and wear.
Apply a generous bead around the horn’s entire base perimeter, then press firmly onto the headband for 30 seconds.
Hold the horn at your desired angle—slightly forward-tilting looks most dynamic. Allow the bond to cure completely for 10 minutes before testing stability.
Reinforce weak spots with additional glue if necessary.
Safety Tips for Hot Glue, Sharp Tools, and Glitter
When working with 3 key hazards—hot glue, sharp tools, and glitter—you’ll want to approach each with deliberate caution. Proper hot glue safety, sharp tool precautions, glitter handling tips, and crafting workspace organization transform potential risks into controlled precision.
- Keep your hot glue gun on a heat-resistant mat; never touch the nozzle directly.
- Use a cutting mat and ruler when trimming foam—never cut toward your fingers.
- Apply glitter glue instead of loose glitter to minimize airborne particle inhalation.
- Designate separate zones for sharp tools and adhesives within your crafting workspace organization.
- Supervise children closely; adults should handle all knife and glue gun operations.
Treat each material as purposeful—your workspace reflects your craftsmanship.
Organized, safety-conscious techniques produce cleaner results and protect everyone involved in the creative process.
Frequently Asked Questions
Can I Wash the Unicorn Horn Headpiece After Wearing It?
You shouldn’t fully submerge your headpiece. For horn cleaning, gently spot-clean with a damp cloth. Practice careful material care by air-drying completely, preserving glitter, gemstones, and elastic integrity for your next magical wear.
How Long Does the Completed Unicorn Horn Headpiece Typically Last?
With proper care, it’ll last 10+ uses! Your headpiece’s durability factors include paint quality and secure knots. Follow these wear tips: avoid moisture, store carefully, and you’ll enjoy your magical creation longer.
What Age Group Is This Unicorn Horn Headpiece Best Suited For?
You’ll find this headpiece suits children’s parties best for ages 5–12, where age appropriateness aligns with supervised crafting. Younger kids need adult assistance with sharp tools and hot glue to guarantee safe, creative participation.
Can I Reuse the Unicorn Horn Headpiece for Multiple Costume Events?
Your shimmering unicorn horn versatility shines across countless costume event options. You’ll simply refresh paint layers, reattach elastic, and swap decorations like flowers or gemstones, transforming it into an entirely new magical creation each time.
Where Can I Purchase All the Required Materials Affordably?
You’ll find craft supply stores like Michaels or Hobby Lobby offer budget-friendly options for foam, glue, and paint. Explore online marketplaces like Amazon or Etsy, or grab convenient DIY kits for everything bundled affordably together.
References
- https://www.youtube.com/watch?v=RbfreiVO1DU
- https://starstruckpanda.com/diy-unicorn-horn-headpiece-tutorial/
- https://gingercake.org/wp-content/uploads/2020/01/Unicorn-Horn-Instructions-.pdf
- https://www.youtube.com/watch?v=rukmmv3A7y0
- https://www.youtube.com/watch?v=DVItk9F0600
- https://livelaughlovetocraft.wordpress.com/2017/10/25/light-up-unicorn-horn-tutorial/
- https://www.youtube.com/watch?v=HZAa0BnNiX8
- https://woojr.com/diy-unicorn-horn-headband/
- https://www.youtube.com/watch?v=Ah98vyBP0PY
- https://tikkido.com/blog/easy-felt-unicorn-headband-tutorial