To enhance your sci-fi robot costume, start with a metallic spray-paint base in silver, chrome, or gunmetal, then layer geometric EVA foam panels for depth and structure. Weathering techniques like dark washes, dry-brushing, and rust accents create a battle-worn authenticity. Strategic LED placement on your helmet, chest, and joints adds high-tech credibility. Seal everything with a matte clear coat, and photograph with rim lighting for maximum impact. Every trick builds on the last.
Key Takeaways
- Spray-paint or dye thrifted clothing in silver, chrome, or gunmetal tones to instantly establish a convincing metallic robot foundation.
- Glue EVA foam panels at varying heights to create realistic, layered armor with depth and dimension.
- Apply weathering techniques—dark washes, dry-brushing, and scratch marks—to give your costume a battle-worn, authentic appearance.
- Strategically place blue, green, or red LEDs on the helmet, chest, and joints for a striking futuristic mechanical effect.
- Use rim lighting and low camera angles when photographing to dramatically emphasize armor details and glowing accents.
Start With a Metallic Base That Reads as Robot
Before any armor panels or LED lights come into play, your base layer does the heavy lifting of selling the robot illusion. Drawing from robot costume history, the most convincing builds have always anchored their visual language in silver, chrome, gunmetal, or black-gray palettes — colors that signal machine before a single detail is added.
Start by spray-painting or fabric-dyeing thrifted clothing to establish that metallic foundation. Push futuristic design trends further by applying darker shading into recessed areas, which forces flat fabric to read as three-dimensional paneling.
Aluminum foil over cardboard delivers a high-shine surface on a minimal budget. Finish everything with a matte or satin clear coat to lock in the paint and eliminate distracting glare that cheapens the overall effect.
Layer Armor Panels to Add Depth and Structure
Once your metallic base is locked in, armor panels are what transform a painted outfit into something that reads as mechanically complex. Cut craft foam or EVA foam into geometric plates, then layer them over your base with hot glue and Velcro for secure, removable attachment.
Material durability matters here — EVA holds paint cleanly and flexes without cracking under movement stress. Stack panels at varying heights to create genuine depth rather than a flat silhouette. Use color contrast intentionally: darker recessed areas against lighter raised surfaces force the eye to read each layer as a separate structural component.
Dry brush edges with a lighter metallic tone to define boundaries sharply. Prioritize your chest and helmet, where layered complexity delivers the strongest visual payoff.
Keep Your Robot Costume Comfortable Enough to Actually Wear
Secure your armor panels with industrial-strength Velcro strips rather than permanent adhesives, giving you the flexibility to reposition pieces that shift during wear.
Attach elastic bands at stress points—shoulders, elbows, and hips—so the costume moves with your body instead of fighting against it.
Prioritize mobility over surface detail in high-movement zones, keeping complex mechanical accents reserved for stationary focal points like the chest and helmet.
Securing Panels With Velcro
How you attach your armor panels can make or break the entire wearing experience — and Velcro is one of the smartest low-profile solutions you’ve got. Among panel attachment strategies, industrial-strength Velcro outperforms most fastening methods because it’s repositionable, washable, and distributes weight evenly across a surface.
Apply the hook side to your base layer and the loop side to your foam or Worbla panel — that pairing protects your underlayer fabric from abrasion.
For heavier chest pieces, stack two or three strips in parallel rather than relying on a single run. Reinforce high-stress corners with hot glue before adding Velcro to prevent peeling mid-wear.
This layered approach keeps your panels locked during movement while still allowing fast removal when you need it.
Prioritizing Mobility Over Detail
Heavy armor shapes can interfere with walking, sitting, and basic comfort — so before you finalize any panel design, you’ve got to test every piece for range of motion. Crouch, raise your arms, and twist your torso while wearing each section. If something binds or shifts dangerously, redesign it.
Ergonomic design isn’t optional — it’s structural logic. Break rigid panels into segmented sections that follow your body’s natural bend points at the elbows, knees, and hips. Material flexibility becomes your greatest engineering advantage here.
EVA foam and craft foam bend with movement rather than against it, unlike thick cardboard or hard plastic shells. Prioritize articulation at every joint, keep your heaviest pieces centered on the torso, and reserve rigid construction strictly for stationary display areas like the chest or helmet crown.
Use LED Lights to Make Your Robot Costume Feel High-Tech
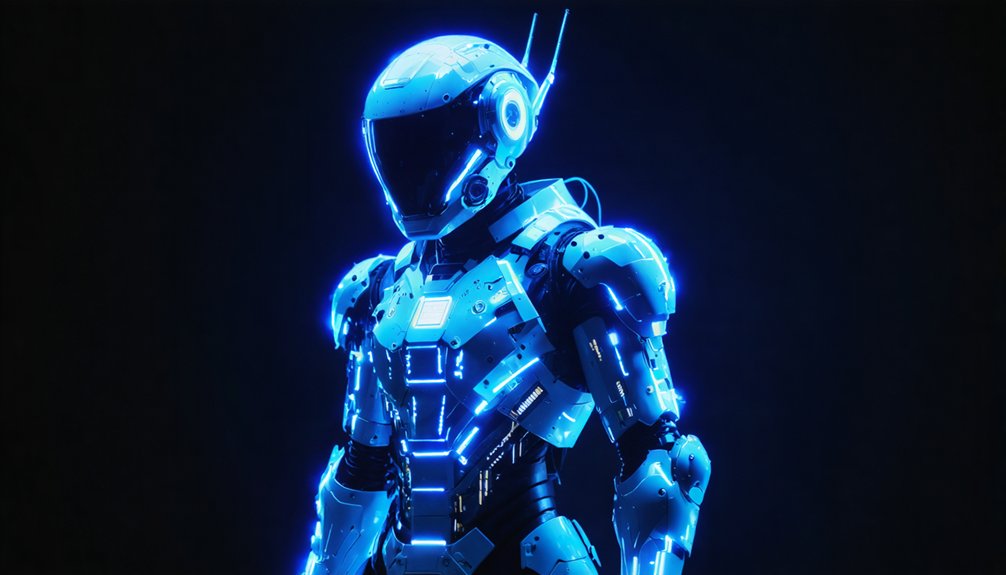
LED strips, EL wire, and individual diodes each serve different needs, so you’ll want to match the light type to the effect you’re chasing—pulsing chest cores call for programmable LEDs, while helmet visors often look sharper with a steady neon-style glow.
You’ll get the most visual return by concentrating your lights at high-visibility zones like the eyes, chest cavity, and shoulder joints, since those areas dominate every angle of the silhouette.
Keep your setup wearable by running battery-powered packs tucked into interior pockets or hidden panels, which cuts the risk of shorts and lets you swap batteries mid-event without tearing the costume apart.
Choosing the Right LEDs
Picking the right LEDs can mean the difference between a costume that feels genuinely futuristic and one that just looks like it has flashlights taped to it. Prioritize color contrast by selecting LEDs that stand out sharply against your metallic base — cool blue, neon green, or red work particularly well against silver and gunmetal finishes.
Strip LEDs offer flexibility for contouring curved armor panels, while individual diodes give you precision placement in tight spots like helmet visors or chest cores.
Battery-operated units keep wiring manageable and eliminate safety risks.
For material durability, opt for weather-resistant LED strips rated for flexible movement, since rigid setups crack under repeated bending.
Always test brightness levels in your target lighting environment before committing to final placement.
Best Placement Spots
Where you place your LEDs determines whether your costume reads as a polished sci-fi machine or a half-finished prop, so treat placement as a deliberate design decision rather than an afterthought. Prioritize high-visibility zones where light naturally draws the eye and reinforces your robot’s mechanical identity.
- Helmet and visor: Sensor integration here signals intelligence, framing your face with glowing eye ports or a lit scanning visor.
- Chest core: A central reactor or pulsing panel becomes your costume’s visual anchor in any lighting condition.
- Joints and seams: Edge-lit articulation points suggest powered movement and mechanical depth.
Smart power management keeps these zones glowing consistently. Route your battery pack to a hidden, accessible panel so you can swap or kill power quickly without breaking character.
Battery-Powered LED Tips
Battery-powered LEDs give you the freedom to build a fully lit costume without tethering yourself to an outlet or hauling a power brick the size of a toolbox. Choose your power source carefully — a compact lithium battery pack tucked inside a chest panel or helmet shell keeps weight balanced and wiring clean.
Opt for diffused LEDs rather than bare diodes; light diffusion softens harsh hotspots and spreads an even glow across visors, eye cavities, and chest cores. Warm white or cool blue tones reinforce a mechanical aesthetic instantly.
Run wires through seams or hollow foam channels to hide them completely. Use a small toggle switch for quick on/off control without dismantling panels, keeping your costume functional throughout an entire event.
Add Gears, Wiring, and Control Panels to Your Robot Costume
Small details are what separate a convincing robot build from a basic costume, so adding gears, wiring, and control panels is one of the highest-impact steps you can take. Strategic gears placement on shoulders, joints, and chest panels immediately signals mechanical complexity.
Wiring integration using salvaged cables, zip ties, and exposed conduit creates an authentic industrial system that reads as functional.
Repurpose these materials for maximum effect:
- Discarded electronics — stripped circuit boards, old keyboards, and motherboard fragments add instant technical credibility
- Hardware store finds — nuts, bolts, and metal washers layer industrial texture across armor surfaces
- Control panel clusters — toggles, switches, and small dials mounted on chest pieces simulate an operational command interface
Focus your detail work where eyes naturally land first.
Weather Your Robot Costume for a Battle-Worn Finish
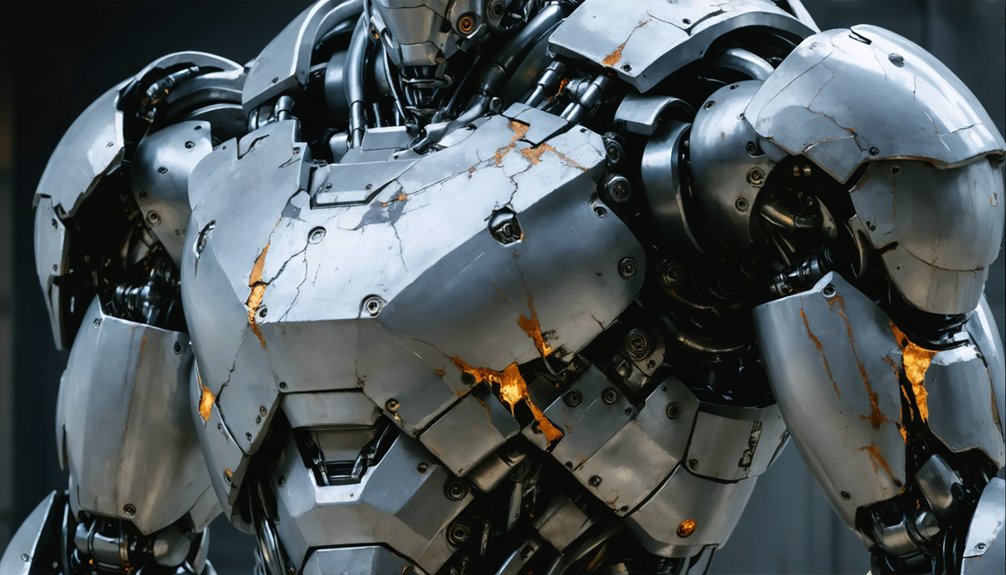
Weathering transforms a clean costume build into something that looks like it’s survived firefights, energy surges, and decades of field deployment.
Your paint color choices drive the entire effect — start with a dark base wash applied into recessed seams, panel lines, and joints to simulate accumulated grime. Once dry, dry-brush a lighter metallic tone across raised edges to mimic physical wear from repeated impact.
Deliberate scuff marks, scratched paint streaks, and rust-toned accents introduce organic imperfection that makes fabricated surfaces read as battle-tested. These techniques also improve robot costume durability perception, making even foam and cardboard components appear structurally substantial.
Seal every weathered layer with matte clear coat to lock in the finish and prevent smearing during extended wear.
Photograph Your Robot Costume to Show Off Every Detail
Once your battle-worn finish is locked in and sealed, the right photography setup turns every scratch, panel line, and glowing LED into a visual statement. Lighting angle and environment transform your futuristic fashion into something cinematic.
The right lighting setup transforms every scratch and glowing LED into a cinematic visual statement.
- Use rim lighting from behind and slightly to one side to define your silhouette and highlight raised armor edges.
- Shoot in dim settings so robot costume accessories like LEDs and glowing visors dominate the frame with maximum contrast.
- Apply color grading in post using cooler blue or teal tones to reinforce the sci-fi aesthetic and deepen shadow recesses.
Position your camera slightly low and angle upward to amplify scale. Every layered panel, bolt, and circuit detail reads sharper when framed with intentional light and deliberate composition.
Frequently Asked Questions
Can I Wash My Robot Costume After Wearing It to Events?
You can wash your robot costume, but prioritize smart fabric care by hand-washing fabric layers separately. For costume maintenance, avoid submerging foam or electronic LED components — spot-clean those instead to protect your innovative build’s integrity.
How Long Does It Typically Take to Build a Robot Costume?
Building your robot costume typically takes 20–80 hours, depending on your chosen robot costume materials like EVA foam or Worbla. Complex layering and finishing techniques that boost costume durability naturally extend your timeline considerably.
Are Robot Costumes Appropriate for Outdoor Daytime Events or Festivals?
Boldly bringing brilliant builds outdoors works well, but you’ll want to contemplate seasonal suitability carefully. Costume durability becomes critical under direct sunlight, so seal your panels, secure your LEDs, and weatherproof your metallic finishes before festival day.
What Is the Average Total Cost of Building a Robot Costume?
You’ll spend anywhere from $50 to $500 on robot costume materials, depending on complexity. Prioritize EVA foam and LEDs, then apply costume maintenance tips like sealing paint to extend your build’s lifespan efficiently.
Can Children Safely Wear a Full Robot Costume With LED Lights?
Yes, children can safely wear a full robot costume with LED lights if you use battery-operated LEDs to guarantee robot safety, while maximizing LED visibility through strategic chest and helmet placement for stunning, innovation-driven results.
References
- https://dannystaple.github.io/2010/10/18/top-robot-costumes-you-can-make-yourself
- https://www.youtube.com/watch?v=pry2usv0CCc
- https://countdowntohalloween.com/homemade-robot-costume/
- https://www.robotfighting.org/robot-fighting-cosplay/
- https://starstruckpanda.com/cyberpunk-robot-cosplay-costume-diy/
- https://shunvogue.com/article/how-to-make-robot-costume-for-fancy-dress