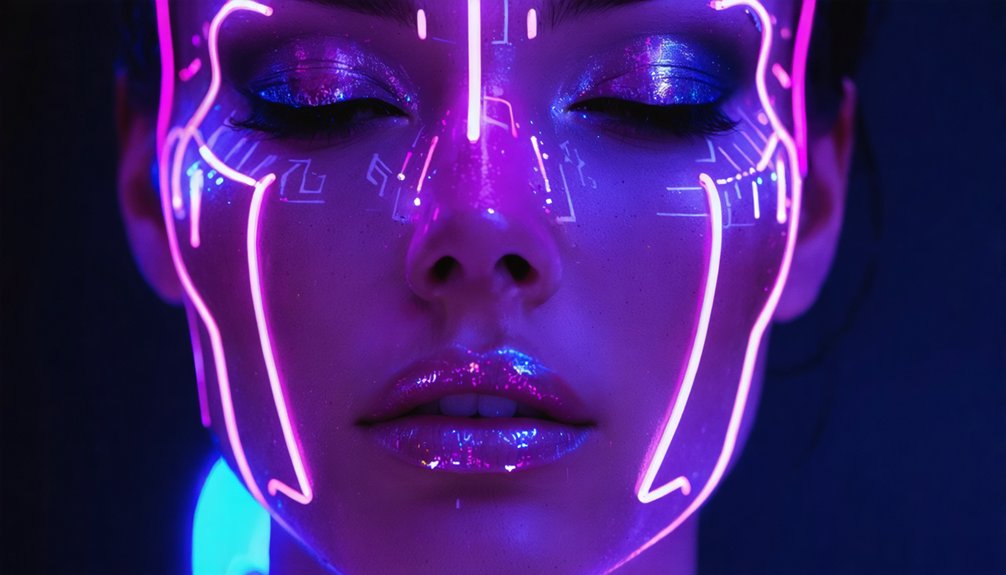
To create a futuristic cyberpunk makeup look, you’ll start with a mattifying primer and radiant foundation base. Build neon eyeshadow impact by pressing electric blue or hot pink over a dark shadow base, then seal it with shimmer topcoat. Draw geometric circuit patterns using gel liner and metallic pigments. Finish with UV-reactive pigments on your lids, cheekbones, and lips, then lock everything with setting spray. There’s a full step-by-step breakdown ahead to perfect every layer.
Key Takeaways
- Start with a mattifying primer and luminous foundation base to create a smooth, light-reflective canvas for bold cyberpunk makeup.
- Build neon eyeshadow intensity by layering bright electric blue or pink over a deep black base using stippling motions.
- Draw geometric circuit board patterns with gel liner and metallic accents to achieve an authentic futuristic PCB-inspired design.
- Apply UV-reactive pigments to eyelids, cheekbones, and lips for a blacklight-activated neon glow effect.
- Seal the entire look with setting spray using an X and T misting motion for smudge-proof, long-lasting wear.
Prep Your Skin for a Flawless Cyberpunk Canvas
Before your neon-drenched eye looks and holographic highlights can hit their full visual impact, your skin needs a solid foundation—literally. Start with a gentle, non-abrasive cleanser to eliminate impurities without compromising your skin’s natural oils—a nod to vintage techniques that prioritize skin integrity over heavy stripping.
Follow with a lightweight, hydrating moisturizer tailored to your skin type, creating the smooth canvas that natural finishes demand before layering futuristic elements.
Next, apply a mattifying primer across your face to control shine and lock everything in place.
Finally, blend a liquid highlighter into your foundation to engineer a radiant, light-reflective base. Allow every product to fully absorb before proceeding—skipping this step causes patchiness that undermines even the most technically precise cyberpunk application.
Build Your Eye Shadow Base for Maximum Neon Impact
Start your eye shadow base by pressing a deep black or dark navy shadow firmly onto the lid using a flat shader brush. This dark foundation makes neon and metallic pigments appear notably more vivid and saturated.
Next, pack a bright electric blue or hot pink shadow directly over the dark base, using a tight, stippling motion to build opaque color intensity without muddying the layers beneath.
Seal the entire lid with a shimmer or glitter topcoat, pressing it gently with your fingertip to lock in the pigments and create a high-impact, futuristic luminosity that catches every light source in the room.
Dark Base Color Selection
Why does a neon eyeshadow look fall flat without the right foundation beneath it? Without a dark base, vibrant pigments scatter rather than saturate. Start with a deep black or dark navy cream shadow packed across your entire lid using a flat shader brush.
Your dark base functions as a color-absorbing canvas, amplifying the electric intensity of neon color combinations layered on top. Think of it as a monitor’s dark screen making pixels pop with maximum contrast.
Skin tone considerations matter here too. Deeper skin tones benefit from a true matte black base, while lighter skin tones can utilize deep charcoal or dark plum to prevent harsh contrast bleed.
Press the product firmly to eliminate patchiness before building your neon layers.
Bright Shadow Packing Techniques
Once your dark base has fully set, you’re ready to pack bright, electric color directly onto the lid with deliberate, intentional pressure. Shadow packing techniques require precision—your flat shader brush becomes an architectural tool, depositing concentrated pigment rather than diffusing it.
Execute neon color blending using this structured sequence:
- Press hot pink or electric blue shadow onto the lid using firm, stamping motions to saturate the pigment fully.
- Build intensity by layering a second application directly over the first, allowing pigment density to compound.
- Apply a shimmer or glitter topcoat using a fingertip, sealing the base while amplifying light refraction.
Avoid sweeping strokes entirely—they dilute vibrancy. Your goal is maximum chromatic saturation that transforms the lid into a luminous, screen-like surface.
Shimmer Topcoat Application
Three precise dabs of shimmer topcoat, pressed directly onto the packed neon base using your fingertip, will seal the pigment layer while simultaneously converting it into a light-refracting surface. The body heat from your fingertip activates the formula, bonding it seamlessly with the electric foundation beneath. You’re not simply adding shine—you’re engineering a holographic shimmer architecture that transforms flat pigment into dimensional luminosity.
Work the topcoat from the inner lid outward, pressing rather than dragging to preserve your base integrity. Where light strikes the shimmer particles, the neon glow intensifies exponentially, creating that signature cyberpunk luminescence.
Build intensity strategically by applying a second press exclusively to the center lid, concentrating the light-refracting effect where visual impact registers most powerfully.
Apply Neon Eyeliner and Graphic Circuit Designs
Grab a bright neon eyeliner in electric blue, green, or hot pink and apply a bold, extended wing past your natural lash line for sharp, high-impact definition.
Using a micro-pen brush loaded with gel liner, draw thin white or silver lines radiating outward from the outer corners to replicate precise circuit board patterns.
Finish by layering a metallic or holographic eyeshadow over the liner to lock in a glowing, multidimensional effect that mimics the luminous intensity of neon-lit surfaces.
Bold Neon Liner Application
With your eye shadow foundation set, you’ll now bring the look to life by applying neon eyeliner and graphic circuit designs. These neon eyeliner techniques demand precision and layering to achieve maximum visual impact.
Follow these circuit pattern drawing steps:
- Apply bright neon blue, green, or pink liner along the lash line, extending a bold, angular wing beyond the natural eye shape.
- Use a micro-pen brush loaded with white or silver gel liner to draw thin radiating lines from the outer corners, mimicking circuit board pathways.
- Layer metallic eyeshadow directly over the neon liner to intensify the holographic, glowing finish.
Keep your strokes sharp and deliberate. Every geometric angle reinforces the cyberpunk aesthetic, transforming your eyes into a high-voltage, tech-inspired focal point.
Geometric Circuit Board Designs
Once the neon liner anchors your lash line, you’ll layer geometric circuit board designs over and around it to push the look into full cyberpunk territory. Grab a micro-pen brush loaded with white or silver gel liner and draw thin, branching lines radiating outward from the outer corners. These angular paths mimic circuit pattern inspiration directly, replicating PCB trace routes across your skin.
Extend short perpendicular intersections off each primary line to simulate connection nodes. For neon color combinations, crosshatch electric green intersecting hot pink lines to generate visual tension and depth. Keep edges razor-sharp using a fine-tipped applicator.
Where lines converge, dot a small metallic accent to simulate solder points. Work deliberately — precision defines this technique, and every stroke should carry intentional geometric weight.
Layering Metallic Holographic Effects
Metallic holographic effects transform your circuit board linework from flat graphic design into luminous, dimensional art. Once your geometric lines are set, holographic texture layering elevates each element into something that shifts and pulses with movement.
Follow this precise layering sequence:
- Press a metallic eyeshadow directly over dried neon eyeliner using a micro-brush, sealing the line while amplifying its reflective depth.
- Apply a holographic loose pigment over circuit board intersections, concentrating product where light naturally peaks.
- Execute neon color blending along shadow edges using a fine detailing brush, softening transitions without dissolving the graphic structure.
Each layer interacts with light differently, creating dimensional contrast between sharp linework and luminous fill.
Finish with setting spray to lock the holographic texture permanently against UV and blacklight exposure.
Create a Cyberpunk Lip You Line, Fill, and Gloss
To nail the cyberpunk lip, start by lining your lips with a neon pink or electric purple lip liner, tracing just outside your natural lip line to exaggerate the shape and sharpen the edges into a precise, graphic silhouette.
Fill the entire lip with matching lipstick, pressing pigment into corners for full, opaque coverage.
Next, dab a small amount of metallic or holographic eyeshadow onto the center of your lips, building a dimensional, light-refracting focal point. This technique mimics the glow of neon signage against a dark cityscape.
Seal everything with a clear, high-shine lip gloss, layering it specifically over the metallic center to amplify depth.
Finally, lock the finished lip with setting spray, ensuring your cyberpunk statement stays sharp and smudge-free throughout extended wear.
Add Metallic Highlights for a Cyberpunk Glow
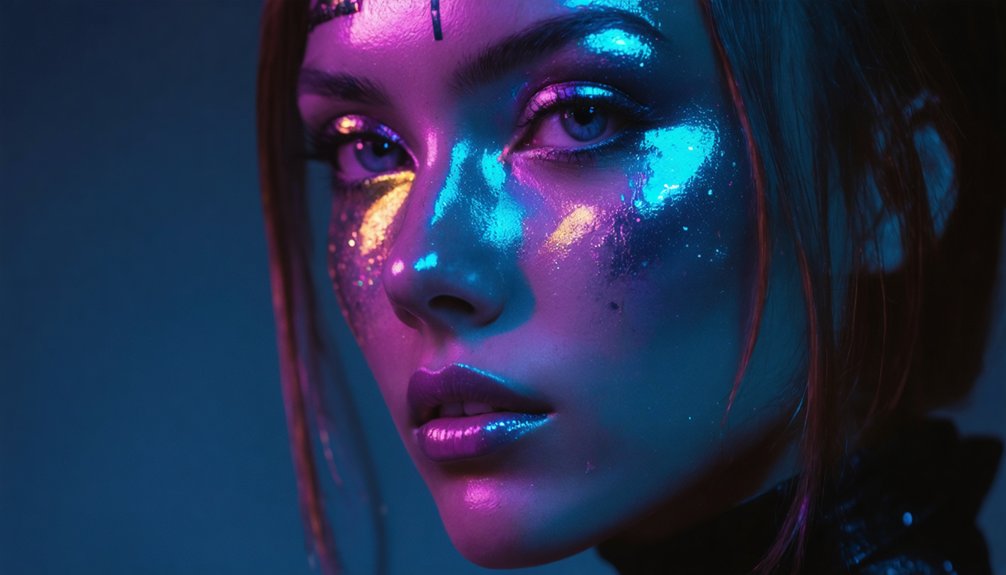
Bringing your cyberpunk glow to full intensity means applying metallic highlights with strategic precision across your high points. Metallic accents amplify light reflection, transforming your face into a luminous, circuit-board surface. Layer liquid highlighter first, then dust a powder formula over top for compounding intensity without caking.
Target these three zones for maximum dimensional impact:
- Cheekbones and brow bones — apply gold or silver highlighter using a fan brush for sharp, architectural definition.
- Nose bridge — drag a thin metallic streak downward to simulate digital rendering.
- Inner eye corners and cupid’s bow — press holographic pigment directly with your fingertip for concentrated light reflection.
Together, these placements create structured luminosity that reads dynamically under both natural and UV lighting environments.
Lock the Look With Setting Spray and Uv-Reactive Pigments
With your metallic highlights locked into place, setting spray becomes the final architectural layer that holds every neon pigment, glitter, and metallic accent exactly where you placed it. Hold the bottle eight inches from your face and mist in an X then T motion, sealing everything uniformly.
Once dry, layer UV-reactive pigments strategically over your eyelids, cheekbones, and lip center. These pigments activate under blacklight, transforming your look into something that complements neon hair and aligns seamlessly with futuristic fashion environments like club events or editorial shoots. Apply them with a fine brush for precision.
A second setting spray mist over the UV pigments bonds them without disturbing underlying layers. Your completed look now performs under both standard and ultraviolet lighting conditions with equal technical intensity.
Frequently Asked Questions
Can Cyberpunk Makeup Be Adapted for Everyday Wear Without Looking Too Extreme?
73% of makeup users adapt bold trends daily. Yes, you can tone it down! Swap neon liners for subtle metallic accents, keeping looks professional office-appropriate. You’ll achieve subtle daytime elegance by layering minimal shimmer highlights strategically.
What Skin Types Benefit Most From a Mattifying Primer Under Heavy Neon Makeup?
If you’ve got oily skin, you’ll benefit most. A mattifying primer controls excess sebum, preventing neon pigments from sliding. Balance it with hydrating formulas underneath to maintain skin integrity while keeping your cyberpunk look sharp and long-lasting.
Are Temporary Tattoo Stencils Safe for Sensitive or Acne-Prone Facial Skin?
Here’s what’s at stake—your skin’s integrity. For sensitive skin concerns, you’ll want to patch-test stencils first. Temporary tattoo safety depends on alcohol-free, hypoallergenic adhesives that won’t clog pores or trigger acne-prone flare-ups beneath neon designs.
How Do Glowing Accessories Complement the Overall Cyberpunk Makeup Aesthetic Effectively?
Glowing accessories amplify your look by mirroring the neon accents in your makeup, creating visual cohesion. They’ll reflect UV light dynamically, reinforcing geometric patterns, metallic textures, and cyberpunk circuitry themes across your entire aesthetic presentation with precision.
Can Neon Nail Art Be Coordinated With Face Makeup for a Cohesive Look?
You can achieve face and nail harmony by matching neon color coordination across both elements—mirror your electric blue liner onto nail art, ensuring sharp geometric patterns unify the look with a technically precise, innovatively cohesive cyberpunk aesthetic.
References
- https://opcosmeticspro.com/creating-a-cyberpunk-2077-makeup-look/
- https://www.reddit.com/r/MakeupAddiction/comments/ctgly5/played_around_with_a_neon_lights_look_since_i/
- https://www.lemon8-app.com/@spicy.mara/7587847815884259853?region=us
- https://www.youtube.com/watch?v=WQth59VMfcE
- https://dystopiastyle.com/cyberpunk-makeup-tips/
- https://www.youtube.com/watch?v=K2HS–cYbRk
- https://www.youtube.com/watch?v=V3–CQJxCQM
- https://www.youtube.com/watch?v=zbr-vJhj9Q4
- https://mixkit.co/free-stock-video/cyberpunk-makeup-with-neon-lights-50445/
- https://www.youtube.com/watch?v=JTOqWTFEd84