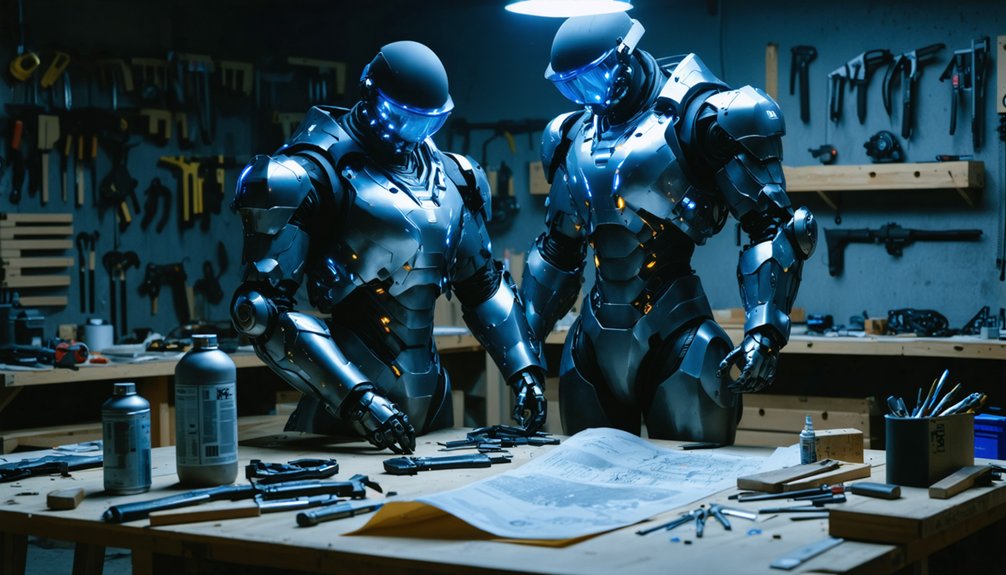
Building a sci-fi power armor costume starts with locking down your armor’s functional concept before touching any materials. You’ll choose EVA foam, ABS sheet, or resin cast parts based on your skill level and timeline. Create poster board templates, test your range of motion, and dry-fit every plate before bonding anything permanently. Surface details, weathering, and a solid harness system transform raw panels into convincing battle-ready gear — and there’s a proven process for nailing every stage.
Key Takeaways
- Start by defining the armor’s purpose and silhouette, then create poster board templates to test fit and range of motion before cutting materials.
- EVA foam is ideal for beginners due to its lightweight, heat-moldable properties, while ABS or resin suits more advanced builds.
- Use a heat gun to shape foam panels, and add styrene strips and carved grooves for mechanical, realistic surface detail.
- Seal EVA foam with Plasti-Dip, prime rigid materials with automotive primer, and sand between coats for a smooth paint-ready surface.
- Dry-brush silver on edges, stipple rust tones in recesses, and seal with matte topcoat to achieve convincing battle-worn weathering.
Design Your Power Armor Concept Before You Cut Anything
Before you cut a single piece of foam or trace a single template, lock down your armor’s core concept. Decide what your armor does functionally — heavy assault, recon, or support — because that decision drives every visual choice afterward.
Start with the helmet. It’s the face of your build and sets the tone for everything else. From there, define your shoulder silhouette, since it establishes your profile at a distance.
If you’re incorporating cybernetic enhancements, plan their placement deliberately — don’t scatter them randomly across panels.
If you’re working alien motifs into the design, study armored animals like horseshoe crabs or beetles for organic reference geometry.
Break the suit into repeating shapes and consistent motifs. Cohesion comes from intentional repetition, not decoration.
Choose the Right Materials for Your Power Armor Build
Once your concept is locked, your material choices determine whether that design becomes a wearable build or a frustrating pile of failed cuts. Material durability and cost considerations both factor into which direction you take.
Material choices made after concept lock determine everything — the difference between a wearable build and a pile of failed cuts.
Your three primary build paths are:
- EVA foam – lightweight, heat-moldable, and budget-friendly, making it ideal for curved panels and first-time builds
- ABS or styrene sheet – rigid, sandable, and paintable, offering stronger material resilience for hard-shell designs
- Resin or fiberglass cast parts – highest fidelity for complex forms, though cost considerations increase substantially with mold materials and casting supplies
Match your material to your skill level and timeline. Don’t let an ambitious material choice stall your build before you’ve cut a single panel.
Build and Test Your Templates First
Templates are your last checkpoint before committing material, so build them in poster board first. Trace each panel, cut it out, and tape it directly onto your body or a dress form.
Check armor symmetry across both sides before transferring anything to foam or rigid stock—asymmetry that looks minor on paper becomes obvious once you’re wearing a full build.
Number your edges using a Pepakura-style system so complex curves align consistently during final construction. Once fit confirms correct sizing, test your range of motion by sitting, raising your arms, and crouching.
Stiff panels that bind during movement will compromise material durability over time through stress fractures and adhesive failure. Adjust your templates now, because recutting finished foam or ABS later wastes both time and material.
Cut and Shape Your Power Armor Plates
Once your templates are finalized, trace them directly onto your EVA foam using a marker. Then cut each panel cleanly with a sharp utility knife in single, confident strokes to avoid jagged edges.
After cutting, use a heat gun to warm each panel until it becomes pliable. Then press or mold it against a curved surface—your knee, a ball, or a shaped form—to lock in the contour you need.
Work one plate at a time, test-fitting each piece against your body before moving on. This way, you can catch fit problems early before your panels are glued, trimmed, or detailed.
Transferring Templates To Foam
After confirming your poster board templates fit correctly, trace them directly onto your EVA foam using a marker or ballpoint pen. Precision here directly impacts your helmet design clarity and shoulder silhouette sharpness once assembled.
Keep these transfer principles in mind:
- Align templates with foam grain to maintain consistent flex and structural behavior across matching plates.
- Mark cut direction and fold lines during tracing so you don’t lose orientation once the template is removed.
- Label each piece immediately with its location and orientation to prevent mismatched assembly later.
Once traced, cut just outside your lines with a sharp utility knife, then trim to final shape in a second pass. This two-step method preserves accuracy and reduces costly foam waste.
Cutting Foam Armor Panels
With your traced panels ready, cutting foam accuracy comes down to blade control and consistent pressure. Use a sharp utility knife and pull it toward you in single, confident strokes rather than sawing back and forth. Replace blades frequently — dull edges compress foam instead of slicing cleanly, leaving ragged panel borders.
For interior cutouts and recessed channel work, foam carving techniques let you remove material precisely without compromising surrounding structure. Score depth in controlled passes rather than one aggressive cut.
If you’re pushing toward a more refined build, laser engraving offers a repeatable, high-precision alternative for surface detailing and panel scribing. Either method demands patience.
Once all panels are cut, sand the edges lightly to transition from raw cuts into smooth, plate-like beveled profiles.
Heat Shaping Curved Plates
Heat guns transform flat EVA foam into contoured plates that follow the body’s natural curves — and learning to control heat application is what separates stiff, boxy builds from armor that actually fits.
Thermal shaping requires controlled, even heat distribution across the panel before bending — overheating burns the surface while underheating causes cracking.
Key techniques for foam bending:
- Hold heat 3–4 inches away, moving continuously to warm the foam evenly without scorching
- Bend immediately after heating and hold the shape until the foam cools completely — roughly 20–30 seconds
- Use your body or a curved form as a mold to achieve consistent, repeatable curvature across matching plates
Test each panel against your body before the foam fully cures to confirm accurate contour alignment.
Add Surface Details That Sell the Sci-Fi Look
Once your plates are shaped and fitted, you can use a Dremel tool to carve grooves, panel lines, and recessed details directly into the foam surface, giving each piece a machined, industrial character.
Layer additional elements like raised ridges, thin styrene strips, or small greeblies on top of the base panels to build visual complexity without muddying the overall silhouette.
You’ll find that repeating a consistent motif across multiple armor sections—such as a particular groove pattern or bolt cluster—ties the whole suit together and makes it read as a coherent design rather than a collection of random parts.
Mechanical Texture Techniques
Surface details are what separate a flat foam panel from a convincing piece of powered combat hardware. A Dremel tool lets you carve grooves that suggest hydraulic systems running beneath the plating, while engraved circuit patterns imply active power distribution across the suit’s surface.
Use these techniques to build convincing mechanical texture:
- Scored lines: Cut shallow, parallel channels to simulate panel seams and conduit routing
- Raised geometry: Glue thin foam strips or styrene rod to suggest structural reinforcement and hydraulic housing
- Recessed detail: Dremel-carved pockets create depth that reads as venting, sensors, or access ports
Layer these methods across different armor zones rather than concentrating them in one area. Varied texture density keeps the eye moving and reinforces the illusion of a functional, engineered system.
Layering Detail Elements
Mechanical texture gives your armor depth, but layered detail elements are what make it read as genuinely sci-fi rather than just distressed foam.
Start with structural additions: thin styrene strips, raised panel lines, and segmented vents establish a functional logic across your armor’s surface. Build outward from there, adding ornamental embellishments like small resin-cast symbols, geometric inlays, or faction insignia that suggest a broader world.
Futuristic motifs work best when they repeat across multiple plates, creating visual cohesion rather than random decoration. Use foam clay to blend raised elements cleanly into surrounding surfaces, eliminating visible seams.
Layer smallest details last, after priming, so paint adhesion stays consistent. Every added element should justify its placement by either implying function or reinforcing your armor’s established design language.
Assemble Your Power Armor and Test the Fit
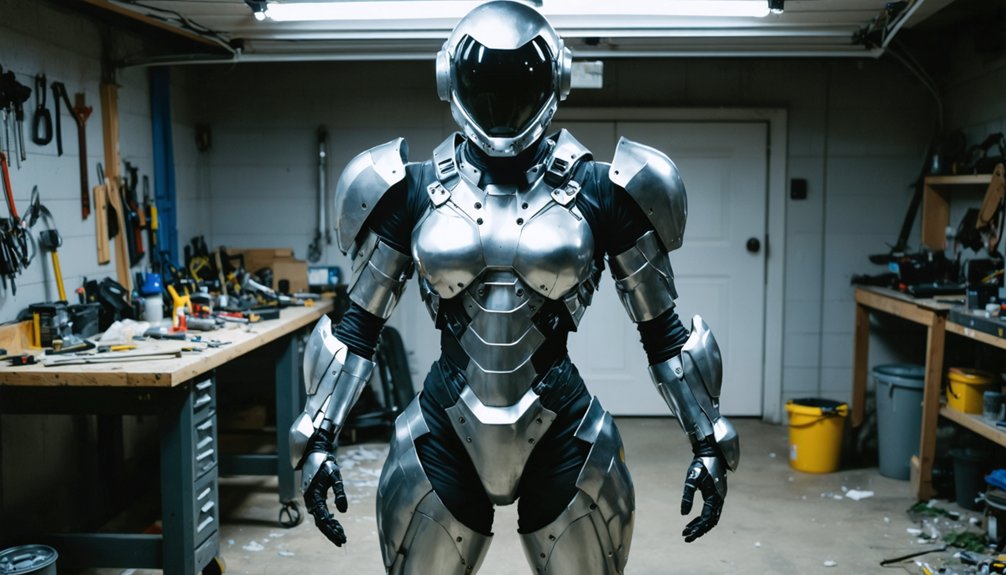
Before committing to permanent adhesive, dry-fit every plate using tape, clamps, or temporary fasteners to confirm placement, overlap, and panel alignment.
Check color contrast between adjacent panels under different lighting effects to catch tonal clashes before final bonding.
Once placement is confirmed, move through your full range of motion.
Test these critical checkpoints:
- Shoulder-to-torso transition: confirm plates don’t bind or separate during arm raises
- Hip and thigh overlap: verify clearance when sitting, crouching, and stepping
- Neck guard and helmet clearance: ensure no pinching or restriction during head rotation
After passing movement tests, bond sections incrementally rather than all at once.
Recheck alignment after each bonded segment cures.
This staged approach prevents compounding errors across the full assembly.
Build a Harness That Actually Holds the Weight
Start with a vest or chest rig as your base structure, since loose plates shift constantly and wear you out fast.
Thread webbing straps across your shoulders, chest, and hips to spread the load across your whole torso rather than letting it hang from a single point.
Once your harness fits correctly, attach your plates using pop rivets with backing washers, heavy-duty snaps, or Chicago screws so each panel stays locked in position without tearing through the fabric.
Choosing Your Base Structure
Once your armor plates are designed, the harness holding them becomes the most critical structural decision you’ll make. Your base structure directly affects your armor silhouette, movement range, and long-term wearability. Choose a foundation that distributes weight evenly and anchors plates without shifting.
Three proven base structures work well for power armor builds:
- Tactical vest platform – offers modular attachment points and naturally follows the body’s organic motifs
- Rigid foam-padded undersuit – bonds directly to panel backs while maintaining flexibility
- MOLLE webbing frame – allows repositionable plate carriers using clips, buckles, and reinforced straps
Whichever you choose, reinforce every attachment point with washers or backing plates. Weak anchor points fail under repeated movement.
Test your full range of motion before committing to final assembly.
Distributing Weight Evenly
Weight distribution can make or break a power armor build—even a lightweight foam suit becomes unbearable after an hour if all the load sits on your shoulders. Anchor your armor to a structured vest or tactical harness so the torso carries the bulk, not your neck and traps.
Route webbing straps diagonally across the chest and back to spread load across multiple contact points, improving ergonomic comfort during extended wear.
For heavy rigid sections like gorgets or backplates, reinforce attachment points with pop rivets and wide washers to prevent tearing.
Hip belts transfer significant weight to your pelvis—your strongest load-bearing structure.
Test weight distribution by wearing the full kit and moving through a full range of motion before committing to final attachment positions.
Securing Plates To Harness
A well-distributed load means nothing if the plates shift, sag, or detach under movement—so how you connect each panel to the harness determines whether the suit holds together or falls apart. Use pop rivets with backing washers to anchor rigid plates to webbing, ensuring attachment points won’t tear through under stress.
If you’re integrating neon lighting or holographic effects into panels, route wiring through the harness layer before securing plates permanently.
Key fastening strategies include:
- Pop rivets with washers for rigid, high-stress connection points
- Hook-and-loop backed with contact cement for repositionable or lightweight panels
- D-ring and snap clips for quick-release sections requiring access or adjustment
Test every joint through a full range of motion before committing to final assembly.
Prime Your Power Armor So Paint Actually Sticks
Before you apply any color, priming your armor guarantees paint bonds to the surface rather than peeling or chipping after the first wear.
Start by sealing EVA foam with Plasti-Dip or a dedicated foam sealant, applying two to three thin coats and allowing each layer to fully cure. This step locks down the porous surface and prevents paint absorption.
For rigid materials like ABS or resin, use a sandable automotive primer to fill minor surface imperfections that would otherwise disrupt your armor aesthetics.
Once sealed, lightly sand between coats to maintain a smooth foundation. A consistent primer layer also preserves your silhouette design by preventing texture buildup from pooling or drips.
Don’t rush drying time—inadequate curing leads to cracking once flexion stress hits the panels during wear.
Weather Your Suit So It Looks Battle-Worn
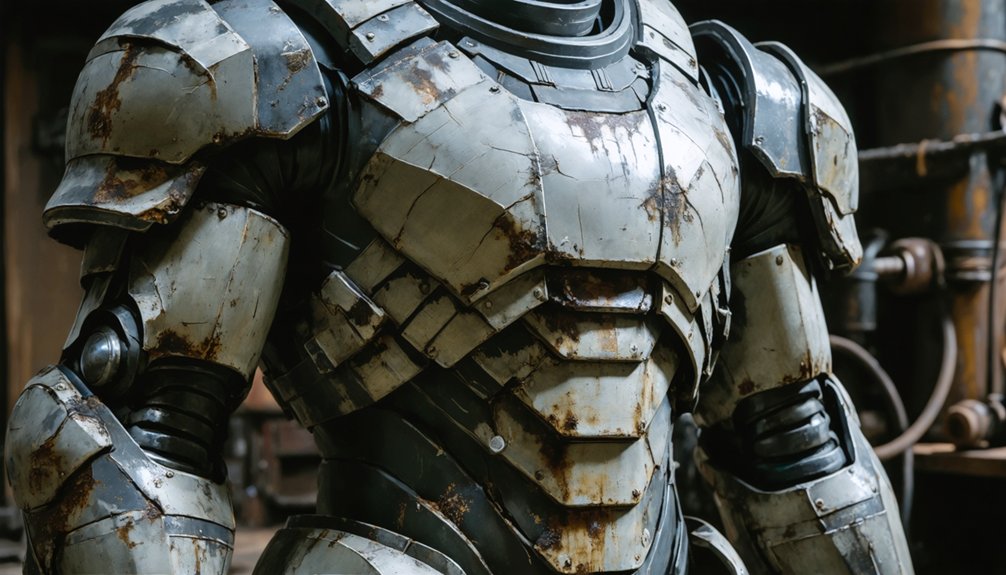
Weathering transforms a clean paint job into convincing battle history, so start with a black base coat across the entire suit to anchor your shadows and give metallic layers depth.
Build weathering effects methodically rather than randomly distressing surfaces.
Apply battle damage using these targeted techniques:
- Dry-brush silver along raised edges and panel corners to simulate worn metal contact points
- Stipple dark brown and rust tones into recessed areas to suggest accumulated grime and oxidation
- Score or gouge foam panels selectively before painting to create authentic impact craters and scrape marks
After detailing, seal everything with a matte topcoat to unify the finish.
Avoid over-weathering uniform areas—concentrate damage where realistic wear actually occurs: knees, shoulders, and forearm guards.
Add Paint Accents That Give Your Power Armor Identity
Once your weathering is sealed and dry, paint accents are what transform your armor from generic hardware into a recognizable faction or character. Use color contrast strategically — a matte olive base reads completely differently when you add a single saturated stripe along the shoulder or a bold trim line around the chest plate.
Keep accent colors to two or three maximum, otherwise the visual hierarchy collapses.
For decal placement, position insignia where observers naturally look first: the helmet, upper chest, and pauldrons. Print decals on waterslide paper, seal them with matte varnish, and apply them before the final topcoat so they integrate rather than sit on top.
Edge-line panel gaps with a fine brush to reinforce depth and sharpen the mechanical reading of each plate.
Frequently Asked Questions
How Long Does a Full Power Armor Build Typically Take to Complete?
You’ll typically spend 200–400 hours completing a full build. Complexity drives that range—armor customization adds detail time, while prioritizing costume durability through reinforced attachments, quality materials, and thorough weathering extends your timeline considerably.
How Much Does It Cost to Build a Sci-Fi Power Armor Costume?
Your cost estimation ranges from $100 to $1,500+. Budget planning depends on your materials, tools, and finishing choices—foam builds stay affordable, while resin, fiberglass, and rigid shells you’re crafting will considerably increase your overall investment.
Can Power Armor Costumes Be Safely Worn at Conventions All Day?
You can wear power armor all day if you prioritize cosplay safety and costume comfort. Distribute weight via a vest harness, check your range of motion, and guarantee ventilation to sustain wearability throughout convention hours.
How Do You Store and Transport a Completed Power Armor Suit?
Disassemble your suit into modular sections and use foam-lined cases as storage solutions. For transportation methods, label each piece, stack plates vertically, and secure straps to prevent shifting during travel.
Are There Beginner-Friendly Power Armor Designs Recommended for First-Time Builders?
Start with flat-paneled chest and shoulder designs—they’re beginner-friendly, boost costume durability, and integrate cosplay accessories easily. You’ll use basic EVA foam cuts, minimal curves, and repeated geometric shapes to build confidence efficiently.
References
- https://www.reddit.com/r/worldbuilding/comments/18o4mm9/advice_on_how_to_make_unique_looking_power_armor/
- https://www.youtube.com/watch?v=vb6CXGortrQ&list=PL646D8F594EDAC43F
- https://www.youtube.com/watch?v=_ySmspST6lo
- https://www.instructables.com/Fantasy-Armour/
- https://www.youtube.com/watch?v=7dESGTqR8ws
- https://www.instructables.com/Build-Lifesize-Space-Marine-Armor-in-352-Terribly-/