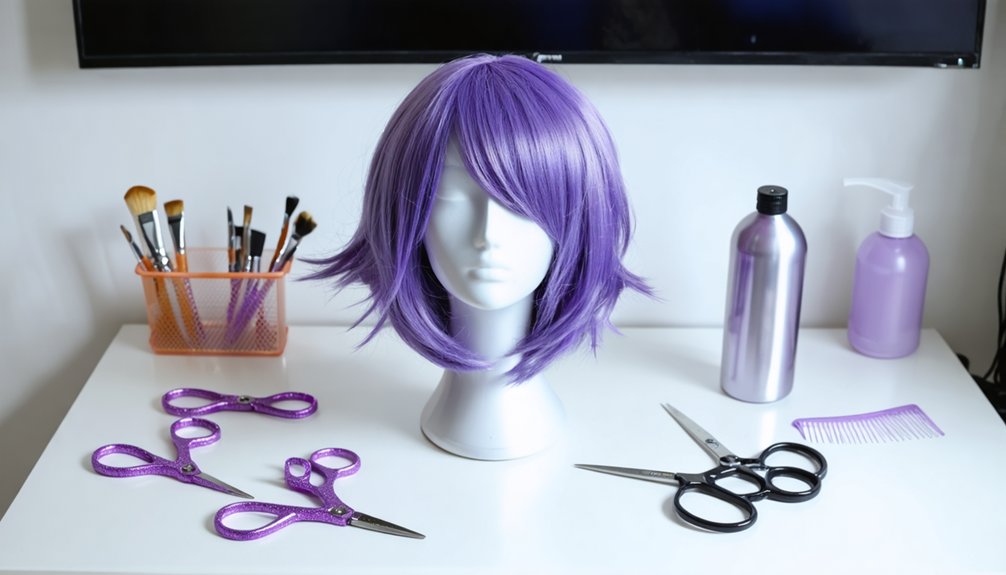
To cut and layer a cosplay wig at home, you’ll need sharp haircutting scissors, thinning shears, a wig stand, and T-pins to secure everything properly. Mount your wig at eye level, detangle it thoroughly, then divide it into horizontal sections working bottom to top. Use point-cutting instead of blunt cuts to keep synthetic fibers looking natural. Layer strategically for realistic movement, and always check symmetry from multiple angles. There’s a whole lot more technique waiting ahead.
Key Takeaways
- Secure the wig firmly on a stand at eye level, brush out all tangles, and study its shape before making any cuts.
- Use sharp haircutting scissors with point-cutting techniques, making small vertical snips to create natural texture and avoid a blunt, fake appearance.
- Build layers by starting at the bottom and working upward, blending transitions with thinning shears for seamless, natural-looking dimension.
- Cut face-framing layers and bangs slightly longer than desired initially, refining gradually with point-cutting for styling flexibility and accuracy.
- Check symmetry frequently from multiple angles, always trimming the longer side toward the shorter side using careful micro-adjustments.
Supplies You Need to Cut a Cosplay Wig at Home
Before making a single cut, you’ll want to gather the right supplies—because the wrong tools can turn a clean trim into a frayed, uneven mess. Sharp haircutting scissors are non-negotiable; dull blades shred synthetic fibers. Grab thinning shears for blending layers seamlessly.
You’ll also need T-pins or wig clips to stabilize sections during cutting, a sturdy wig head and stand, and a wide-tooth comb for detangling.
For wig maintenance between cuts, keep detangling spray nearby—it’s essential for synthetic fibers. A handheld mirror lets you check symmetry from multiple angles.
Finally, consider color matching your tools to your workspace lighting; accurate color perception helps you spot uneven density and inconsistent texture before finalizing any layer. Preparation here directly determines your result.
Prep and Detangle Your Cosplay Wig Before Cutting
Before you make a single cut, secure your wig firmly onto a wig head or mannequin using T-pins or wig clips to prevent shifting during the process.
Next, brush out every tangle by combing from the ends upward, working in small sections to avoid fiber breakage — a detangling spray helps with stubborn synthetic knots.
Once the wig is smooth and fully detangled, study its existing shape, density, and natural fall direction so you can plan your cuts with precision.
Secure The Wig First
Rushing straight into cutting without prepping your wig first is one of the easiest ways to ruin it, so secure it on a wig head, mannequin, or stable stand before you even pick up your scissors. Proper wig storage before your session keeps fibers protected and tangle-free, while thoughtful dyeing techniques applied earlier give you clearer visual guidelines for where cuts should land.
- Mount the wig firmly using T-pins or wig pins through the cap.
- Confirm the wig sits at natural eye level for accurate proportion assessment.
- Use masking tape along the base to prevent shifting mid-cut.
- Check that previous dyeing techniques haven’t altered fiber density unevenly.
- Inspect wig storage conditions beforehand to confirm fibers aren’t matted or stressed.
Brush Out All Tangles
Once your wig is locked in place on the stand, the next step before any scissors come near is a full detangle from ends to roots. Work in small sections, starting at the tips and gradually moving upward to prevent fiber breakage.
If your wig has experienced damage from color treatment or improper wig storage, expect tighter knots near the weft base — tackle those with extra patience. A detangling spray formulated for synthetic fiber loosens stubborn snags without stressing the strands.
Once every section moves freely through your brush, check that the hair falls naturally in its intended direction. Cutting tangled fiber guarantees uneven results, so a thorough brush-out isn’t optional — it’s the technical foundation everything else depends on.
Check Wig Shape
With your wig fully detangled, take a moment to study its existing shape before committing to any cuts. Different wig fiber types behave uniquely under scissors, so understanding your wig’s current structure helps you plan smarter.
- Identify the natural fall direction and density distribution across all sections.
- Note any factory-cut layers already built into the wig’s base construction.
- Assess thickness at the crown, sides, and nape before deciding where bulk needs removal.
- Consider your styling product options, since heat-resistant fibers allow more post-cut shaping flexibility.
- Spot any uneven wefts or asymmetrical panels that need correcting before layering begins.
This assessment phase saves you from overcutting sections that already have workable structure. Treat it as your blueprint — every deliberate cut afterward becomes more confident and precise.
Choose the Right Tools for Cutting Cosplay Wig Hair
Before you make a single snip, having the right tools ready makes all the difference between a clean, professional-looking cut and a frustrating, uneven mess. Sharp haircutting scissors are non-negotiable — they deliver precise control over synthetic fiber, preserving hair texture integrity without fraying the ends. Skip fabric scissors entirely; they’ll damage both your wig and the blades.
Grab thinning shears for blending layers smoothly, plus T-pins or wig clips to stabilize sections during cuts. A fine-tooth comb helps you isolate panels cleanly. When color matching layered sections, accurate sectioning tools prevent misaligned cuts that disrupt visual continuity across fiber tones.
Keep a spray bottle nearby for light dampening if needed. Remember — small, intentional cuts with quality tools always outperform rushed trimming with the wrong equipment.
Section Your Cosplay Wig Before the First Cut

Before you make a single cut, divide your wig into clean horizontal layers using the natural weft lines as your guide, starting from the bottom and working upward.
Clip each upper section firmly out of the way so it doesn’t interfere with the panel you’re actively trimming.
This layered sectioning system keeps your cuts organized, prevents accidental over-trimming, and gives you precise control over how each level of the wig falls.
Divide Into Horizontal Layers
Once the wig is prepped and tangle-free, you’re ready to section it into horizontal layers before making a single cut. This method gives you precision control over color blending gradations and accessory attachment points throughout the wig’s structure.
- Start at the nape and clip the upper sections away cleanly.
- Create each horizontal panel by parting at consistent vertical intervals.
- Align sections with the weft for uniform density across each layer.
- Use T-pins or clips to secure inactive panels without distorting the fiber.
- Work bottom-to-top, completing each layer fully before releasing the next.
This layered sectioning approach prevents uneven cuts and keeps your workflow organized. You’re building a roadmap for every trim that follows, so precision here directly determines your final result.
Clip Sections Out of Way
Clipping your sections out of the way is what separates a clean, professional-looking cut from a chaotic mess of tangled fibers. Once you’ve divided the wig into horizontal layers, secure each upper panel with strong clips or T-pins, keeping them completely clear of your active cutting zone.
This precision matters especially when you’re planning color matching across gradient or multi-toned wigs, since stray fibers from upper layers can disguise uneven cuts until it’s too late. Think of each clipped section as a controlled variable.
Strategic accessory placement, like pinning decorative elements temporarily to your wig head, also helps you visualize how cut layers will interact with cosplay hardware. Work deliberately through each freed section before releasing the next, maintaining consistent tension for sharper, more intentional results throughout every cut.
Use Point-Cutting to Keep Your Cosplay Wig Looking Real
Straight-across cuts are the fastest way to make your cosplay wig look fake, so point-cutting is the technique that fixes that instantly. Instead of blunt edges, you’ll create textured finishes that mimic real hair movement naturally.
- Hold your scissors vertically and snip upward into the ends rather than cutting across.
- Work in small, controlled bursts — never removing more than a few millimeters per snip.
- Angle your blade at roughly 45 degrees into the hair fiber for maximum softness.
- Target the final quarter-inch of each section where blunt edges are most visible.
- Alternate your snipping depth and spacing to prevent repetitive patterns that look artificial.
Point-cutting takes slightly longer, but the payoff is dramatically more realistic, dynamic hair that actually convinces people your cosplay wig is the real deal.
Layer Your Cosplay Wig for Natural Movement and Shape

Layering transforms a flat, bulky cosplay wig into something with genuine dimension and movement, so it’s worth taking the time to do it right. Start at the bottom layer and work upward, cutting each successive tier slightly shorter than the one beneath it. This staggered approach builds natural flow and opens up incredible opportunities for creative styling.
Use thinning shears lightly at layer transitions to blend seams without disrupting your outline. Face-framing layers should begin from a conservative front guideline — trim conservatively, then refine.
If your wig involves color blending across multiple sections, stratifying strategically lets those tonal shifts catch light more dynamically. Keep checking symmetry as you progress, and always make small incremental cuts. Precision here directly determines whether your final result reads as polished or amateur.
Trim Bangs and Face-Framing Layers on Your Cosplay Wig
Bangs and face-framing layers are the most visible elements of any cosplay wig, so getting them right requires patience and a light hand. For bangs trimming, always cut longer than your target length first — styling compresses the appearance.
Face framing layers should angle inward toward the chin for a natural contour that flatters the character’s silhouette.
- Pin the wig securely before starting any face-framing layers
- Use point-cutting exclusively for bangs trimming to avoid blunt, blocky edges
- Work in small vertical snips rather than single horizontal cuts
- Check symmetry from straight ahead after every few cuts
- Blend face-framing layers into side sections using thinning shears for seamless blending
Small adjustments build the most accurate, character-faithful results you’re aiming for.
Check Symmetry and Fix Uneven Cuts on Your Cosplay Wig

Once you’ve completed the main cuts and layering, stepping back to assess full symmetry is where your wig truly comes together. View the wig from multiple angles — front, sides, and back — to catch any asymmetry correction needs you might’ve missed up close. Use a mirror or photograph the wig to spot imbalances more clearly.
For proportion adjustment, compare left and right sections by holding a comb horizontally across both sides simultaneously. Mark any longer sections with a clip before trimming. Always cut the longer side toward the shorter one, never the reverse.
Use point-cutting for final tweaks rather than blunt snips, which preserves texture consistency. Make micro-adjustments in passes, checking balance after each one until the overall silhouette reads as intentional, clean, and character-accurate.
Frequently Asked Questions
Can You Reattach Cosplay Wig Fibers After Accidentally Cutting Too Much Off?
You can’t easily reverse wig fiber reattachment at home, but don’t panic! Explore innovative wig repair techniques like heat-bonding wefts or adhesive fiber extensions—they’ll creatively restore your cosplay wig’s volume and transform your trimming mishap into a styled masterpiece!
How Do You Store a Cosplay Wig After Cutting to Preserve Its Shape?
After your wig’s transformation rests, you’ll want to cradle it on a wig head using innovative wig storage tips. Secure its freshly cut silhouette, apply wig styling techniques to maintain shape, and keep it dust-free!
Does Cutting a Synthetic Cosplay Wig Void Any Seller Warranty or Return Policy?
Yes, cutting typically voids returns! Once you alter wig fiber integrity through trimming, most sellers consider it used. You’ve introduced synthetic material damage potential, so always review seller policies enthusiastically before making any innovative cutting modifications!
Can Heat Styling Be Done on a Cosplay Wig After Cutting and Layering?
You can absolutely do heat styling after cutting, but you’ve got to confirm your wig’s synthetic fibers are heat-resistant first! Using low-temperature tools protects your freshly layered style while letting you sculpt incredible, innovative cosplay looks!
How Often Should Cosplay Wigs Be Recut to Maintain Their Styled Appearance?
70% of cosplay wigs lose shape after 10+ wears! You’ll want to recut every 3–6 months for solid wig maintenance. Apply these styling tips after each convention to keep your wig’s layered structure fresh and innovative!
References
- https://www.youtube.com/watch?v=RcR6AEFbPyI
- https://www.youtube.com/watch?v=x_vSPBYJZUs
- https://www.youtube.com/watch?v=mQlJn0VkK9Q
- https://www.youtube.com/watch?v=exgfWFYu_h0
- https://www.youtube.com/watch?v=9WMkDBMobuQ
- https://www.crazecosplay.com/blogs/questions/how-to-cut-and-style-a-cosplay-wig
- https://www.youtube.com/watch?v=9ftqSu7jZkk
- http://www.youtube.com/watch?v=c-qLiicy3Yo
- https://ehwap.com/Blog/how_to_style_a_wig_for_cosplay_a_complete_step_by_step_beginner_friendly_guide_with_heat_safe_cutting_teasing_and_finishing_tips.html
- https://ehwap.com/Blog/how_to_cut_a_wig_into_layers_step_by_step_for_a_natural_flowing_finish_with_pro_tips.html