You can sculpt custom cosplay prosthetics at home using oil-based, sulfur-free clay, liquid latex, and a plaster of Paris mold. Start by shaping your clay sculpture, building a mold barrier, and casting it overnight. Then apply five to seven stippled latex layers, letting each coat dry fully before peeling. Paint with bruise tones and secure it to your skin with prosthetic adhesive. Keep exploring to master every technical step.
Key Takeaways
- Use non-hardening, sulfur-free oil-based clay to sculpt your prosthetic, blending edges outward for smooth, natural-looking integration with skin.
- Build a plaster of Paris mold around your sculpt using concentric clay barriers, letting it set overnight for structural integrity.
- Apply liquid latex in 5–7 thin layers using a stippling sponge, drying each coat completely with a hair dryer.
- Brush translucent powder over dried latex before peeling, starting at one edge at a low angle to prevent micro-tears.
- Secure the prosthetic using latex adhesive at a tacky state, seal edges completely, and set with translucent powder for lasting wear.
What Are Cosplay Prosthetics and How Do They Work?
Cosplay prosthetics are custom-made pieces of latex or silicone that replicate wounds, injuries, or fantastical features, letting you transform your appearance for a character.
You’ll find two primary prosthetic types: latex-based pieces, which are lightweight and flexible, and silicone-based pieces, which offer superior realism and skin-like texture. Each material responds differently to application techniques, so understanding their properties shapes your workflow from sculpting through final blending.
Prosthetics function by adhering directly to your skin using latex or specialized prosthetic adhesives along the edges.
Thin, blended borders allow the piece to integrate seamlessly with your natural skin tone. You then use foundation, bruise paints, and blood effects to unify the prosthetic visually.
Properly executed, the result reads as a convincing, three-dimensional surface transformation rather than an obvious add-on.
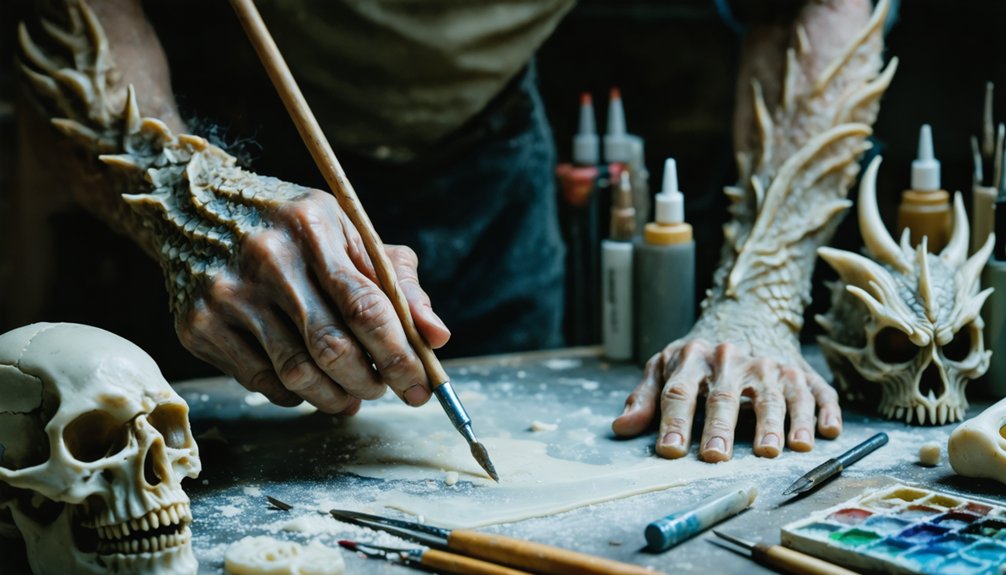
Gather Your Clay, Latex, and Sculpting Tools First
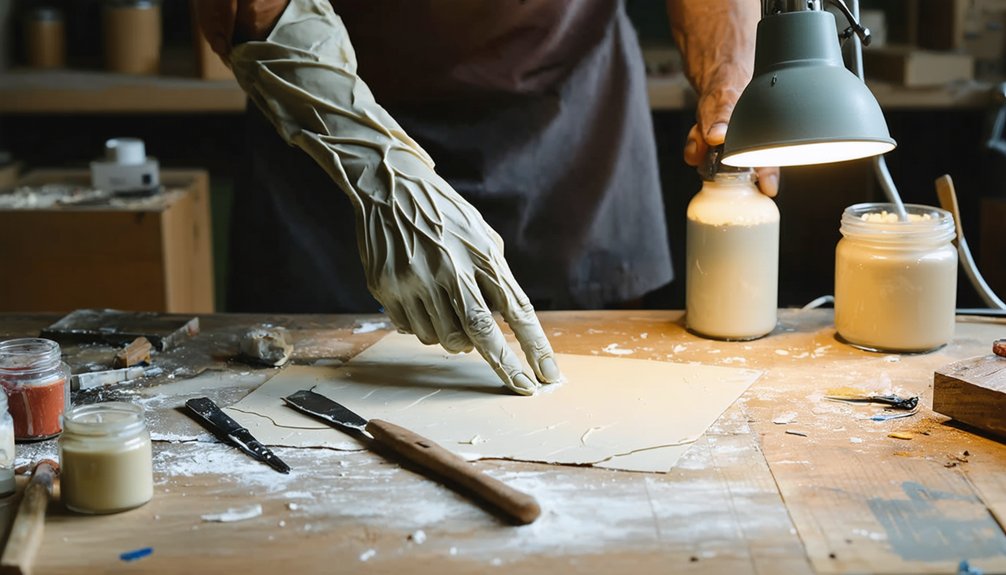
Before you start sculpting, you’ll need to gather a few essential tools: modeling clay, liquid latex, a stippling sponge, rounded sculpting tools, and plaster of Paris.
When choosing your clay, opt for a non-hardening, oil-based variety, as it stays workable and responds well to water during the blending process.
You’ll also want to have a hair dryer, powder, and basic mold-building materials on hand to carry your prosthetic from raw sculpt to finished piece.
Essential Tools Needed
Whether you’re crafting a gory battle wound or a subtle scarring effect, having the right tools assembled before you begin will save you significant time and frustration. Your core tool types include rounded and pointed sculpting tools, stippling sponges, and fine-bristle brushes essential for achieving advanced texture effects.
Material choices should prioritize oil-based modeling clay, liquid latex, plaster of Paris, and translucent powder. Each supports distinct sculpting techniques, from pressing depth into wound layers to refining delicate edges.
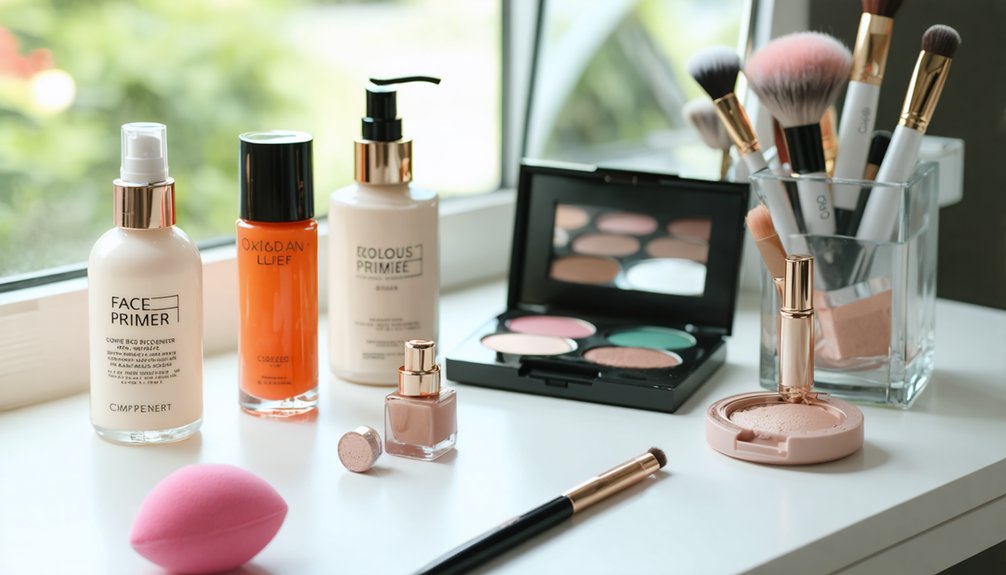
For finishing touches, keep bruise paints, clear gloss, and skin-tone foundation accessible.
Observe safety precautions by working in ventilated spaces, particularly when using latex. Implement smart storage methods, sealing clay airtight to prevent drying.
Pre-plan color mixing by testing pigment combinations on scrap material before committing to your final prosthetic design.
Choosing The Right Clay
Selecting the correct clay type determines how well your prosthetic holds detail and releases cleanly from the mold. For prosthetic sculpting, you’ll want oil-based, non-hardening clay. It stays workable indefinitely, allowing you to refine details without rushing.
Sulfur-free varieties are critical if you’re using platinum silicone later, since sulfur inhibits silicone curing entirely.
Understanding clay properties helps you choose correctly. Firmer clays hold crisp, fine details better, while softer clays blend edges more smoothly against skin-mimicking surfaces. Medium-firm clay types like Roma Plastilina No. 1 or Chavant NSP balance both qualities effectively.
Avoid water-based clays entirely—they shrink and crack as they dry, distorting your sculpt.
Keep your chosen clay slightly warm using a heat lamp to maintain ideal workability throughout the sculpting process.
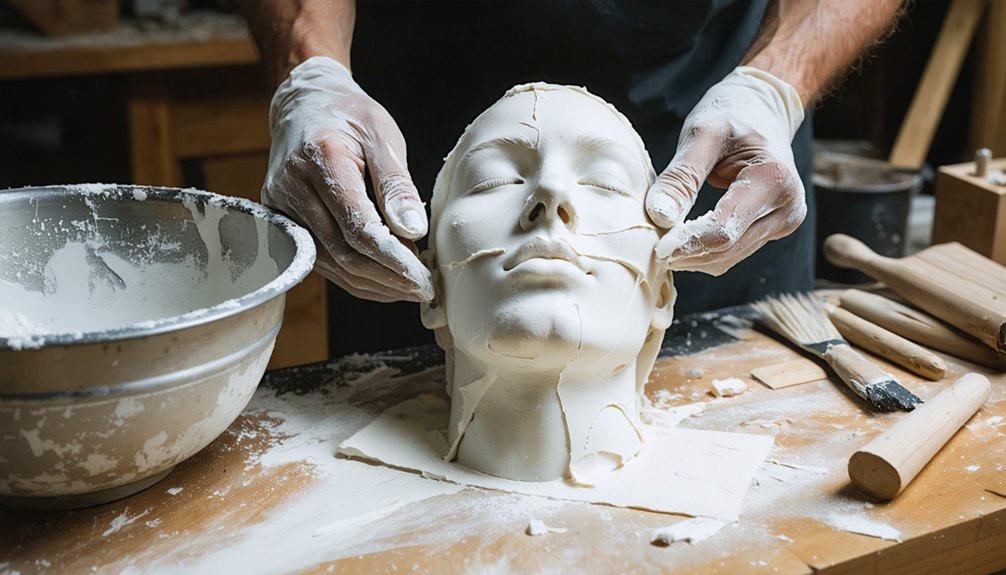
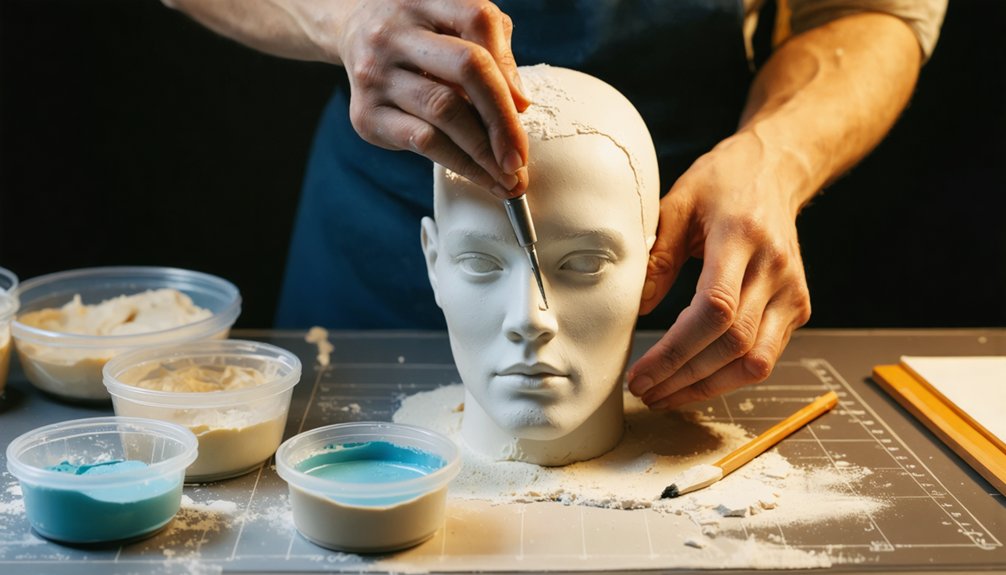
How to Sculpt a Base Wound Shape With Clay
To shape your clay base, form a small ball, press it flat against your chosen surface, and blend the edges outward using water to create smooth, seamless shifts.
Keep the layer thin so the finished prosthetic sits naturally against your skin without visible bulk.
Once blended, outline your wound shape and use a rounded sculpting tool to peel back inner layers, pressing randomly into the clay and removing small bits to build realistic depth.
Shaping the Clay Base
Shaping a convincing wound starts with just a few basic clay-working steps.
Begin by rolling your modeling clay into a ball, then press it flat against your chosen surface. Your clay consistency should be pliable but firm — too soft and it’ll lose definition, too stiff and blending becomes difficult. Apply water to smooth the edges seamlessly into the surrounding surface.
Keep the layer thin; thick clay produces unrealistic, bulky prosthetics.
Once your base shape is positioned, use sculpting techniques to refine the wound’s form — outline the shape first, then peel back inner layers using a rounded sculpting tool. Press into the clay randomly, removing small bits to build natural-looking depth.
These deliberate, controlled movements create the dimensional realism your finished prosthetic demands.
Blending Edges Smoothly
Blending your clay edges smoothly is what separates a convincing prosthetic from an obvious costume piece. Seamless blending requires deliberate technique, not guesswork.
Edge smoothing determines whether your prosthetic disappears into skin or sits on top of it.
Apply water to your fingertips while working the clay outward toward the edges. Use these precise methods for professional results:
- Press the clay edge firmly against the surface and drag outward using circular motions
- Thin the edge until it’s nearly translucent against the base surface
- Use a rounded sculpting tool for edge smoothing in tighter, detailed areas
- Rewet the clay as needed to maintain workability during seamless blending
Keep your edges as thin as possible. Thick edges catch light unnaturally and immediately break the illusion.
Creating Wound Depth
Once your edges are blended thin, you can begin sculpting depth into the wound itself. Take a rounded sculpting tool and peel back the inner clay layers to expose a cavity that mimics torn tissue. This step drives wound realism by establishing dimensional contrast between the wound’s interior and its surface edge.
Next, press your tool randomly into the clay and remove small bits to build irregular depth. Avoid uniform patterns—real wounds aren’t symmetrical. Apply these texture techniques by varying pressure across different zones, creating raised ridges near the perimeter and deeper recesses toward the center.
Keep the base layer thin throughout this process. Excessive clay thickness compromises how the finished prosthetic sits against skin, reducing both comfort and visual authenticity during wear.
Build a Plaster Mold for Your Cosplay Prosthetic
Before pouring your plaster, roll thin lengths of clay into long sausages and form two concentric circles around your sculpt. The inner circle catches excess gelatin; the outer acts as your plaster barrier. Both walls must stand at least one centimeter taller than your sculpt.
These plaster techniques guarantee a clean, precise mold every time:
These proven plaster techniques deliver a clean, precise mold every single time without fail.
- Mix plaster of Paris thoroughly, eliminating lumps before pouring.
- Fill the mold completely to the top of your clay barrier walls.
- Bang the surface gently to release trapped air bubbles.
- Let the mold set overnight undisturbed for maximum structural integrity.
Once your mold materials have hardened completely, remove the clay walls to reveal a stable, ready-to-use plaster mold that’ll produce consistent, professional-grade prosthetic results.
Apply Latex Layers to Your Prosthetic Without Wrecking the Edges
With your plaster mold ready, apply liquid latex in 5 to 7 thin layers using a stippling sponge, letting each coat dry completely before adding the next. Rushing this process creates a gooey interior that compromises structural integrity.
Use a hair dryer between coats to accelerate drying and strengthen each layer efficiently.
For precise latex application techniques, keep your stippling motion light and consistent across the mold’s surface.
Edge preservation tips are critical here — avoid building up multiple layers along the prosthetic’s outer edges. Thick edges won’t blend seamlessly against skin, destroying the illusion entirely.
Optionally, incorporate tissue between coats to increase durability without sacrificing flexibility.
Once all layers are solid and dry, you’re ready to powder and peel the finished prosthetic cleanly from the mold.
Fix Cosplay Prosthetic Sculpting Mistakes Before They Set
Catching errors in your clay sculpt early saves you from scrapping the entire mold. Before the clay stiffens, you’ve got a narrow window for fixing mistakes, correcting shape, and enhancing details with precision.
Use these quick repairs and last minute adjustments to recover your sculpt:
- Smoothing edges: Dampen your fingertip and drag it across uneven shifts to blend seamlessly.
- Deepening features: Press a rounded sculpting tool into shallow areas to restore lost dimension.
- Adjusting texture: Re-stipple flattened sections using a sponge to rebuild realistic skin texture.
- Preventing errors from compounding: Remove unwanted clay immediately using a loop tool before layers dry.
Emergency fixes work best when you’re decisive. Overworking wet clay distorts surrounding detail, so target only the compromised area and stop once it’s corrected.
Powder and Peel Your Cosplay Prosthetic Without Tearing It
Peeling your latex prosthetic off the sculpture is the stage where most pieces tear, and powder is what prevents that. Before you attempt removal, brush a thin layer of baby, translucent, or face powder directly over the entire dried latex surface.
Then work the powder underneath the edges using a soft brush, separating the latex from the clay to eliminate adhesion points.
For clean prosthetic peeling techniques, start at one edge and peel slowly at a low angle rather than pulling upward. Rushing causes micro-tears along thin sections.
These latex removal tips matter most at the edges, where the material is thinnest and most vulnerable. Once fully detached, smooth any edge irregularities immediately. Your prosthetic should flex without resistance and lie completely flat for painting.
Paint and Blend Your Cosplay Prosthetic to Match Your Skin
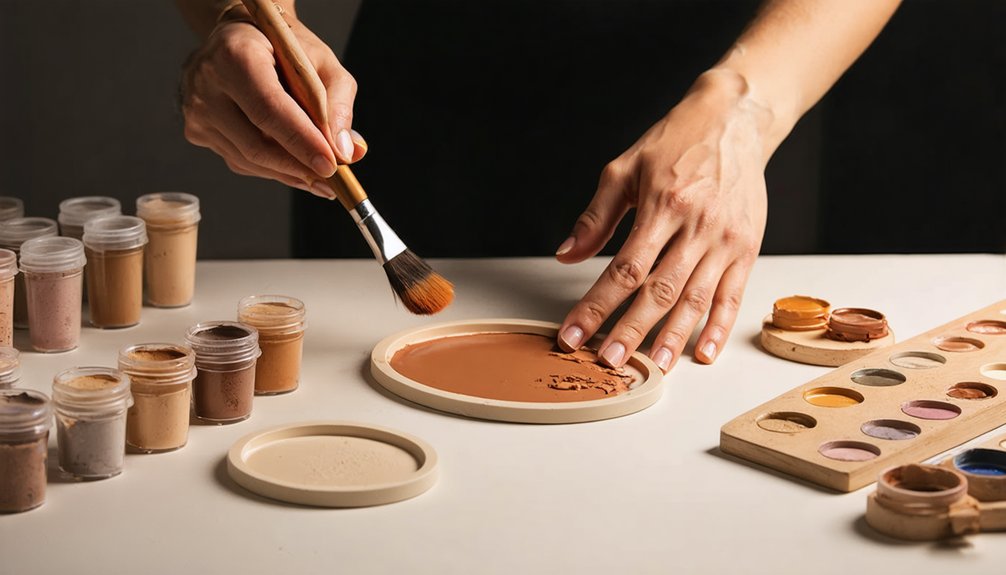
Before applying any color, powder the prosthetic with translucent powder so your foundation and bruise paints grip the surface properly.
Color matching starts with applying a foundation that mirrors your skin tone across both the prosthetic and surrounding skin simultaneously.
Use these techniques for seamless texture blending:
- Layer bruise paints in purples, reds, and yellows to replicate realistic trauma depth
- Stipple foundation across the prosthetic edges to unify the blending zone
- Apply blood effects selectively to add dimensional, authentic wound detail
- Dab clear lip gloss onto the wound center to simulate fresh moisture and shine
Secure the prosthetic using latex only along outer edges near sensitive areas like eyes or mouth.
Build color gradually rather than saturating the surface immediately.
Keep Your Cosplay Prosthetic Secure Through Long Wear
Long convention days test even the most carefully applied prosthetic, so you’ll want to layer your adhesion strategy from the start. For secure application, apply latex adhesive directly to your skin and let it reach a tacky state before pressing the prosthetic down firmly.
Work from the center outward to eliminate air pockets that compromise skin adhesion over time. Prosthetic durability depends on sealing the edges completely. Press them flat using a silicone-tipped tool and apply a second thin latex layer over the seam to lock them down.
For long wear, set everything with translucent powder to reduce oil migration, which breaks down adhesive bonds. Carry a small touch-up kit containing extra latex, powder, and blending foundation to perform quick field repairs between panels or shoots.
Frequently Asked Questions
Can Cosplay Prosthetics Cause Skin Reactions or Allergies in Sensitive Users?
Yes, cosplay prosthetics can trigger reactions if you’re sensitive. Always perform allergy testing on a small skin area before full application. Latex and adhesives commonly cause skin sensitivity, so you’ll want to explore silicone alternatives proactively.
How Long Do Finished Latex Cosplay Prosthetics Typically Last Before Degrading?
Your finished latex prosthetics typically last one to three years if you’re storing them properly. Maximize latex durability by keeping pieces in cool, dry conditions. Follow these maintenance tips: avoid stretching, apply powder after use, and limit UV exposure.
Are Homemade Cosplay Prosthetics Safe for Use Around Children?
Yes, they’re safe when you follow proper safety precautions. Although latex allergies concern many, you’ll easily test skin beforehand. Always guarantee child supervision when kids wear prosthetics, monitoring for irritation, loose pieces, or accidental ingestion of materials.
Can You Reuse a Plaster Mold Multiple Times for Different Prosthetics?
Yes, you can reuse your plaster mold multiple times. With proper mold maintenance—keeping it clean and dry between uses—you’ll extend its lifespan considerably. Refine your casting techniques each session to consistently produce higher-quality, innovative prosthetic results.
What Is the Average Total Cost of Making One Prosthetic at Home?
You’ll spend roughly $20–$50 per prosthetic. Smart material selection keeps costs low, and refined application techniques stretch your budget further—clay, latex, plaster, and paints you’ve already sourced can repeatedly deliver professional, innovative results.
References
- https://www.youtube.com/watch?v=x2P217Ycio8
- https://www.instructables.com/Easy-SFX-Prosthetics/
- https://www.youtube.com/watch?v=GEsHII2D6wU
- https://www.youtube.com/watch?v=gr_YQm-xSek
- https://morbidlybeautiful.com/prosthetics-sfx-tutorial/
- https://www.youtube.com/watch?v=oECKNZ8MhqM
- https://www.qcmakeupacademy.com/blog/2017/05/making-prosthetics-special-fx-makeup-business-part-2
- https://www.youtube.com/watch?v=ZqUtZ9QiouU
- https://www.youtube.com/watch?v=sAIrfD-E7JY
- https://www.youtube.com/watch?v=SlJxcx4bojQ