For the best airbrush makeup results in cosplay, you’ll want to build thin, layered applications that bond directly to skin within 30 seconds. Maintain a 4-6 inch spray distance for broad coverage, then move closer for fine details. Always prep skin properly, mix paints to the right consistency, and seal your finished look with a setting spray. Master these fundamentals and you’ll discover techniques that take your character transformation to the next level.
Key Takeaways
- Prepare skin by applying a lightweight moisturizer, waiting 2–3 minutes, then removing excess oils for smooth, even pigment adhesion.
- Build coverage using thin, layered applications with circular motions, allowing 30 seconds of drying time between each layer.
- Maintain a 4–6 inch spray distance for broad coverage and move closer to 1–2 inches for precise detailing.
- Layer colors from dark to light, concentrating shadows in recessed areas and highlights on raised edges for a 3D effect.
- Seal the finished look with translucent powder and sealing spray to ensure durability against sweat, friction, and humidity.
Why Airbrush Makeup Lasts Through Full Cosplay Events
Airbrush makeup outlasts conventional cosmetics at cosplay events because it builds coverage through thin, layered applications that bond directly to the skin rather than sitting on top of it. Each layer dries within thirty seconds, creating a flexible, skin-integrated film that resists sweat, movement, and environmental exposure.
You’ll achieve superior makeup durability by allowing every coat to fully set before adding the next, preventing the cracking and separation that conventional products develop mid-event. Color longevity improves markedly when you finish with a translucent powder dusting followed by a sealing spray, locking pigment against friction and humidity.
Unlike cream-based alternatives, properly layered airbrush pigment flexes with your skin across joints and facial expressions, maintaining character accuracy from the first hour through the final convention hour.
Prep Your Skin for a Flawless Airbrush Base
Before airbrushing, apply a lightweight moisturizer to hydrate your skin. Then use a damp cotton pad to remove any excess oils, skincare residue, or impurities from the surface.
Skipping this cleansing step causes the airbrush pigment to bead up and distribute unevenly, compromising your final coverage.
After moisturizing, wait two to three minutes for full absorption before you begin spraying to guarantee the product adheres cleanly to your skin.
Hydrate And Cleanse First
Proper skin preparation directly determines how well airbrushed pigment adheres and blends. Before any application, prioritize makeup removal and skin exfoliation to eliminate residue, excess oils, and dead skin cells that compromise adhesion.
- Use a damp cotton pad to strip away impurities and previous makeup completely.
- Apply a lightweight moisturizer, then wait two to three minutes for full absorption.
- Avoid heavy occlusive creams that prevent pigment from bonding to your skin.
- Skip silicone-based primers entirely, as they cause beading and uneven spray distribution.
These steps aren’t optional—they’re your foundation for flawless results. Contaminated or poorly hydrated skin forces pigment to sit unevenly, creating patchy coverage that no technique can fully correct.
Clean skin transforms your airbrush into a precision tool.
Remove Excess Oils
Even the cleanest skin can sabotage your airbrush work if excess oils are still present on the surface. Removing excess oils requires more than a quick rinse — it demands precision. Use a damp cotton pad to wipe away residual skincare, silicone primers, or natural sebum that causes pigment beading.
Avoid aggressive facial massage before application, as stimulating circulation increases oil production and compromises your base. Instead, apply gentle, controlled strokes across the T-zone and cheeks, focusing on areas prone to shine.
Any silicone-based product left on the skin will repel water-activated airbrush pigment entirely.
Once the surface feels balanced and matte, allow two to three minutes before beginning your application. A properly prepped, oil-free canvas ensures your pigment adheres evenly and builds coverage without disruption.
Allow Moisturizer Absorption
Moisturizer absorption is a step most cosplayers rush — and it costs them their entire base. Proper skin hydration means nothing if you spray before absorption completes. Wait two to three minutes after moisturizing before touching the airbrush.
Here’s what skipping this step actually causes:
- Pigment beading across unabsorbed moisturizer, destroying coverage uniformity
- Patchy layering that no amount of technique can correct mid-application
- Premature breakdown of your base during long convention hours
- Wasted product from pigment sliding off a still-slick surface
Moisturizer absorption isn’t passive waiting — it’s active preparation. Use that time to mix your formula, inspect your nozzle, and plan your layering sequence.
Precision starts before the airbrush ever leaves your hand.
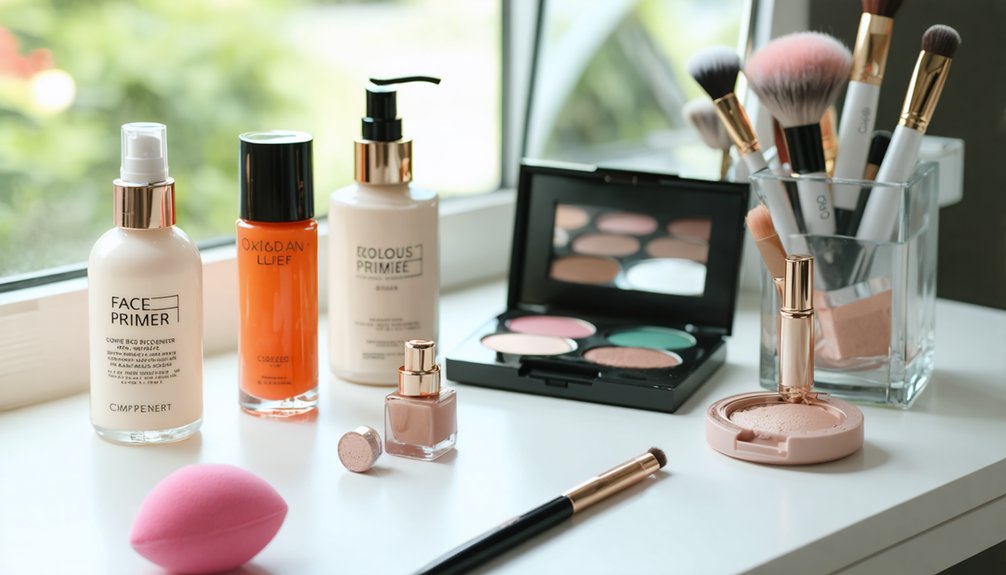
Mix and Thin Your Airbrush Paints for the Right Consistency
Getting your paint consistency right is the foundation of smooth, clog-free airbrushing.
For water-activated body paints, mix three tablespoons of water per ounce of paint to achieve *ideal* flow. Add a small amount of airbrush thinner to further reduce viscosity, preventing nozzle blockages mid-application.
Paint consistency tips become critical when you’re executing complex cosplay designs. Your mixture should be thin enough to pass through the nozzle effortlessly yet thick enough to deliver solid pigment coverage.
Test it by observing the spray pattern — spitting indicates excessive thickness, while fading suggests over-thinning.
Control Distance, Pressure, and Motion for Even Coverage
Once your paint is mixed and ready, mastering distance, pressure, and motion determines whether your coverage lands smooth or uneven. Keep your spray distance at four to six inches for broad coverage, then close to one to two inches for precision zones.
Distance, pressure, and motion transform mixed paint into flawless, even coverage across every surface you touch.
- Move the airbrush before pulling the trigger to eliminate pooling and hard edges.
- Use circular, layered motions to build color blending gradually without oversaturating.
- Reduce pressure near delicate facial features to maintain control and pigment accuracy.
- Keep constant motion throughout every pass—stopping mid-spray creates uneven patches instantly.
You’re not just applying color; you’re engineering a second skin. Every deliberate movement compounds into a flawless, character-defining finish that holds under stage lighting, photography, and hours of convention wear.
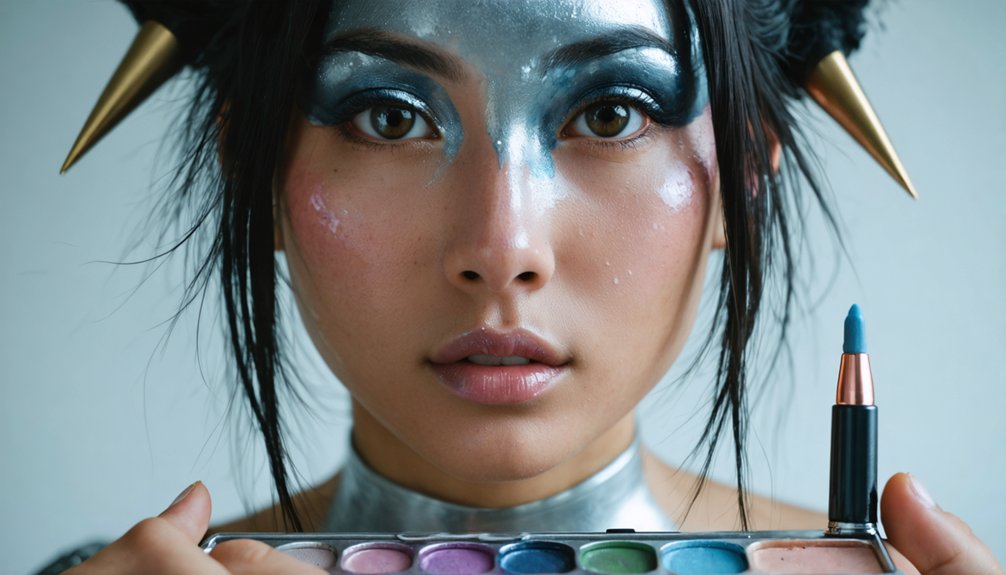
Build Cosplay Details With Airbrush Stencils and Layering
To create sharp cosplay details, choose stencils that match your character’s specific symbols, masks, or facial markings, and hold them flush against the skin to prevent paint bleeding underneath the edges.
Layer your colors strategically by applying lighter base shades first, then building darker tones on top to achieve realistic depth and dimension across the stenciled design.
Once you remove the stencil, use a fine-tipped makeup brush or a low-pressure airbrush pass to soften hard edges and blend the stenciled detail seamlessly into the surrounding airbrushed pigment.
Choosing Effective Cosplay Stencils
Stencils give your airbrush work clean, repeatable edges that freehand spraying simply can’t match, making them essential for cosplay details like faction symbols, geometric armor patterns, or character-specific facial markings.
Prioritize stencil selection based on flexibility, adhesion, and edge sharpness to maintain precision across curved body surfaces. Use shields or reusable Mylar stencils for color blending transitions between layered tones.
- Choose stencils with crisp, laser-cut edges that honor the exact geometry of your character’s design
- Select flexible materials that conform to jaw, cheekbone, and shoulder contours without lifting
- Match stencil scale precisely to your body proportions for authentic, screen-accurate results
- Layer multiple stencils sequentially to build dimensional, multi-tone patterns that transform your appearance completely
Hold each stencil flat against the skin while maintaining four to six inches of spray distance.
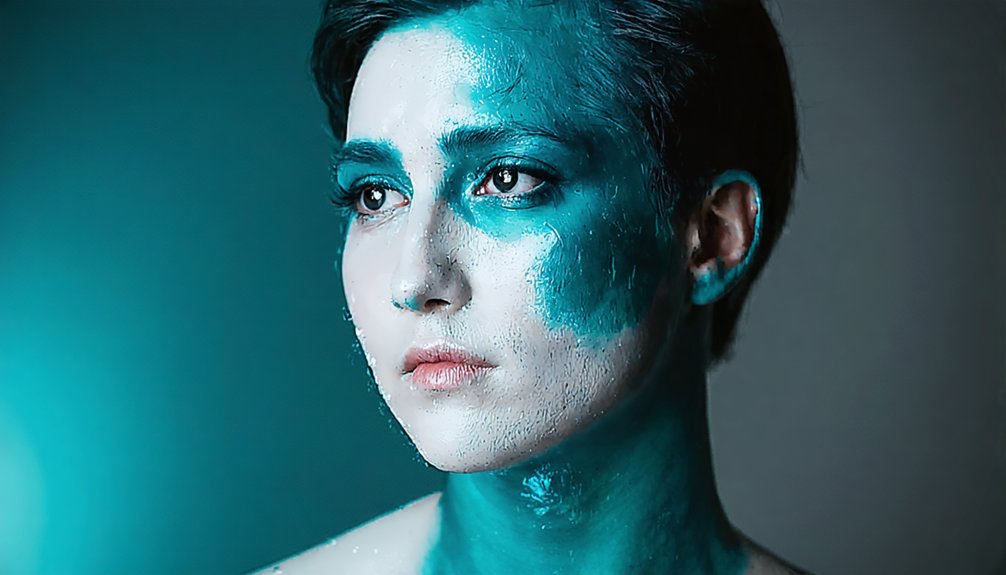
Layering Colors For Depth
Layering colors with stencils transforms flat airbrush work into dimensional cosplay details that read as depth and texture from a distance. Start with your darkest shade as a base, then build upward through midtones before finishing with highlights. This systematic color blending creates convincing three-dimensionality across scales, armor plates, or fantasy markings.
Allow each layer thirty seconds of drying time before repositioning your stencil or advancing to the next tone. Shade variation is your primary tool for simulating light source direction — concentrate darker pigment in recessed areas and lighter tones along raised edges.
Hold the airbrush four to six inches away for broad gradations, then move closer for precise edge definition. Thin layers always outperform single heavy passes in achieving professional, controlled depth.
Blending Stenciled Airbrush Details
Once your layered depth is locked in, blending stenciled edges is what separates raw airbrush work from polished cosplay detail. Use stencils or shields for stencil accuracy when creating fantasy symbols, masks, or character markings.
After spraying, immediately blend the edges using a fine-tipped brush to soften gradations and enhance color blending across skin contours.
- Bend joints while airbrushing to reach recessed stenciled areas evenly.
- Apply alcohol paint first under eyeshadow zones before blending airbrushed pigment over it.
- Move the airbrush in controlled circular motions to feather stenciled borders naturally.
- Use a damp sponge along jawline stencil edges to eliminate harsh demarcation lines.
Hold each stencil firmly, spray light passes, and build opacity deliberately. Precision here defines your character’s authenticity.
Airbrush Techniques for Eyes, Nose, and Fine Lines
Airbrushing around the eyes, nose, and fine lines demands tighter control over both distance and pressure. Reduce your airflow and move the nozzle one to two inches from the skin to achieve precision without oversaturation.
For airbrush shading along the eyelid crease or orbital bone, use short, controlled bursts rather than continuous sweeps.
When working near the nose, exhale gently or hold your breath to prevent pigment displacement from natural airflow.
Color blending across fine lines requires thin, successive layers that build definition without pooling into creases. Apply alcohol-activated paint first to anchor shadow tones before airbrushing over them.
For sharp liner details, switch to a fine-tipped brush to refine edges that the airbrush can’t execute with sufficient accuracy.
Seal Your Look, Then Clean and Store Your Airbrush

After you’ve built your final layer of coverage, lock the pigment in place with a sealing spray to extend wear time and deliver a dewy, natural finish. Protecting your airbrush color mixing investment means finishing strong and maintaining your equipment with equal precision.
- Run clean water through the nozzle until the liquid appears slightly pink, clearing every trace of residual pigment.
- Inspect the nozzle and filter immediately after equipment cleaning to prevent future clogging.
- Seal your paint bottles tightly to preserve consistency for your next session.
- Store your airbrush in a dry, protected case away from dust and direct sunlight.
These steps protect both your artistry and your tools, ensuring every future cosplay transformation starts with reliable, high-performing equipment.
Frequently Asked Questions
Can Airbrush Makeup Be Used Safely Over Tattoos or Body Art?
Yes, you can safely apply airbrush makeup over tattoos. Use thin layers for tattoo coverage, build opacity gradually, and employ body art blending techniques with circular motions to seamlessly integrate pigment over existing ink.
What Airbrush Compressor PSI Setting Works Best for Cosplay Makeup?
Just as precision defines great cosplay, you’ll find 10–15 PSI works best. Lower pressure enhances makeup blending techniques for detail work, while consistent airbrush maintenance guarantees your compressor delivers flawless, uninterrupted spray performance every time.
How Do You Airbrush Makeup Onto Darker or Deeper Skin Tones?
For deeper skin tones, you’ll prioritize thorough skin prep and precise color matching. Layer warm undertones first, build coverage gradually, and blend custom pigment mixes to achieve seamless, natural-looking results without ashiness or uneven saturation.
Is Airbrush Makeup Safe for Sensitive or Acne-Prone Skin Types?
Perfectly primed, protected skin prevails! You can safely use airbrush makeup on sensitive skin and acne-prone skin by selecting water-based, non-comedogenic formulas, maintaining proper hygiene protocols, and hydrating your skin beforehand to prevent irritation or breakouts.
Can Airbrush Makeup Withstand Outdoor Heat During Convention Events?
Yes, airbrush makeup can withstand outdoor heat when you use weather resistant applications and long lasting formulas. Set each layer with translucent powder, then seal with finishing spray to lock pigment against heat, humidity, and extended convention wear.
References
- https://www.youtube.com/watch?v=Ahnf-IBynHw
- https://www.youtube.com/watch?v=B-IADlCW5-0
- https://www.reddit.com/r/sfx/comments/1l4mn7/help_airbrush_makeup_suggestions/
- https://www.youtube.com/watch?v=0br3kkxoDKE
- https://rogerriggle.com/essential-tools-for-stage-makeup-artists/
- https://www.cosplaytutorial.com/list/basicmakeup.php
- https://www.youtube.com/watch?v=hD3K1EhaprA
- https://cosplay.com/archive/thread/5qr242/homemade-airbrush-make-up
- https://cosplay.com/archive/thread/zpe2zw/airbrush-makeup-and-equipment
- https://www.airgoo.com/en-gb/blogs/productnews/how-to-airbrush-makeup-for-beginners