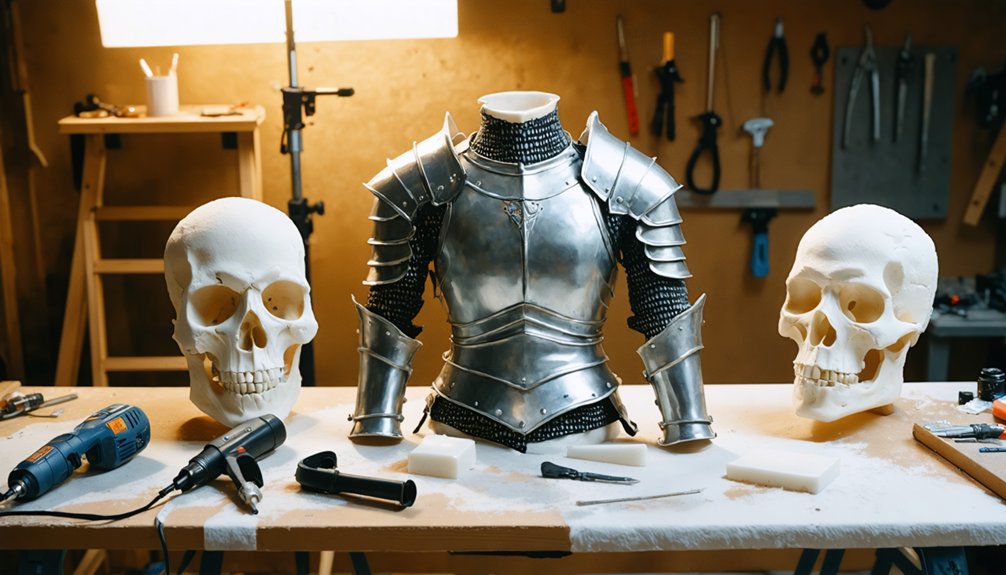
To make competition-worthy cosplay props, you’ll want to start with detailed reference images and accurate paper patterns before cutting any materials. Use EVA foam for large builds and Worbla for structural armor pieces. Bond components with contact cement, reinforce internals with PVC pipes or wooden dowels, and seal surfaces with flexible primer before painting. Apply weathering techniques like dry brushing and dark washes for realism. Keep exploring to master every technique that separates good props from award-winning ones.
Key Takeaways
- Break down complex prop shapes geometrically and use paper patterns to test scale before committing to final materials.
- EVA foam suits large lightweight builds, while Worbla thermoplastics provide structural integrity for rigid armor pieces.
- Use contact cement on both surfaces for strong foam bonds, reinforcing large props internally with PVC pipes or dowels.
- Seal foam with flexible primer, then layer base coats, dry brushing, and dark washes for realistic weathering effects.
- Sand all edges smooth, replace metal parts with thermoplastics, and submit props for staff inspection to ensure convention compliance.
How to Plan and Design Your Cosplay Props
Planning your cosplay prop starts with gathering reference images of your target character from multiple angles—front, side, and back—so you’ve got a clear picture of every detail before you commit to any design decisions. Strong character references eliminate guesswork and anchor your entire build process.
Next, translate those references into rough sketches, establishing your design foundations before drafting precise technical drawings. Apply geometric breakdown to deconstruct complex shapes into manageable forms—cylinders, rectangles, and cones become your structural vocabulary.
Break complex shapes into simple geometry—cylinders, cones, and rectangles transform intimidating designs into buildable, manageable components.
Once you’ve finalized drawings, develop paper or cardboard patterns for pattern testing, confirming scale and fit before cutting expensive materials. Use dimensional scaling to calculate accurate ratios, adjusting the character’s proportions to your body measurements precisely.
This systematic approach guarantees every component aligns with your original vision.
Choosing Materials for Your Cosplay Prop Build
With your patterns finalized and scaled, material selection determines whether your prop succeeds structurally and visually. Each prop material carries distinct trade-offs across durability factors, material weight, and cost analysis that you can’t ignore.
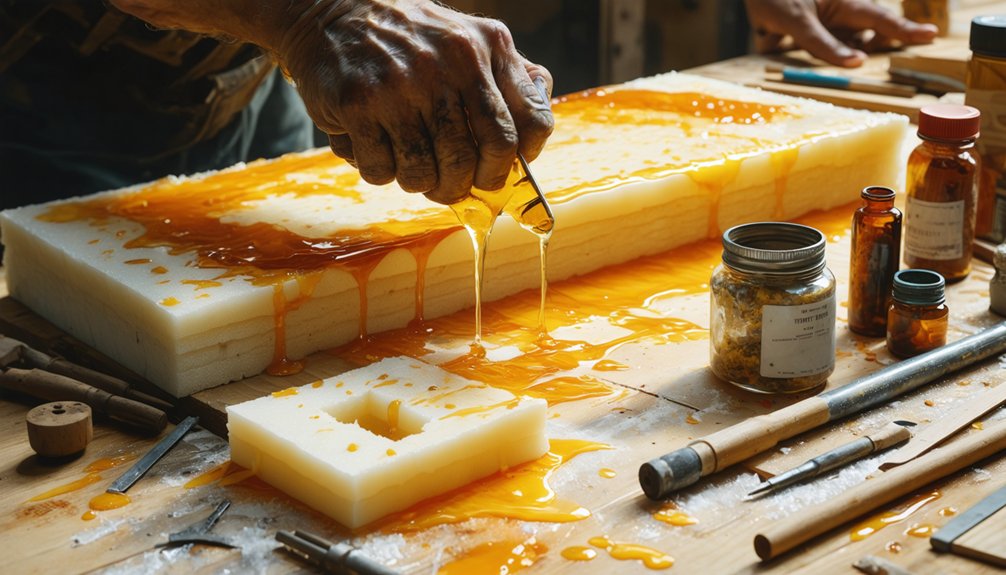
EVA foam delivers lightweight flexibility, making it ideal for large builds requiring extended wear. It shapes efficiently under heat and accepts paint reliably.
Craft foam works better for smaller, detailed components where budget constraints tighten your options.
When rigidity matters, thermoplastic options like Worbla provide superior structural integrity for armor plates and raised detailing. They’re heavier, however, so you’ll need to balance durability factors against wearability.
Texture considerations also drive your decision. Smoother thermoplastics replicate metallic surfaces convincingly, while foam layering creates organic, worn aesthetics.
Match every material choice directly to your character’s visual requirements.
How to Cut and Shape Foam for Accurate Results
Once you’ve selected your foam, you’ll need a sharp craft knife and a clean cutting surface to trace and cut your patterns with precision, ensuring smooth edges that align accurately with your design templates.
You should apply steady, controlled pressure along your cut lines rather than sawing through the material, which reduces tearing and maintains clean geometric edges.
After cutting, you can use a heat gun to warm the foam until it becomes pliable, then press and hold it against a curved form or mold to achieve bends, contours, and three-dimensional shapes that match your character’s reference images.
Cutting Foam With Precision
Cutting foam with precision starts with the right blade — a sharp craft knife gives you clean, controlled cuts that prevent jagged edges and material compression.
Replace blades frequently, as dulling happens faster than most crafters expect, compromising your precision cutting quality immediately.
For curved cuts, you’ll find that smaller blades offer greater maneuverability through tight radii.
Always cut against a self-healing mat to stabilize your workpiece and protect your blade’s edge.
Score thicker EVA foam in multiple light passes rather than forcing a single heavy stroke, which distorts the material.
Among essential foam tools, a rotary cutter handles straight lines efficiently on thinner foam sheets.
Mark your pattern lines clearly using a fine-tip marker before cutting, ensuring dimensional accuracy matches your original design specifications throughout assembly.
Shaping Foam Using Heat
Heat transforms rigid EVA foam into a pliable, sculptable material that you can bend, curve, and contour to match almost any character design.
Using a heat gun, apply consistent, sweeping passes six inches from the foam’s surface until it softens evenly. These foam techniques require controlled movement—holding heat too long creates warping or surface burns that compromise structural integrity.
Once softened, immediately press the foam against a curved mold, your knee, or a custom form to lock in the desired shape. Hold the position firmly until the material cools and stiffens.
Heat shaping works exceptionally well for pauldrons, gauntlets, and curved chest plates. Layering multiple heated pieces adds dimensional complexity.
Always wear heat-resistant gloves to protect your hands throughout the entire shaping process.
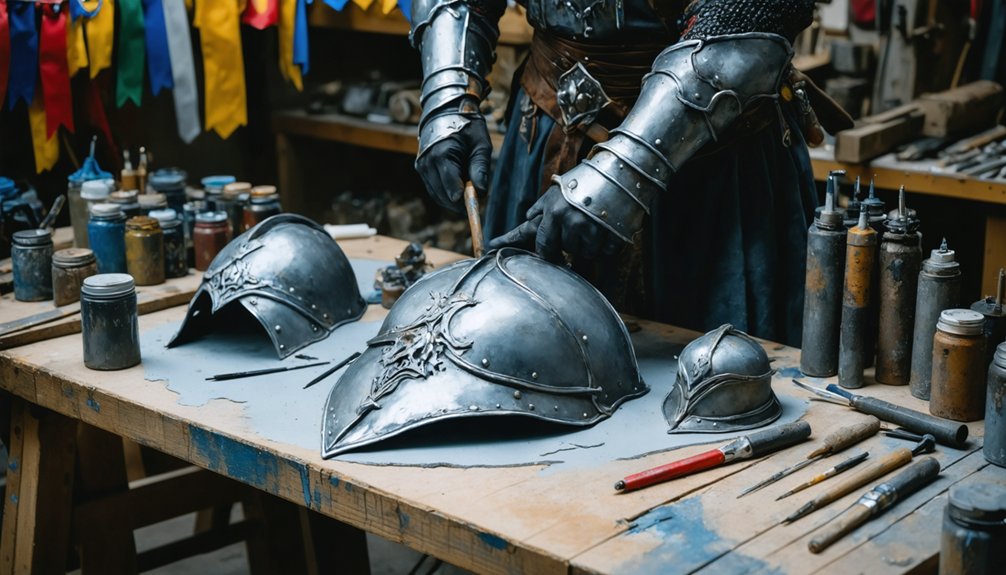
How to Add Surface Details Before You Paint
Before painting, you’ll want to build up surface details that give your prop depth, texture, and visual authenticity. Apply foam clay using sculpting methods to create raised panel lines, rivets, or organic textures directly onto your base structure.
Use detailing techniques like carving with a craft knife to achieve precise surface textures and pattern application that mirrors your reference images.
Layering approaches work effectively here—add thin foam strips to simulate armor plating or mechanical components.
Embellishment ideas such as craft wire, mesh fabric, or textured paste introduce visual effects that elevate realism.
Once details are set and cured, sand everything smooth and apply flexible primer as essential paint preparation. This seals all materials uniformly, ensuring your subsequent paint layers adhere consistently across every surface.
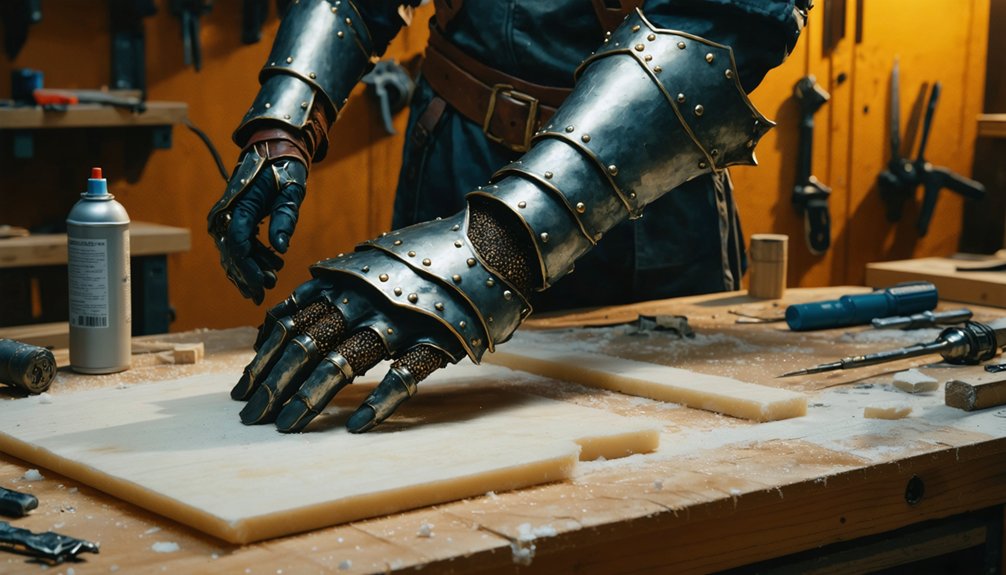
How to Bond and Reinforce Your Cosplay Props
Once you’ve finished adding surface details, you’ll need to select the right adhesive for your specific materials—contact cement works best for foam-to-foam bonds, while epoxy resin handles plastic-based components more effectively.
You should reinforce internal structures using PVC pipes or wooden dowels to prevent flexing in larger, heavier props that experience repeated stress during conventions.
Applying adhesive to both surfaces, letting it become tacky, and pressing pieces together firmly guarantees long-term durability that holds up through extended wear and movement.
Choosing The Right Adhesive
Choosing the right adhesive can make or break your prop’s structural integrity, so you’ll need to match the bonding agent to your specific materials. Understanding adhesive types is critical — contact cement excels at bonding foam-to-foam connections, while epoxy resin handles plastic-based components with superior strength ratings.
Always verify adhesive compatibility before committing to your chosen bonding techniques, since mismatched products weaken joints over time.
Application methods matter equally. Apply contact cement to both surfaces, let it reach tackiness, then press firmly together. Factor in drying times carefully — rushing assembly compromises bond strength.
For flexibility considerations, choose adhesives that maintain elasticity on wearable pieces to prevent cracking during movement. Finally, keep appropriate solvents on hand to streamline cleanup processes and protect surrounding materials from accidental contamination.
Reinforcing Internal Structures
Reinforcing your prop’s internal structure separates a display piece from one that survives a full convention day.
Structural integrity depends on strategic internal support, not surface materials alone. Poor weight distribution causes warping, snapping, or uncomfortable carrying strain over hours.
Apply these reinforcement methods for maximum durability:
- PVC pipe cores — Insert rigid PVC through weapon handles and staff shafts, anchoring foam layers around a stable central spine.
- Wooden dowel frameworks — Use dowels inside segmented armor pieces to maintain shape and improve weight distribution across the entire prop.
- Epoxy-bonded joints — Secure connection points between internal supports and outer foam shells using epoxy resin, preventing separation under movement stress.
These techniques transform fragile builds into convention-ready props engineered for performance and longevity.
Ensuring Long-Term Durability
Internal reinforcement gives your prop its backbone, but the adhesives and bonding methods you choose determine whether that structure holds through a full day of handling, posing, and transport.
Apply contact cement to both bonding surfaces, letting each side become tacky before pressing them together firmly. For plastic-based components, epoxy resin delivers superior material longevity over standard craft glues.
Don’t skip durability testing—flex your assembled prop, simulate transport stress, and identify weak joints before convention day.
Seal all foam surfaces with flexible primer to prevent paint delamination under repeated handling. Where structural loads concentrate, reinforce seams with additional foam strips or thermoplastic backing.
These layered bonding strategies compound your prop’s resistance to wear, ensuring it performs consistently across extended competition and display conditions.
Priming and Base Coating Your Cosplay Props
Before you apply any paint, you’ll need to seal your foam with a flexible primer to prevent absorption and guarantee proper adhesion.
Priming techniques vary based on material, but a flexible primer guarantees acrylic paint bonds without cracking during movement.
Once primed, execute base coating systematically:
- Apply two thin primer coats, allowing complete drying between layers to build an even, sealed foundation.
- Select base coating colors that match your reference images precisely, establishing your prop’s dominant tones before detailing.
- Use spray paint for large surfaces and brush-applied acrylics for detailed sections, guaranteeing full, consistent coverage.
These foundational steps eliminate uneven absorption and create the ideal surface for weathering, dry brushing, and final sealing applications.
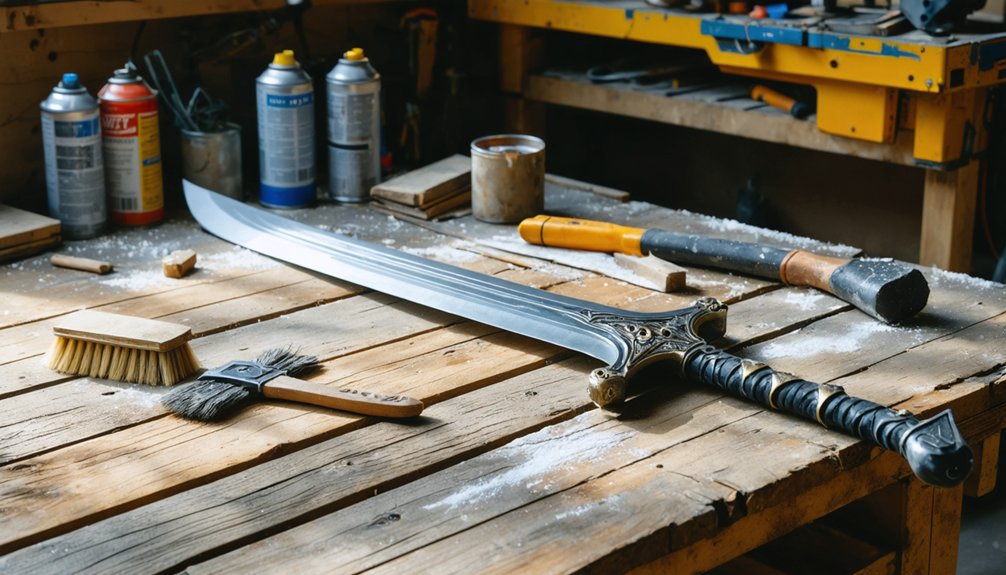
Weathering and Finishing Your Cosplay Props
Weathering transforms a flat, painted prop into a convincing, battle-worn piece with realistic depth. You’ll apply dry brushing first, dragging a nearly dry brush loaded with lighter pigment across raised edges to simulate wear.
Layer darker washes into recessed areas to create shadow contrast and visual dimension. Acrylic paints deliver precise control during these weathering techniques, letting you build gradual tonal shifts without overworking surfaces.
Darker washes pooled into recesses build shadow and dimension without sacrificing surface control.
Stipple sponges replicate chipped paint and corrosion textures effectively. Once satisfied with depth and contrast, seal everything with a finishing coat matched to your desired surface quality—matte for aged metal, gloss for polished armor.
These finishing touches protect your prop from convention handling while locking in every carefully constructed detail you’ve built throughout the entire fabrication process.
How to Make Your Props Convention-Safe
Once your finishing coat has cured, you’ll need to shift focus from aesthetics to compliance—because a beautifully crafted prop that violates convention safety rules won’t make it past the front door.
Convention guidelines demand that your prop materials, construction methods, and structural integrity meet specific safety regulations before approval.
Follow these critical compliance steps:
- Eliminate sharp edges by sanding all foam and thermoplastic surfaces until completely smooth, preventing accidental injury during crowded floor navigation.
- Prioritize lightweight designs using EVA foam and internal PVC supports, ensuring comfortable wear throughout extended convention hours without fatigue-related accidents.
- Remove all metal components from weapon props, substituting rigid thermoplastics like Worbla to satisfy safety regulations without sacrificing visual accuracy.
Proactively submitting your prop for staff inspection demonstrates professionalism and prevents disqualification.
Frequently Asked Questions
How Do You Transport Large Cosplay Props Safely to Convention Venues?
You’ll disassemble large props into modular sections using lightweight prop materials like EVA foam, securing each piece in padded cases. Follow smart transportation tips: label components, use foam inserts, and reassemble on-site for structural integrity.
Can Beginners Win Cosplay Contests Against Experienced Prop Makers?
Yes, you can win experienced competition as a beginner by mastering beginner strategies like precise foam cutting, clean seam finishing, and accurate character scaling—your attention to detail and innovative construction techniques often outweigh years of experience.
How Do Judges Score Prop-Making Quality in Cosplay Competitions?
Like a symphony scored note by note, judges evaluate your prop construction precision, material selection wisdom, surface finishing quality, structural durability, and screen accuracy—each criterion you’ve mastered amplifies your total score considerably.
What Storage Solutions Work Best for Preserving Finished Cosplay Props?
Store props in climate-controlled spaces using padded cases or custom foam inserts. You’ll extend longevity by applying prop maintenance tips like sealing surfaces and utilizing prop display techniques on wall mounts to prevent structural warping.
How Do You Repair a Damaged Prop Quickly During a Convention?
Like a surgeon with a field kit, you’re ready for anything. Pack emergency supplies — contact cement, foam scraps, and flexible primer — for quick fixes. Reattach broken pieces firmly, smooth edges fast, and seal immediately.
References
- https://www.youtube.com/watch?v=rewCL624QOs
- https://www.youtube.com/watch?v=IVw4rbsLEVk
- https://makezine.com/article/craft/cosplay-props/cosplay-pro-tips/
- https://www.youtube.com/watch?v=YnFwielXmVQ
- https://www.youtube.com/watch?v=BF-JzuhS36I
- https://cosplayadvice.com/58-cosplay-prop-making-tutorials/
- https://www.slideshare.net/slideshow/how-to-make-your-props-more-gooder/45230131?nway-content_model=A
- https://www.dremel.com/ap/en/make-with-dremel/how-to/how-to-start-making-cosplay-props—with-waynes-workshop
- https://www.youtube.com/watch?v=XAUfbiCq6OY
- http://mirroredwilderness.blogspot.com/2012/08/prop-making-101-cosplay-prop-making-for.html