To nail cyberpunk post-apocalyptic cosplay, you’ve got to lock in your character concept before touching a single material. Start with reference images and community builds to sharpen your vision. Layer thrifted and surplus clothing, then add weathered armor, tech details, and utility gear that tell your character’s story. Every scratch, LED accent, and holster should feel earned, not random. Stick around, and you’ll uncover exactly how to pull it all together.
Key Takeaways
- Start with thrifted and military surplus clothing, layering pieces and distressing them to create an authentic, battle-worn cyberpunk aesthetic.
- Define your character’s faction, backstory, and motivation first, letting those narrative details guide every costume and gear decision.
- Incorporate LED accents, foam armor, holographic materials, and metallic finishes to blend futuristic tech with post-apocalyptic grit.
- Use reference images and mood boards to solidify your character concept digitally before committing to physical construction and material selection.
- Apply aggressive contouring, grime effects, metallic eye accents, and asymmetric hairstyles to reinforce your character’s hardened, cyberpunk identity.
Use Reference Images and Community Builds to Sharpen Your Concept
Before you cut a single piece of fabric or fire up a hot glue gun, you need a clear visual target. Reference images aren’t optional — they’re your blueprint. Pull from films, graphic novels, games, and street-level community builds that push aesthetic exploration into raw, uncharted territory.
Reference images aren’t optional — they’re your blueprint. No blueprint, no build.
Study how other cosplayers handle concept development. Their design inspiration reveals construction shortcuts, material choices, and storytelling decisions you’d never discover solo. Cosplay collaboration accelerates your character evolution faster than any tutorial.
Create a mood board that locks in your visual storytelling before you touch a single material. Track how your concept shifts during research — that drift defines your style.
The strongest builds start digitally, long before they become physical.
Build Your Cyberpunk Post-Apocalyptic Character Concept First
Before you touch a single piece of fabric or foam, you need a locked-in character concept that drives every decision you’ll make.
Ask yourself who you’re playing — a rogue hacker running ghost ops for a fractured resistance cell, a scavenger jury-rigging stolen tech in a collapsed megacity, or a mercenary marked by a faction that no longer exists.
Once you’ve got that narrative core, you can start layering cyberpunk chrome and neon against post-apocalyptic grime and wreckage in a way that actually means something.
Choose Your Narrative Role
Every strong cyberpunk post-apocalyptic cosplay starts with one thing: a clear narrative role.
Are you a rogue hacker dismantling corrupted systems from the shadows? A battle-scarred mercenary surviving on grit and black-market tech? Maybe a wasteland scavenger piecing together civilization’s broken fragments?
Your choice carries narrative significance beyond aesthetics. It shapes every design decision — your armor’s damage patterns, your gadget choices, your faction markings.
Without it, your costume becomes a random collection of cool-looking pieces rather than a lived-in identity.
Lock down your character motivation early. Know what drives your character: survival, revenge, rebellion, profit.
That internal logic transforms your look from costume to character. Wear your role’s history visibly.
Let every torn seam, glowing circuit, and weathered strap tell that story without a single word.
Define Faction And Backstory
Once you’ve locked down your narrative role, faction and backstory transform that choice into something tangible and cohesive. Your faction identity determines everything — color schemes, insignia, gear philosophy, and allegiance.
Are you patching into a rogue hacker collective running dark-net operations? Scavenging for a wasteland syndicate trading black-market tech? Every detail on your costume should echo that answer.
Character motivation sharpens the look further. A corporate defector carries different scars than a street mercenary who’s never known loyalty.
Define what drives your character — survival, revenge, profit, or liberation — then let that tension bleed into your distressing choices, accessory placements, and visual hierarchy.
Faction patches, branded markings, and coded symbols communicate belonging without a single word spoken. Build the lore first, then dress the body accordingly.
Blend Cyberpunk With Post-Apocalyptic
Blending cyberpunk with post-apocalyptic isn’t just an aesthetic mash-up — it’s a worldbuilding decision that locks in your character’s entire visual logic. Your futuristic fashion choices should reflect urban survival instincts, where tech integration collides with resource scarcity. Glowing circuitry doesn’t contradict torn fabric — it reinforces narrative depth by showing what your character prioritized rebuilding first.
Push aesthetic cohesion hard. Every element needs visual storytelling weight, from your cracked visor to your patched jacket. Character development lives in those contradictions — advanced tech strapped onto weathered gear signals someone who scavenges smart, not lucky.
Asymmetry, layered silhouettes, and deliberate damage aren’t decoration; they’re biographical markers. When your high-tech details and your decay feel inevitable together, you’ve stopped cosplaying a character and started embodying one.
Start With Thrifted and Surplus Clothing Foundations
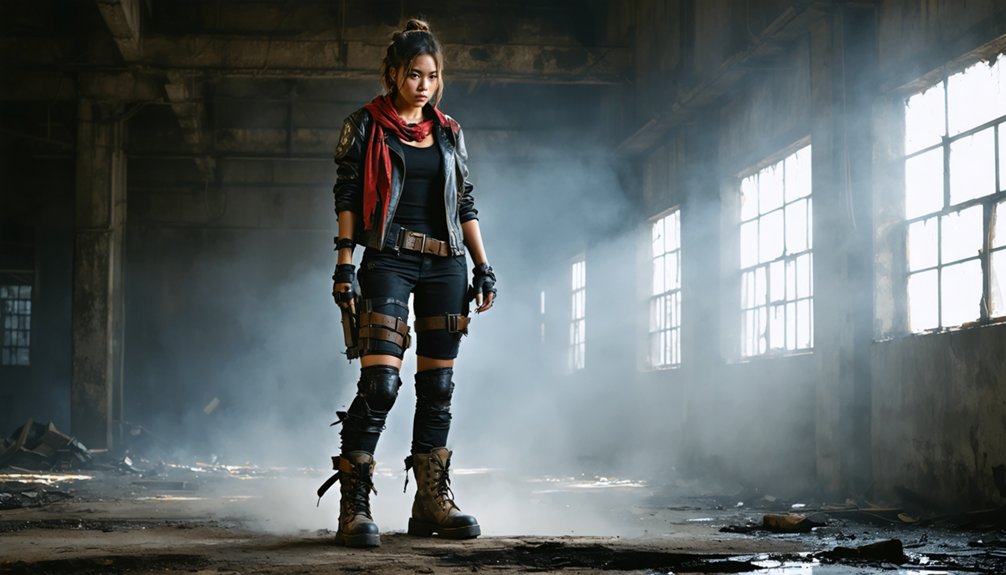
Before you spend a single credit on specialty cosplay gear, raid your closet, hit the thrift stores, and dig through military surplus bins. Your foundation doesn’t need to be expensive — it needs to be layered, functional, and adaptable.
Thrift store strategies work because chaos built the wasteland aesthetic. Grab oversized cargo pants, worn leather jackets, tactical vests, and frayed utility tops. Sustainable sourcing isn’t just budget-smart — it’s on-brand for a world rebuilding from collapse.
Chaos built the wasteland aesthetic — and thrift stores built the budget that gets you there.
Military surplus delivers instantly credible textures: worn canvas, heavy-duty buckles, and authentic weathering you didn’t fake. Stack civilian pieces against tactical gear to create that hybrid survivor silhouette.
Build from the bottom up — boots first, then layers — so every piece earns its place in your character’s visual narrative.
Layer Clothing to Build a Believable Dystopian Silhouette
Start your build from the skin out, anchoring the look with a tight base layer that hugs your frame and reads as functional underarmor.
Once that foundation’s locked in, throw on tactical outerwear — a surplus jacket, a strapped vest, or a shredded trench — to push the silhouette into dystopian territory.
You’re not just getting dressed; you’re stacking narrative depth, one layer at a time.
Start With Base Layers
Every strong cyberpunk costume is built from the ground up, and your base layers are where that foundation takes shape.
Smart layering techniques start with breathable, form-fitting pieces that won’t restrict your movement during long convention runs.
Choose your base layer materials strategically:
- Compression tops in black or dark gray for a sleek, tactical underbase
- Moisture-wicking fabrics to stay functional under heavy outer layers
- Fitted thermals that add warmth without bulk in layered builds
- Dark mesh shirts to introduce texture and visual complexity early
- Synthetic blends like nylon or polyester for durability and dystopian sheen
These foundational choices define how every additional layer sits, stacks, and reads from a distance.
Get the base right, and the whole silhouette locks into place.
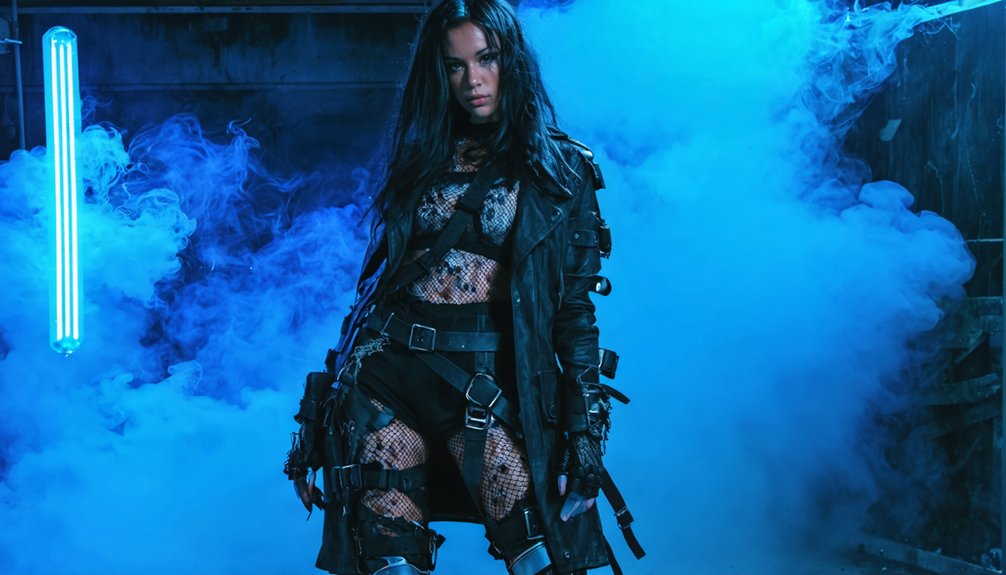
Add Tactical Outerwear
Once your base layers are locked in, three key outerwear pieces can transform a basic build into a full dystopian silhouette: a battered field jacket, a hooded utility vest, and a long asymmetric coat or duster. Each layer serves a purpose beyond aesthetics.
Tactical layering isn’t decorative—it signals survival intelligence. Distress every outer piece with sandpaper, paint burns, and strategic tearing. Mismatched patches, exposed stitching, and frayed hems communicate scarcity and resourcefulness simultaneously.
Load your outerwear with functional accessories: clipped-on pouches, magnetic buckle straps, detachable sleeves, and wired cable runs. These details reward close inspection and reinforce the idea that your character built this kit under pressure, not in a boutique.
Stack silhouettes deliberately. Asymmetry creates tension. Volume creates authority. Neither happens by accident.
Add Tech Details That Actually Look Cyberpunk
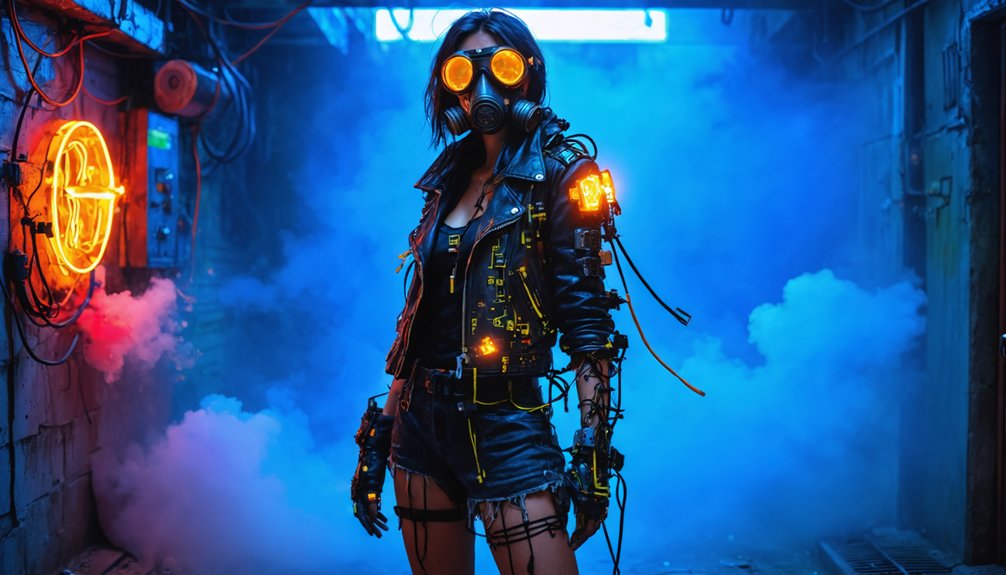
What separates a convincing cyberpunk build from a Halloween knockoff is the tech — and it’s all in the details. You don’t need a massive budget to pull off futuristic authenticity. You need smart choices that signal a world where survival and technology have merged violently.
- Weave LED accents and neon details into seams, collars, or armor edges.
- Add cybernetic enhancements using foam, paint, and metallic finishes on exposed limbs.
- Wrap gear in holographic materials or reflective film for that augmented-reality shimmer.
- Lock in futuristic eyewear — visors, goggles, or HUD-style frames complete the identity instantly.
- Layer tech accessories like glowing tattoo sleeves, circuit-printed patches, and illuminated wrist panels.
Every piece should whisper: *this world broke, and you rebuilt yourself from its wreckage.*
Add Goggles, Holsters, and Utility Gear to Finish the Look
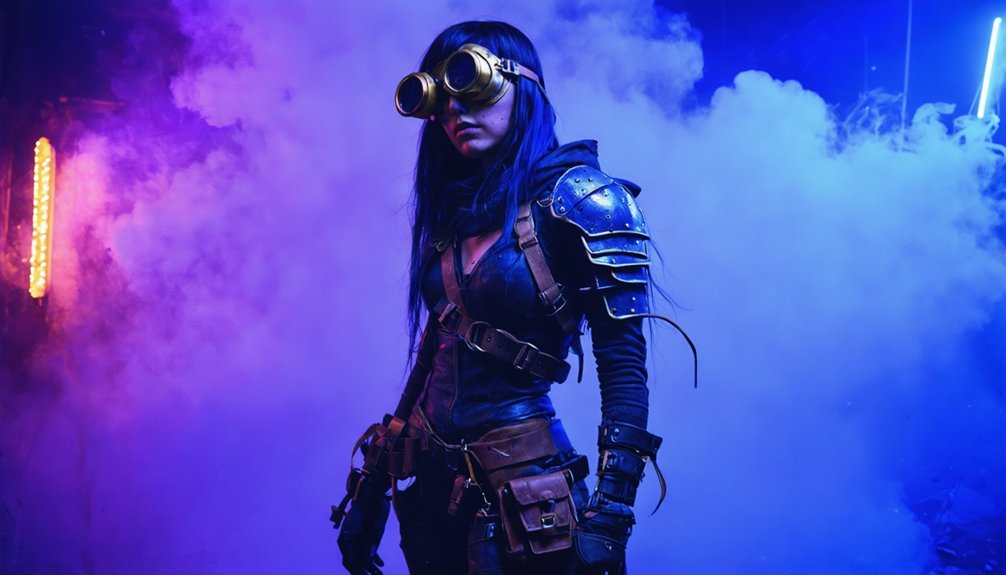
Tech details give your build its identity — utility gear gives it its soul. Layer in goggles designs that read tactical — scratched lenses, worn straps, cracked frames repaired with scrap metal or electrical tape. They’re not decoration; they’re survival equipment.
Choose holster styles that match your character’s function — side-draw for a mercenary, cross-body for a scavenger running hot zones. Rig them with weathered leather, fraying cord, or reclaimed webbing.
Your utility gear does the heavy lifting: pouches, harnesses, canteens, and belt rigs that look like they’ve seen real use. Distress everything to match your base layers. Each strap, buckle, and clip should suggest purpose.
When your accessories look lived-in, your entire character stops being a costume and starts being a story.
Build Armor Pieces and Props From Foam, PVC, and Recycled Parts
Three materials — foam, PVC, and recycled junk — can build armor that looks like it was salvaged from a collapsed factory district.
With smart foam crafting, PVC techniques, and recycled materials, you’ll construct wearable pieces that scream functional dystopia.
- Prop painting: Layer rust, carbon, and neon tones for believable surface damage
- Armor layering: Stack foam sheets for dimensional depth and structural reinforcement
- Texture detailing: Press mesh, grating, or wire patterns into heat-softened foam
- Assembly tips: Use contact cement and hot glue strategically — reinforce every seam
- Safety precautions: Ventilate your workspace when cutting PVC or heat-shaping foam
Sand edges, seal surfaces, and weather everything consistently.
Your armor shouldn’t look manufactured — it should look *survived*.
Weather and Distress Your Costume for Post-Apocalyptic Realism
A costume that looks factory-fresh breaks immersion faster than a broken visor in a firefight. Weathering techniques separate a convincing survivor from a clean-cut cosplayer who’s never touched scrap metal.
Start your distressing methods with sandpaper on seams, edges, and high-contact zones. Aging materials becomes strategic when you layer rust tones, charcoal smudges, and diluted brown paint over base fabric.
Fabric manipulation through controlled tearing, fraying, and heat scoring adds brutal texture without looking accidental. Simulate environmental effects by dry-brushing grime along stress points where real wear accumulates.
Push color variations using bleach splatter, dark ink washes, and oxidized metallic sprays. Texture layering across clothing, armor, and props ties the full look together.
Apply realism tips consistently — nothing kills the aesthetic like a spotless boot on a battle-scarred jacket.
Style Your Makeup and Hair to Match the Dystopian Aesthetic
- Contour aggressively to harden features against industrial backgrounds.
- Apply grime effects using brown and gray eyeshadow smudged into creases.
- Use metallic accents near eyes or temples for cybernetic character expression.
- Style futuristic hairstyles with asymmetric cuts, shaved sections, or structured braids.
- Layer tactical coverings like face masks or painted markings to reinforce dystopian themes.
Your face is another prop — make it scream the same broken future your costume already promises.
Frequently Asked Questions
How Do I Keep My Costume Comfortable During a Full Convention Day?
Master your fabric choices — breathable synthetics keep you cool while layering techniques let you adapt fast. You’ll stay mobile, gritty, and convention-ready all day without sacrificing that razor-sharp, dystopian edge you’ve engineered.
Can I Enter Cosplay Competitions With a Cyberpunk Post-Apocalyptic Costume?
Like a rogue AI rewriting its own code, you can absolutely compete. Judges reward bold character design and deliberate material choices, so let your dystopian vision hit the stage and dominate.
What Is the Average Budget Needed to Build This Type of Costume?
You’ll spend anywhere from $50 to $500 on costume materials, depending on your vision. Map out a budget breakdown covering thrifted basics, DIY weathering supplies, LED tech, and armor pieces to hack costs efficiently.
Are There Specific Events or Conventions That Celebrate This Cosplay Genre?
You’ll find your tribe at cyberpunk conventions like DragonCon and Neo Japan, or post-apocalyptic meetups such as Wasteland Weekend. These events celebrate your gritty, tech-fused aesthetic, connecting you with fellow innovators who push dystopian cosplay into uncharted territory.
How Do I Safely Transport Fragile Props and Armor Pieces to Events?
Pack your gear like a pro using foam-lined cases and rigid containers for solid armor packing techniques. You’ll master prop protection methods by wrapping fragile pieces individually, securing loose parts, and keeping everything modular for maximum field-ready transport efficiency.
References
- https://starstruckpanda.com/cyberpunk-post-apocalyptic-cosplay-tips/
- https://postapocevents.com/post-apocalyptic-costumes-101/
- https://cuckoo4design.com/diy-post-apocalyptic-costume-for-girls/
- https://www.youtube.com/watch?v=-kbcENyXmUg
- https://forum.choiceofgames.com/t/need-post-apocalyptic-cyberpunk-wasteland-outfit-ideas/38659
- https://www.reddit.com/r/Cyberpunk/comments/1mstsf6/a_bunch_more_dystopiancyberpunk_influenced_pieces/
- https://www.youtube.com/watch?v=GVY3f_WZ0dI
- https://www.theotheraesthetic.com/blog/how-to-style-cyberpunk-fashion-on-a-budget/
- https://www.pinterest.com/texascosplay/futuristic-apocalyptic-cyberpunk-costume-ideas/
- https://www.facebook.com/groups/775269537836709/posts/1043947634302230/