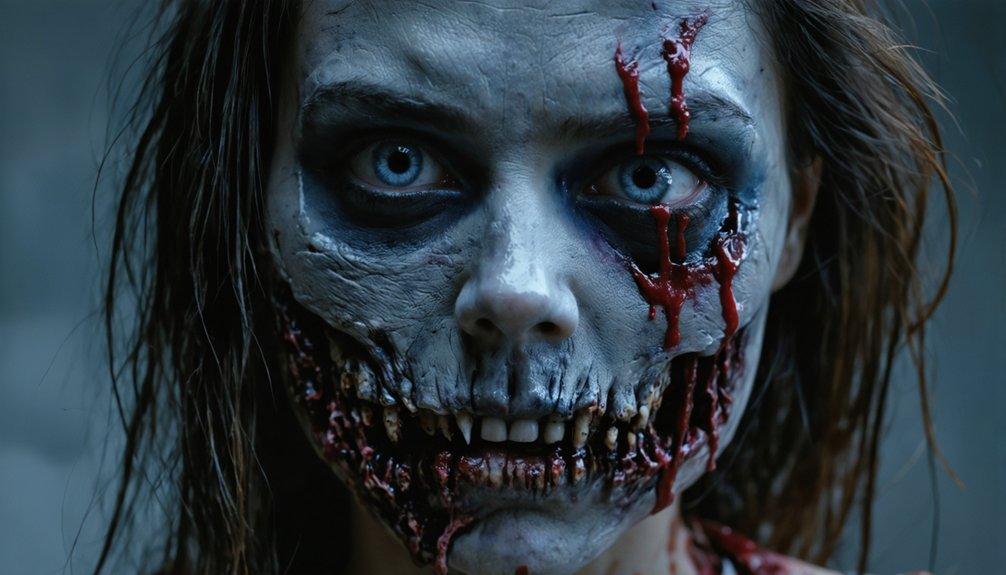
Realistic zombie makeup starts with a grey or greenish cream foundation set with baby powder for that flat, lifeless texture. You’ll contour with dark browns and greys to hollow out your cheeks and eye sockets. Build wounds using liquid latex and tissue paper, then paint them with reds and blacks. Mix cornstarch with red food coloring for convincing fake blood. The techniques ahead will transform your entire approach to the undead look.
Key Takeaways
- Use cream-based foundation in grey, green, or blue hues, set with baby powder for a dull, flat, unhealthy complexion.
- Contour with dark grey or brown beneath cheekbones and layer purples and greys in eye sockets for a skeletal effect.
- Apply liquid latex with tissue paper to create decaying flesh textures, painting exposed areas with red, brown, and black.
- Mix corn starch, red food coloring, and dish soap for realistic fake blood, adding maroon or purple for an aged effect.
- Press oatmeal or cornflakes around latex wounds for added texture, blending yellows, greens, and purples to simulate infection spread.
Start With the Right Foundation for Zombie Skin
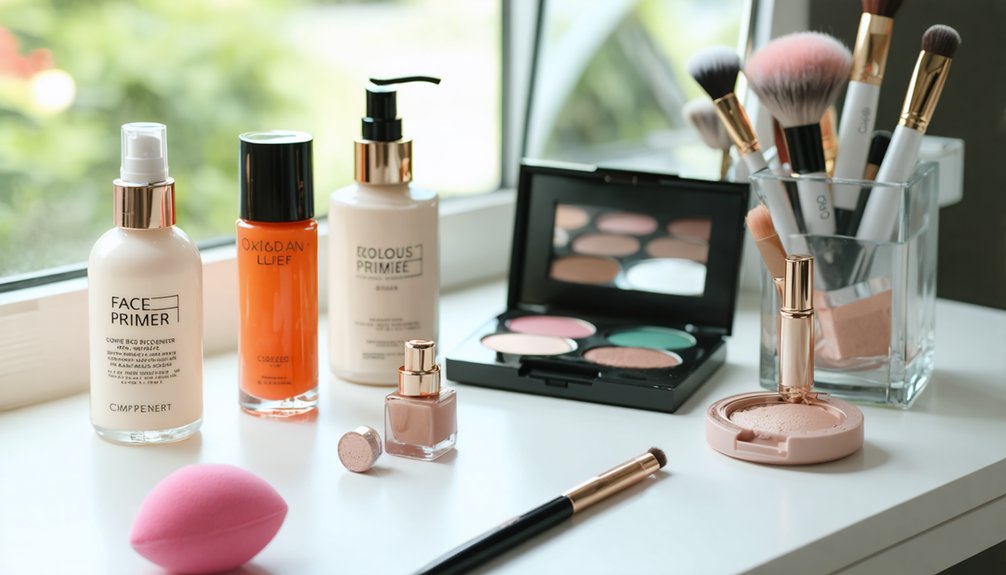
Getting zombie skin right starts with choosing a cream-based foundation several shades lighter than your natural skin tone. Select color palettes featuring sickly grey, pale green, or slightly bluish hues rather than conventional skin-matched foundation types. Avoid full coverage—you need that unhealthy pallor to show through.
Your blending techniques matter greatly here. Work the foundation thoroughly across your face and down your neck, ensuring continuity without harsh lines. Application tools like damp sponges or palette knives give you precise control over uneven distribution.
Finish by pressing baby powder over everything to kill any natural skin luminosity, creating that dull, flat, deadened texture.
Prioritize proper skin care before application—well-moisturized skin holds latex and cream products better. Plan your makeup removal strategy using oil-based cleansers to protect your skin afterward.
Contouring Tricks That Create a Sunken, Skeletal Zombie Look
Once your base is set, contouring transforms flat, pale skin into something gaunt and skeletal. Using contouring techniques strategically, apply dark grey or brown cream directly beneath your cheekbones to sculpt hollow cheeks instantly.
Contouring is your secret weapon—dark grey or brown cream beneath the cheekbones sculpts instant, hauntingly hollow cheeks.
Blend upward toward your temples to extend skeletal shadows across the face’s upper planes.
For depth enhancement around the eyes, pack deep red eyeshadow into the socket, then layer purples and grays into the hollows. This color layering creates convincing sunken effects that suggest tissue deterioration.
Define the nose’s sides with shadow to sharpen defining features and reinforce a skeletal silhouette.
Balance your shadows with dramatic highlights along the cheekbone tops and nose bridge. This contrast intensifies the gaunt, three-dimensional illusion, making your zombie transformation disturbingly convincing under any lighting condition.
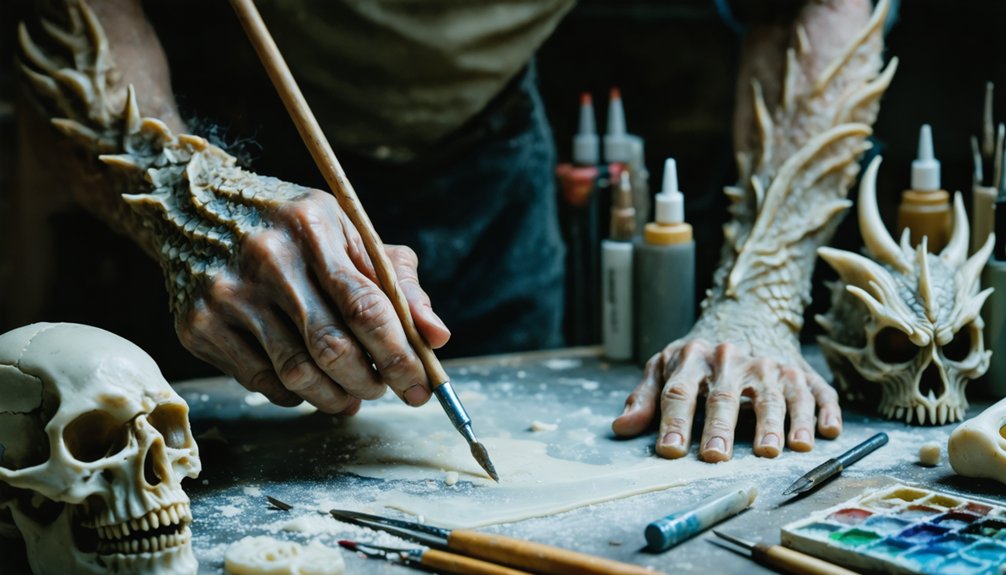
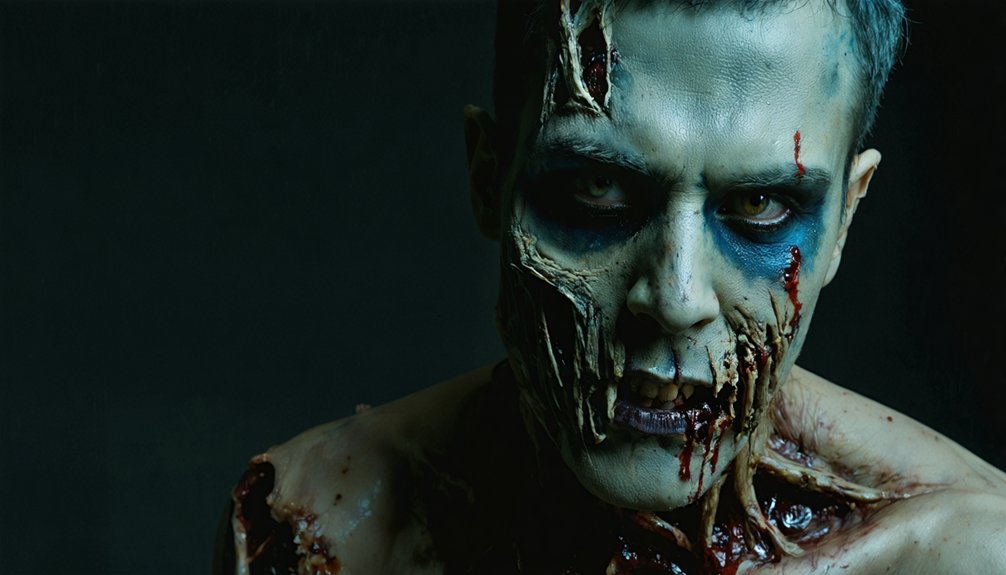
Build Realistic Zombie Wounds and Rotting Flesh Effects
To build convincing zombie wounds, apply a thin layer of liquid latex directly to clean, dry skin. Then press a single-ply sheet of tissue paper over the wet latex and repeat the layering process two to three times.
Once dry, carefully tear and peel back sections of the tissue to simulate ripped, decaying flesh. Use a hairdryer to accelerate drying and enhance the skin-stretching effect.
Paint the exposed wound areas with red, dark brown, and black to replicate raw flesh and necrotic tissue, blending colors outward to create a naturalistic shift between damaged and surrounding skin.
Applying Liquid Latex Layers
Liquid latex is the foundation of realistic zombie wounds, and mastering its layered application separates convincing effects from amateur results.
Start by applying a thin latex layer directly onto clean, dry skin. Before it fully dries, press a single-ply tissue sheet over the surface, smoothing it carefully. Add another latex coat over the tissue, then repeat this process two to three times.
These latex layering techniques build dimensional depth that mimics actual damaged tissue. Once dry, use a hairdryer on low heat to accelerate curing and encourage natural skin texture enhancements as the material contracts.
Then carefully tear through the layered surface using a toothpick or fingernail, revealing jagged, realistic wound edges. Dust loose translucent powder over finished areas to prevent unwanted sticking during subsequent makeup application.
Painting Exposed Flesh Effects
With your latex wounds torn and set, three core colors — red, brown, and black — form the foundation of convincing exposed flesh effects. Layer these strategically to build dimensional, realistic texture tips that separate amateur work from professional results.
- Red first: Stipple crimson into wound cavities, simulating fresh tissue exposure beneath broken skin.
- Brown mid-layer: Dry-brush dark brown over red to oxidize the wound, creating aged, infected exposed flesh techniques.
- Black deepening: Concentrate black into the wound’s deepest recesses, reinforcing anatomical depth and necrotic decay.
Between layers, use a fine brush to pull color outward onto surrounding latex edges, blending infection naturally into undamaged skin.
This graduated shift prevents harsh lines and anchors the wound convincingly within its surrounding tissue context.
Perfect Zombie Eyes for a Dead, Hollow Appearance
Creating the perfect zombie eyes requires 3 essential techniques that work together to achieve a truly hollow, lifeless appearance.
First, completely black out your eye socket using matte black eyeshadow, maintaining precise control throughout application.
Second, outline the bottom socket with black liner to deepen your hollow gaze techniques, then layer light blue over red to simulate bruising.
Third, add yellow around the blue edges to complete a realistic color shift.
Your eye shadow choices determine authenticity — deep purples and grays applied to the hollows create that signature sunken, gaunt effect.
Your eyeshadow palette makes or breaks the illusion — purples and grays sculpt those irresistibly haunting, sunken zombie hollows.
Use a fine brush to trace and darken natural shadows, amplifying skeletal definition.
These three layered techniques combined transform ordinary eyes into convincingly dead, expressionless voids that elevate your entire zombie look.
Mix Fake Blood That Makes Your Zombie Makeup Look Real
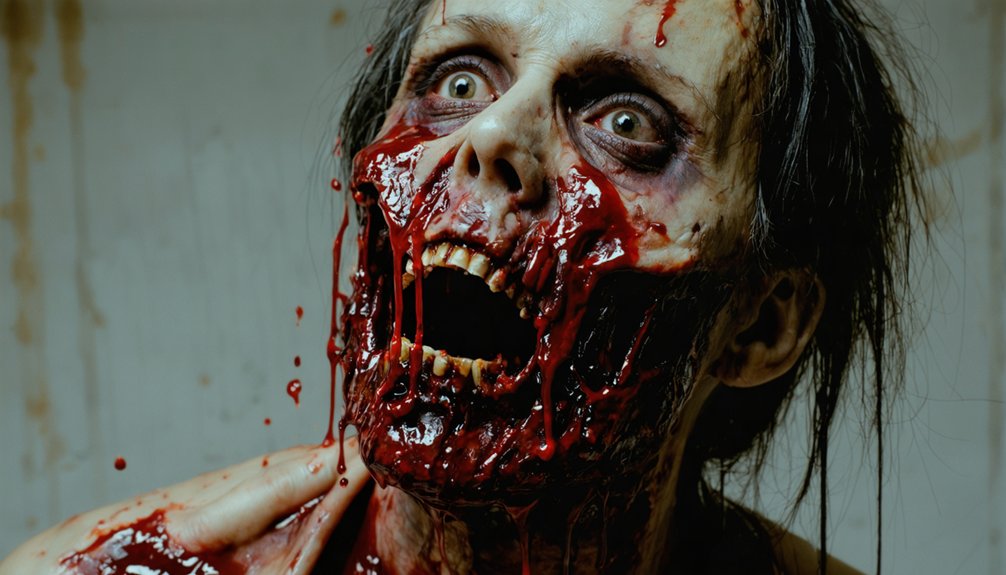
To mix realistic fake blood, combine corn starch and red food coloring until you achieve a thick, viscous consistency that mimics real blood’s weight and opacity.
Add a small amount of dish soap to prevent the mixture from beading on your skin, and incorporate dabs of purple or maroon to simulate dried, aged blood.
Apply solid red lipstick as a base where you’ll place the blood, then layer your mixture over latex wounds using red and brown tones to create a convincing dried blood effect.
Fake Blood Basic Ingredients
Fake blood needs just 3 basic ingredients to achieve a realistic consistency: corn starch, red food coloring, and a small amount of dish soap.
These fake blood recipes deliver professional-grade results without expensive products. Mastering blood consistency separates amateur zombie looks from genuinely unsettling transformations.
Each ingredient serves a precise function:
- Corn starch thickens the mixture, mimicking real blood’s viscosity and preventing it from running too quickly across skin.
- Red food coloring provides the foundational crimson hue, which you’ll deepen with maroon or purple tones for dried blood effects.
- Dish soap breaks surface tension, stopping the blood from beading on latex or skin and ensuring it spreads naturally.
Adjust ratios until you achieve your desired texture before application.
Achieving Realistic Blood Consistency
Mixing those three ingredients correctly determines whether your fake blood looks convincing or cheap. Blood viscosity depends heavily on your corn starch ratio — too little produces watery, unrealistic runoff, while too much creates paste that won’t flow naturally.
Start with two tablespoons of corn starch per half cup of water, then adjust incrementally.
Color saturation requires layering rather than dumping excessive food coloring upfront. Begin with red, then introduce small amounts of blue and green to achieve that darker, venous tone real blood carries. Bright cherry-red reads as costume; deeper burgundy reads as authentic.
Add one drop of dish soap to prevent beading on skin surfaces, ensuring your blood spreads convincingly.
Test consistency on your inner wrist before full application — it should flow slowly without immediate dripping.
Applying Blood For Effect
Blood placement follows three zones that determine whether your zombie reads as freshly turned or long-rotting.
Mastering blood application techniques separates amateur from professional results.
- Wound origin points — Apply brightest red directly inside latex wounds, letting it pool naturally before feathering outward.
- Gravity tracks — Use blood layering methods to streak downward from wounds, thinning the mixture as it travels to simulate real flow patterns.
- Dried peripheral edges — Dab maroon and purple at streak endings where blood oxidizes and darkens over time.
Add dish soap to your mixture so it spreads rather than beads on skin.
Apply solid red lipstick beneath fake blood on lips before layering your mixture over it for dimensional depth.
Add Veins, Texture, and Latex Details to Complete Your Zombie Look
The finishing details transform a basic zombie look into a convincingly decayed and infected appearance. Master vein placement by using a fine brush to draw thin, branching lines emerging from wound edges, blending dark purples and blues for spreading infection realism.
For texture layering, press small oatmeal or cornflake pieces around latex application zones, securing them with an additional latex coat. Use a hairdryer to accelerate drying, which simultaneously creates realistic skin-stretching decay details.
Achieve wound realism by applying translucent powder over latex to prevent unwanted sticking.
Color blending requires working outward from wound centers using yellows, greens, and purples to simulate skin aging and infection spread. These combined techniques maximize makeup durability throughout extended wear while maintaining unsettlingly convincing results.
Frequently Asked Questions
How Long Does Zombie Makeup Typically Take to Apply Completely?
You’ll typically spend 2–4 hours on full zombie makeup. Prioritize application tips like prepping skin beforehand and using time-saving techniques such as pre-mixing latex layers and blood formulas to streamline your transformation efficiently.
Can Zombie Makeup Cause Skin Irritation or Allergic Reactions?
Yes, zombie makeup can irritate your skin. You’ll want to conduct allergy tests on different skin types before full application. Test latex, adhesives, and pigments on your inner wrist 24 hours prior to committing fully.
How Do You Remove Latex and Fake Blood After Halloween?
Peel latex slowly from skin’s edges using latex removal techniques, then cleanse with oil-based remover. For blood cleanup tips, you’ll want micellar water or soap to dissolve corn starch-based fake blood effectively and completely.
Does Zombie Makeup Transfer Onto Clothing or Furniture Easily?
Yes, it transfers easily, but you can prevent it. Seal your zombie makeup types with setting spray and powder. For clothing protection, wear a cape during application—you’ll avoid smudging latex, fake blood, and pigments onto furniture or fabrics.
How Do You Keep Zombie Makeup Intact Throughout a Long Night?
Set your zombie makeup techniques with translucent powder and a setting spray. You’ll extend wear by layering latex properly and using long lasting products like waterproof foundations, ensuring your look stays intact throughout even the most demanding night.
References
- https://www.reddit.com/r/halloween/comments/4chljw/zombie_makeup_tipssecrets/
- https://www.theguardian.com/lifeandstyle/2015/oct/29/halloween-costume-ideas-zombie-walking-dead-makeup-tips
- https://www.wikihow.com/Look-Like-a-Zombie
- https://www.lemon8-app.com/@paofxart/7463801504504349230?region=us
- https://www.youtube.com/watch?v=zoJqZV8jZjE
- https://www.treasurehouseofmakeup.co.uk/blog/how-to-do-zombie-makeup/
- https://necolebitchie.com/how-do-you-make-zombie-makeup/
- https://www.oreateai.com/blog/unleash-your-inner-ghoul-a-beginners-guide-to-zombie-makeup/fc732b001c1421c4847f7bd86ab9aca2
- https://craftylittlesecret.com/2012/10/30/how-to-zombie-make-up-warning-totally-gross-pictures/
- https://www.youtube.com/watch?v=HBb-o4EPQDc