Styling a Nezuko wig starts with choosing heat-resistant synthetic fibers featuring pre-dipped orange tips. You’ll detangle bottom-up using a fine-tooth comb, then build texture with hairspray. Backcomb the crown for volume, define loose waves with light wax, and split the ponytail at a 45-degree angle wrapped in pink ribbon. Finish by centering the hachimaki across your forehead and securing the muzzle snugly—and there’s plenty more technique ahead to perfect every detail.
Key Takeaways
- Choose a heat-resistant wig with pre-dipped orange tips and long straight base, ensuring adjustable straps for a secure fit.
- Detangle using a fine-tooth comb starting from the bottom, applying hairspray section by section to improve texture.
- Enhance orange-dipped tips with spray ink if needed, rinsing only with cold water to prevent color bleeding.
- Backcomb the top section for volume, define loose waves with light wax, and secure a split ponytail with pink ribbon.
- Position the pink hachimaki centered on the forehead, attach the muzzle snugly, and lock all accessories with finishing spray.
Choose the Right Nezuko Wig Before You Start
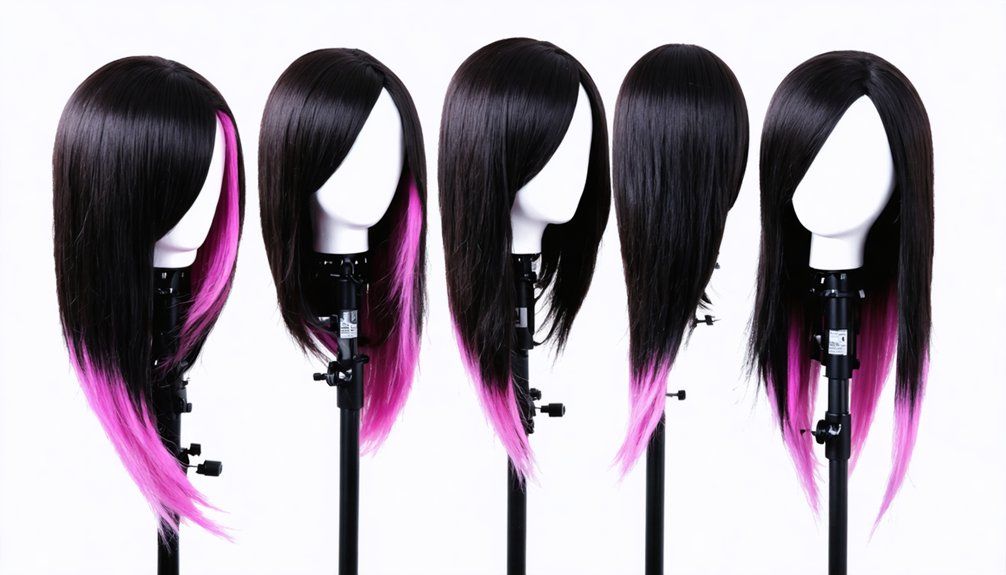
Before anything else, you’ll need to nail down 3 key features in your Nezuko wig: heat-resistant synthetic fibers, pre-dipped orange tips, and a long straight base. These wig materials aren’t negotiable — they’re your foundation for achieving an accurate, screen-faithful result.
Heat resistance lets you apply straighteners and curlers without melting fiber structure. Pre-dipped orange tips eliminate guesswork around color variations, saving you hours of manual dyeing. A long, straight base means minimal prep before you jump into actual styling.
Also check inside the wig for adjustable straps — a secure fit prevents mid-convention disasters.
Prioritize high-quality synthetic construction that holds its shape under repeated styling stress. Lock in these specs first, and every technique that follows becomes considerably easier to execute with precision.
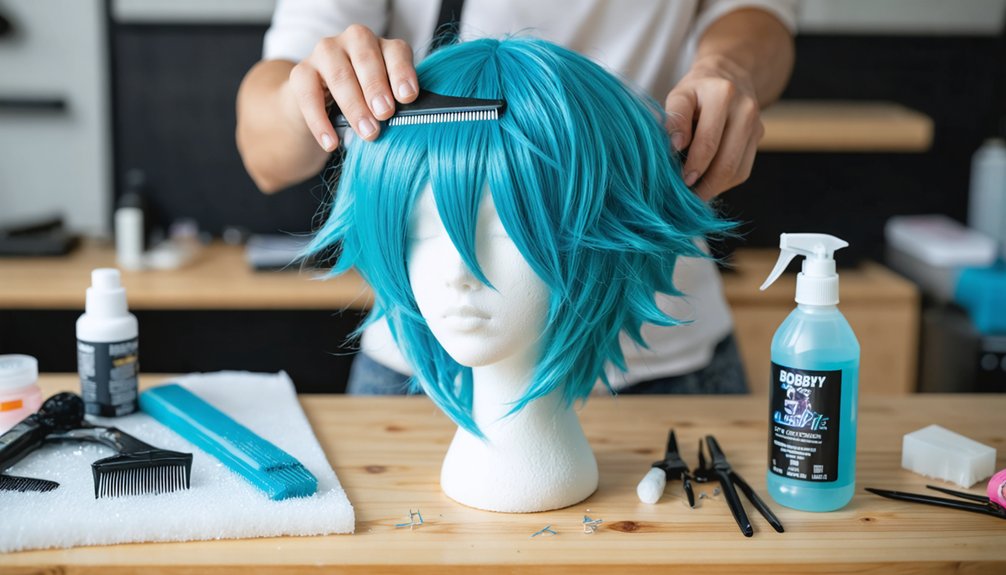
Detangle and Texture Your Nezuko Wig for Styling
Before you touch a single styling tool, grab a fine-tooth comb and work from the bottom of the wig upward, systematically releasing tangles without tearing through the fibers.
Once it’s smooth, apply hair spray section by section from roots to ends, then follow each pass with your comb to lock in an even texture.
Repeat this spray-and-comb cycle twice, and you’ll transform the wig’s base feel into something far more workable for Nezuko’s signature wave.
Start From The Bottom
Getting the detangling process right sets the foundation for a flawless Nezuko style, so start from the bottom and work your way up. Grab your fine-tooth comb and tackle the ends first — this wig care essential prevents unnecessary breakage and keeps the fiber structure intact.
Work in small sections, applying your styling tools with precision as you move upward. Smart detangling techniques preserve the wig’s heat resistance properties and protect those vibrant orange-dipped tips for color preservation.
Don’t rush this step; methodical upward strokes eliminate stubborn knots without distorting volume creation potential later.
Once you’ve cleared each section, you’re building the perfect base for attachment methods and advanced styling. Clean, tangle-free fibers respond dramatically better to shaping — and that’s where Nezuko’s iconic look truly begins.
Apply Hair Spray Sections
With your wig freshly detangled, it’s time to lock in that texture using hair spray — and section control is everything here.
Don’t just blast the entire wig at once; instead, apply your styling products deliberately, working section by section from roots to ends.
This targeted hair spray technique guarantees every strand receives even coverage without oversaturation. Hold the can approximately six inches away, then mist each section with a controlled sweep.
Once applied, comb through immediately to distribute the product and reinforce that smooth, flowing texture Nezuko’s look demands.
Here’s the game-changer: repeat the spray-and-comb process twice per section. That second pass transforms the wig’s texture dramatically, creating a polished, structured foundation that holds up beautifully through the more complex styling steps ahead.
Repeat For Better Texture
The second pass is where the magic actually happens. You’ve already laid the groundwork, so now you’re amplifying results with intentional repetition. Reapply your hair spray section by section, working from roots to ends exactly as before.
Then comb through immediately while the product’s still active. This dual-application approach delivers serious texture enhancement that a single pass simply can’t achieve.
Think of it as layering your styling methods — each repetition builds structure into the synthetic fibers, creating that perfectly controlled, voluminous Nezuko aesthetic.
You’ll notice the strands respond differently this second time, holding shape more firmly and resisting frizz more effectively. Don’t rush it. Work methodically through each section, and you’ll lock in a texture foundation that makes every subsequent styling step dramatically easier and more precise.
Get Nezuko’s Orange-Dipped Tips Right First
Getting Nezuko’s orange-dipped tips right is one of the most critical steps to nailing her iconic look, so you’ll want to start by choosing a wig that already comes pre-dipped to save yourself serious time and effort.
If your wig needs color enhancement, mix a spray ink solution and apply it section by section, building depth gradually rather than soaking the tips all at once.
Once you’ve achieved that perfect gradient, rinse only with cold water to prevent color bleeding from the orange sections onto the lighter base hair.
Choosing Pre-Dipped Wigs
Before you buy anything, know that choosing a pre-dipped wig saves you hours of DIY dyeing and delivers Nezuko’s iconic black-to-orange gradient right out of the box.
Prioritize these critical selection factors:
- Wig materials — Choose heat-resistant synthetic fibers that withstand curlers and straighteners without melting or frizzing.
- Color variations — Confirm the orange-dipped tips match Nezuko’s reference gradient precisely; inconsistent blending ruins authenticity.
- Length — Select a long, straight base requiring minimal alteration before styling begins.
- Fit system — Verify adjustable interior straps guarantee a secure, comfortable hold during wear.
Skipping material verification is a costly mistake.
A pre-dipped wig built from quality fibers locks in color vibrancy longer, giving your cosplay a polished, screen-accurate finish immediately.
Applying Spray Ink Mixture
Nailing Nezuko’s orange-dipped tips with a spray ink mixture takes three things: the right ink ratio, controlled application distance, and section-by-section precision.
Mix your ink at a 2:1 ratio of orange to water — this ink mixture ratio delivers vibrant pigment without oversaturation.
Separate the wig into manageable sections before you begin spray application techniques, working from the tips upward in short, controlled bursts.
Hold the spray bottle 6–8 inches from the hair to avoid blotching. You’ll want overlapping passes to build color gradually rather than dumping pigment in one shot.
Let each section dry before moving to the next — this prevents color bleeding onto the black base.
Once fully dry, comb through lightly to reveal sharp, defined orange tips that match Nezuko’s signature gradient perfectly.
Preventing Color Bleeding
Three mistakes kill Nezuko’s orange-dipped tips before they’re even finished — hot water, top-down brushing, and skipping the dry cycle between sections.
Nail your color preservation with these rinse techniques:
- Rinse exclusively with cold water to lock pigment into the fiber structure.
- Work bottom-up when brushing — top-down pulls saturated color through clean sections.
- Dry overnight between washes to eliminate moisture that triggers dye migration.
- Isolate orange-tipped sections during rinsing so runoff never contacts the black base.
You’re engineering a two-tone result that demands precision.
Each step compounds the last — skip one and the gradient bleeds into an undefined, muddy mess that no finishing spray can rescue.
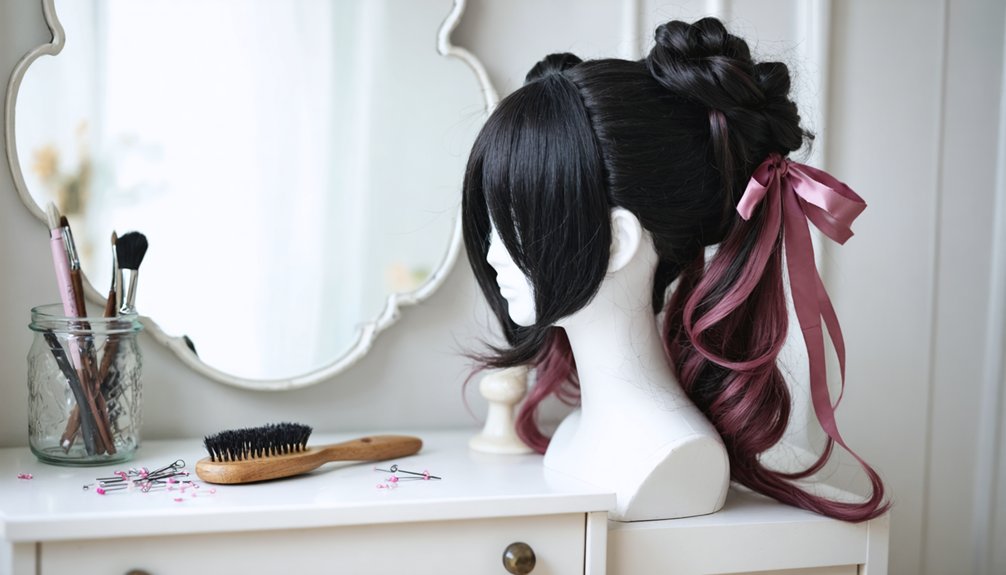
Style Nezuko’s Signature Split Ponytail Step by Step
Creating Nezuko’s split ponytail comes down to four core steps that build on each other, so don’t rush through them.
First, gather all your hair into a base ponytail and secure it with an elastic band.
Second, divide it into two distinct sections — one short, one long — using precise ponytail techniques that keep each strand clearly separated.
Third, focus on volume creation by backcombing the shorter top section, building that iconic loose wave structure Nezuko’s style demands.
Fourth, angle the longer strand at exactly 45 degrees to nail that signature “spoofy” effect.
Once both sections are positioned correctly, wrap a pink ribbon or cloth around the base.
Finish with a light wax application to define the waves, then lock everything with finishing spray.
Attach the Pink Hachimaki, Clips, and Muzzle

Once the split ponytail is locked in, you’re ready to layer on the accessories that pull Nezuko’s entire look together. Precise hachimaki attachment and muzzle integration elevate your cosplay from good to screen-accurate.
Follow this sequence for clean results:
- Position the pink hachimaki across the forehead, centering it between the hairline and the first ponytail wrap.
- Tie it firmly at the back, tucking the knot beneath the wig’s base layer.
- Clip any loose sections flanking the face using hair clips for a polished finish.
- Complete muzzle integration last, securing it snugly so it doesn’t shift the wig forward.
Lock everything with a final finishing spray. Your Nezuko transformation is complete and cosplay-ready.
Mistakes That Can Ruin Your Nezuko Wig
Even a flawless accessory setup can unravel fast if earlier steps went wrong. Smart wig care starts before you touch a single styling tool.
Don’t brush from root to tip — you’ll lock in knots instantly. Always work bottom-up. Skipping heat checks is another costly error; using non-heat-resistant fibers with curlers causes permanent, irreversible damage.
Reference images aren’t optional — cutting without them destroys your proportions completely. Overloading elastic bands weakens strands and collapses structure over time.
Never skip the drying phase after wetting; trapped moisture flattens your carefully built volume fast. Spray ink fixes color depth, but applying it unevenly creates patchy results that undermine the entire look.
Precision at every stage isn’t perfectionism — it’s what separates a stunning Nezuko from a disappointing attempt.
Frequently Asked Questions
How Long Does a Fully Styled Nezuko Wig Typically Last?
With proper wig maintenance tips and smart styling techniques, your fully styled Nezuko wig can last several months! You’ll maximize longevity by storing it carefully, using finishing spray, and avoiding heat damage consistently.
Can a Nezuko Wig Be Restyled After Wearing It Multiple Times?
Yes, you can absolutely restyle it! With proper wig maintenance tips like detangling bottom-up and cold-water rinsing, your Nezuko wig stays vibrant. Apply restyling techniques—backcombing, finishing spray—and you’ll breathe fresh life into every rewear!
What Is the Best Way to Store a Styled Nezuko Wig?
Store your styled Nezuko wig on a foam head for ideal wig maintenance tips! You’ll preserve every curl using breathable bags as smart storage solutions, preventing tangles, flattening, and moisture buildup between your innovative cosplay adventures!
How Do You Fix a Nezuko Wig Damaged by Heat Exposure?
Like Icarus learning from the sun, you’ve learned heat’s limits! For wig care, you can’t reverse heat damage, but trim frayed ends, apply a heat protection spray, and restyle carefully using low-temperature tools.
Are There Budget-Friendly Alternatives to Professional Cosplay Nezuko Wigs?
You’ve got affordable options! Seek out high-quality synthetic wig materials from budget retailers—they’re durable, heat-resistant, and perfect for DIY orange-tip dyeing. With creativity and smart sourcing, you’ll craft an stunning Nezuko look without breaking the bank!
References
- https://www.youtube.com/watch?v=s8wZ_v6yDd8
- https://www.youtube.com/watch?v=Px20bQScaDg
- https://www.youtube.com/watch?v=PlWw8iwAfOU
- https://www.youtube.com/watch?v=BLuDn2sXhwk
- https://www.youtube.com/watch?v=Jjko-aB4aLk
- https://www.crazecosplay.com/blogs/questions/how-to-put-on-a-nezuko-cosplay
- https://pl.manuals.plus/ae/1005010727185979
- https://oronsoft.com/nezuko-cosplay-guide-outfit-makeup-wig-accessories/
- https://www.mothergeek.co.uk/geeky-stuff/2025/12/cosplay-demon-slayer/
- https://www.instagram.com/reel/DPCFb2MkR_i/